Before you decide that quilling looks like too much work, try making one flower. Just one.
You might be surprised by how quickly a flat strip of paper starts looking like something you actually want to keep.
That transformation is what makes Paper Quilling Ideas so enjoyable. You get a handmade result without needing a cupboard full of craft supplies.
Another reason I like quilling for beginners is the room it gives you to make mistakes. If a coil comes out too tight, you can loosen it.
If a petal looks a little odd, you can reshape it. Even better, you can use simple shapes again and again without making the project look repetitive.
That makes it easier to learn while still giving you plenty of freedom to experiment.
You also do not need to sit down for three hours to make something worthwhile. A small card, bookmark, name initial, or flower can give you a finished project in one sitting.
Then, once your hands get comfortable with the basic shapes, you can start combining them into more detailed designs.
That is the approach I’m taking here. We’ll begin with projects that feel manageable, then work toward ideas that make people ask, “How did you make that?”
What You Need to Get Started
You can start quilling without buying a huge collection of supplies. Most beginner projects need the same few basics.
- Quilling paper strips – (Available on Amazon)
- White craft glue
- Quilling tool – (Available on Amazon) or toothpick
- Tweezers
- Small scissors – (Available on Amazon)
- Pencil
- Cardstock – (Available on Amazon)
- Ruler
- Small tray for your paper strips – (Available on Amazon)
A quilling board can help you make matching coils. Still, you can learn plenty without one. Use a toothpick if you want to test the craft before buying more tools.
47 Beginner-Friendly Paper Quilling Ideas That Wow Everyone
1. Simple Quilling Flower
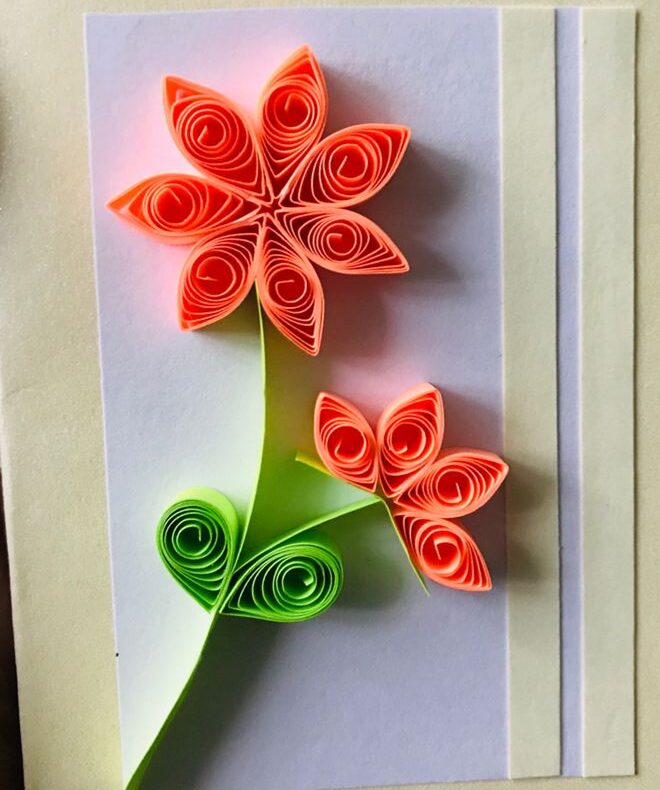
A simple flower gives you a good introduction to the basic quilling shapes. Start by making five or six loose coils for the petals.
Pinch one side of each coil to create a teardrop shape. Arrange the pointed ends around a small tight coil.
Glue the petals together only after you like their spacing. Add a second color to the center for more contrast.
2. Colorful Flower Card
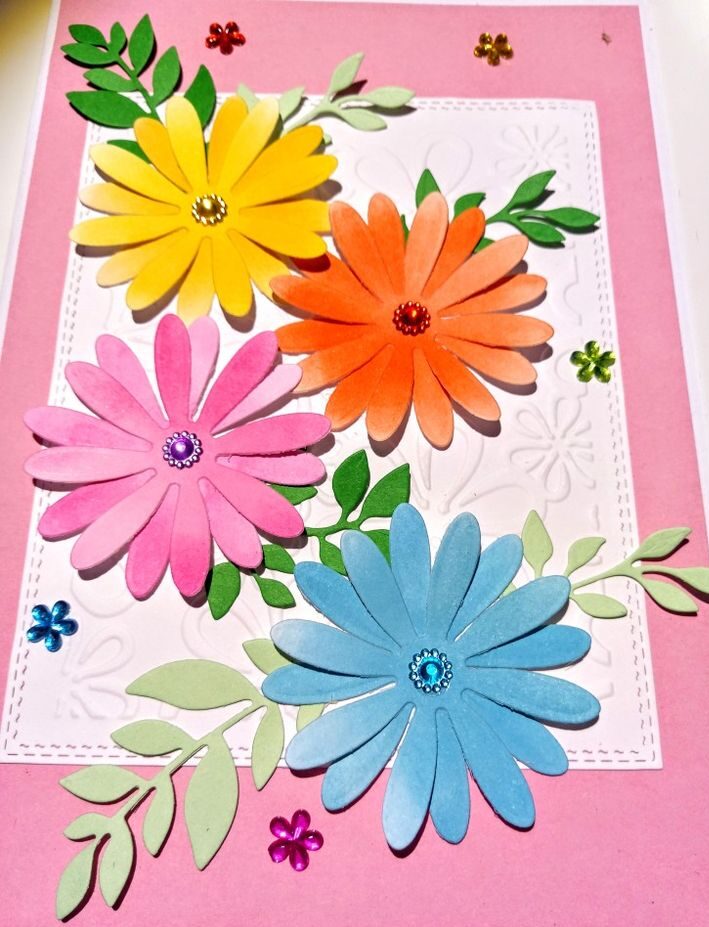
A handmade flower card can look detailed without taking an entire afternoon. Choose two or three paper colors that look good together.
Make several small flowers and a few leaves. Arrange them in one corner of a folded cardstock card.
Leave plenty of blank space around the arrangement. That simple choice keeps the card neat and lets the flowers grab attention.
3. Quilled Butterfly
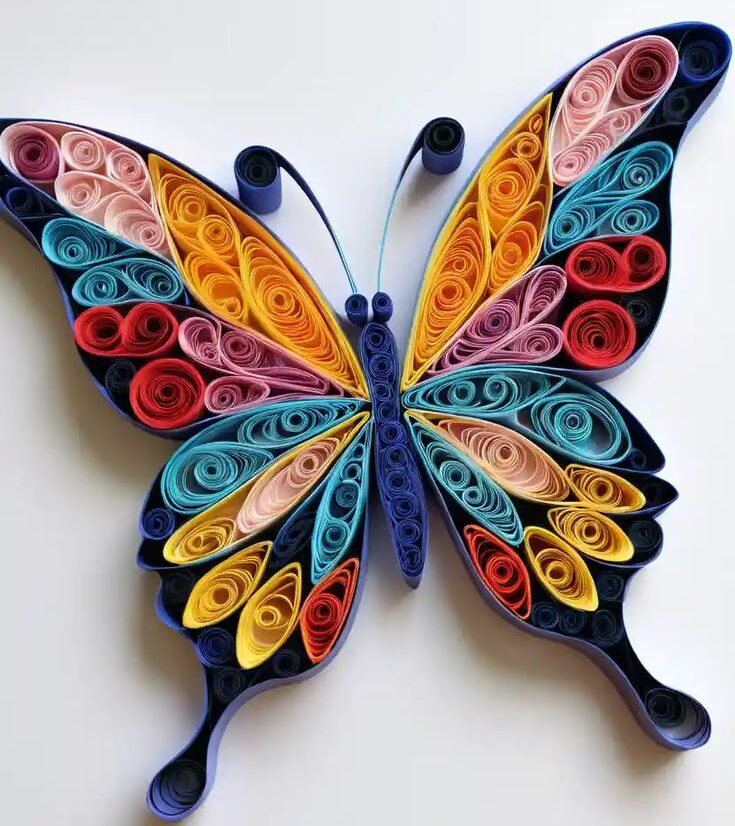
A butterfly lets you practice symmetry without making the project too difficult. Make two large teardrops for the upper wings.
Create two smaller shapes for the lower wings. Then add a narrow strip through the center for the body.
Try different colors for each wing pair. Place the butterfly on cardstock, a gift box, or a handmade card.
4. Paper Quilling Bookmark
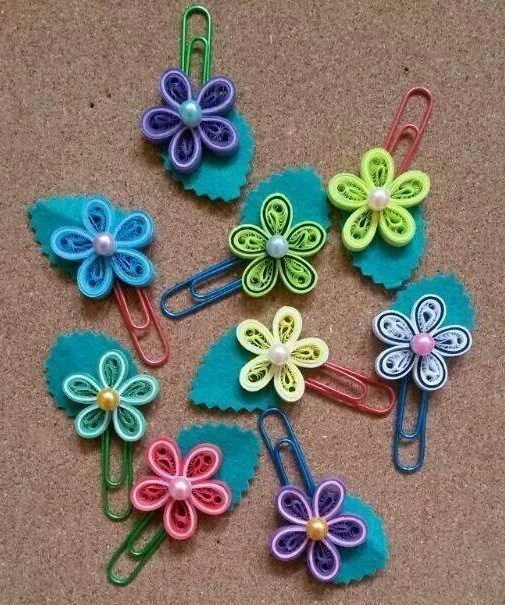
A bookmark gives you a useful project while you practice small shapes. Cut a strip of sturdy cardstock for the base.
Add a flower, heart, butterfly, or leafy branch near the top. Keep the decoration fairly narrow so the bookmark remains easy to use.
You can also add a small tassel at the top. Choose colors that make the bookmark feel personal.
5. Quilled Initial
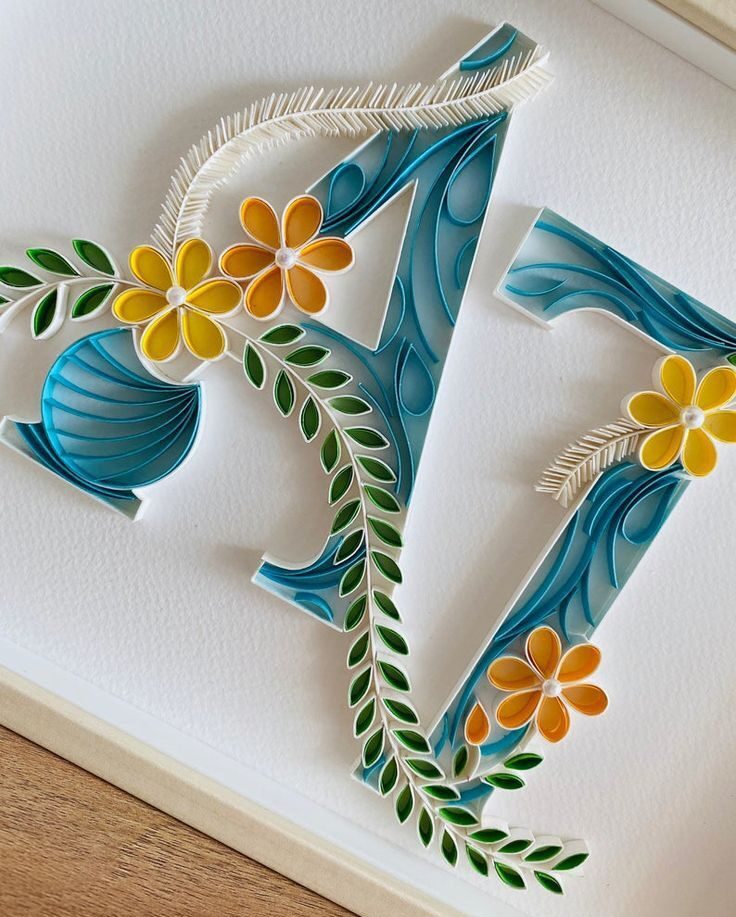
Turn someone’s first letter into a personalized piece of art. Lightly draw the letter on cardstock before adding any paper.
Follow the outline with thin strips and glue them down slowly. Use small coils to fill wider sections of the letter.
Flowers, leaves, and stars can decorate the empty areas. Keep those details small so the main letter stays easy to read.
6. Little Quilled Heart

A heart makes one of the easiest Paper Quilling Ideas for a complete beginner. Start with a long strip and form the basic heart outline.
You can also build the heart from separate curved pieces. Fill the inside with small coils if you want more texture.
Try red for a classic look. Pink, purple, orange, or blue can make the same design feel completely different.
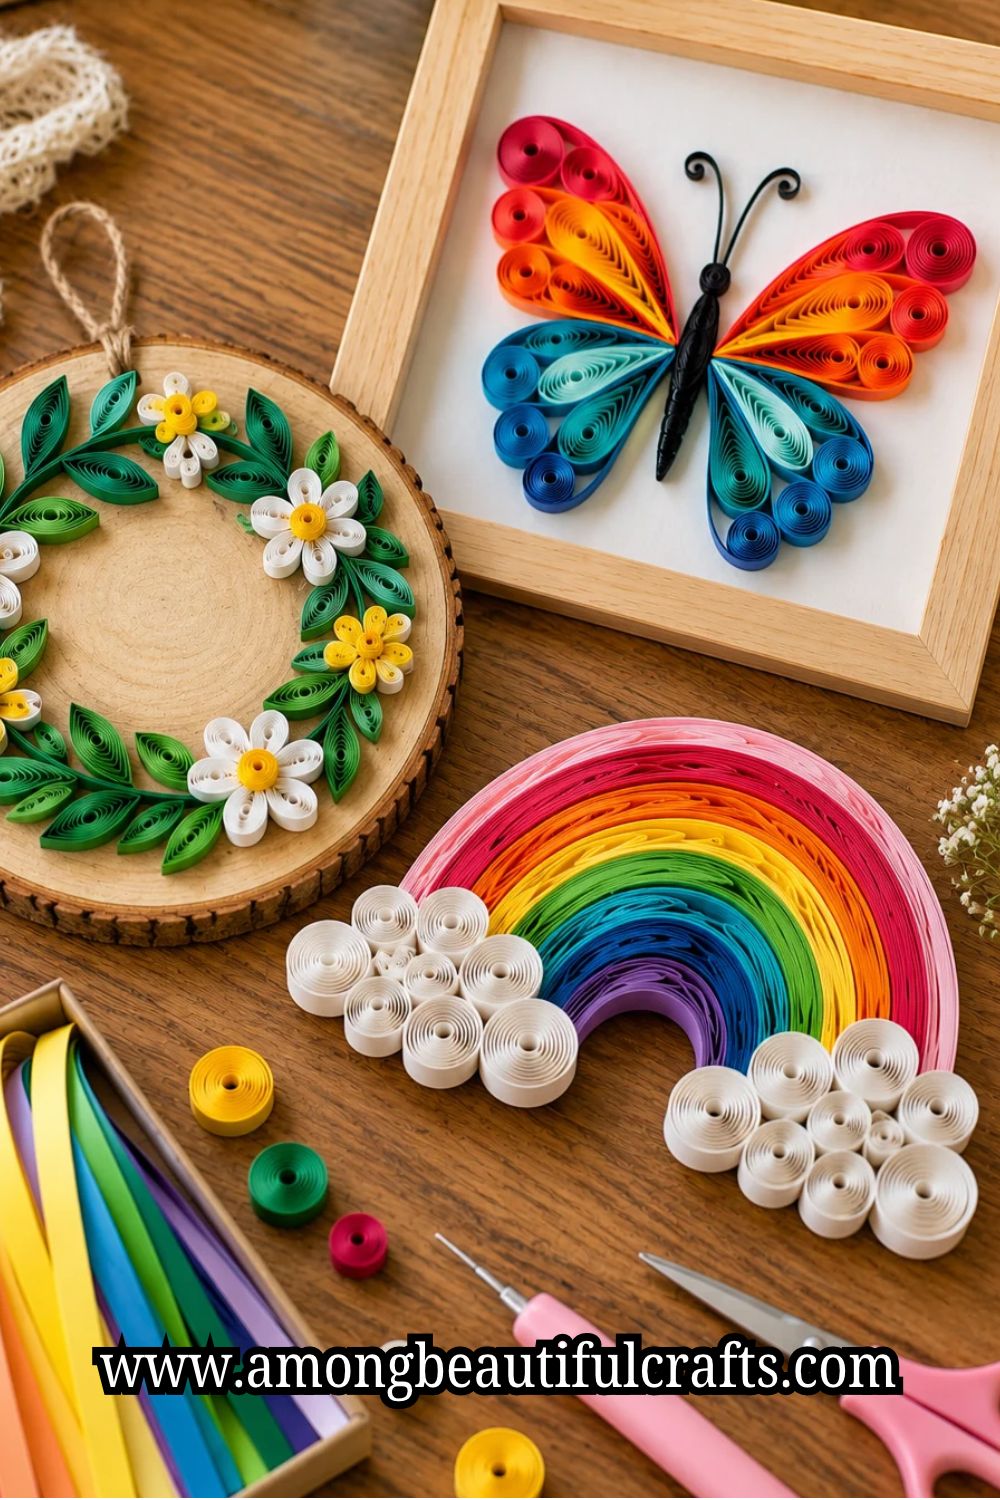
7. Quilled Rainbow

Build a rainbow from several long paper strips in different colors. Curve each strip into an arch and arrange the arches together.
Keep the spaces between the colors small. Two little white clouds can finish the bottom edges.
For a card, make the rainbow fairly small. For wall art, create wider arches and add flowers or tiny birds around it.
8. Quilled Leaf Branch
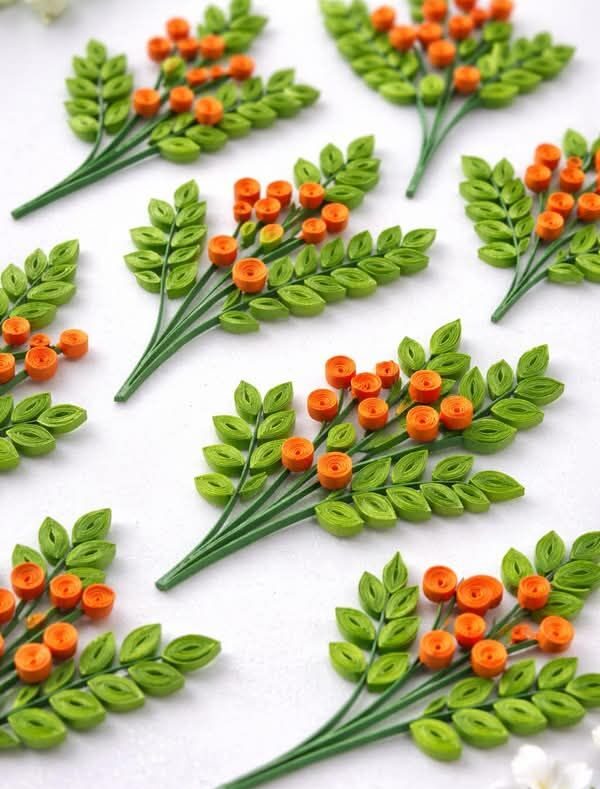
This project focuses on one of the most useful quilling shapes. Make several green teardrops and pinch their points slightly.
Next, curve a longer brown or green strip into a branch. Place the leaves along both sides of the branch.
Vary the direction of the leaves instead of lining them up perfectly. That small change makes the branch look more natural.
9. Quilled Greeting Card
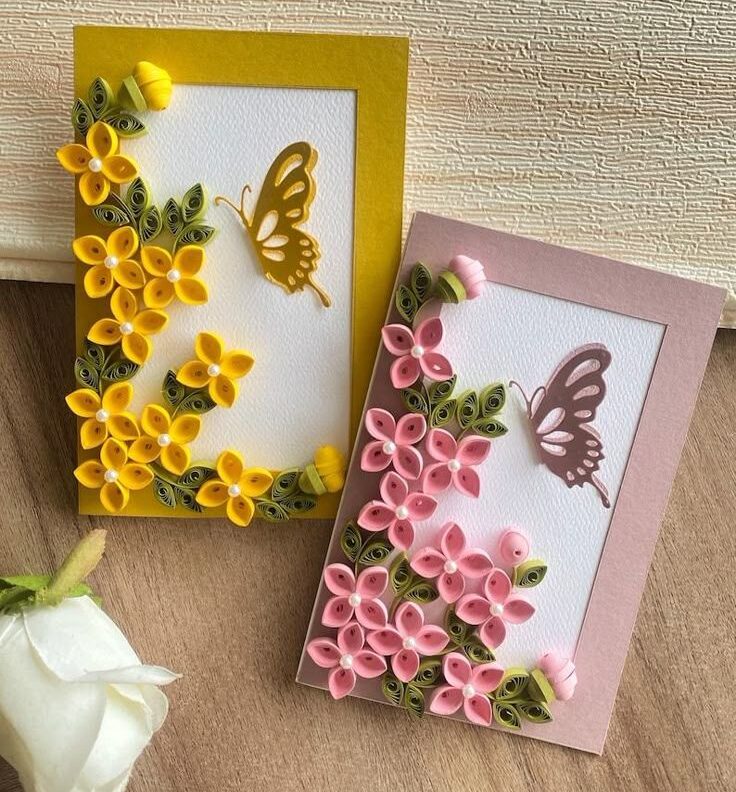
Create a small floral arrangement for a birthday, thank-you, or congratulations card. Start with three larger flowers as your main shapes.
Fill the gaps with tiny coils and narrow leaves. Keep the decoration toward one side of the card.
A short handwritten message can sit opposite the quilled design. This gives the card a handmade look without making it feel crowded.
10. Quilled Sun
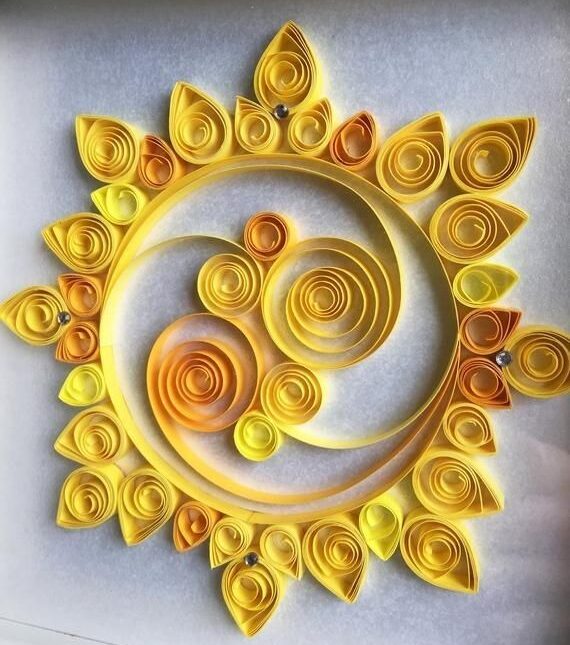
A bright sun can turn a plain piece of cardstock into cheerful wall art. Start with a tight yellow coil for the center.
Make several narrow strips for the rays. Attach them around the center at slightly different angles.
You can use yellow and orange together for more depth. Add a few small clouds if you want to create a complete sky scene.
11. Quilled Hot Air Balloon
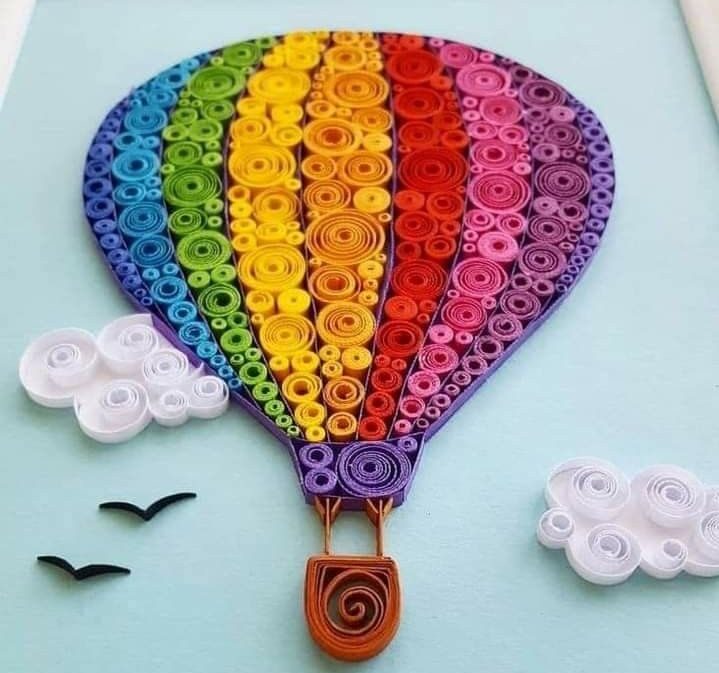
Create the balloon with several curved strips that form a rounded shape. Use different colors for each section.
Add two narrow strips underneath for the ropes. A small rectangular basket can finish the balloon.
Place clouds around it if you want a fuller picture. Blue cardstock makes a simple background for this design.
12. Quilled Rainbow Cloud
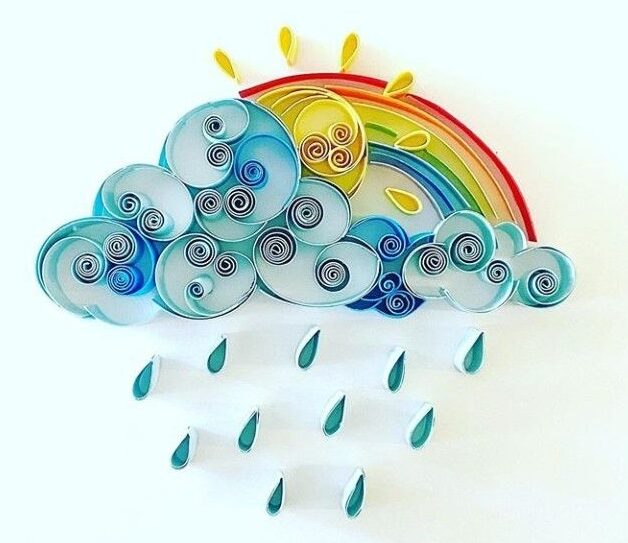
This idea combines two easy shapes into one cheerful project. Make loose white coils for the clouds and colorful arches for the rainbow.
Arrange the rainbow behind the clouds so the ends disappear slightly. That makes the pieces look connected.
You can also add tiny stars around the design. This works especially well for children’s cards and room decorations.
13. Quilled Butterfly Garden

Create several butterflies in different sizes and colors. Then add small flowers, stems, and leaves underneath them.
Do not place every butterfly at the same height. Some can sit close to the flowers while others can appear higher.
That arrangement creates movement across the picture. A pale background will also help the colors stand out.
14. Quilled Monogram Frame
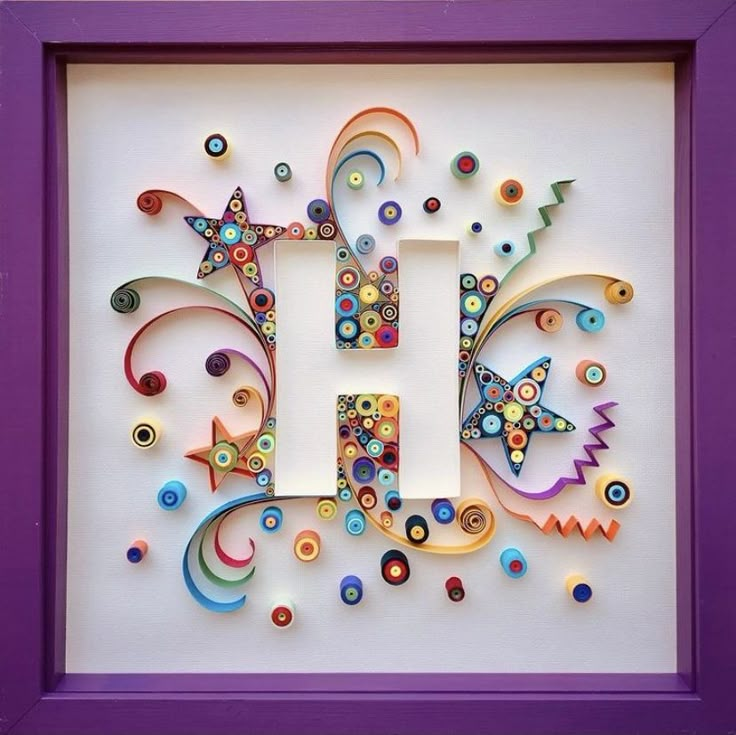
Choose one large initial for this personalized project. Draw it lightly on cardstock and cover the outline with paper strips.
Add small flowers along one side of the letter. A few leaves can fill the spaces without hiding the initial.
Frame the finished piece for a bedroom or desk. You can also make matching initials for two people.
15. Quilled Flower Pot
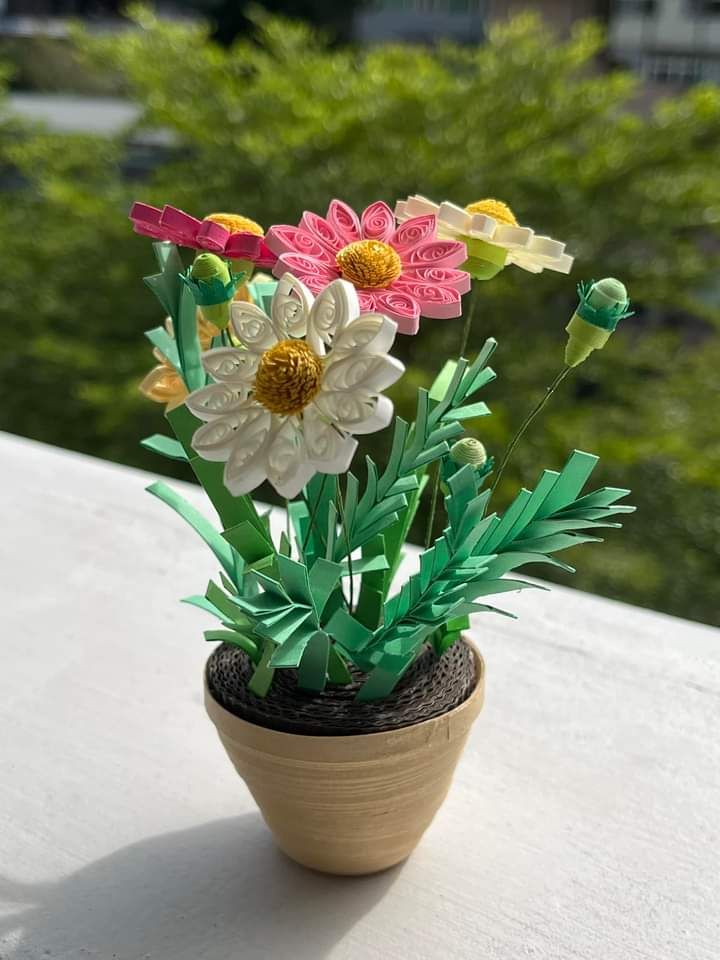
Make a small flower pot from curved strips in brown, cream, or terracotta shades. Give the pot a slightly wider top.
Next, create flowers in different sizes and attach green stems. Add leaves between the flowers to fill small gaps.
Let some flowers lean outward instead of keeping everything upright. That makes the little arrangement feel fuller and less stiff.
16. Quilled Peacock
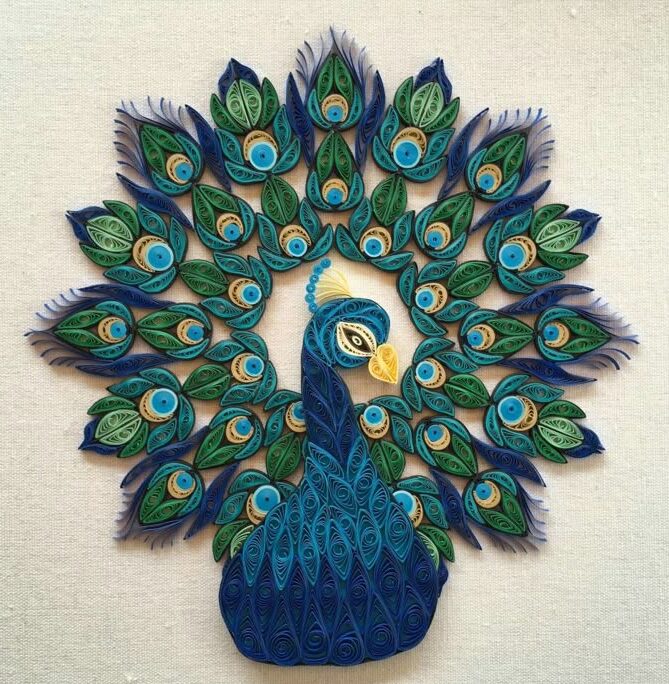
A peacock gives you an excuse to use several bold colors together. Start with a simple blue body and small head.
The tail takes most of the attention, so build it slowly. Use teardrops, ovals, and small circles in layered rows.
Blue, green, purple, and gold work especially well together. Arrange the tail in a wide fan for a dramatic finish.
17. Quilled Butterfly Frame
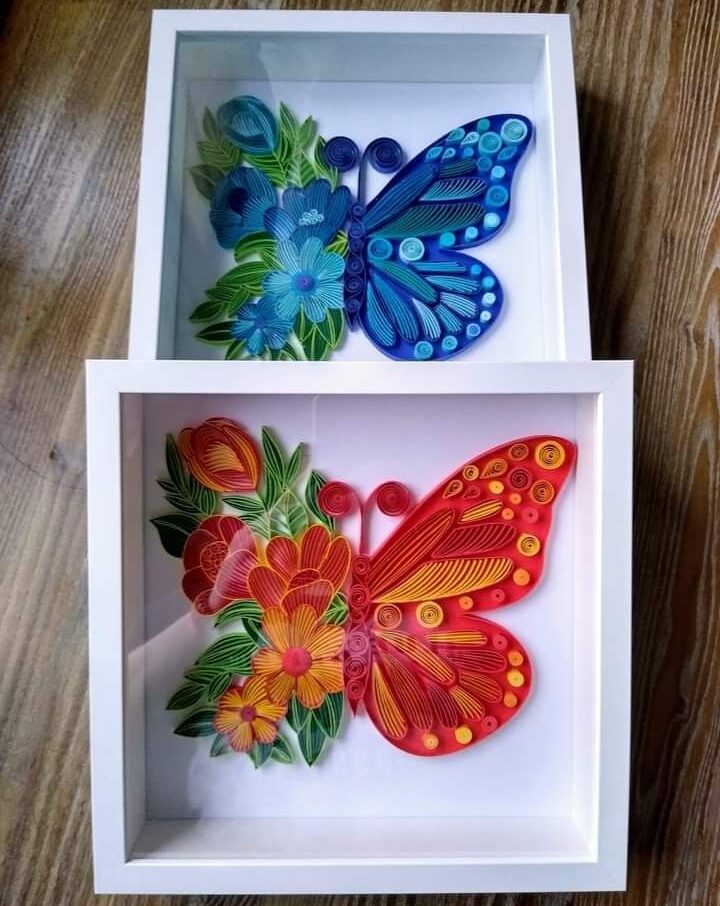
Decorate a plain photo frame with small paper butterflies. Start by making butterflies in two or three sizes.
Place the largest ones near opposite corners. Fill the remaining corners with smaller butterflies and tiny flowers.
Do not cover the entire frame. Leaving some of the original frame visible will make the decoration look cleaner.
18. Quilled Apple
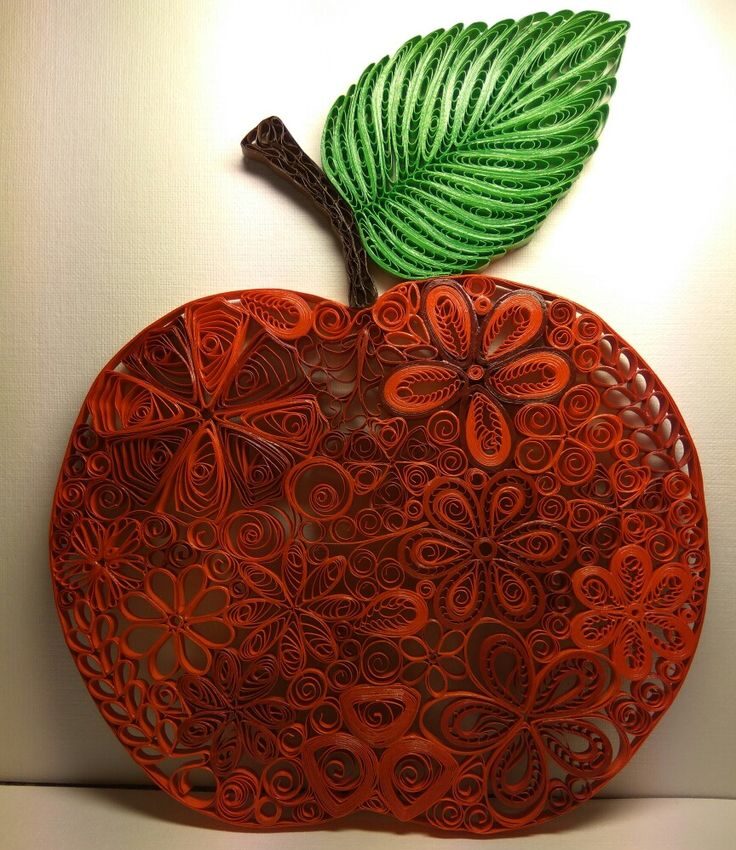
An apple makes a simple school-themed or teacher-gift project. Create the rounded body with several curved red strips.
Add a short brown strip for the stem. A green teardrop can become the leaf.
For more detail, add one small white curve as a highlight. Mount the apple on a card with a short handwritten message.
19. Quilled Ice Cream Cone
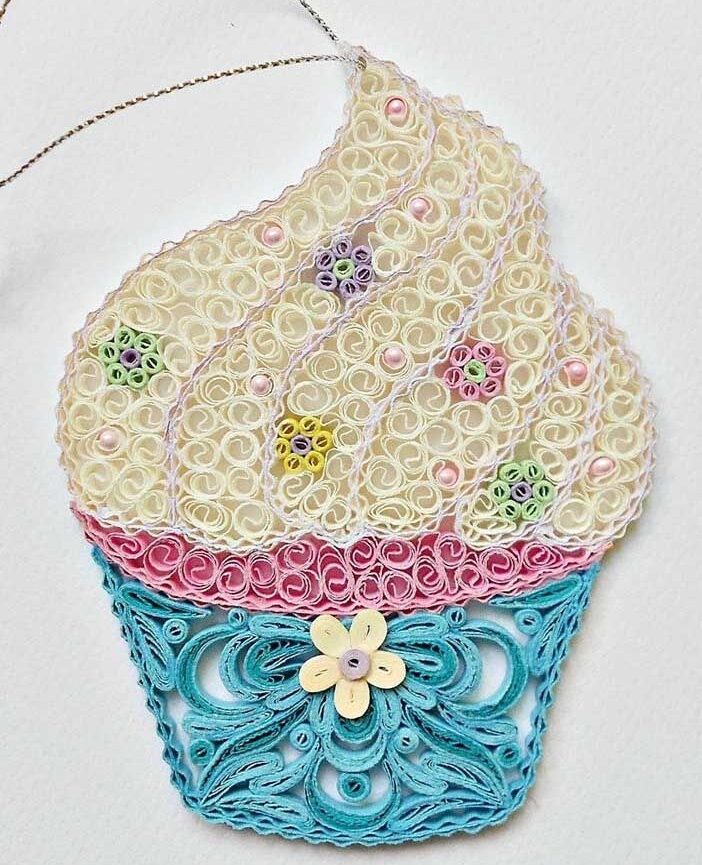
Start with a triangular cone made from tan strips. Add several diagonal strips across it to suggest the waffle pattern.
Then create a rounded scoop using loose coils. Pink, yellow, mint, or purple can work nicely.
Tiny colorful coils can become sprinkles. Add a second scoop if you want to make the design more playful.
20. Quilled Hot Air Balloon Scene
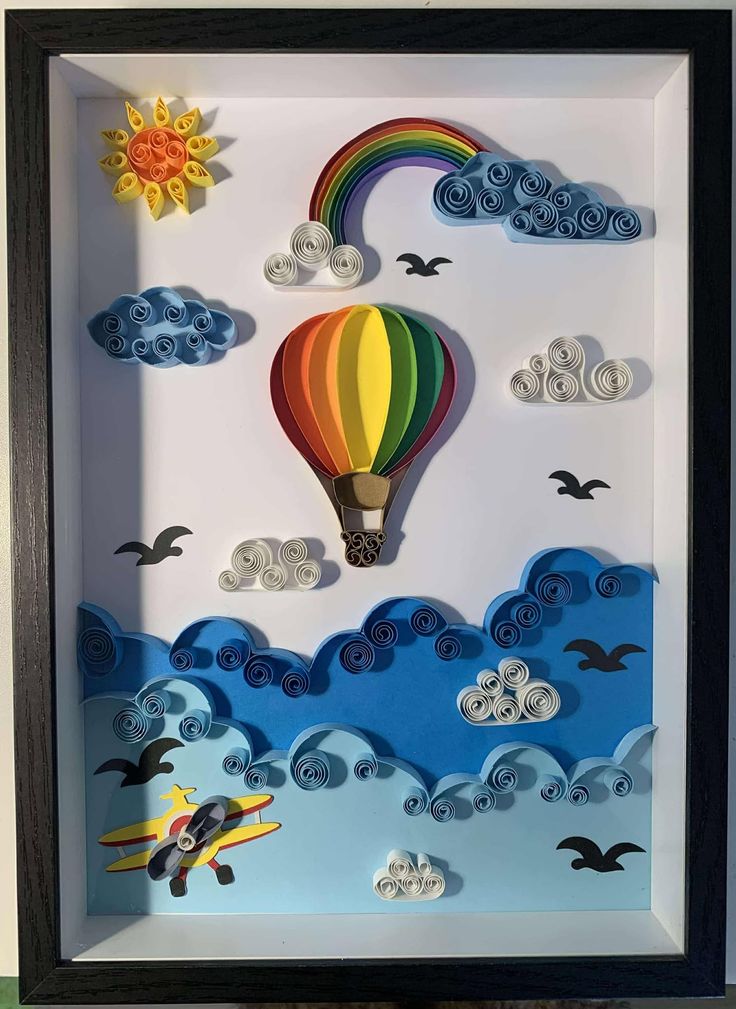
Take the balloon project further by creating an entire little landscape. Make the balloon the largest object in the picture.
Add clouds, small birds, hills, and a sun around it. Keep those extra shapes smaller than the balloon.
This helps the main subject stay clear. It also gives you practice arranging many pieces without making the picture too busy.
21. Quilled Name Art
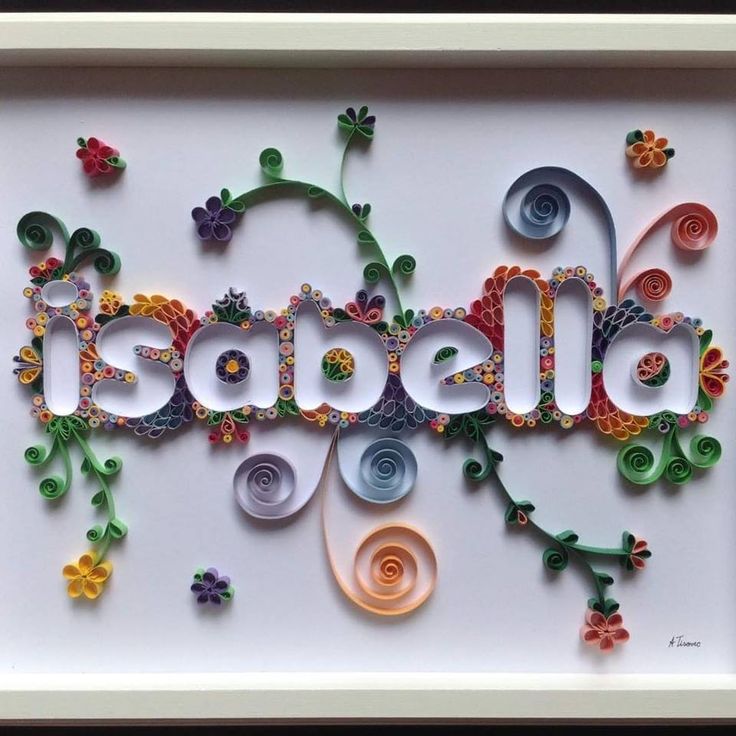
Write a name in large letters on cardstock before you begin. Trace each letter with narrow paper strips.
Use small coils to decorate selected letters. Flowers work well for softer designs, while stars suit a more playful look.
Keep the decorations away from crowded sections. The name should remain the first thing people notice.
22. Quilled Peacock Feather
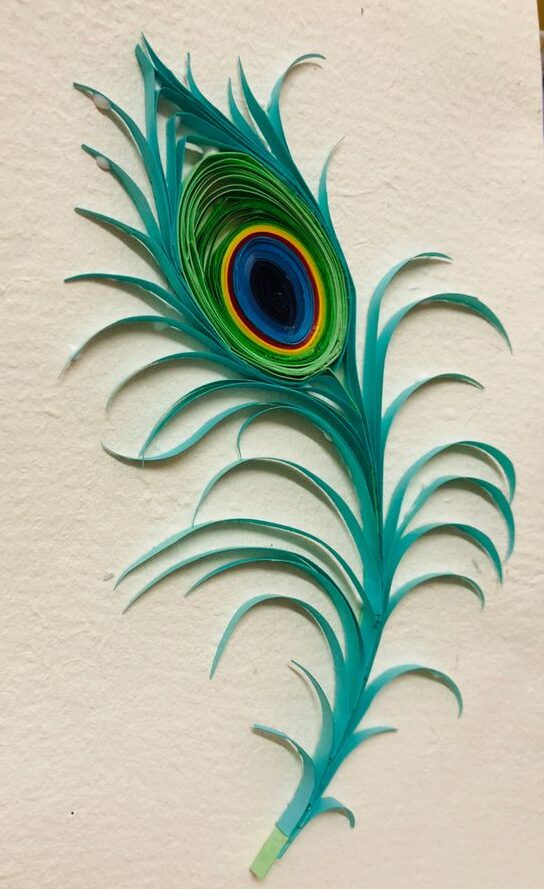
A single feather gives you the colorful look of a peacock without making the whole bird. Start with one long curved strip.
Build the inside with teardrops, ovals, and small coils. Place the smallest shapes near the center of the feather.
Use dark cardstock underneath the feather. The contrast will make the brighter paper colors stand out.
23. Quilled Christmas Tree

Create a simple triangular tree using green strips. Add a brown strip underneath for the trunk.
Small circles can become ornaments, while a star can sit at the top. Use different colors for the decorations.
You can make several tiny trees for a holiday card. A single large tree can also become framed seasonal artwork.
24. Quilled Snowflake
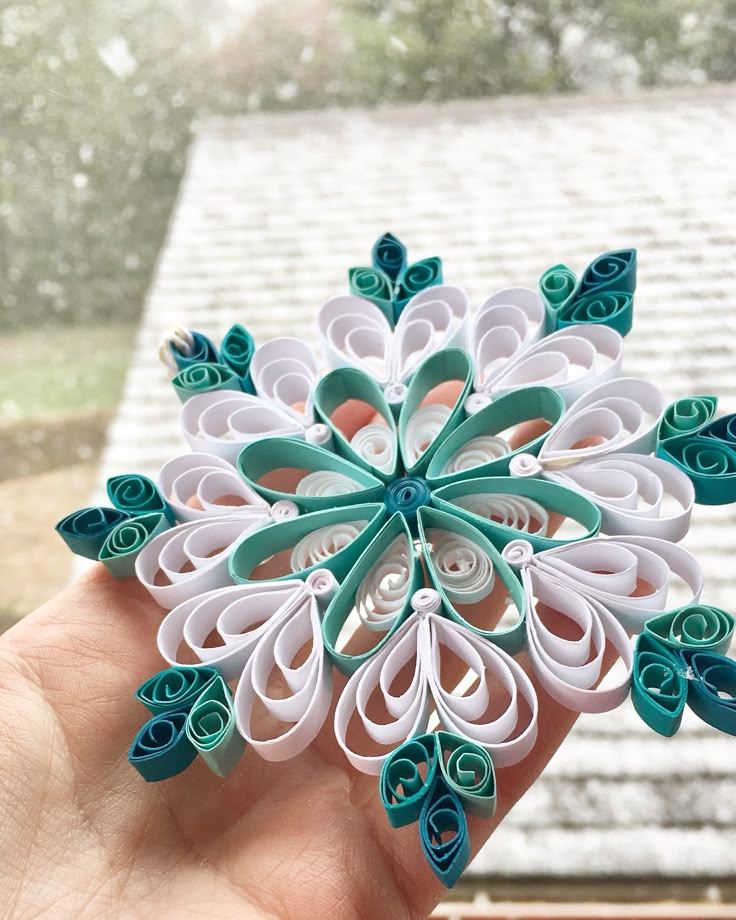
Snowflakes look detailed because several simple shapes repeat around one center. Start with a small tight coil.
Build six main branches from narrow strips. Add small teardrops and circles along each branch.
Keep checking the spacing as you work. You do not need perfect symmetry, but the six sections should feel balanced.
25. Quilled Pumpkin

A pumpkin works nicely for autumn cards and seasonal artwork. Make several curved orange pieces and arrange them side by side.
Add a short brown stem at the top. A green leaf can sit beside it.
You can also add thin curved strips across the pumpkin. Those extra lines help show its rounded sections.
26. Quilled Mushroom
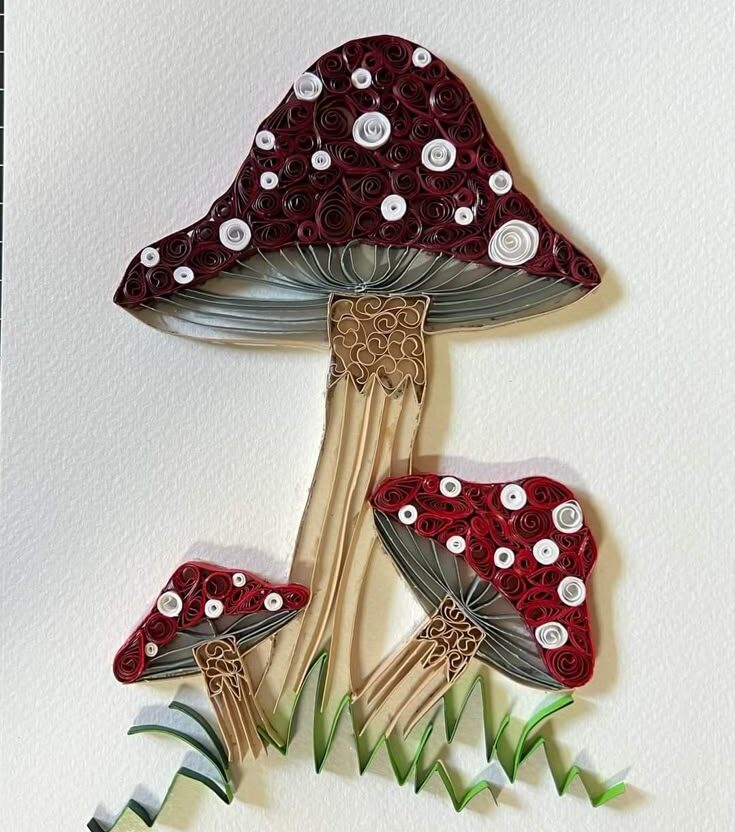
Make a rounded red mushroom cap from curved strips. Add small white coils across the top for the spots.
Create a simple cream or white stem underneath. Several mushrooms can create a cute woodland scene.
Add green leaves and tiny flowers around the bottom. Keep the background simple so the mushrooms remain easy to see.
27. Quilled Dragonfly
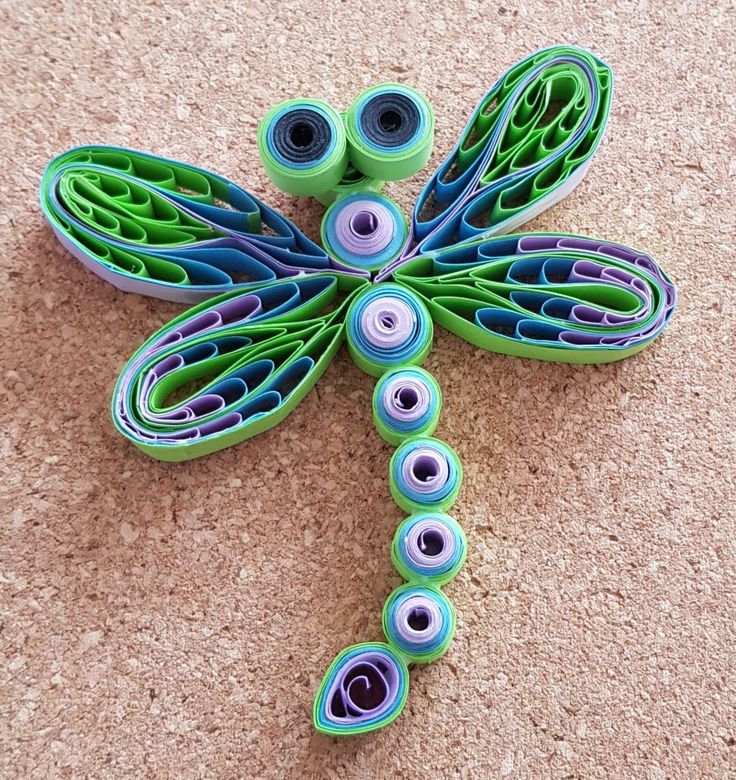
Use four teardrop shapes for the wings. Make the upper wings slightly larger than the lower pair.
A thin strip can form the body between them. Add two tiny curved pieces for the antennae.
Try pale blue, purple, or metallic paper for the wings. You can also place the dragonfly beside flowers or leaves.
28. Quilled Rainbow Name

This project combines colorful lettering with simple quilling. Write a large name across cardstock first.
Cover each letter with small coils in different rainbow colors. Change the colors gradually from one letter to the next.
Do not pack the coils too tightly. Small gaps can help the letters stay readable.
29. Quilled Flower Vase
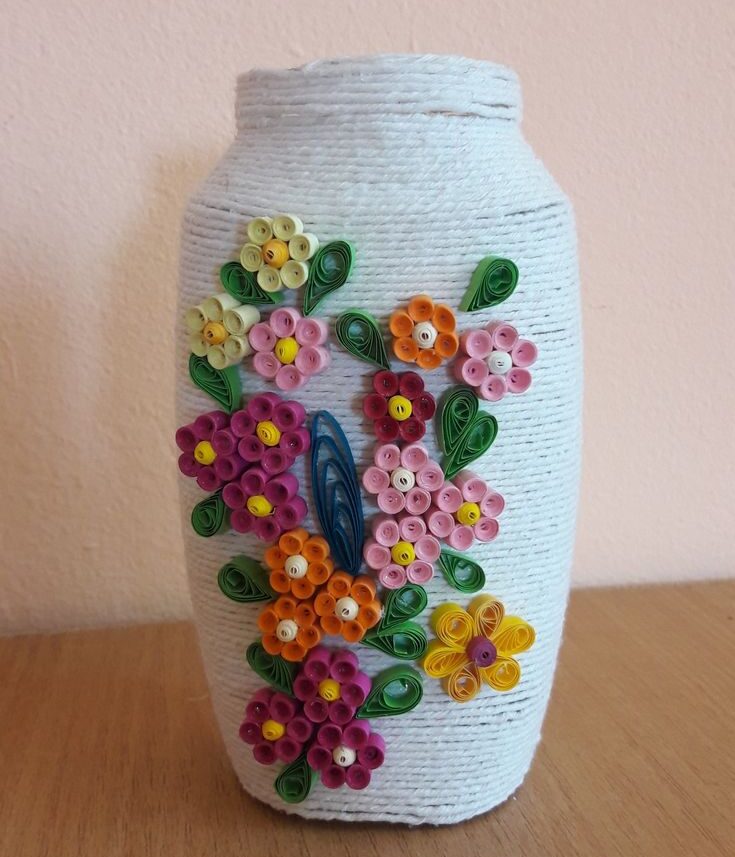
Make a small vase using curved strips that widen slightly toward the top. Choose a color that contrasts with your flowers.
Fill the vase with flowers of different shapes and sizes. Add thin green stems between them.
Let a few leaves extend outside the vase. Those little details can make the arrangement look more natural.
30. Quilled Bird

Start with a large curved shape for the bird’s body. Add a smaller circle for the head and a tiny triangle for the beak.
Use a few feather shapes along the body. A small black coil can become the eye.
Place the bird on a curved branch. Add two or three leaves to turn the simple bird into a complete scene.
31. Quilled Cat Silhouette
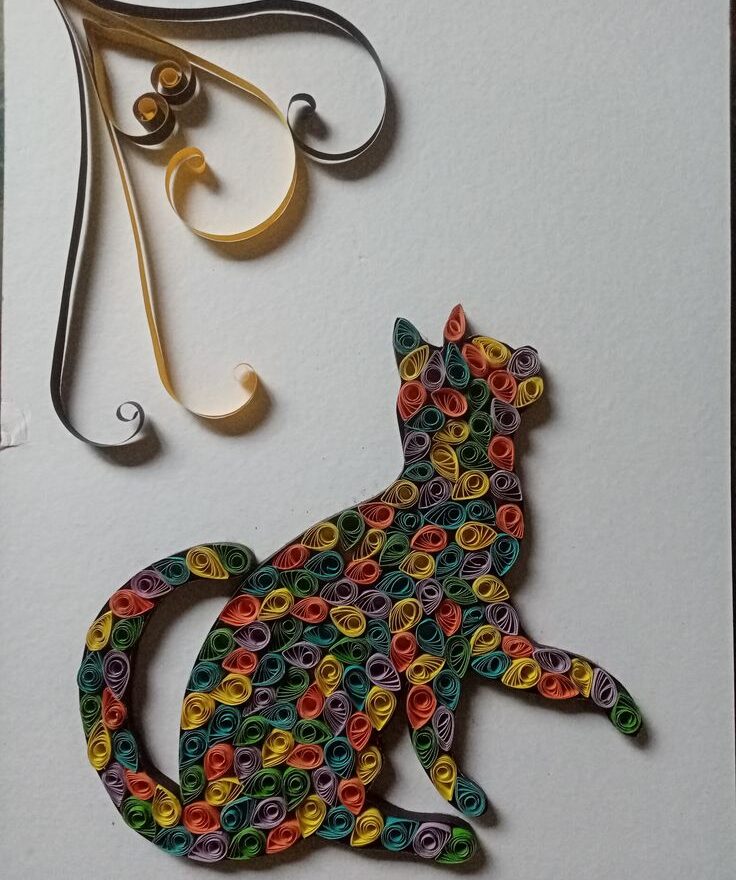
Draw a simple sitting cat on dark cardstock. Follow the outline with black or dark gray paper strips.
Add two small coils for the eyes if you want facial detail. You can also leave the entire body as a clean silhouette.
A tiny flower or crescent moon beside the cat can give the design more personality. Keep the extra details minimal.
32. Quilled Fish
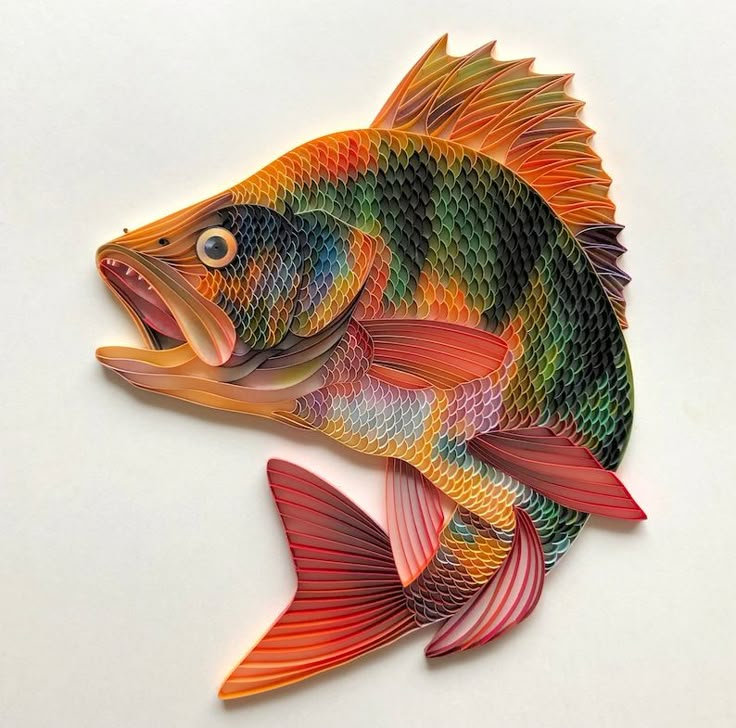
Make an oval body with curved strips and add a pointed tail. A tiny circle can become the eye.
Decorate the body with small teardrops to suggest scales. Use two or three colors instead of covering every section.
A few bubbles can complete the underwater look. Blue cardstock works well as a simple background.
33. Quilled Ocean Scene
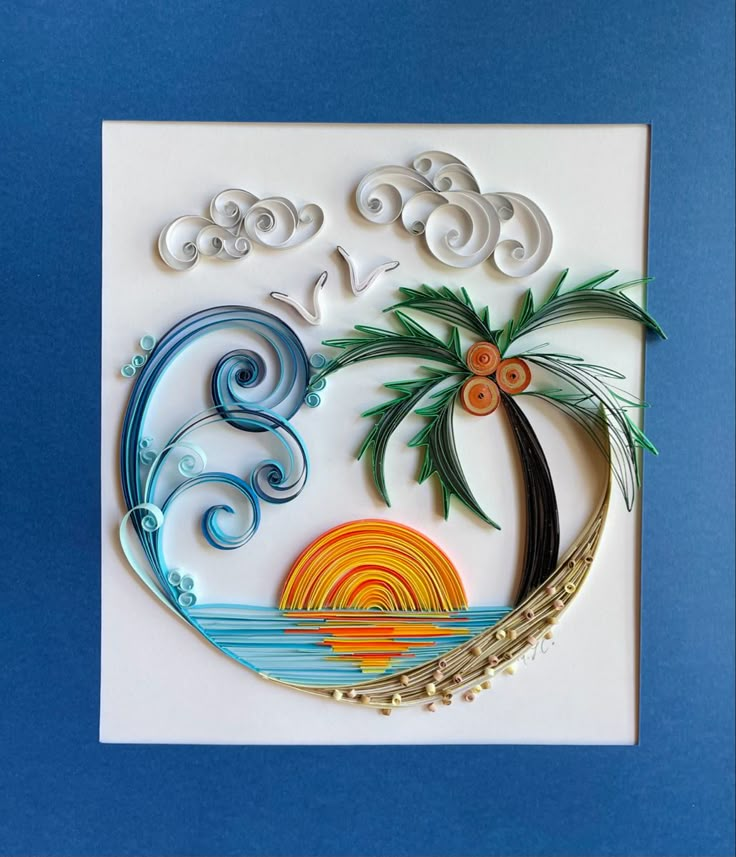
Build a small underwater picture with fish, seaweed, bubbles, and waves. Start with the larger shapes first.
Place seaweed near the bottom and fish across the middle. Then fill open spaces with tiny bubbles.
Different shades of blue can add depth. You can also include a small shell or starfish near the bottom.
34. Quilled Flower Wreath
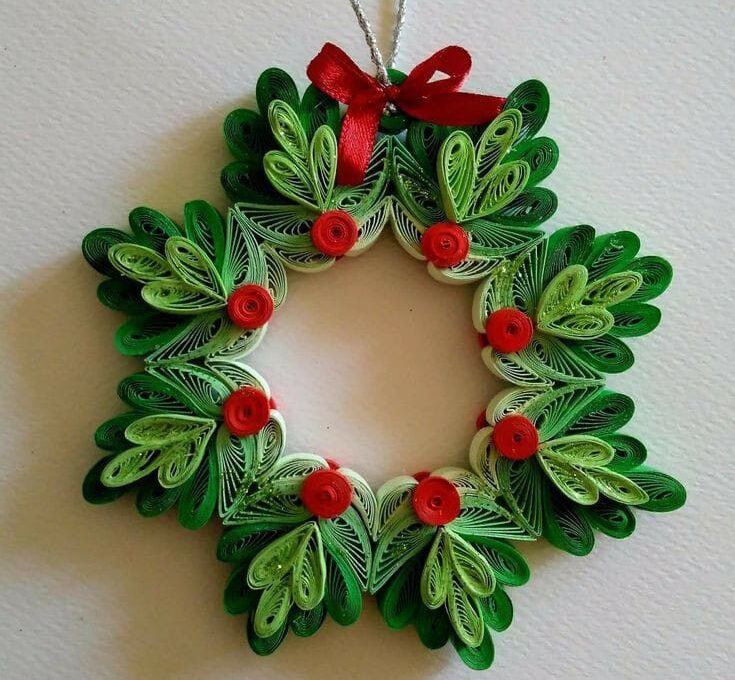
Create several flowers in matching colors before arranging the wreath. Add leaves in between the flowers to connect the pieces.
Start by forming a loose circle with a pencil. Place the larger flowers around the circle first.
Fill the smaller spaces afterward. This method helps you avoid awkward gaps and keeps the wreath balanced.
35. Quilled Bee
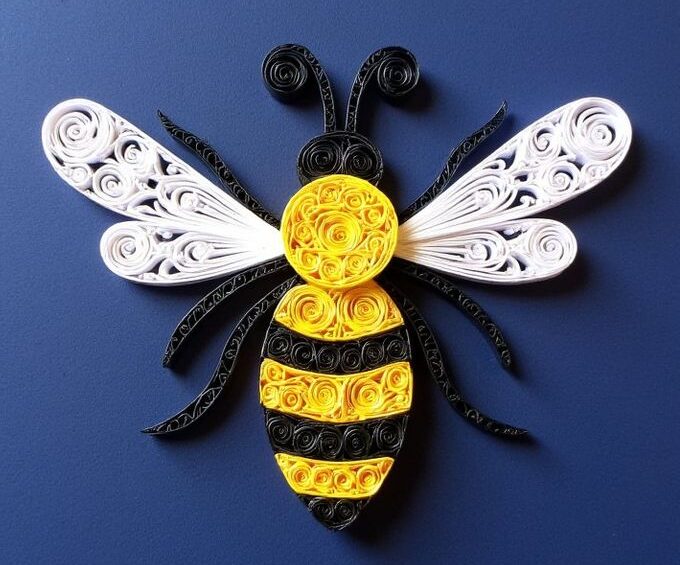
Create an oval yellow body and wrap black strips around it. Add a small black head at one end.
Two loose white coils can become the wings. Tiny black strips can form the antennae.
Place the bee beside small flowers for a complete garden design. The yellow and black combination will make it easy to recognize.
36. Quilled Ladybug
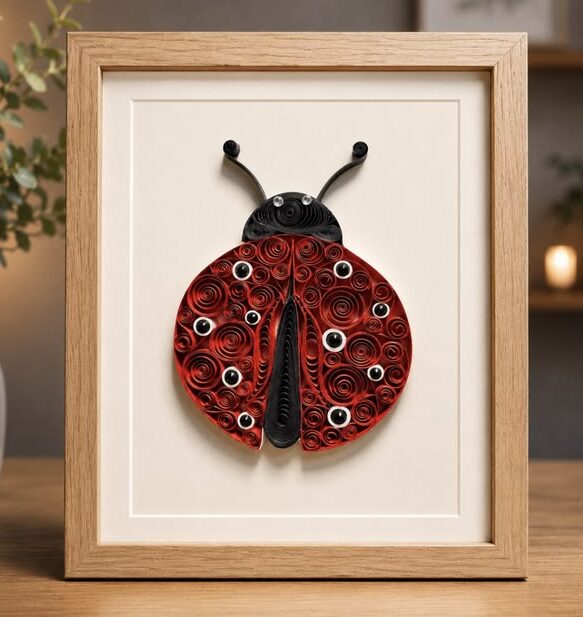
Start with a rounded red body and a small black head. Add tiny black circles across the red section for spots.
Use thin strips for the legs and antennae. Keep them short because long legs can overpower the small body.
Add a green leaf underneath the ladybug. You can make several ladybugs in different sizes for a playful scene.
37. Quilled Balloon Bunch
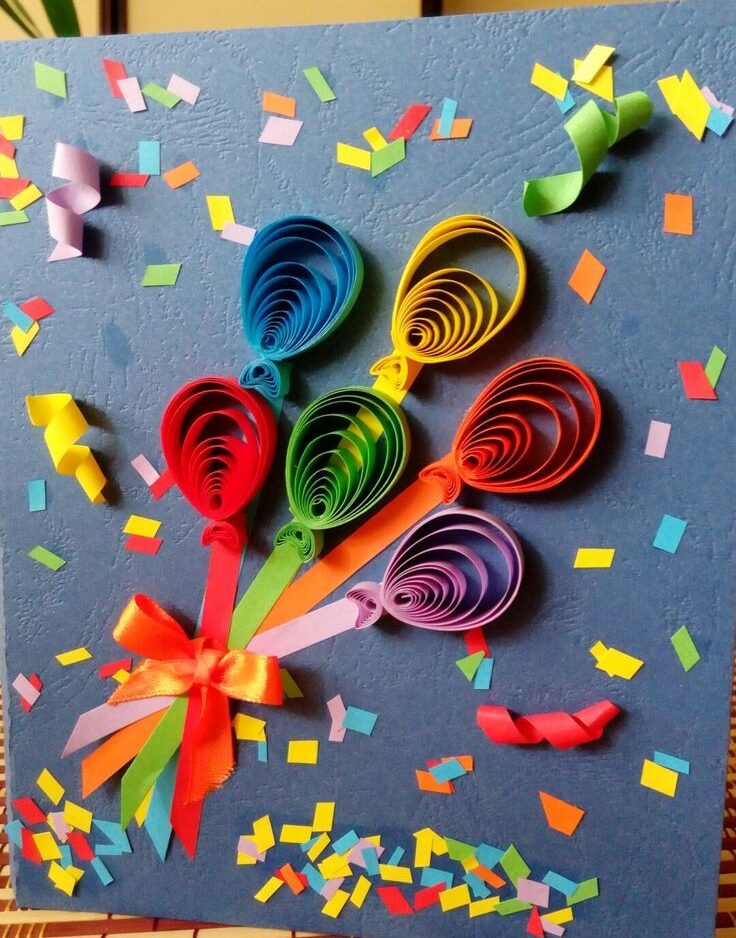
Make several balloon shapes from loose coils. Pinch each coil slightly at the bottom to create the pointed balloon end.
Choose different colors and sizes. Then attach thin strips underneath as the strings.
Gather the strings together near the bottom. This makes an easy birthday card that still has plenty of handmade detail.
38. Quilled Cupcake

Create a small cupcake wrapper from tan or brown strips. Build the frosting with several rounded pieces above it.
Add tiny colorful coils as sprinkles. A small red circle can become a cherry on top.
Keep the cupcake compact so the details remain visible. You can also make three cupcakes in different colors across a birthday card.
39. Quilled Coffee Cup
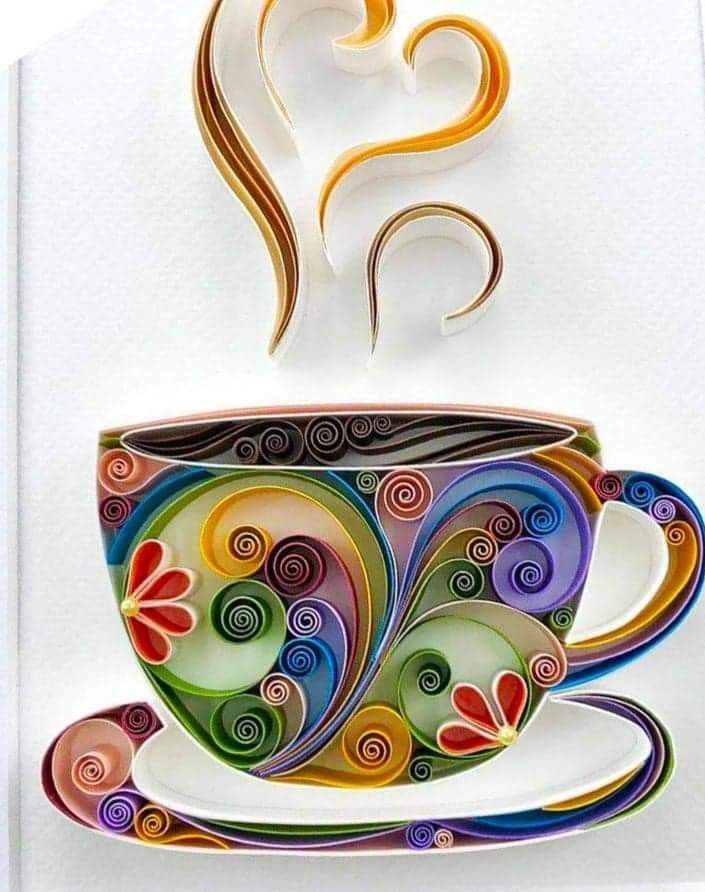
Create a simple cup with curved strips and add a small handle beside it. Use brown paper inside the top for the coffee.
Thin curls above the cup can suggest steam. A tiny heart on the cup can make the design feel warmer.
This works nicely on thank-you cards, friendship cards, or small framed pieces for a kitchen corner.
40. Quilled House

Build the house from a square or rectangle with a triangular roof. Add tiny windows and a simple door.
A narrow chimney can sit on one side of the roof. You can also add a small tree beside the house.
Do not worry about adding every detail. A few recognizable shapes will make the house easy to understand.
41. Quilled Moon and Stars
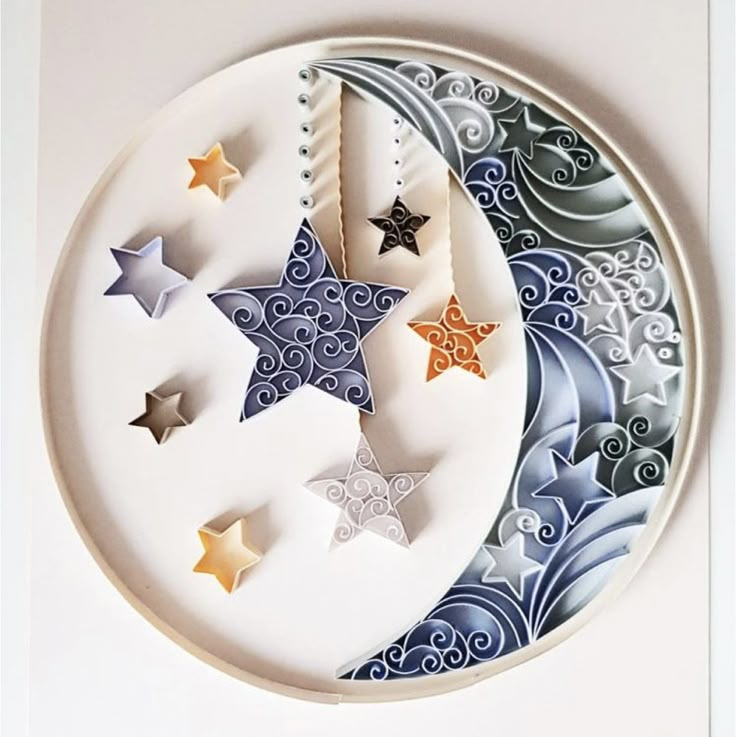
Create a crescent moon using several yellow or cream strips. Build the shape slowly so the curve stays smooth.
Add small stars around the moon using tight coils and pointed shapes. Dark blue cardstock makes the whole scene stand out.
You can make the stars different sizes. That small variation keeps the background from looking too uniform.
42. Quilled Camera
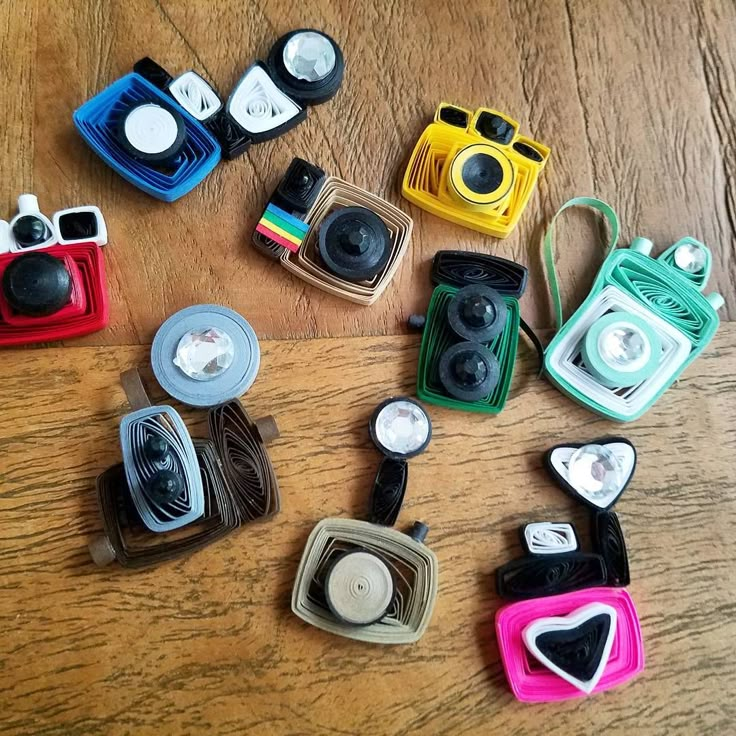
Make a small rectangular camera from cardstock. Add a large circular lens in the center using several paper rings.
Tiny strips can suggest buttons across the top. Add a simple flash beside the lens.
Black, gray, silver, or bright colors can work for this design. It makes a fun card for someone who loves photography.
43. Quilled Sunglasses
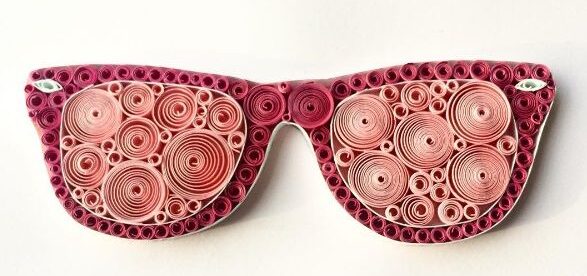
Create two rounded frames from curved paper strips. Connect them with a small strip across the middle.
Add another curved piece inside each frame for the lenses. Bright colors can give the sunglasses a fun summer feel.
Place them beside a tiny sun or flower. That simple combination can turn them into a cheerful card design.
44. Quilled Butterfly Initial
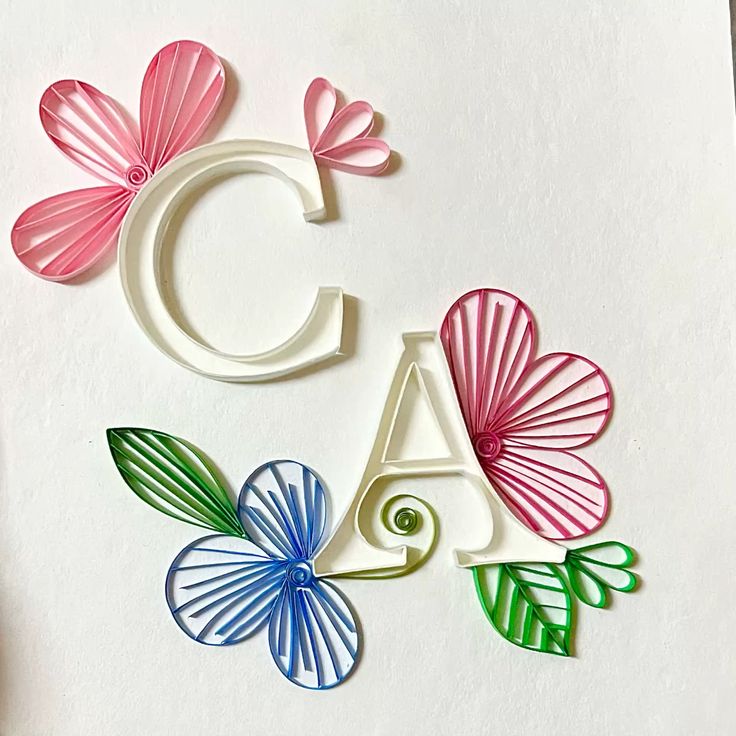
Start with a large initial and decorate it with butterflies. Keep the letter bold enough to remain easy to recognize.
Make one larger butterfly the main decoration. Add smaller butterflies around it to fill selected spaces.
You can match the butterflies to the letter color. A contrasting background will help the entire design stand out.
45. Quilled Floral Mandala
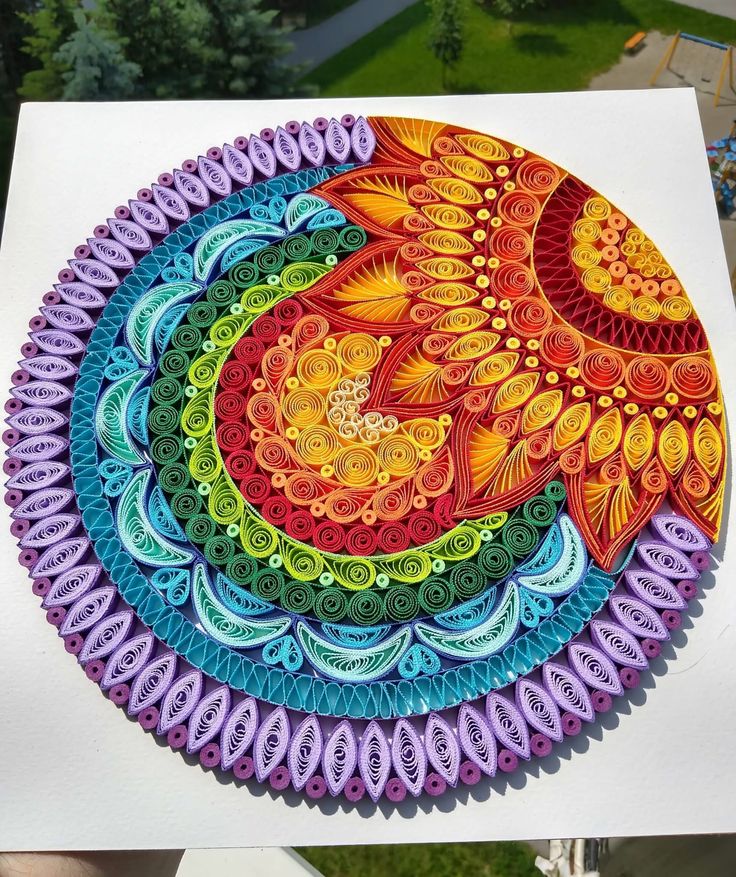
A floral mandala gives you a gentle introduction to repeated patterns. Start with a small tight coil in the center.
Build outward with petals, leaves, teardrops, and small circles. Repeat similar shapes around the center.
You do not need perfect symmetry. Focus on keeping the visual weight balanced from one side to the other.
46. Quilled Wall Art

Choose one main subject before starting a larger wall piece. Flowers, birds, trees, and abstract patterns all work well.
Sketch the basic layout lightly on cardstock. Build the largest shapes first, then use smaller coils to fill selected areas.
Give the design some breathing room. Empty sections can make the finished piece look more intentional.
47. Quilled Floral Quote
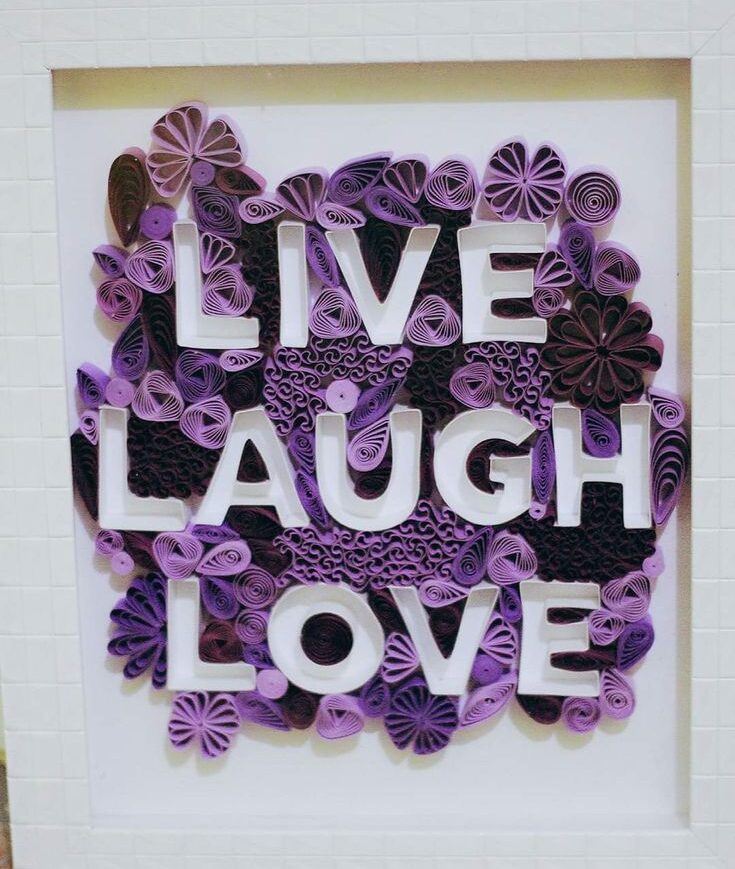
Combine simple lettering with a small floral arrangement. Write a short phrase or quote across the cardstock first.
Trace selected letters with thin paper strips. Then create flowers and leaves around one or two corners.
Do not decorate every letter and every empty space. Let the words remain clear while the flowers frame them.
Final Thoughts
The nice thing about quilling is that the finished design can look far more complicated than the process itself.
You are really working with coils, curves, loops, and a few simple shapes. Once you understand that, Paper Quilling Ideas stop looking like something meant only for experienced crafters.
Your first project may not look exactly like the picture you imagined. One petal might sit higher, or one coil might come out tighter than another.
That does not mean you failed. Those little differences are part of learning how your hands handle the paper.
So, pick one idea from this list and actually make it. Start with a flower if you want the easiest introduction, or choose a project that already makes you excited.
The more shapes you create, the easier it becomes to combine them. Before long, you may start looking at an ordinary strip of paper and seeing something much more interesting.