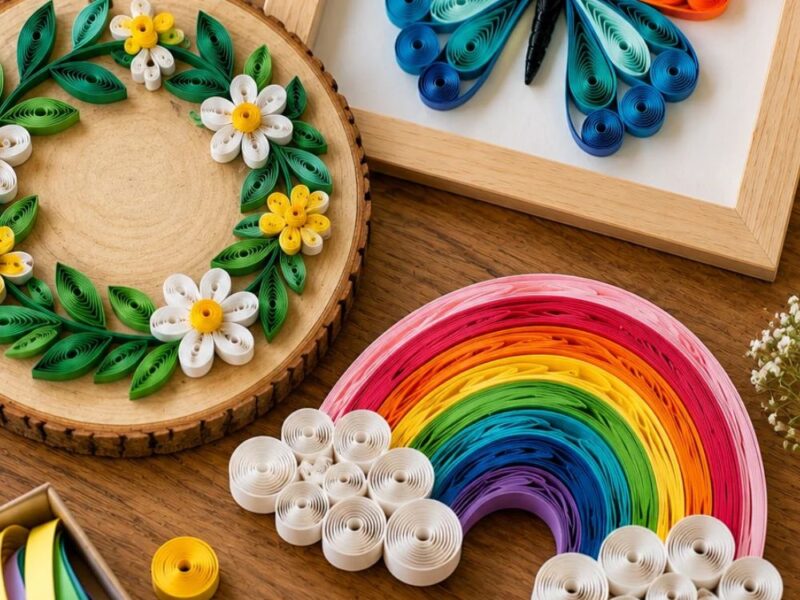
If you have never tried iris folding, the technique can look more complicated than it really is.
You cut a shape into your card, then build the design from the back using folded paper strips.
The strips overlap toward the center, creating a layered opening that gives the finished card its signature look.
If you already know the technique, you probably know that the real fun starts when you begin playing with the shapes, colors, and paper combinations.
That is where these cards can become surprisingly creative. You can use patterned scraps for a busy design or stick with a few solid colors for something cleaner.
Even better, you do not need a huge pile of expensive supplies to experiment with different looks.
So, whether you are learning the technique for the first time or simply hunting for your next project, there is plenty to explore here.
Some designs keep the shape simple so you can concentrate on the folding. Others give you more room to play with color and pattern placement.
The goal is not to make every card look perfect. It is to find designs you can actually enjoy making and ideas that give your handmade cards a little more personality.
23 Stunning Iris Folding Patterns for Handmade Cards
1. Classic Heart
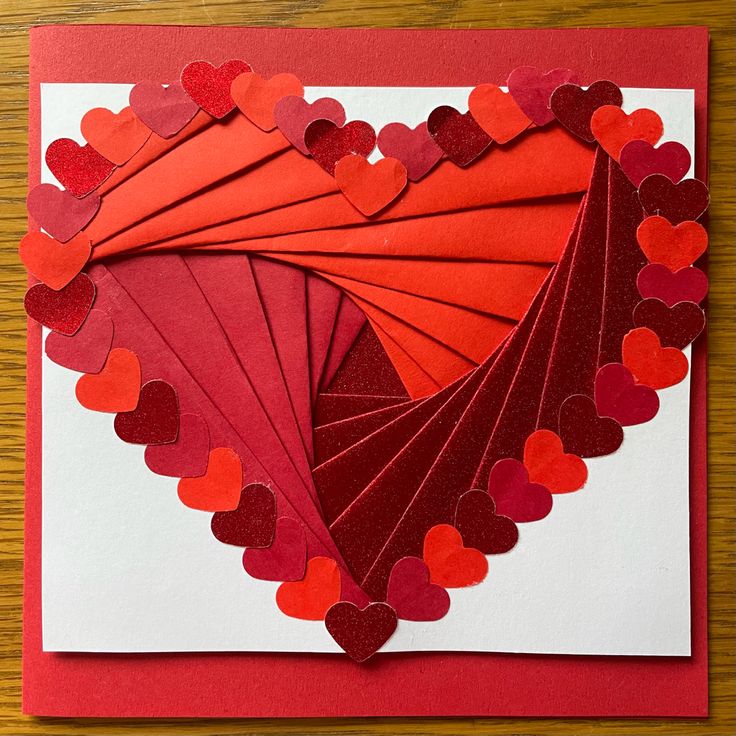
A heart is one of the easiest shapes to use when learning the technique. It has a simple outline, and the finished design works for several occasions.
Start with red, pink, cream, or a mixture of those colors. Cut four or five sets of strips so each section has a slightly different shade.
Arrange the darker colors toward the outside and lighter shades closer to the center. A tiny metallic paper section in the middle can give the heart a lovely finishing touch.
This design works for Valentine’s Day, anniversaries, weddings, or even a simple friendship card.
2. Iris Folding Flower
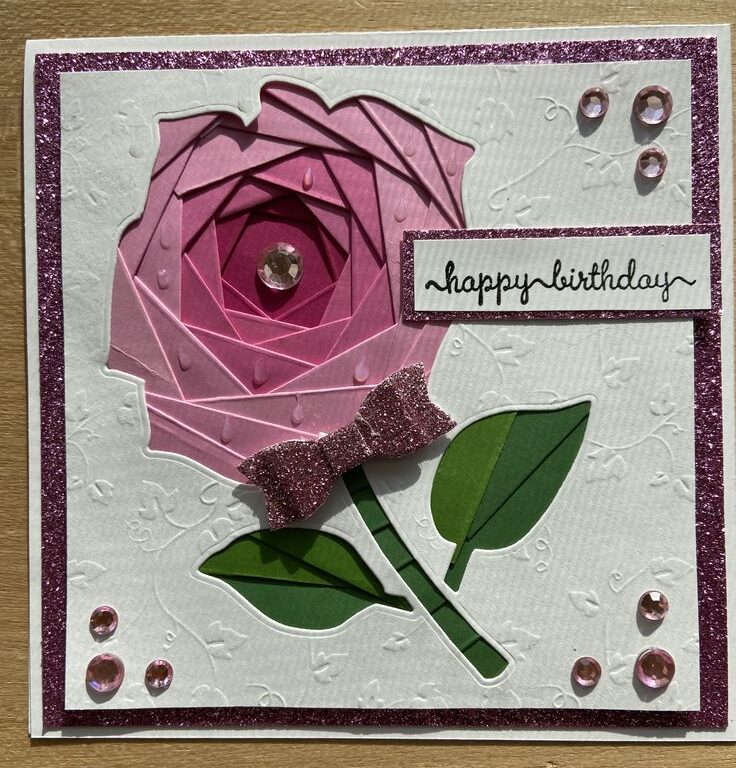
A flower gives you more freedom to experiment with color. Choose a simple flower template with wide petals rather than tiny sections.
You can use one color family throughout the design. Try several shades of pink, purple, yellow, or blue for a softer result.
For something more playful, alternate solid and patterned papers. A small circular opening in the center can become the flower’s middle.
This is one of those Iris Folding Patterns that can look completely different depending on the paper you choose.
3. Butterfly
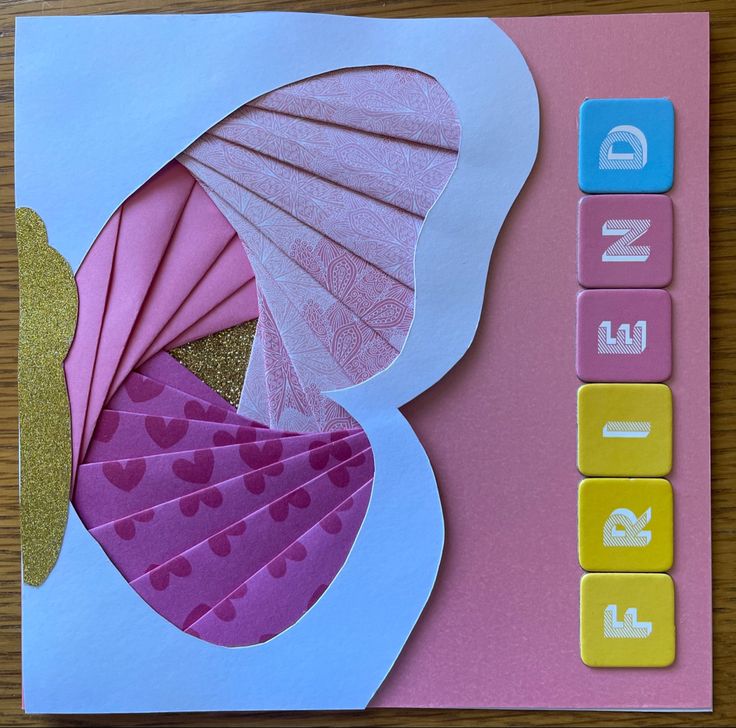
A butterfly makes a lovely spring or birthday card. Pick a template with broad wings so you have enough room to place the strips comfortably.
Use two colors for the wings, then add a contrasting strip through the center. You can even use a floral print on one side and a solid color on the other.
Keep the body simple because the wings should remain the main feature. Add a few small paper flowers around the butterfly if you want a fuller card.
4. Christmas Tree
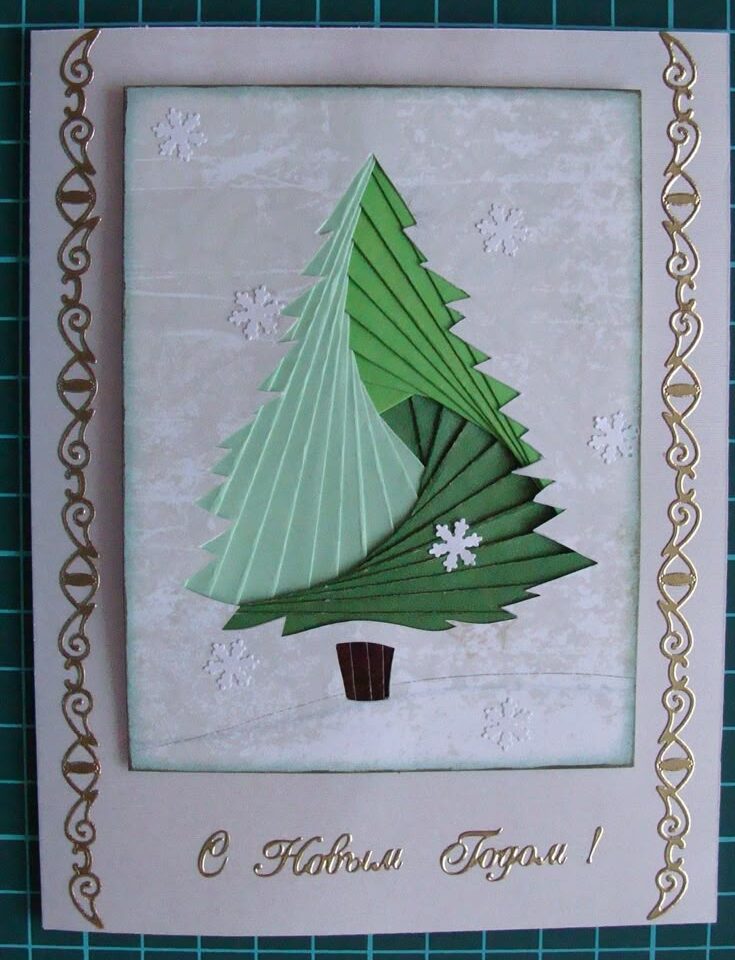
Turn a simple Christmas tree outline into a layered holiday decoration. Green paper works naturally, but you do not have to stay with traditional colors.
Try dark green, pale green, gold, and cream for a more elegant card. Red and patterned paper can create a warmer, more playful version.
Add a small gold star above the tree after completing the folding. A few tiny gems can also work, but keep them light so they do not make the card bulky.
5. Pumpkin
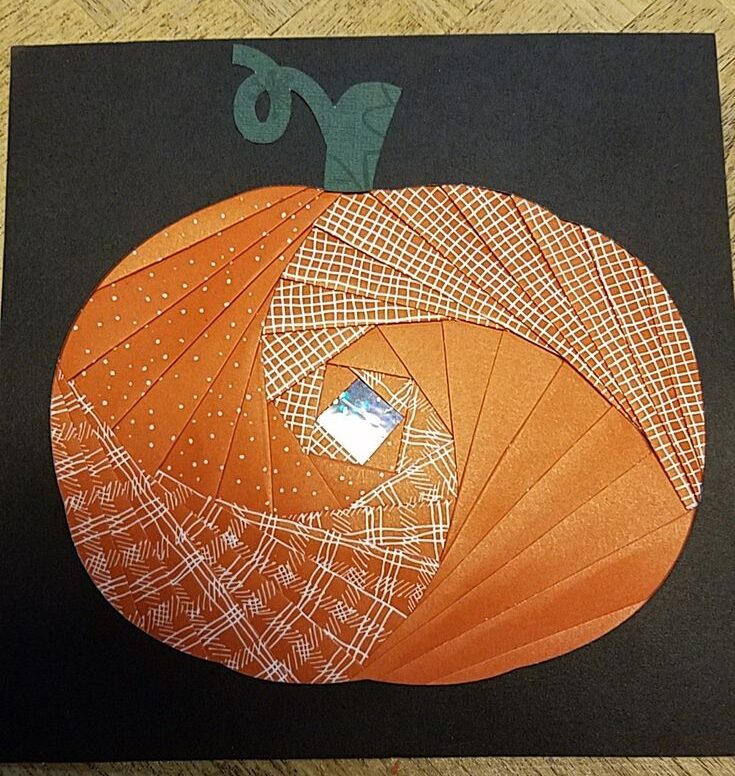
A pumpkin shape makes a great autumn greeting card. Choose orange papers in several shades so the sections look like the natural curves of a pumpkin.
You can mix plain orange with a subtle pattern. Brown paper works well for the stem, while a small green section can suggest a leaf.
A cream card base will give the pumpkin a softer look. Dark brown or deep green cardstock will create stronger contrast.
6. Peacock Feather
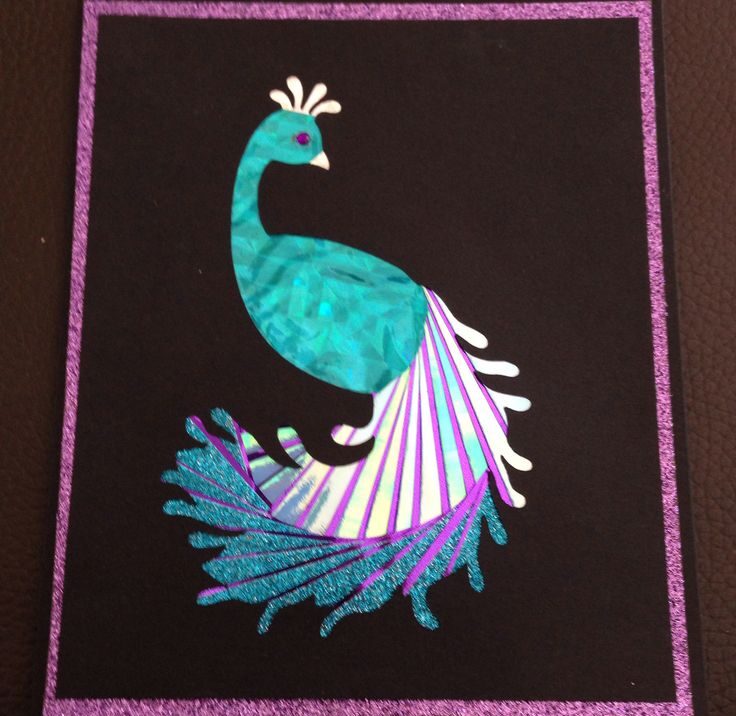
A peacock feather gives you more room to play with color than many simple shapes. Start with blue, green, turquoise, and purple paper strips.
Place the strongest colors around the central opening. Then work outward with softer shades.
You do not need to make the feather extremely detailed. The color combination will already create much of the visual interest.
This pattern looks especially good on a dark card base because the bright colors stand out immediately.
7. Christmas Ornament
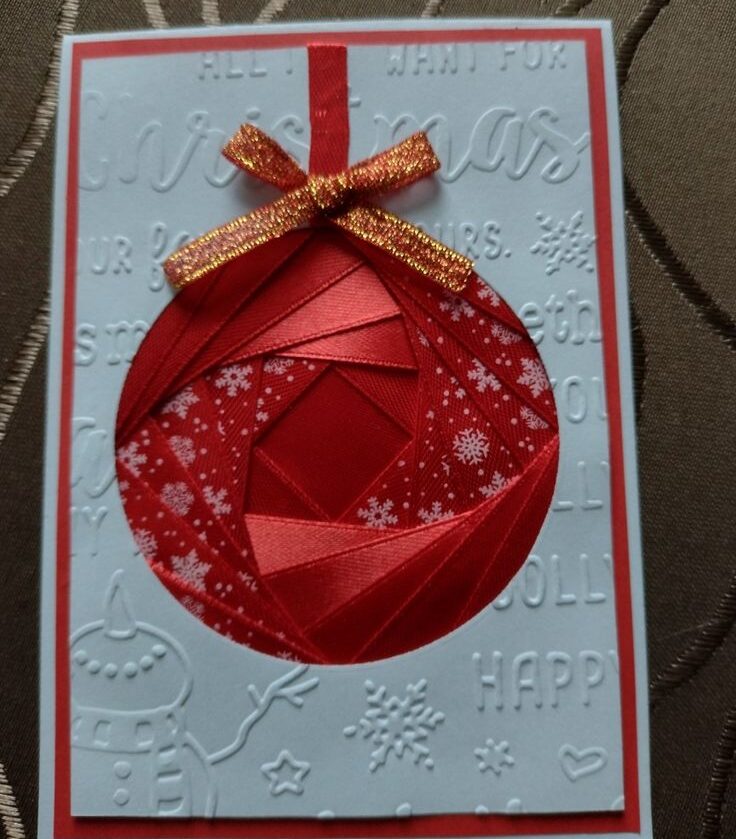
An ornament is another useful holiday design because you can change its appearance so easily. Use red and gold for a traditional look.
Try blue and silver if you prefer cooler colors. You can also use patterned paper for one or two sections to make the ornament feel more decorative.
After completing the folding, add a thin gold strip above it. That small detail makes the ornament look as though it hangs from the top of the card.
8. Leaf
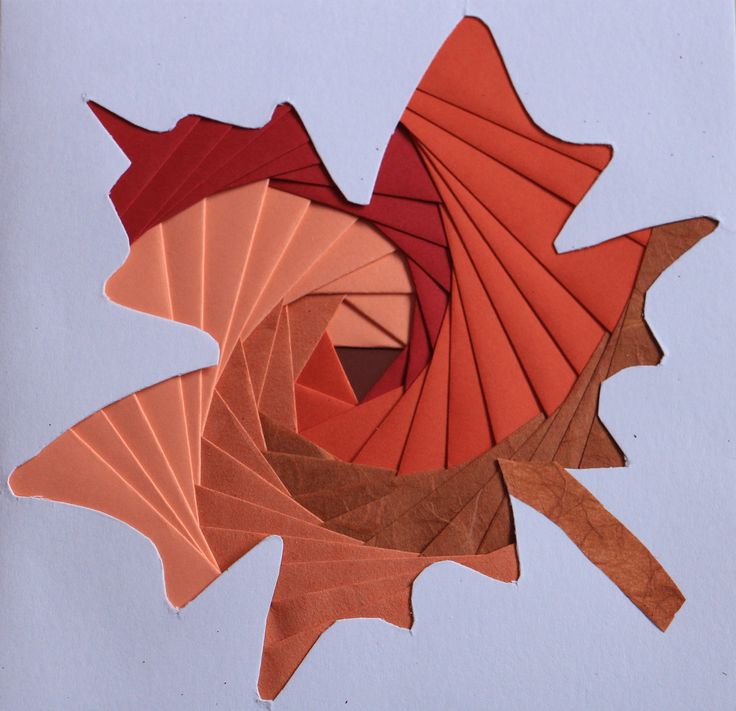
A leaf is a good choice when you want something understated. Use several shades of green and arrange them from dark to light.
You can also use autumn colors instead. Brown, rust, mustard, orange, and deep red can turn the same pattern into a fall card.
Mount the finished leaf on cream or kraft cardstock. Add a short handwritten message underneath for a simple finished design.
9. Birthday Balloon
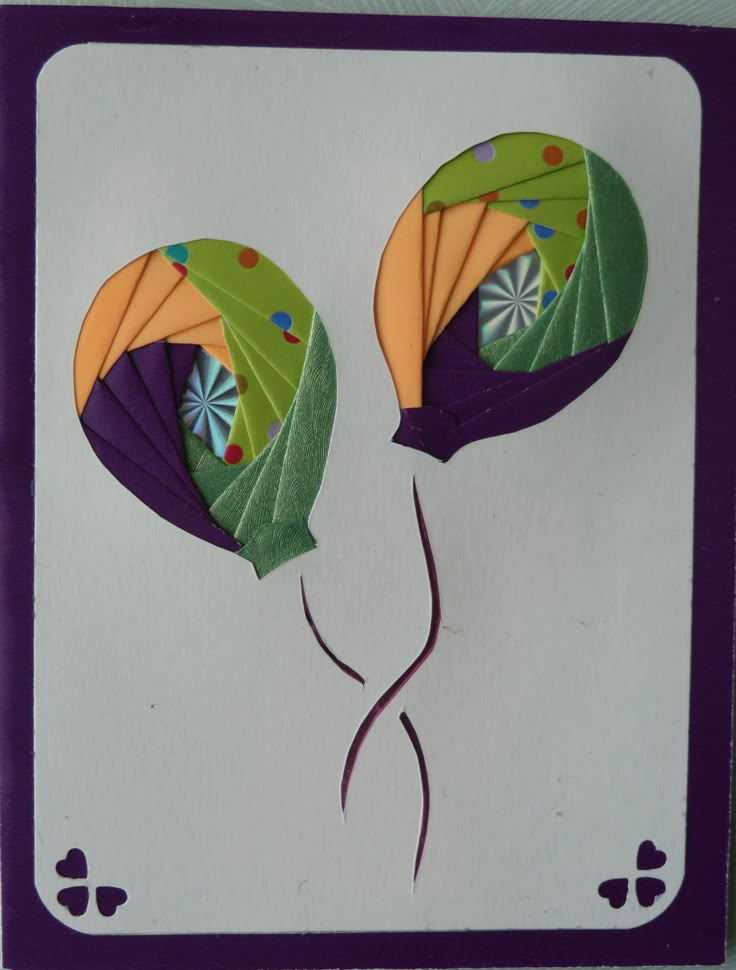
A balloon gives you an easy excuse to use several bright colors on one card. Make each section a different color, or use two shades throughout.
Try combining blue with yellow, pink with purple, or orange with red. Patterned paper can add another layer of interest.
Once you finish the folding, draw or glue a thin string below the balloon. Add two or three small balloons around it if you want a fuller birthday card.
10. Christmas Stocking
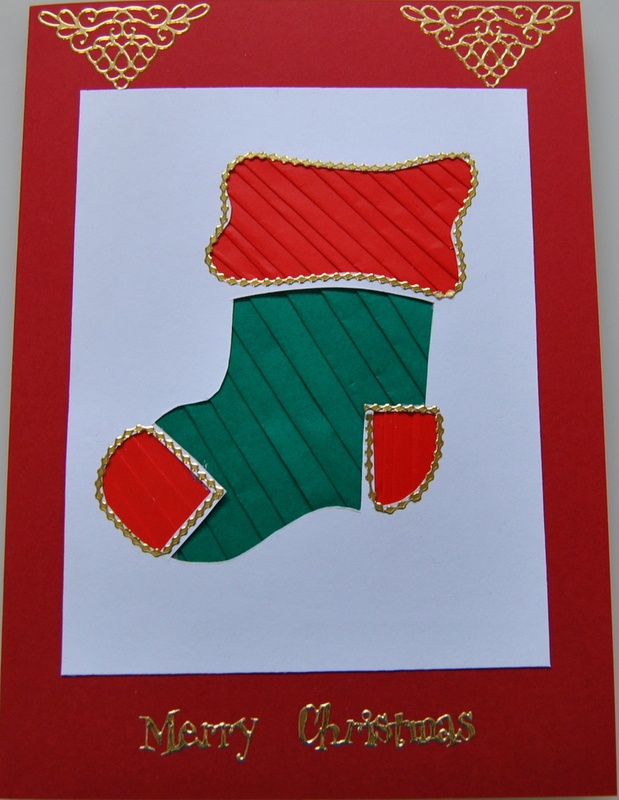
A stocking shape works especially well when you want a cozy holiday card. Use red strips for the main sections and white paper for the top.
You can also use green, cream, and gold if you want something less traditional. Small patterns can make the stocking look like fabric.
Add a tiny bow or snowflake near the top once you finish. Just keep the embellishments flat enough for the card to close comfortably.
11. Owl
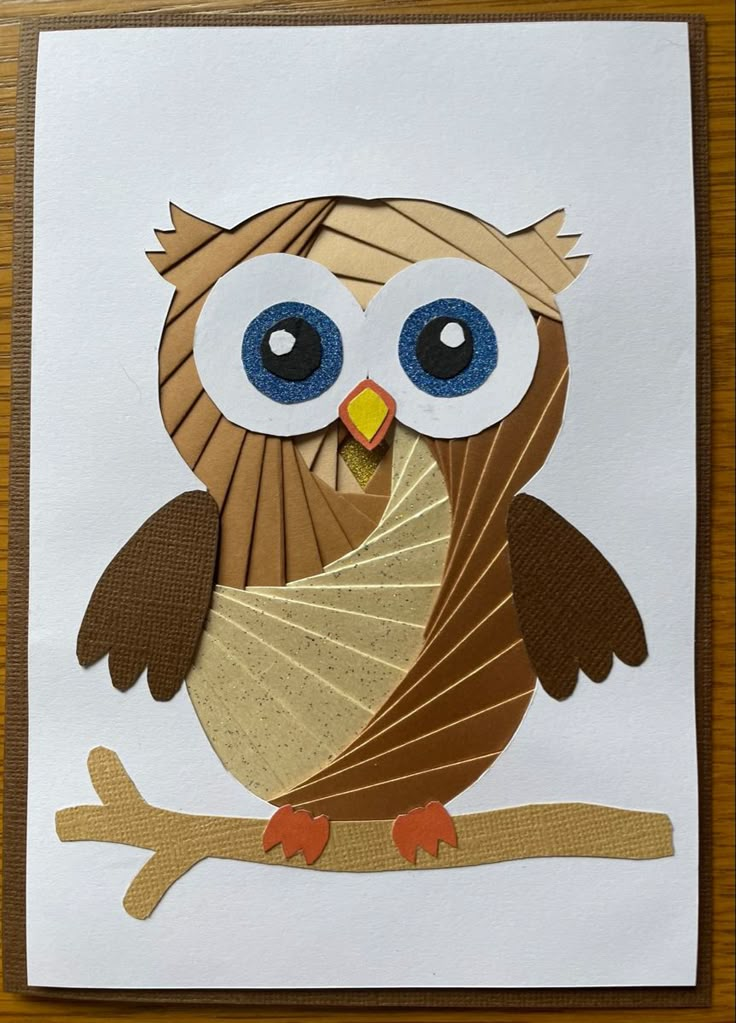
An owl gives you a fun opportunity to use contrasting papers. Brown, cream, and gold can create a natural-looking bird.
For something brighter, try blue, purple, and yellow. Keep the center sections lighter so the eyes remain noticeable.
You can add tiny paper circles for the eyes after finishing the iris folding. A branch underneath will turn the owl into a small scene rather than a standalone shape.
12. Apple
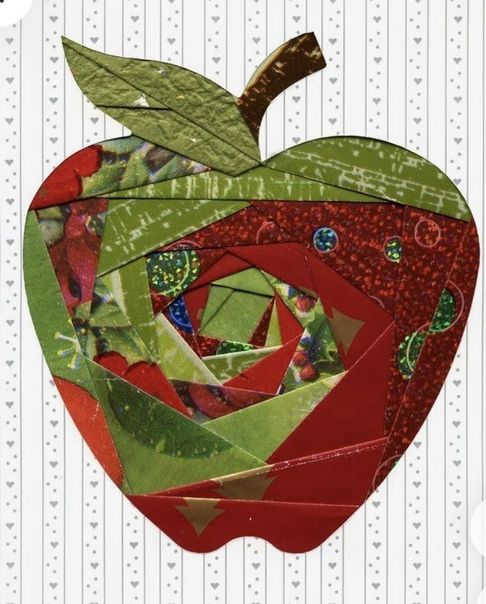
An apple shape works well for teacher cards, thank-you cards, or back-to-school greetings. Use several shades of red for a traditional design.
A mixture of red and pink can make the apple feel softer. Green paper works for the leaf, while brown can create the stem.
Place the apple on a white or cream card so the color becomes the main focus. You can add a small handwritten message beside it.
13. Snowflake
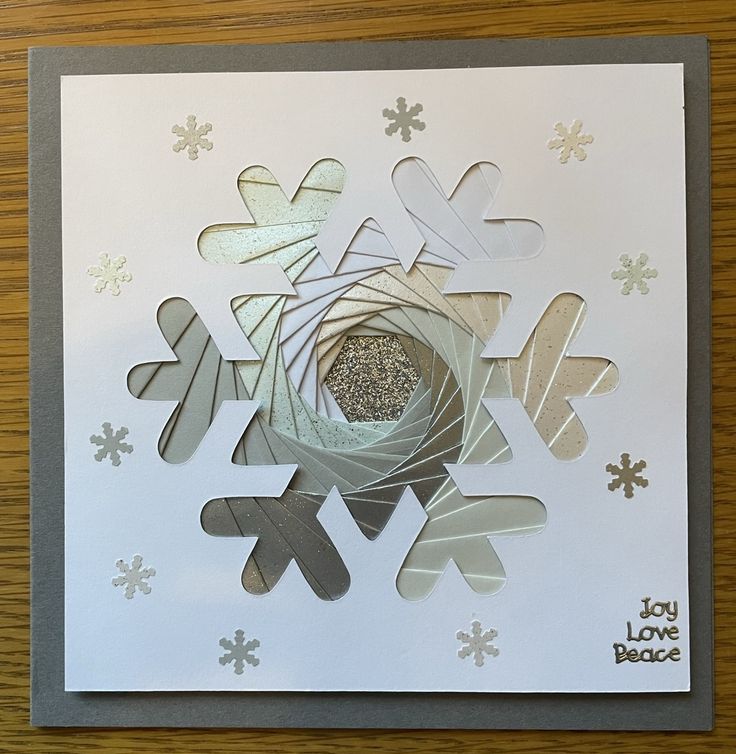
A snowflake lets you create a delicate winter design without adding lots of decorations. Choose white, pale blue, silver, and icy gray papers.
Keep the outer strips slightly darker than the inner sections. This can give the snowflake a subtle sense of depth.
A dark blue card base can make the lighter strips stand out beautifully. You can also add a few tiny punched stars around the shape.
14. Christmas Bell
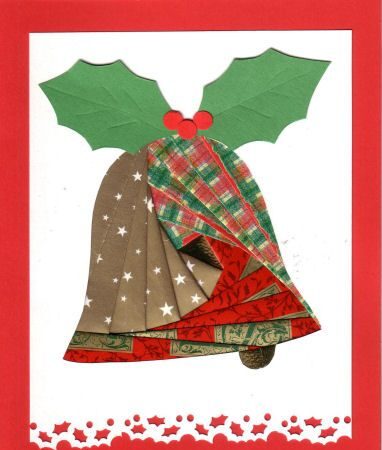
Use gold, yellow, cream, and warm brown strips for a traditional bell. Metallic-looking paper can work especially well in this design.
Try alternating gold and cream sections rather than using gold everywhere. Too much metallic paper can make the card look busy.
A narrow strip above the bell can represent the hanging loop. Add a tiny red bow underneath for a festive finishing touch.
15. Star
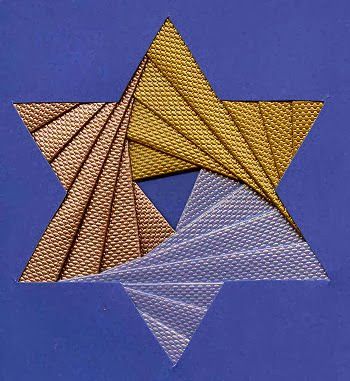
A star gives you one of the simplest ways to experiment with bold colors. Choose a five-point template with enough space between the sections.
You can use one color family or make every section different. For a birthday card, bright colors work well.
Gold and cream can create a more elegant version. A dark navy or black card base can make the finished star look especially striking.
16. Coffee Cup
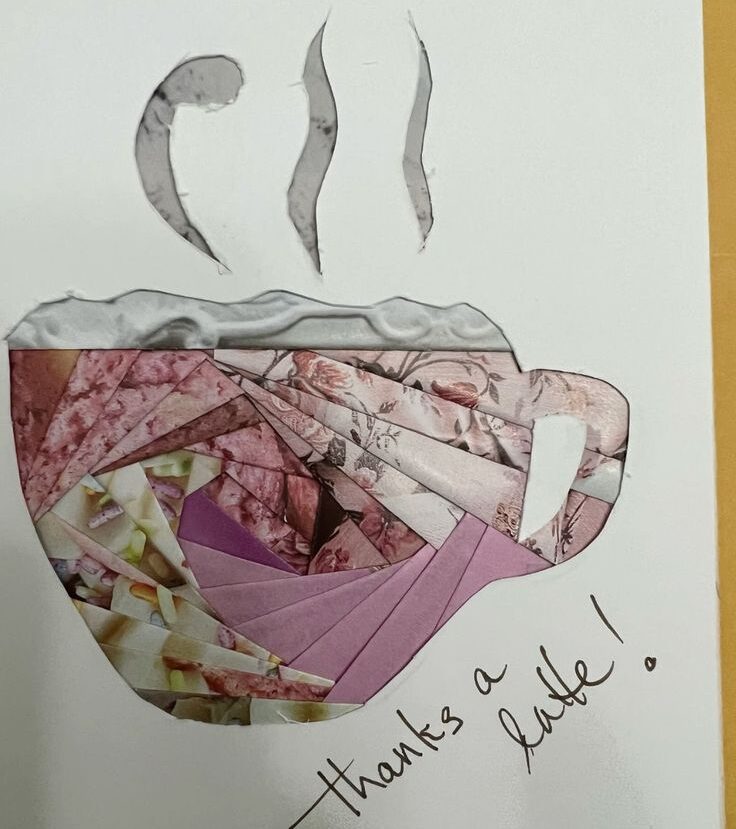
A coffee cup is a fun option for a birthday, thank-you, or friendship card. Choose warm colors such as brown, cream, tan, and muted orange.
Use patterned paper for one section to suggest a decorated mug. Keep the remaining strips fairly simple so the design does not become too busy.
After completing the folding, add a small paper heart or flower to the cup. A few thin curls above it can suggest rising steam.
17. Dress
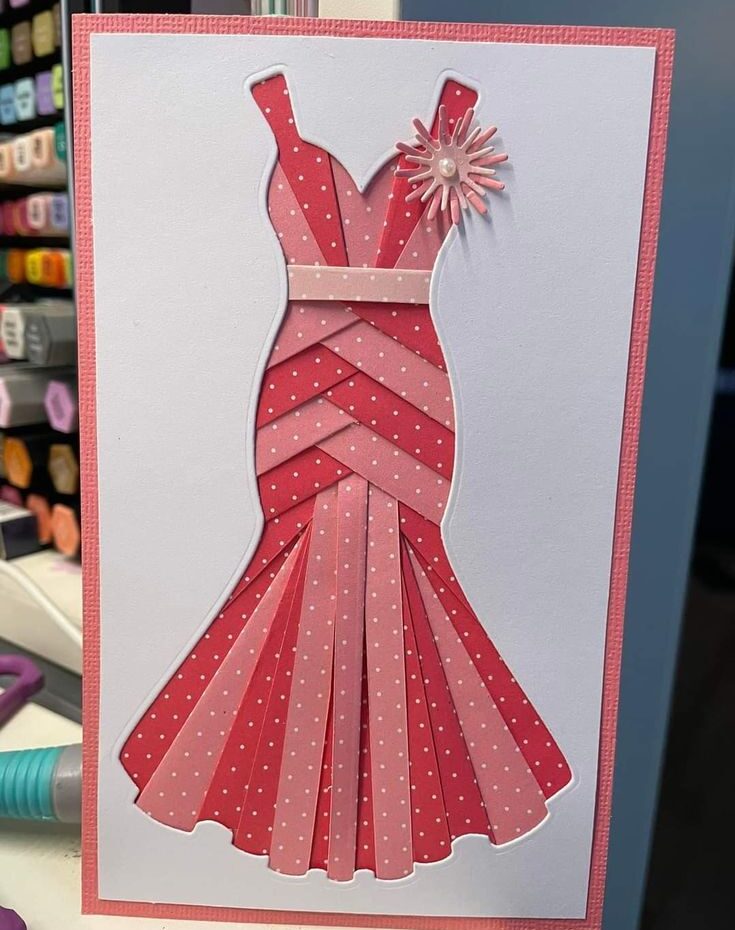
A dress shape can turn into a lovely card for a birthday, bridal shower, or special celebration. Pick a template with a broad skirt because it gives you more room to show the paper.
Use two or three coordinating colors. Floral paper can look especially pretty in the skirt sections.
Keep the bodice simple and let the lower part carry most of the pattern. A tiny ribbon around the waist can finish the design.
18. Peacock
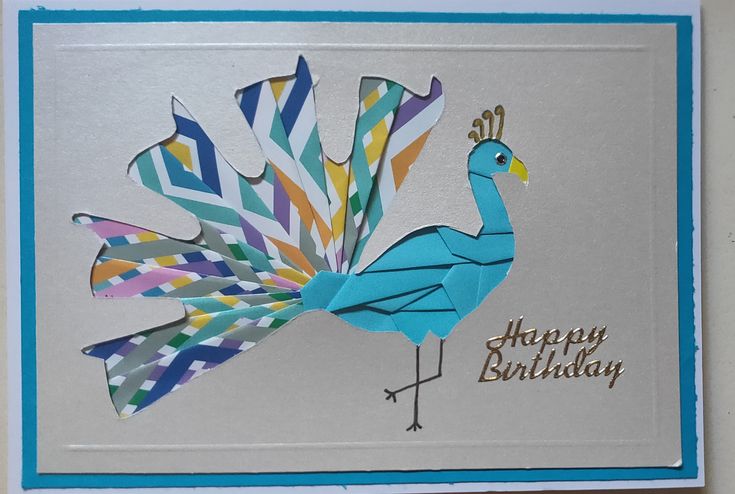
If the feather idea feels too simple, try the full bird. The tail gives you plenty of space for interesting paper combinations.
Use blue, green, turquoise, purple, and gold for a colorful result. Start with the body, then give most of your attention to the tail.
Do not overload the card with extra decorations. The folded tail already provides plenty of detail.
19. Sunflower
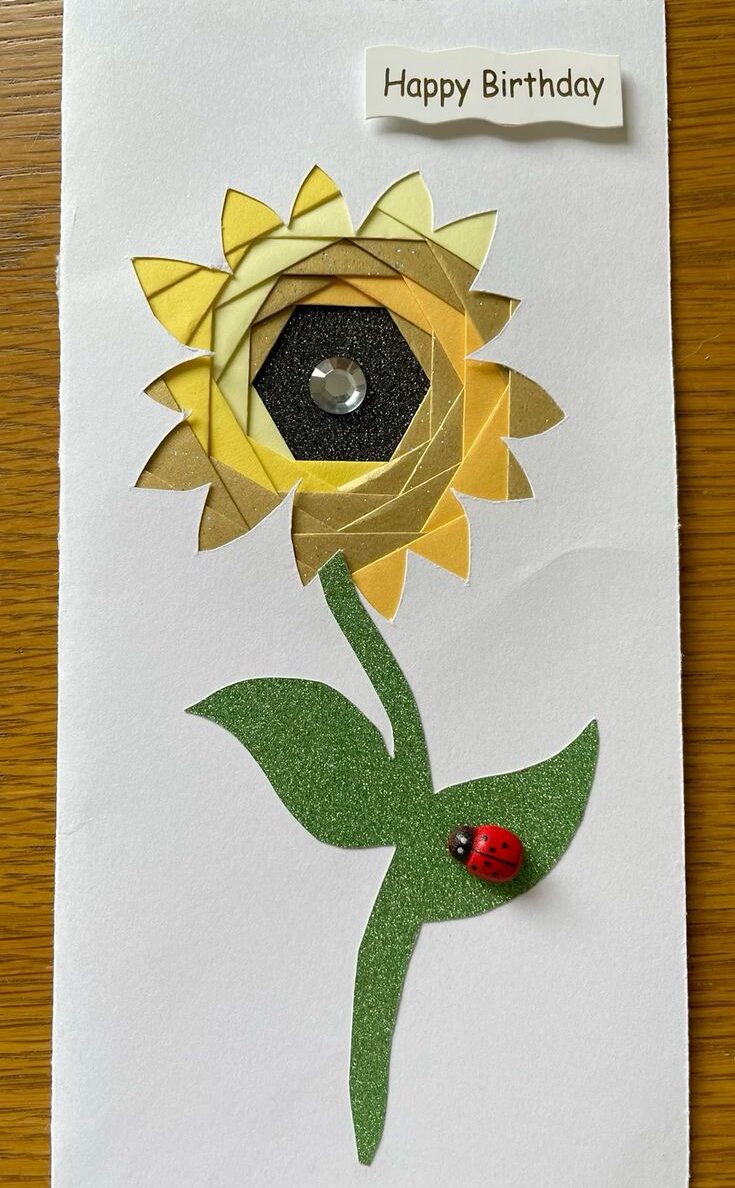
A sunflower makes a warm handmade card for birthdays, thank-you notes, or autumn greetings. Use yellow and gold strips for the petals.
Brown or dark orange can work around the center. Green paper can create a small leaf beneath the flower.
A cream card base will give the flower a gentle appearance. For stronger contrast, use a deep green or brown background.
20. Angel
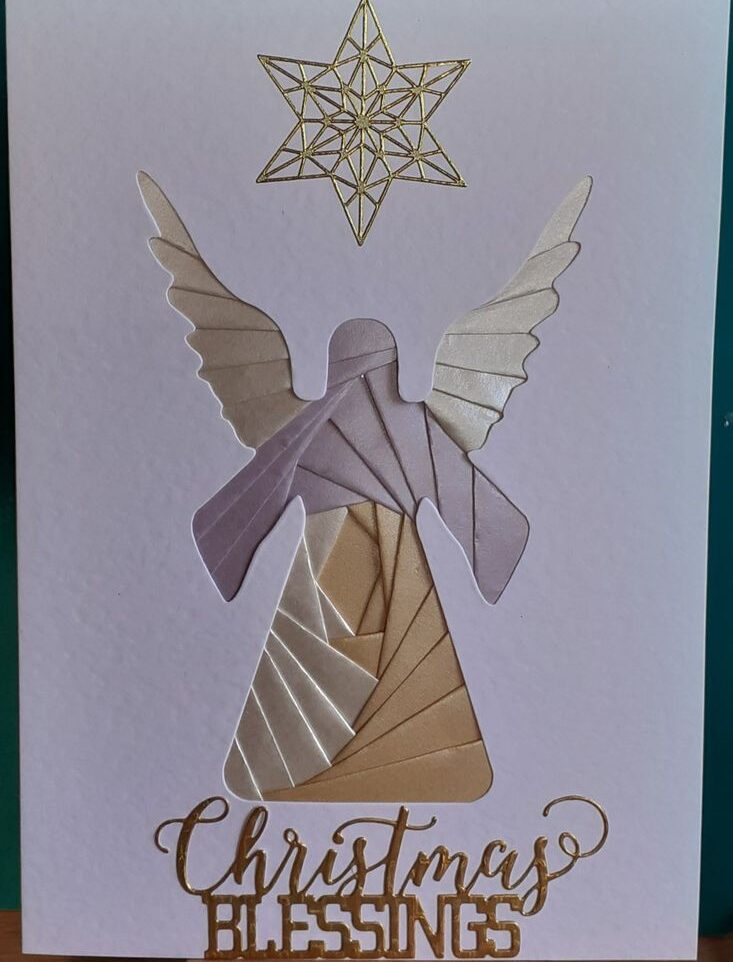
An angel shape can work for Christmas cards, sympathy cards, or peaceful winter designs. Choose white, cream, pale gold, or silver paper.
Use slightly darker shades for some sections so the outline remains visible. Avoid making every strip metallic because the design can become difficult to read.
A small gold star or halo above the head can finish the card. Keep the added pieces flat and simple.
21. Teapot
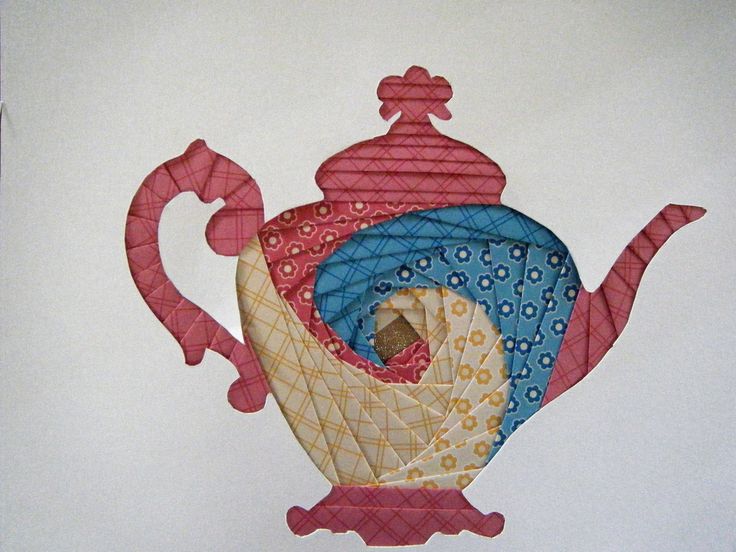
A teapot makes a charming card for tea lovers, birthdays, or afternoon gatherings. Choose soft colors such as cream, pink, sage, or blue.
Floral paper can work beautifully in the larger sections. You can balance it with plain paper in a matching shade.
Add a tiny flower near the handle after completing the folding. A small cup beside the teapot can turn the card into a little tea-time scene.
22. Cat
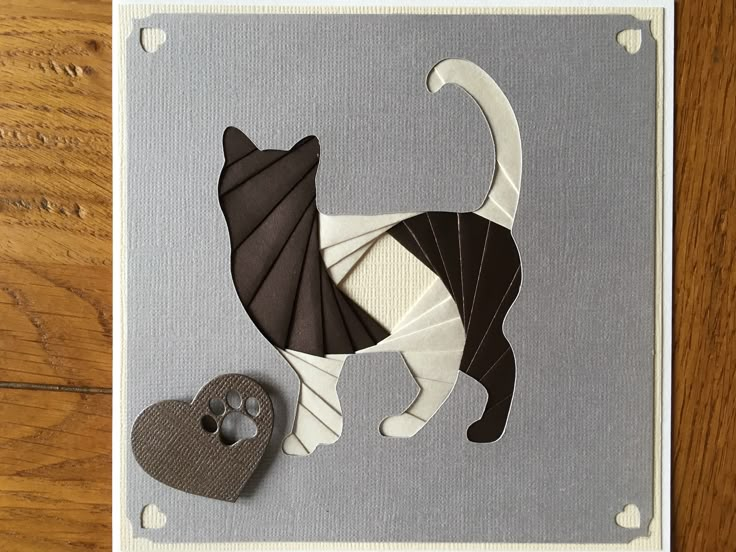
A cat silhouette can make a fun birthday card or a thoughtful gift for a cat lover. Black, gray, cream, and orange all work well.
If your template has several sections, use different shades to create subtle variation. You can also use a small patterned paper section for the body.
Once finished, add two tiny paper eyes. A simple crescent moon or star beside the cat can give the card a cozy nighttime feel.
23. Christmas Wreath
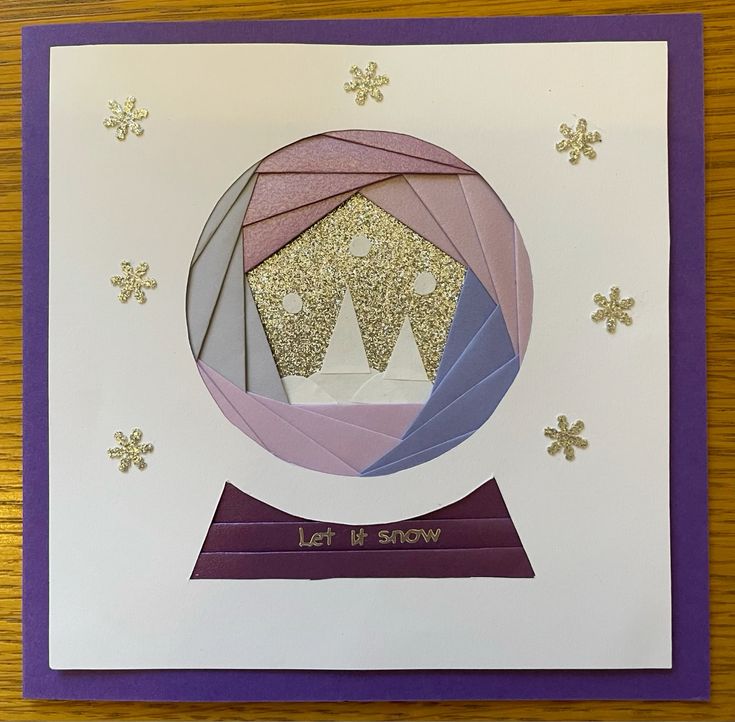
A wreath makes a beautiful final project because you can combine several colors without making the card look chaotic. Start with green strips in different shades.
Add red or gold sections for small berries and decorations. Keep the center opening visible so the iris effect remains easy to notice.
Once the folding is complete, add a small bow at the bottom. Mount the wreath on cream cardstock for a softer look or deep green cardstock for stronger contrast.
What You Need for Iris Folding
The supply list for iris folding stays pleasantly short. You probably already have some of these things at home.
- Cardstock for the card – (Available on Amazon)
- Colored or patterned paper
- Scissors – (Available on Amazon)
- Pencil
- Iris folding template – (Available on Amazon)
- Ruler
- Craft knife – (Available on Amazon)
- Glue or double-sided tape – (Available on Amazon)
- Small pieces of tape
- Cutting mat – (Available on Amazon)
Ways to Make Your Cards Look More Special
Mix Plain and Patterned Paper
You do not need every strip to match. A few patterned pieces can break up solid colors and make the design more interesting.
Just choose patterns with similar colors. That small connection keeps the finished card from looking random.
Try One Color in Several Shades
A monochromatic card can look surprisingly elegant. Pick one main color and gather several shades from pale to dark.
Arrange the lightest shades near the center and darker ones farther out. This creates a gentle visual transition.
Match the Design to the Recipient
Think about the person receiving the card before choosing your pattern. A coffee cup may suit one friend, while a butterfly may suit another.
The personal connection can matter more than making the most complicated design.
Keep Embellishments Flat
A few extra details can make a card feel finished. Still, avoid adding too many bulky pieces.
Small paper flowers, thin ribbons, stickers, or punched shapes can add enough interest without making the card difficult to mail.
Final Thoughts
Iris folding has an interesting way of making simple paper look much more elaborate than it is.
You are really just folding strips, following a sequence, and slowly working toward the center.
Once you understand that basic rhythm, you can start changing the colors and shapes to suit almost any card.
The best part is that you can make the same pattern several times without getting the same result.
Change the paper and the whole card can feel different. Use floral prints for one version, solid colors for another, or mix scraps that you would normally have thrown away.
That freedom gives these Iris Folding Patterns much more mileage than you might expect.
So, do not wait until you feel completely confident with the technique. Pick a shape that catches your eye and give it a try.
If you already know iris folding, use these ideas as a starting point and change the colors or paper combinations.
Either way, the goal is the same: make a card that feels thoughtful, handmade, and worth keeping.