Halloween gives you a pretty good excuse to make things a little mind-blowing.
A tiny clay pumpkin can have an exaggerated grin, a ghost can peek around a corner, and a little black cat can look like it knows something you do not.
That playful freedom is what makes Halloween Clay Crafts so enjoyable to work on.
If you already have some floating paper ghost decorations hanging up, a few clay pieces beneath them make a lovely grounded contrast.
If you want your finished pieces to look polished, the details deserve just as much attention as the main shape.
Think about smooth surfaces, clean edges, balanced colors, and tiny features that give the piece character.
You can keep the design simple and still make it look like something you would happily spot on a store shelf.
I’ve picked 23 projects that have that kind of finished appeal. Some are creepy, some are cute, and others have just enough weirdness to make them interesting.
As we go through them, I’ll show you how to shape each piece and where you can add those little details that make the final result feel special.
23 Spooky Halloween Clay Crafts That Look Store-Bought (Check Price of Modeling Clay Kit on Amazon)
1. Grinning Pumpkin Clay Decoration
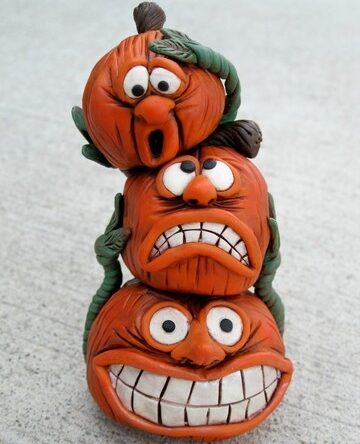
A clay pumpkin is a simple place to start, but the face can make it feel much more special. Shape the clay into a round pumpkin and press gentle lines down the sides.
Keep those lines slightly uneven so the pumpkin still looks handmade.
For the face, carve a wide grin with small pointed teeth. Add tiny black eyes and a short brown stem on top. You can also paint the pumpkin in a muted orange instead of a bright shade.
To get that polished store-bought look, smooth the surface before adding the face. Keep the paint neat around the eyes and mouth.
A little matte sealer can also give the finished piece a clean appearance. If you want more character, make the grin slightly crooked instead of perfectly centered.
2. Little Ghost Figurine
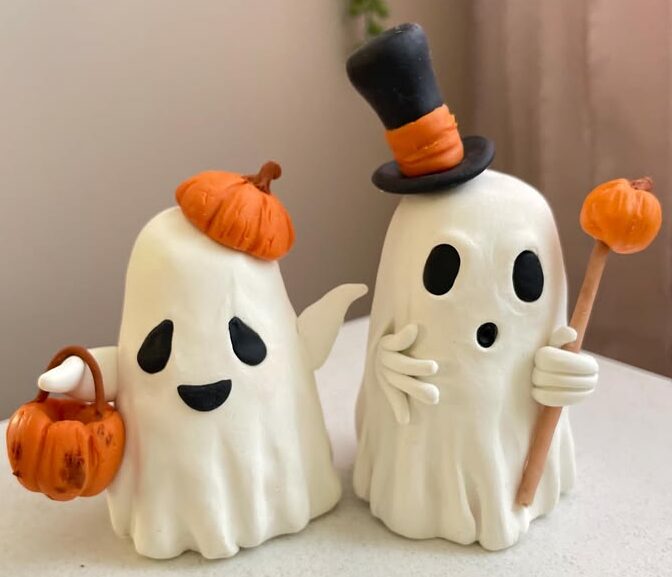
Shape a small ghost with a rounded head and a flowing body. Let the bottom spread slightly so the figure can stand on its own.
You can make the body uneven to give the ghost a playful floating effect.
If sculpted ghosts like this are your favorite, these whimsical clay ghosts for a magical Halloween go into much more detail on shaping and painting them.
Keep the face simple with two dark eyes and a tiny open mouth. A slightly worried expression can make it look adorable instead of frightening.
Add a small blush to the cheeks if you want a softer finish.
Place the ghost on a small clay base if it feels unstable. You can also add tiny raised hands to make the figure more expressive.
These little details can make a basic ghost look like a finished collectible. Try making the body slightly wider at the bottom for a softer, more rounded shape.
3. Mini Haunted House
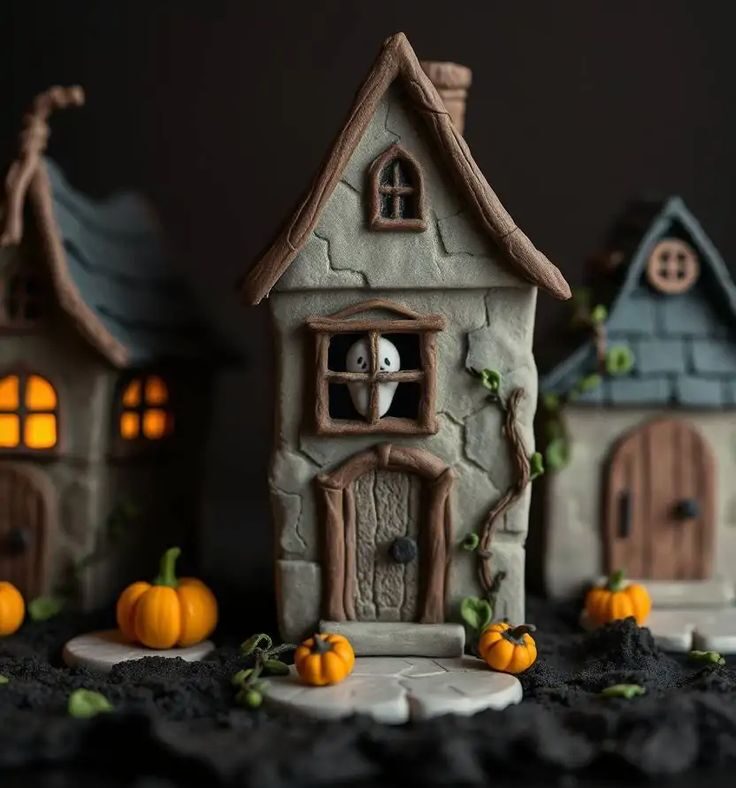
Build a tiny haunted house from clay using simple geometric shapes. Start with the main house, then add a pointed roof and a small chimney.
Keep the walls slightly crooked for an old, spooky appearance.
Press tiny windows into the front and paint them warm yellow. Add a black door with a tiny silver-colored handle. You can also place a few pumpkins around the entrance.
For a more finished look, add thin clay strips around the windows. These strips can make the house look more detailed without requiring complicated sculpting.
If layered, dimensional scenes like this appeal to you, this enchanting haunted forest shadow box creates a similar effect with paper instead of clay.
A little moss-colored paint around the base can complete the scene. You could also add tiny cracks to the walls for an older, weathered appearance.
4. Spooky Black Cat
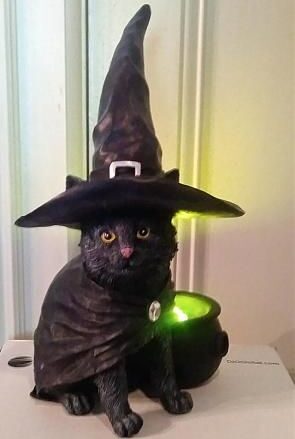
Black cats fit perfectly into a Halloween clay collection. Shape the body into a simple sitting position, then add a rounded head and pointed ears. Make the tail curve around one side of the body.
Paint the cat deep black after the clay dries. Then, add bright yellow or green eyes to create contrast. Tiny whiskers can be carved into the clay or painted with a very fine brush.
Keep the body smooth and the facial features clean. You can also place the cat on a small round base with a tiny pumpkin beside it.
That extra detail can make the piece feel like a complete decoration. Give the cat slightly raised ears to make it look alert and curious.
5. Cute Vampire Bat
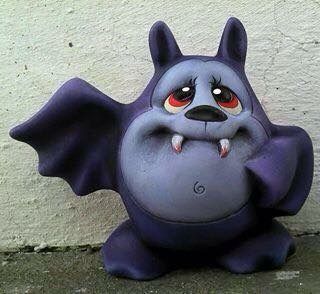
Create a small bat with a rounded body and two wide wings. Keep the wings slightly curved instead of making them completely flat.
That small change can make the bat look like it is about to fly.
Paint the body black and add tiny white fangs. A small pair of red eyes can give it a classic Halloween look. You can also add a little purple inside the wings.
For a store-bought finish, smooth the wing edges carefully before painting. Add small lines across the wings to show their texture.
A thin wire stand can also help you display the bat as though it is flying. You can make the ears slightly pointed to give the face a sharper shape.
6. Witch Hat With Tiny Details
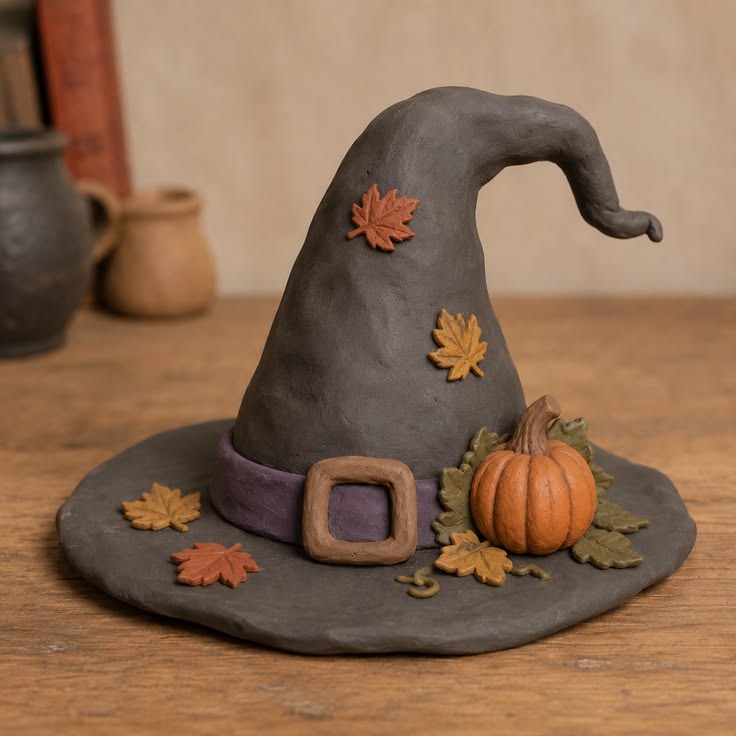
A clay witch hat can become a charming standalone decoration. Shape a tall cone and bend the top slightly to one side. Then, create a wide brim that sits firmly underneath.
Paint the hat black and add a purple or orange band around it. Tiny stars, moons, or dots can decorate the surface. You can also add a miniature buckle to the band.
Make sure the brim stays smooth and even. That one detail can make a big difference in the final appearance.
Place the finished hat beside pumpkins or tiny potion bottles for a complete Halloween display.
If you enjoy making little bottles like that too, these 25 witchy Halloween potion bottle ideas that cast a spell pair perfectly with a clay witch hat display.
A small bent tip will also give the hat more personality than a perfectly straight cone.
7. Frankenstein Clay Figure
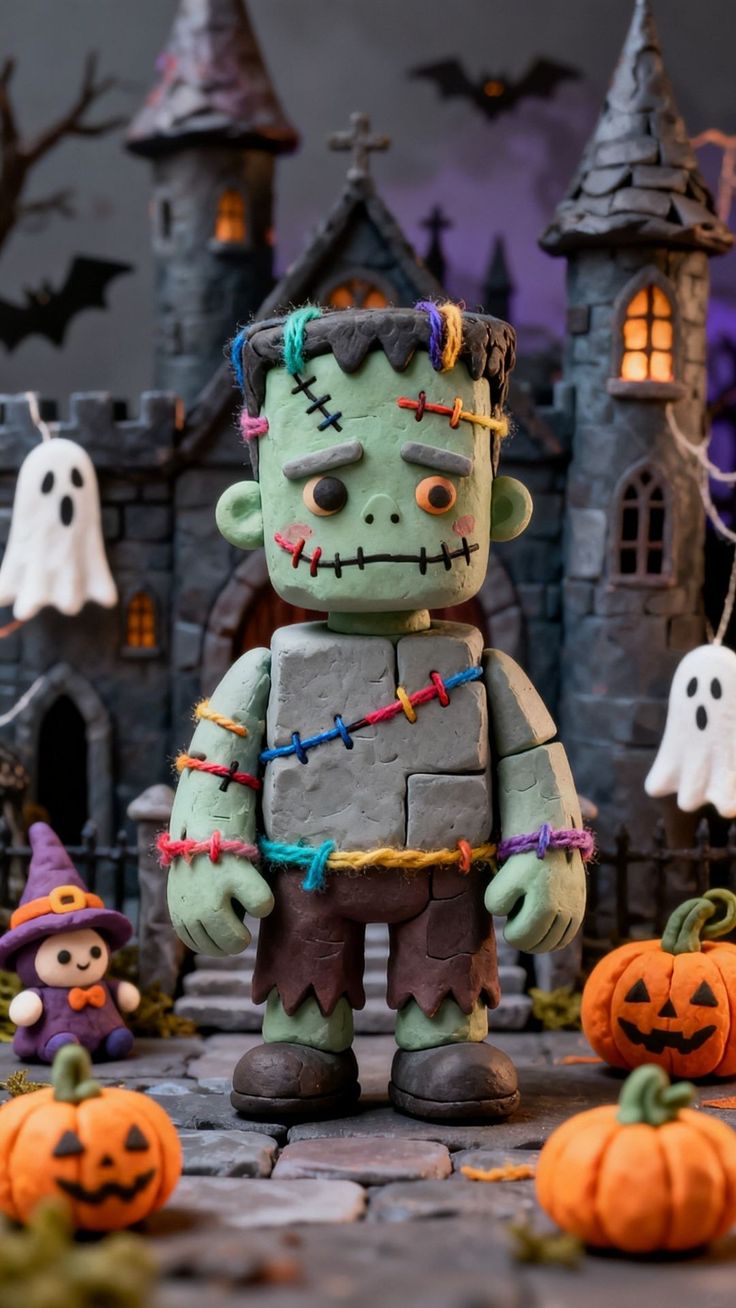
Frankenstein is a fun character to recreate with clay because his features are easy to recognize. Start with a square head and a slightly wider body.
Add small ears, messy hair, and a simple stitched mouth.
Paint the skin a muted green and the hair black. Add tiny bolts on each side of the neck using small clay pieces. Keep the eyes slightly uneven for a playful expression.
You can make the clothing dark gray or black. Add a few painted lines to suggest folds in the jacket. Those small details will help the figure look more complete.
Add a few subtle scars across the face to make the character instantly recognizable.
8. Tiny Witch Figurine
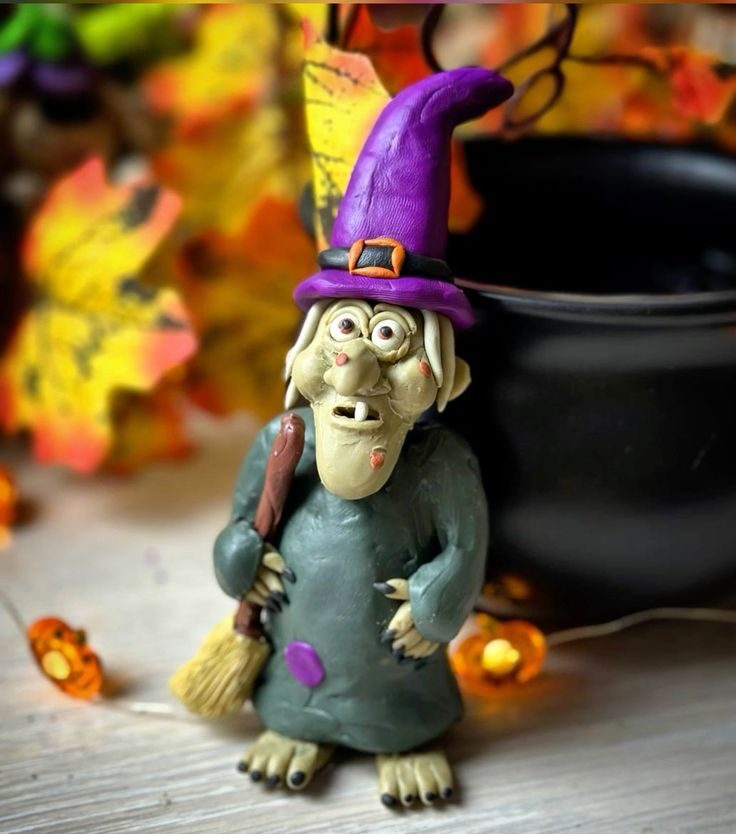
Shape a small witch with a pointed hat, simple dress, and tiny shoes. You do not need to sculpt detailed facial features. A small nose, two eyes, and a tiny smile can be enough.
Use dark purple, black, and orange for the clothing. Add a little clay broom beside her hand. You can also give her a tiny pumpkin to carry.
Keep the proportions slightly exaggerated for a storybook feel. A large hat and tiny body can make the figure look charming.
If storybook-style characters like this appeal to you, these 31 whimsical Halloween painting ideas that belong in a storybook capture that same whimsical charm on canvas.
Smooth the clothing carefully before painting so the colors stay clean. You can also give her a slightly tilted hat to make her look more playful.
9. Eyeball Clay Trinket
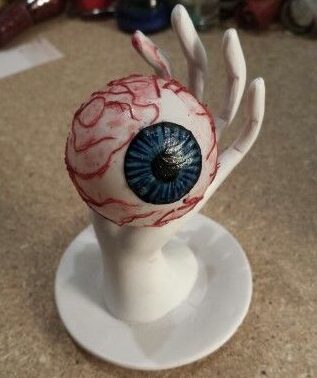
This project is creepy but surprisingly easy. Roll clay into a smooth ball and flatten it slightly. Then, create a raised iris in the center.
Paint the eyeball white and add a blue, green, or brown iris. Finish it with a black pupil and thin red veins. Use a very fine brush for the veins so they stay delicate.
You can turn the eyeball into a small dish by creating a shallow opening in the center. Alternatively, make several small eyeballs for a creepy bowl filler.
Keep their sizes slightly different for a more natural look. A glossy finish can also make the eyes look more realistic and give them that polished decorative appearance.
10. Skull Clay Ornament
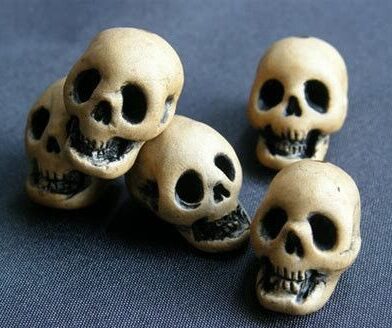
Shape a small skull using a rounded piece of clay. Press two eye sockets into the front and add a tiny nose opening. Then, carve simple lines to represent teeth.
Paint the skull white or pale gray. Add a little darker paint inside the eye sockets to create depth. You can also brush a small amount of gray around the edges.
A thin black ribbon can turn the skull into a hanging ornament. If you prefer a tabletop decoration, place it on a small clay base.
The simple design can still look surprisingly polished. Try making the teeth slightly uneven for a handmade skull with more personality.
11. Witch’s Cauldron
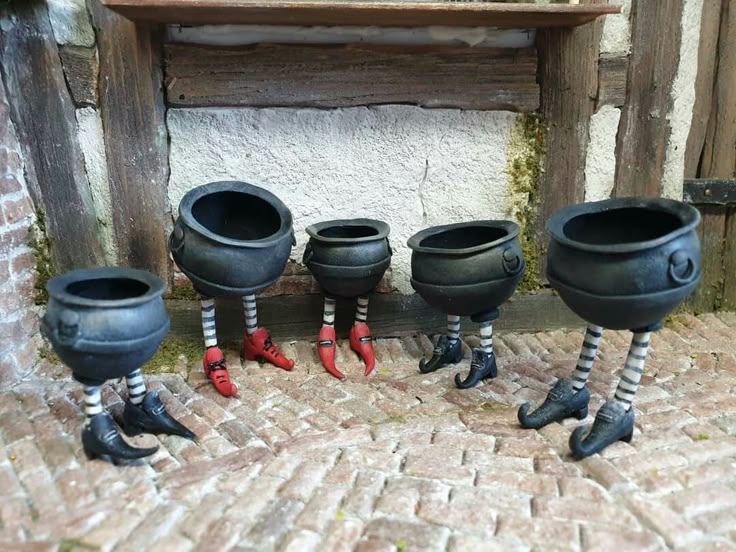
A tiny clay cauldron can make a great centerpiece for your Halloween display. Shape a rounded bowl with a slightly wider opening at the top. Add three small feet underneath.
Paint the outside black and add a gray or bronze rim. Fill the opening with green clay to create the appearance of bubbling potion. You can press tiny circles into the surface for bubbles.
Add a small clay spoon or stick leaning against the side. A few tiny mushrooms or herbs around the base can make it look like a real witch’s workspace.
If gathering natural touches like moss and herbs interests you, these 33 witchy nature crafts every Halloween lover should try share the same earthy inspiration.
You can also add purple bubbles beside the green ones for a more colorful potion effect.
12. Creepy Pumpkin With Worms
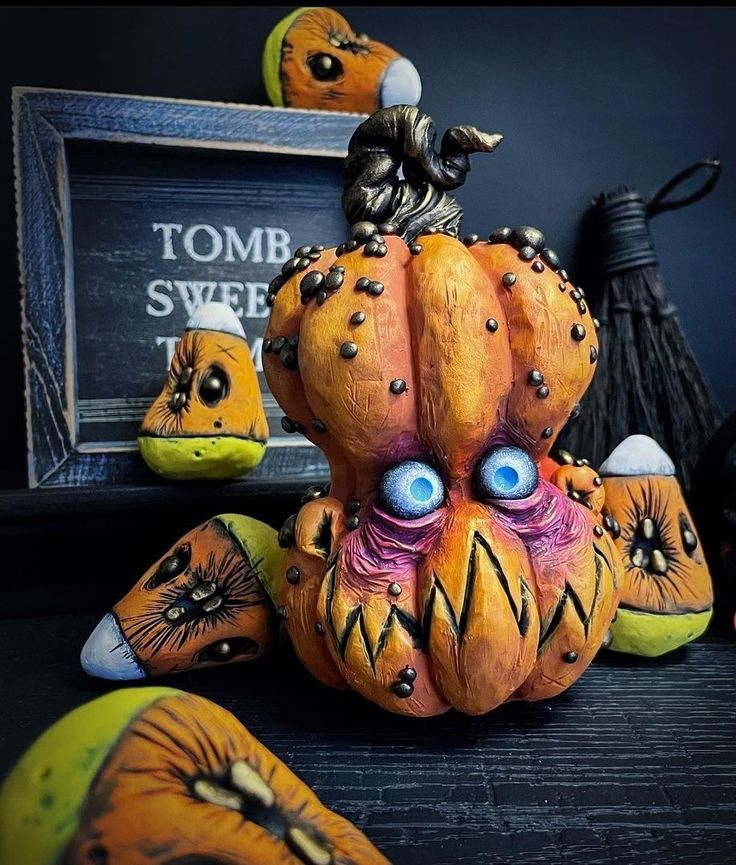
Give a regular clay pumpkin a more playful creepy twist. Shape the pumpkin normally, then add a few small clay worms crawling out from the top.
Keep the worms thin so they do not overpower the pumpkin.
Paint the pumpkin orange and the worms in shades of brown or green. Add tiny dark eyes to the worms if you want a funny look.
A little darker paint inside the pumpkin grooves can add depth.
This design works especially well for children’s Halloween displays. It looks spooky without being too frightening.
If you enjoy involving kids in Halloween projects, these 41 easy last-minute Halloween face painting ideas for kids make a fun pairing for a family craft afternoon.
Place several pumpkins together with different expressions for a fun collection. You can also make one worm hang over the pumpkin’s edge for a more lively look.
13. Mummy Clay Figure
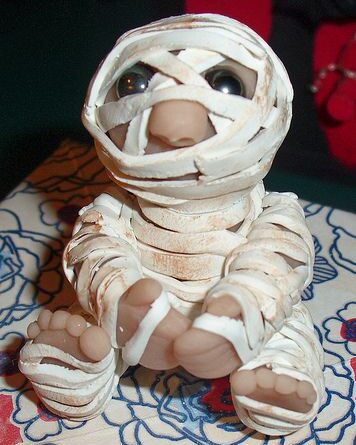
Wrap a small clay figure in thin strips to create a mummy. Start with a simple body shape, then press narrow clay strips across the surface.
Let some strips overlap for a more realistic wrapped effect.
Paint the mummy in an off-white or beige color. Add dark gray shading between the strips to make the layers easier to see.
Two tiny dark eyes peeking through the wrapping can complete the face.
Keep the strips uneven rather than perfectly straight. That makes the figure look more natural. You can also add a tiny clay scarab or tombstone beside it.
A few loose strips around the arms can make the figure look even more realistic.
14. Haunted Pumpkin House
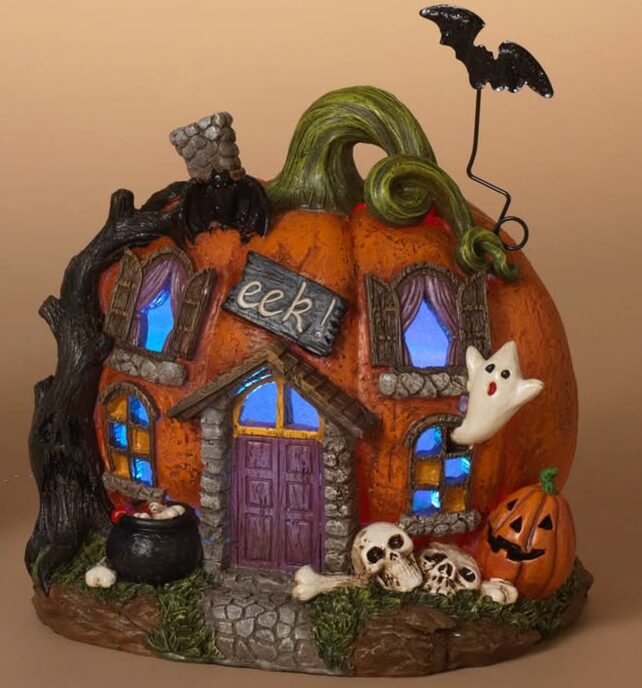
Turn a pumpkin into a tiny haunted home. Start with a large rounded pumpkin shape and flatten the bottom. Add a small door and several tiny windows across the front.
Paint the pumpkin in dark orange or muted brown. Use yellow paint inside the windows to make them glow.
Then, add a tiny roof or chimney if you want a more house-like appearance.
Surround the base with miniature clay leaves or pumpkins. A small black cat beside the door can make the scene even cuter.
If ghost details like this appeal to your Halloween decorating, these 27 whimsical Halloween ghost ideas that elevate your decor offer even more inspiration.
This is one of those Halloween Clay Crafts that can work as a centerpiece on its own. You can also add a tiny crooked fence around the house for a fuller miniature scene.
15. Spooky Mushroom Family
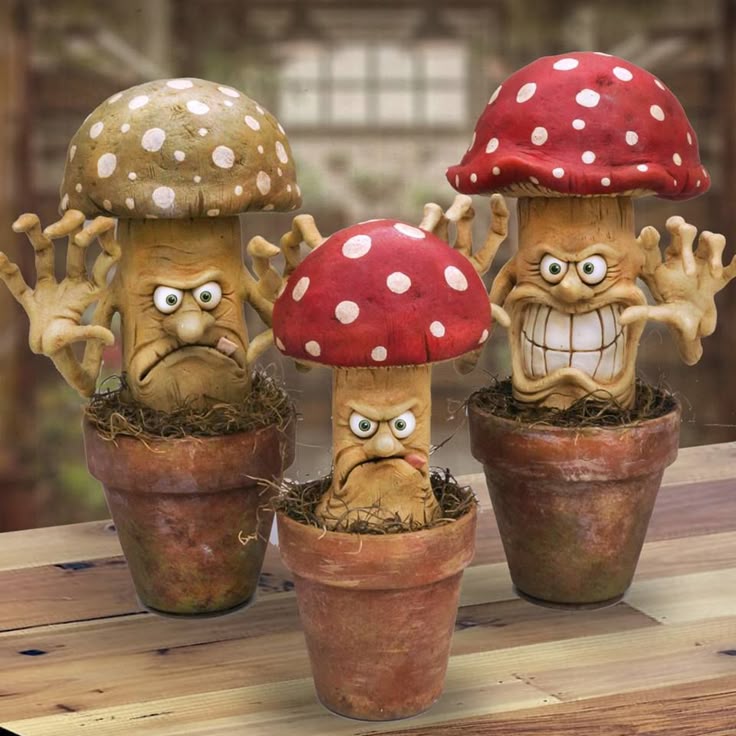
Create several small mushrooms with different shapes and heights. Make the stems slightly curved and give the caps rounded or pointed tops. Add tiny dots to the caps for extra detail.
Use dark red, purple, orange, and brown for the mushrooms. Paint the dots in a lighter color so they stand out. A little shading underneath the caps can make them look more three-dimensional.
Place the mushrooms on a shared clay base covered with tiny leaves. You can even add a miniature ghost hiding behind one.
The whole piece can look like a tiny enchanted forest. Varying the mushroom heights will also make the arrangement look more natural.
If autumn woodland scenes like this fascinate you, these 29 enchanting Halloween nature crafts inspired by autumn magic share the same forest inspiration.
16. Vampire Head
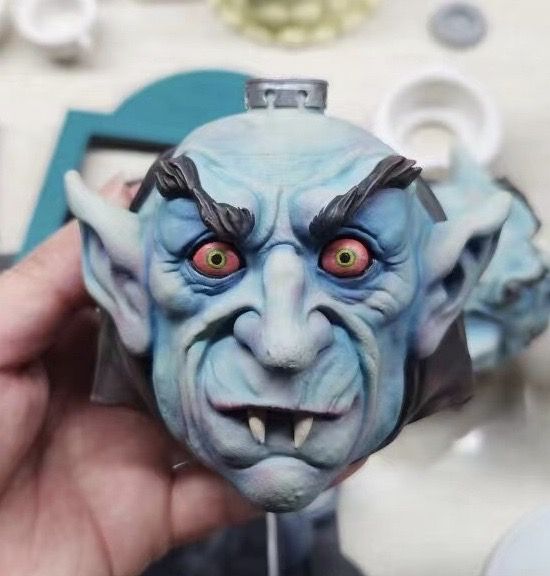
A small vampire head can become a fun tabletop decoration. Shape a rounded head and add pointed ears. Then, create a widow’s peak using a small amount of clay.
Paint the face pale and the hair black. Add dark eyebrows, red eyes, and two tiny fangs. A little red paint around the mouth can make the character look more dramatic.
For a polished result, keep the facial features symmetrical. You can also add a small black cape behind the head.
That extra shape instantly makes the character easier to recognize. A tiny red bow tie can make the finished figure look more like a collectible Halloween character.
17. Ghost Candle Holder
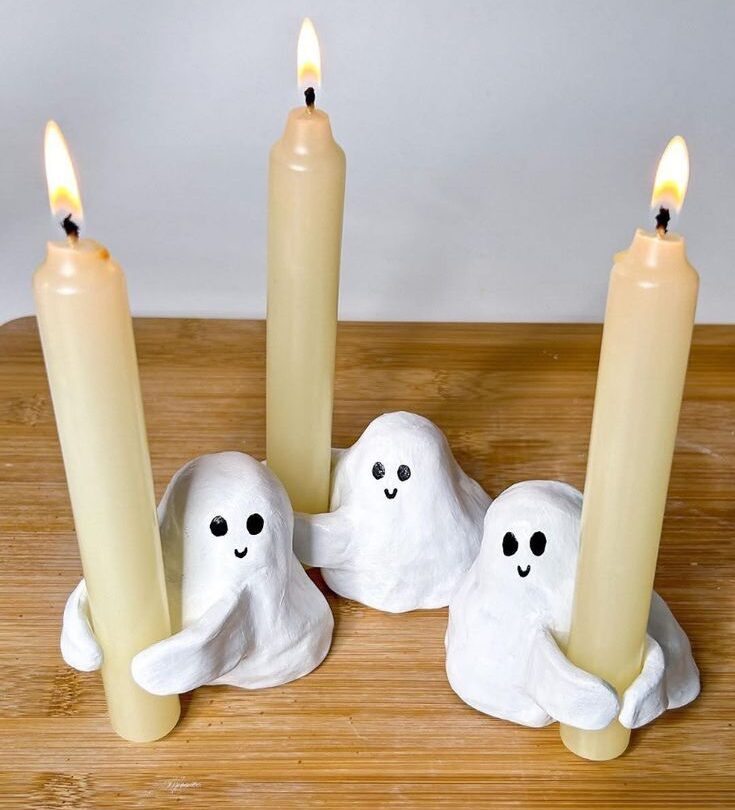
Turn a clay ghost into a small candle holder by creating a shallow opening at the top. Shape the body so it curves outward slightly. Make the ghost wide enough to stay stable.
Paint it white or pale gray and add a simple face. You can brush light gray around the bottom for some depth. A small black bow can give it an extra personality.
Use it only with a suitable candle or LED light designed for the holder. Keep the clay fully cured before using it.
The soft glow can make the ghost look especially cute at night. If you prefer a safer display, an LED tea light can create the same cozy effect.
18. Pumpkin Skull
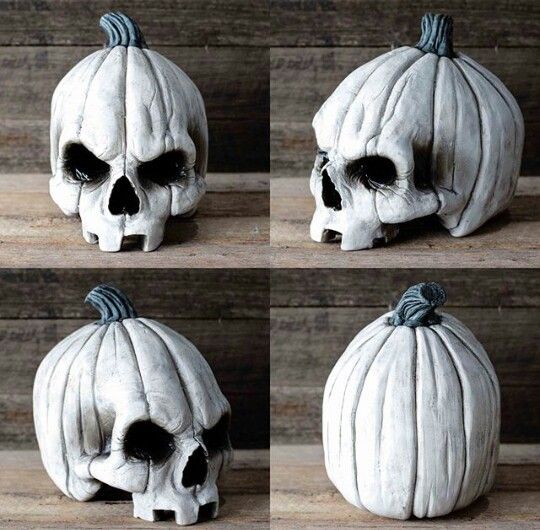
Combine two classic Halloween symbols in one clay decoration. Shape a small pumpkin first, then add a skull-like face to the front. Keep the pumpkin grooves visible around the face.
Paint the pumpkin dark orange and the skull features black. Add tiny white highlights around the teeth if you want them to stand out. A small stem on top can complete the design.
You can also make the eyes slightly larger for a cartoon-like look. Place the finished piece beside regular pumpkins for an interesting contrast.
A little dark paint inside the pumpkin grooves can give the piece more depth.
19. Witch’s Spell Book
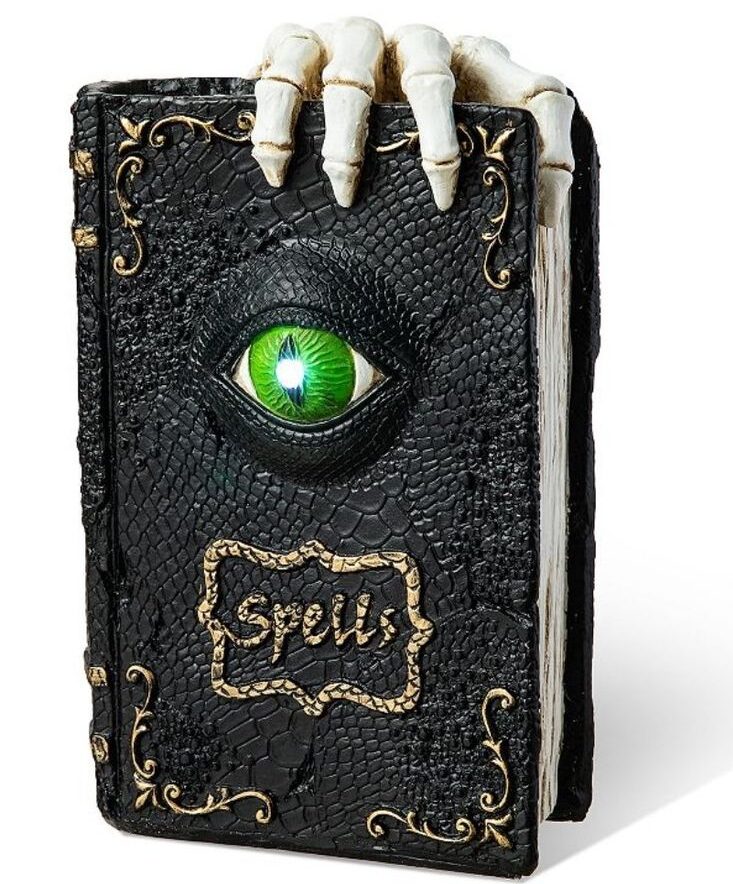
Shape a small rectangular clay book with slightly uneven edges. Add a raised spine and a few decorative lines on the cover. You can also create a tiny clay clasp.
Paint the book dark purple, brown, or black. Add gold or silver details to the cover. A tiny moon, star, or decorative symbol can make it feel magical.
Stack two or three books together for a larger display. Place a tiny clay potion bottle on top to make the scene feel like a miniature witch’s desk.
If you enjoy painting decorative moon and star symbols like this, these 21 moody Halloween canvas painting ideas worth displaying explore similar symbols on a larger canvas.
You can even press tiny lines along the pages to make the book look more detailed.
20. Creepy Little Tombstone
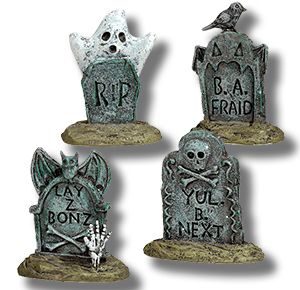
Make a small tombstone with a rounded or pointed top. Add a slightly rough texture around the edges so it looks old. Carve a short word or name into the front.
Paint the stone gray and use darker paint inside the carved letters. Add small cracks across the surface for extra character. A little green paint around the bottom can imitate moss.
You can make several tombstones with different shapes. Arrange them together with tiny pumpkins and ghosts.
This creates a miniature graveyard without taking much space. Add one crooked fence section behind them if you want the display to feel more complete.
21. Three-Eyed Monster
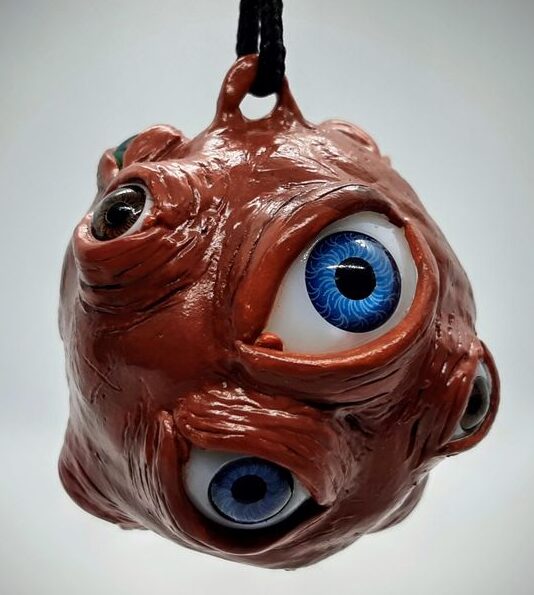
Let yourself have fun with this little creature. Shape a round body with short arms and feet. Then, add three raised eyes across the face.
Paint the body purple, green, or blue. Give each eye a different iris color for a playful effect. Add tiny teeth or a crooked grin to finish the face.
You can exaggerate the hands and feet to make the monster look cuter. A small clay base can also help it stand upright.
These details keep the monster fun instead of frightening. Try adding tiny horns or a few raised spots to give your creature its own personality.
22. Black Cauldron With Bats
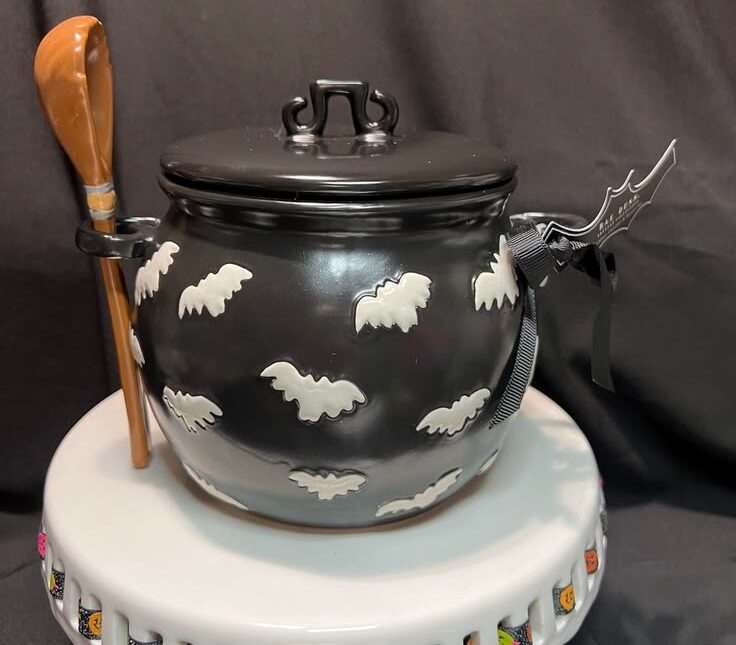
Start with a rounded clay cauldron and add three small feet. Shape several tiny bats flying around the top. You can attach them to thin pieces of wire after the clay cures.
Paint the cauldron black and add a dark green potion inside. A few purple bubbles can make the mixture look magical. You can also paint a subtle metallic rim around the top.
Place tiny pumpkins around the bottom of the cauldron. That creates a fuller display without adding too many separate pieces.
A little fake moss can also help ground the scene. For more movement, angle the bats at different heights around the cauldron.
23. Mini Halloween Village
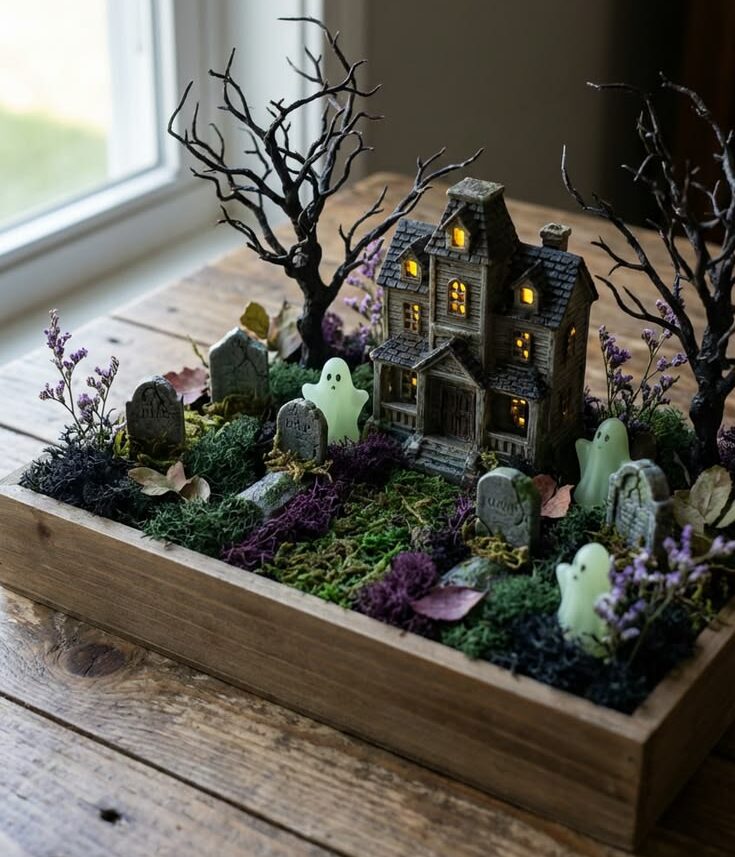
Bring several Halloween favorites together in one clay display. Create three or four tiny houses with different roof shapes. Add pumpkins, trees, ghosts, and cats around them.
Keep the buildings in similar colors so the village feels like one collection. Then, use small pops of orange, purple, and yellow for the details.
Warm windows can make the houses feel especially inviting.
Take your time with the tiny features because they will make the biggest difference. Small doors, windows, signs, and pumpkins can make the village look surprisingly detailed.
If you enjoy adding paper details to a scene like this, these 35 witchy Halloween paper decorations for spellbinding displays could bring a fun mixed-media touch to your village.
Among these Halloween Clay Crafts, this one gives you the most room to create your own little world.
You can also place the houses on one clay base instead of making separate pieces. That makes the village easier to move and display.
Add a winding path between the houses to give the scene a little more depth.
Final Thoughts
Clay gives you so much freedom when you are making Halloween decorations. You can keep a design simple, then add tiny details that completely change how it looks.
A few clean lines, carefully painted features, or a small accessory can make a homemade piece feel much more finished.
If you want that store-bought appearance, take your time with the finishing stage. Smooth rough edges before painting, keep your colors neat, and let each layer dry properly.
If gothic, moody accents fit your home’s aesthetic, these 25 gothic botanical Halloween decor crafts for a moody home pair beautifully with a clay collection like this.
Also, do not be afraid to make small changes to the ideas above. Your pumpkin does not need the same face as mine, and your little witch can have her own personality.
Start with one project that feels manageable, then build from there. Soon, you could have a whole collection of handmade Halloween decorations sitting around your home.
If painted decor is more your speed too, these 25 artistic Halloween painting ideas for a hauntingly beautiful home make a lovely companion to a clay collection.
And honestly, that is the best part of making Halloween Clay Crafts; you get decorations that look special because you made them yourself.