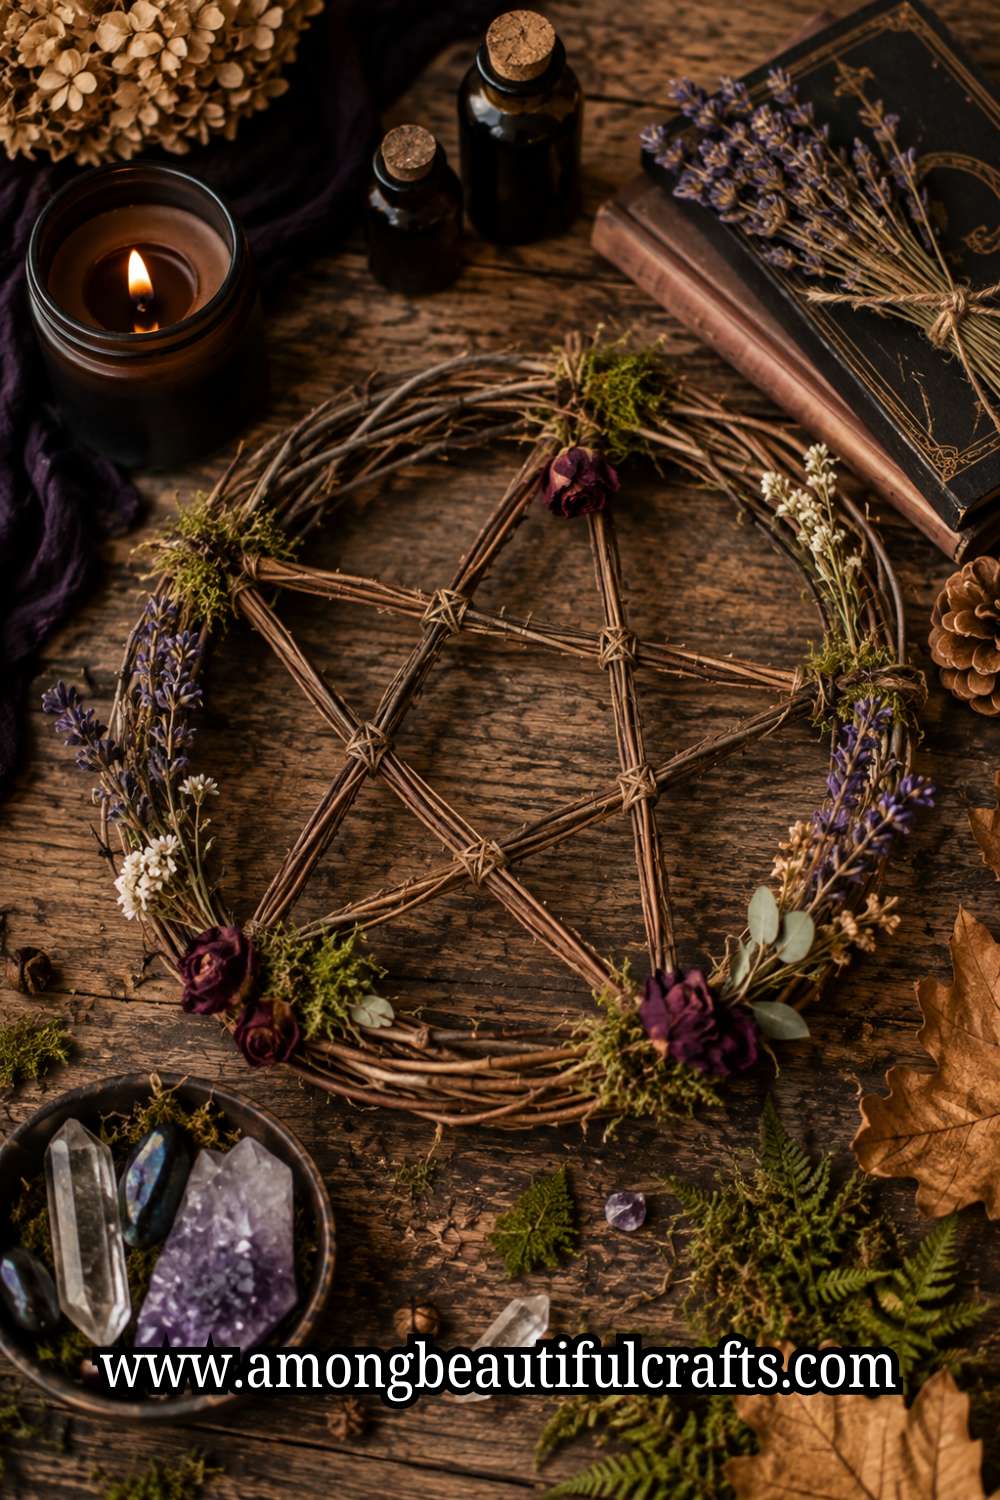
If you have never used things from nature to decorate for Halloween, this is the year to change that. You will be surprised by how much beauty hides in a pile of fallen leaves, a handful of pinecones, a twisted branch, or a patch of soft moss.
Those simple finds can turn into decorations that look rich, rustic, and full of Halloween charm. Witchy Halloween Nature Crafts give you something that store-bought décor never can.
Every piece tells its own story because nature never makes the same thing twice. That alone makes your home feel more interesting and personal.
I also love that these projects make Halloween decorating feel more rewarding. You spend less money, enjoy the creative process, and end up with decorations that people actually stop to admire.
Even better, most of these crafts do not ask for special skills. If you can collect a few natural materials and follow simple steps, you already have everything you need to make something beautiful.
That is exactly why I put this collection together. I wanted ideas that look impressive without feeling difficult.
I wanted projects that make people ask, “Where did you buy that?” only for you to smile and say, “I made it.”
In this guide, I will walk you through 33 creative projects, share little tricks that make a big difference, and help you turn ordinary outdoor finds into Halloween decorations that look like they belong in an enchanted woodland cottage.
Once you finish a few of these crafts, I doubt you will ever look at an autumn walk the same way again.
33 Witchy Nature Crafts Every Halloween Lover Should Try
1. Make a Twig Witch’s Broom
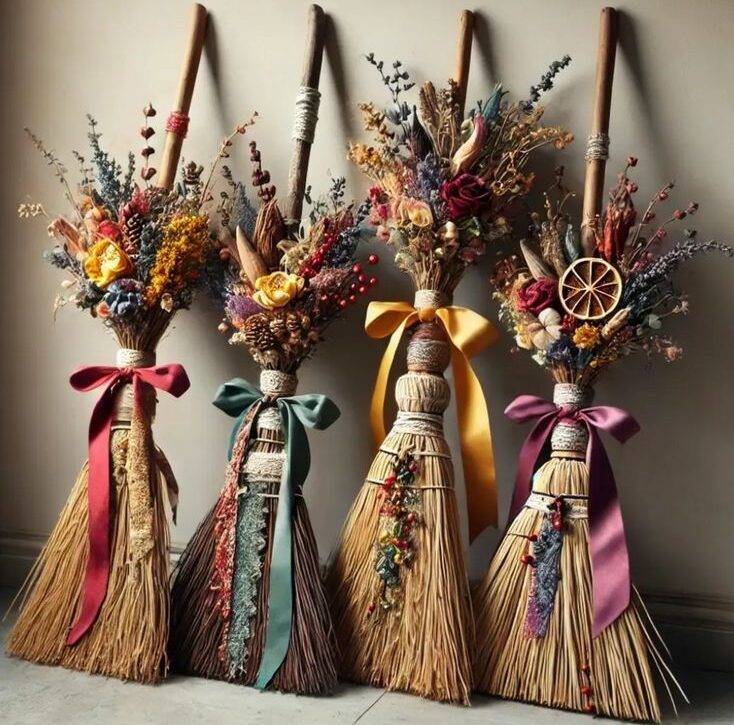
A tiny witch’s broom is one of the easiest projects to start with, yet it looks like something straight out of an old woodland cottage.
Look for a thin, straight stick that feels sturdy in your hand. Then gather dry grass, pine needles, or long pieces of straw.
Tie everything tightly around one end with jute twine. After that, trim the bottom until it looks neat.
If you want to give it more personality, wrap a strip of black fabric around the twine or tuck in a few dried flowers. You can also glue on tiny acorns or small feathers.
I like placing several mini brooms inside an old wooden bucket by the front door. They also look beautiful on a Halloween wreath or beside a group of pumpkins.
2. Turn Pinecones Into Enchanted Owls
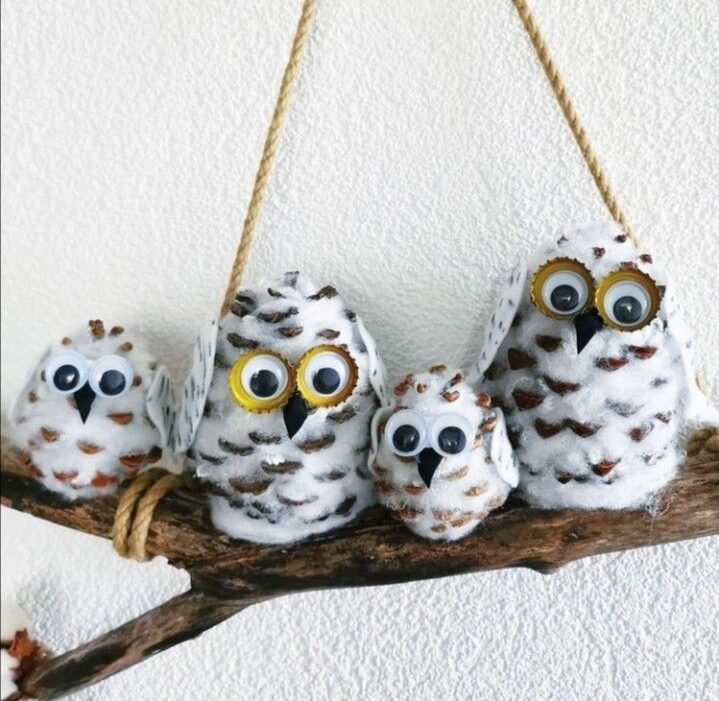
Pinecones already have the perfect texture for woodland creatures. With a little creativity, they become adorable Halloween owls that fit perfectly into a witchy display.
Pick pinecones that have opened fully because they give you more space to work.
Glue on large eyes, a small wooden bead for the head, and tiny felt wings. Next, paint the beak gold, black, or orange.
Once the glue dries, place your owls on moss, beside candles, or around a centerpiece. A few different sizes together create a display that feels collected from an enchanted forest.
3. Create Spell Bottles With Natural Finds
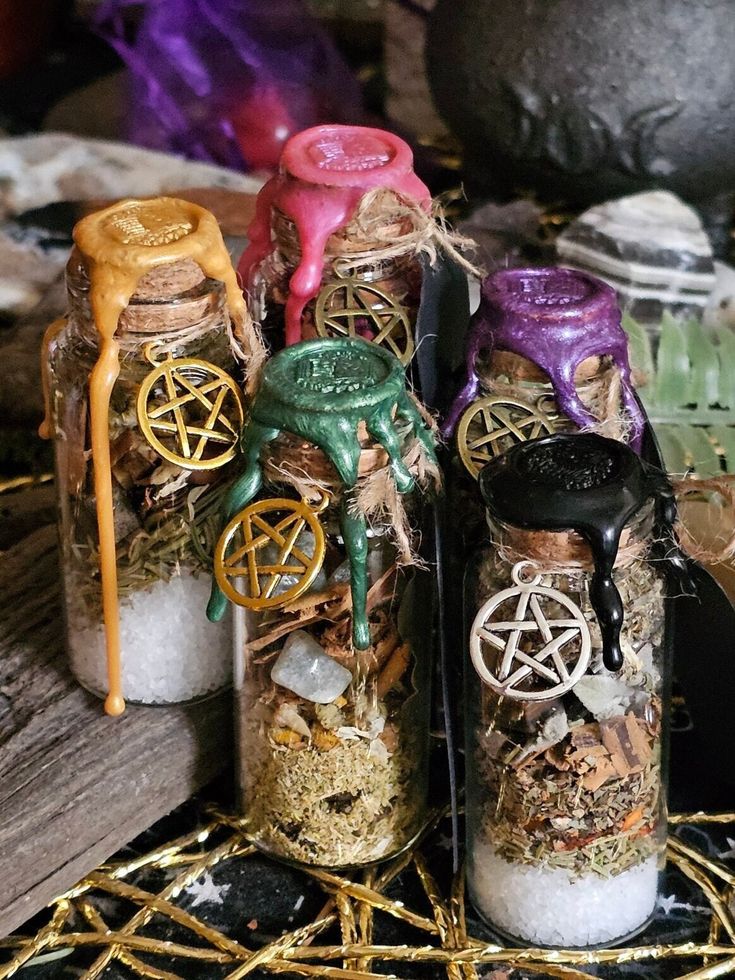
Spell bottles always catch attention because they look mysterious without being difficult to make. Start with small glass bottles or recycled jars. Then fill each one with different natural materials.
Try mixing tiny pebbles, dried lavender, acorns, moss, bark, black beans, and dried herbs. You can even add cinnamon sticks or star anise for extra texture.
Tie twine around each bottle and attach a handwritten tag with playful names like “Moon Dust” or “Forest Whisper.” These bottles look beautiful on bookshelves, trays, and fireplace mantels.
4. Craft a Crow Nest Centerpiece
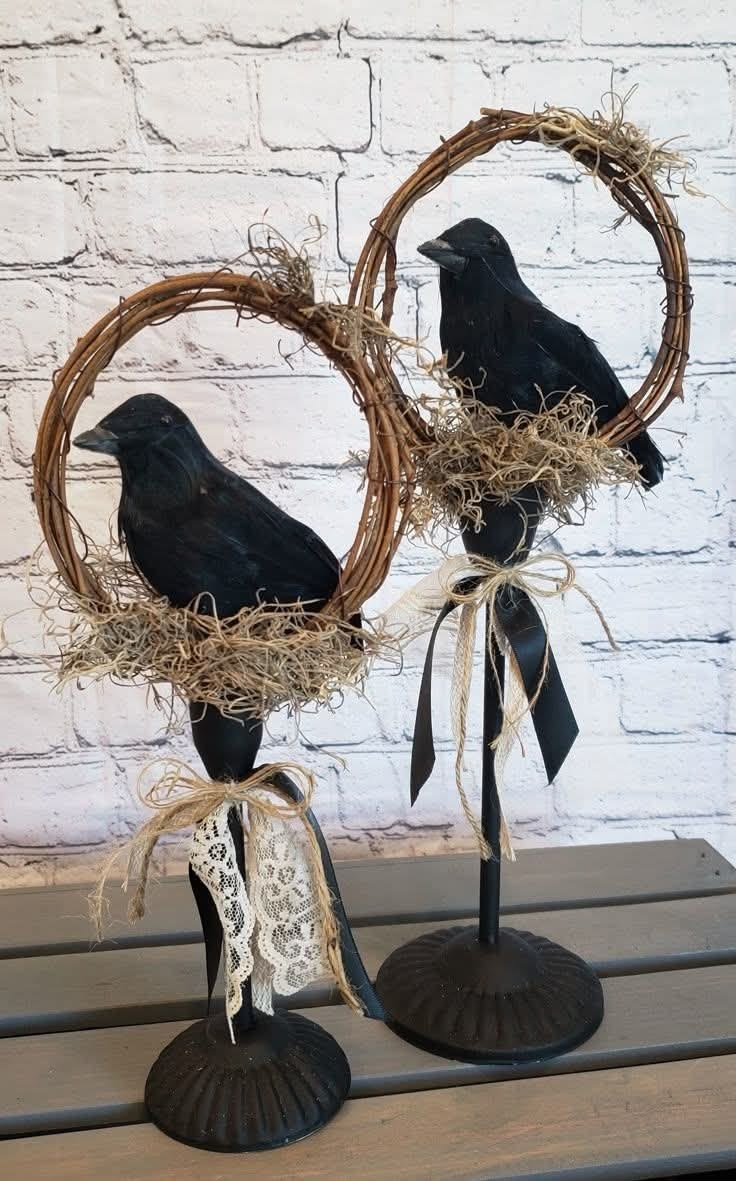
A simple bird’s nest can become the star of your Halloween table. Collect small flexible twigs and bend them into a loose circle. Keep adding more branches until the nest feels full and sturdy.
Now place moss inside before adding black feathers, tiny pinecones, acorns, or decorative eggs painted black. You can even add a small crow figurine to finish the scene.
The mix of rough branches and soft moss creates plenty of texture without making the centerpiece feel crowded.
5. Decorate Wooden Slices With Moon Designs
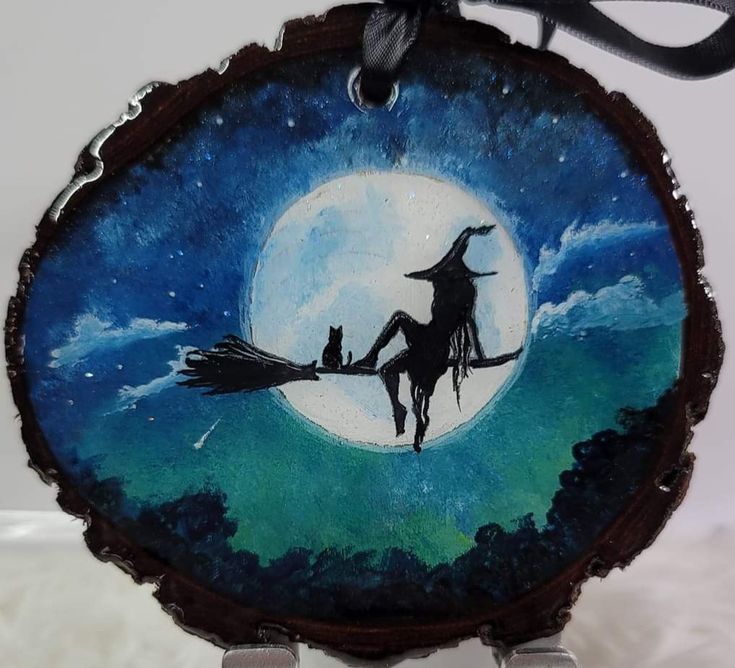
Tree slices make wonderful Halloween decorations because their natural wood grain already looks beautiful. Brush away any dust first. Then sketch moons, stars, ravens, mushrooms, or simple botanical designs with a pencil.
Paint the designs with white, black, or metallic gold paint. Once everything dries, seal the surface with a clear finish.
Stand the slices on shelves, lean them against pumpkins, or use them as candle bases. They instantly give your space a warm woodland feeling while staying simple enough for beginners.
6. Build a Moss-Covered Potion Tray
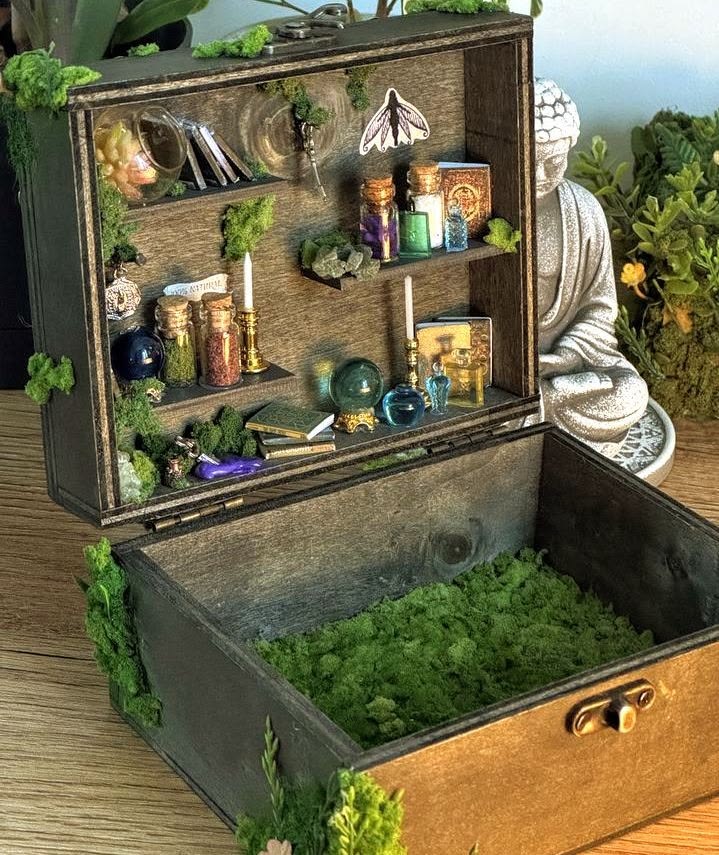
Sometimes the smallest details make the biggest difference. Instead of displaying Halloween decorations on an ordinary tray, turn the tray itself into part of the display.
Cover a wooden tray with preserved moss, pieces of bark, tiny branches, and scattered acorns. Leave enough open space for candles, potion bottles, crystals, or pumpkins.
I always keep the arrangement uneven because nature rarely looks perfectly organized. That little trick makes the finished tray feel more realistic and much more interesting to look at.
7. Make a Crescent Moon Vine Wreath
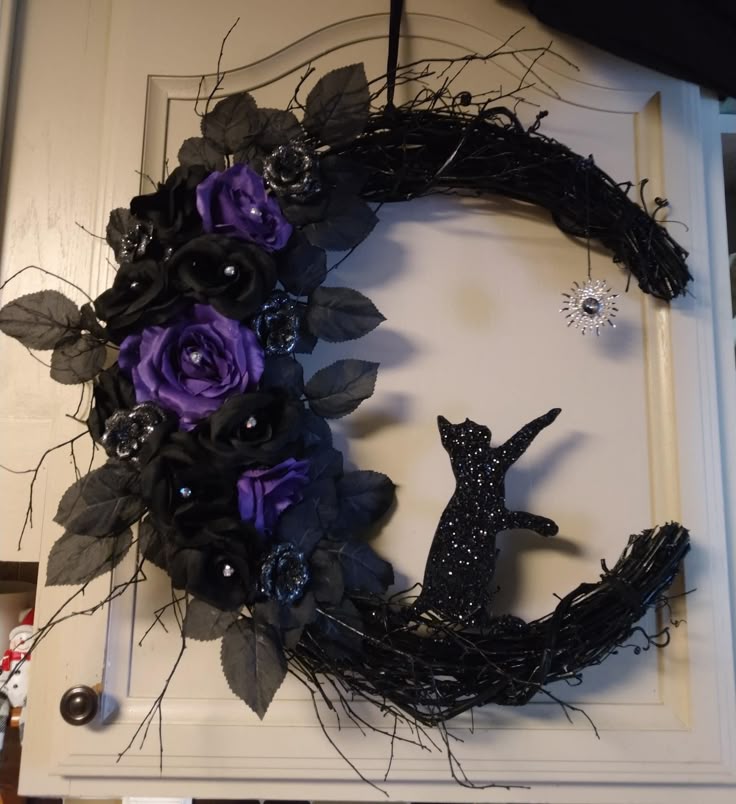
A grapevine wreath already has a natural woodland look, so it works perfectly for Halloween. Instead of leaving it round, gently shape flexible vines into a crescent moon. You can also buy a crescent frame if that feels easier.
Next, decorate one side with moss, dried eucalyptus, pinecones, feathers, and small black flowers. Then weave in a few twisting vines to give the wreath more movement.
Finish with a velvet ribbon for hanging. I like keeping one side fuller than the other because it creates a more dramatic look without much effort.
8. Paint Acorns Like Tiny Potion Ingredients
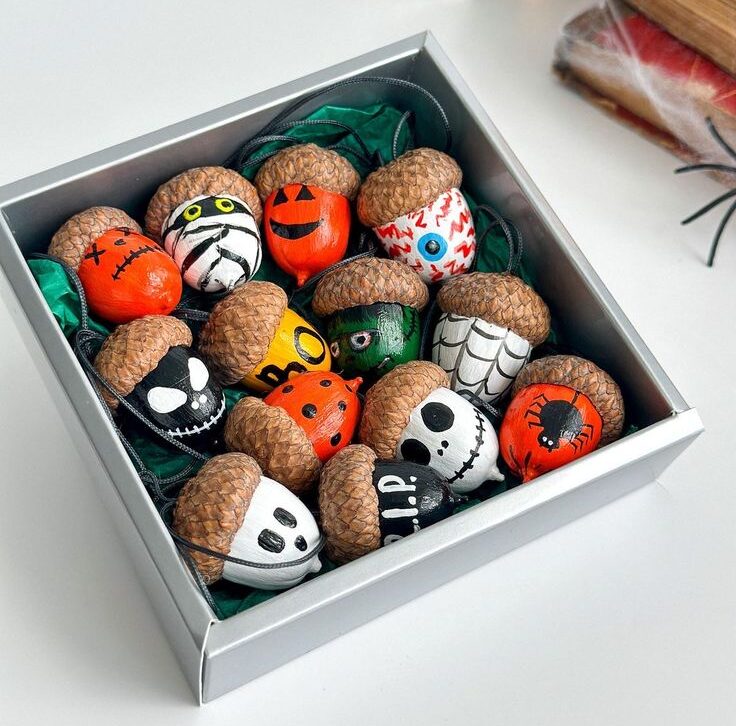
Acorns may seem too small to matter, yet they can completely change a Halloween display. Gather acorns in different sizes and clean away any dirt before you start decorating.
Paint some black, others deep purple, and a few metallic gold. You can even add tiny white dots or simple moon symbols with a fine brush.
After they dry, scatter them around candles, place them inside bowls, or fill glass jars with them. These little details tie everything together and make your decorations feel thoughtfully styled.
9. Create a Forest Wand From Fallen Branches
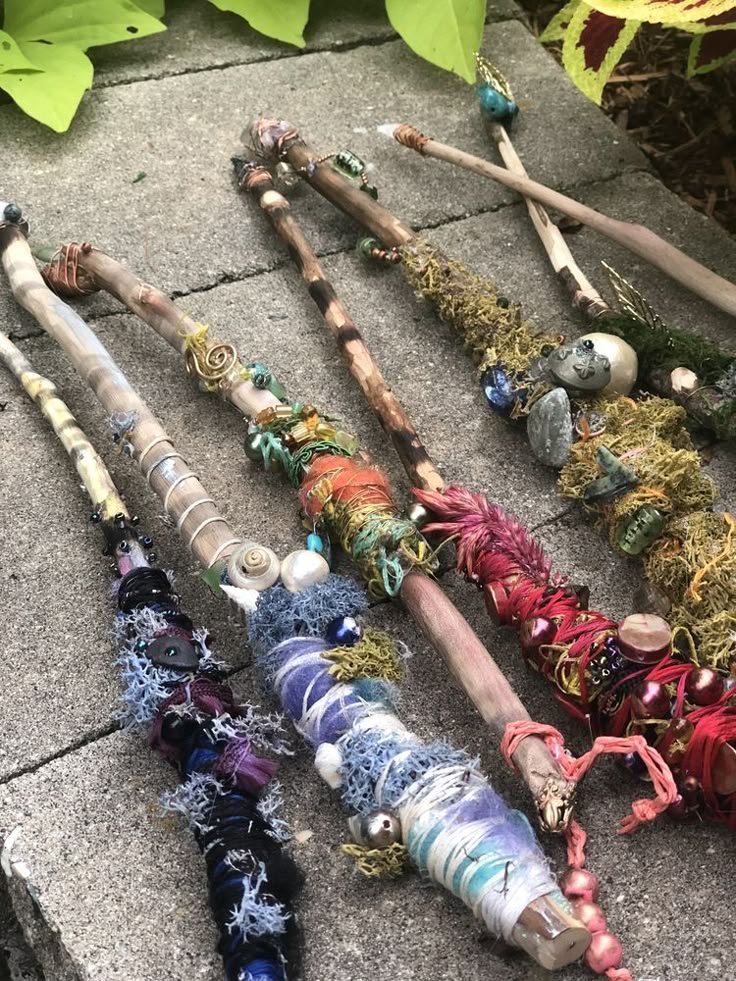
Every witchy display deserves a handmade wand. Luckily, nature already provides the perfect base. Look for a branch with an interesting twist or a natural curve. The more unique the shape, the better it looks.
Wrap sections with twine, then glue on dried moss, feathers, tiny crystals, or seed pods. You can even paint the tip with gold or silver for a subtle highlight.
Display the finished wand across stacked books or inside a rustic basket. It becomes an eye-catching decoration while still feeling completely natural.
10. Turn Fallen Leaves Into Black Roses
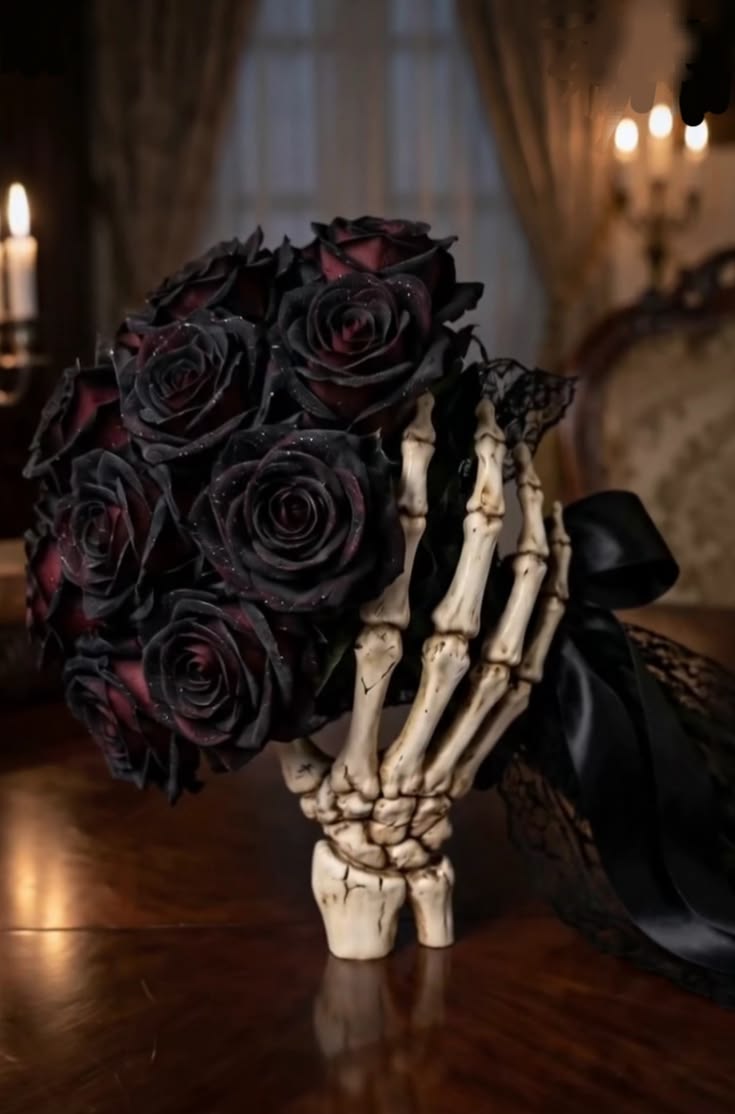
Large autumn leaves can become elegant Halloween flowers with just a few simple folds. Pick flexible leaves that have not become too dry. Freshly fallen leaves usually work best.
Roll one leaf into the center of the flower. Then wrap more leaves around it until you create a full rose shape. Secure everything with floral wire or twine.
Spray the finished roses with black paint after they dry. Arrange several inside an old vase with bare branches. From a distance, they look surprisingly realistic.
11. Design a Witch’s Herb Drying Rack
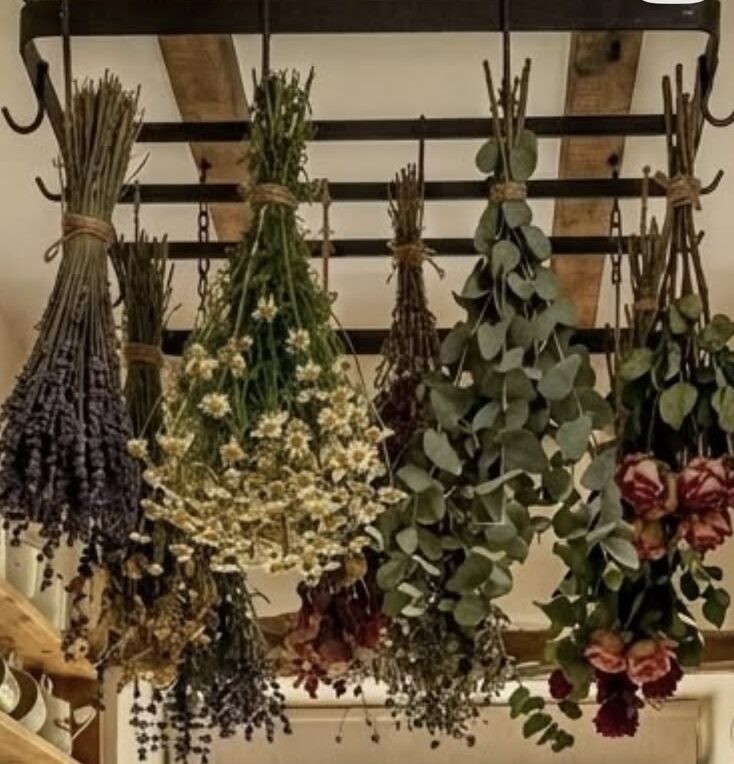
This project doubles as decoration and storage. Start with a weathered branch that has several smaller offshoots. Hang it from jute rope or place it across two hooks.
Tie bundles of rosemary, lavender, eucalyptus, wheat, sage, or dried grasses with black string. Let the bunches hang at different heights for a relaxed look.
You can even tuck in cinnamon sticks or dried orange slices for extra texture. The finished display brings warmth to any room while giving your Halloween décor an old cottage feel.
12. Make Stone Rune Decorations
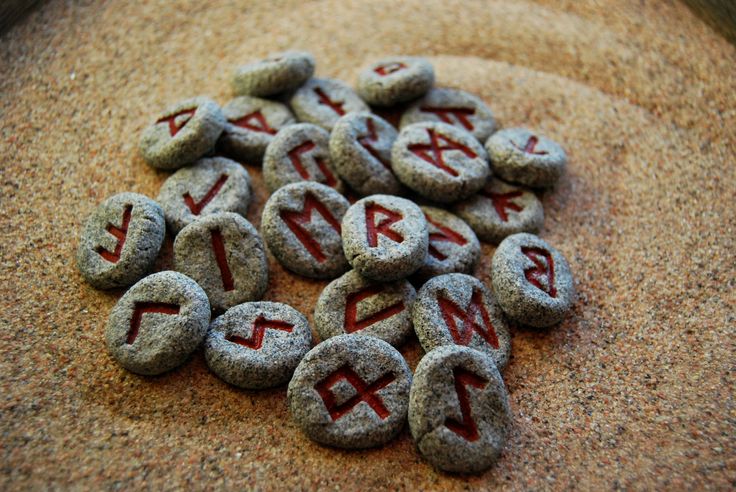
Smooth stones become beautiful decorative pieces with only a little paint. Collect flat stones that fit comfortably in your hand. Wash them well and let them dry completely.
Paint simple symbols, tiny moons, stars, ravens, mushrooms, or leaves using white or gold paint. You do not need complicated artwork.
Clean lines often look better against the natural stone. Arrange the finished pieces in wooden bowls, on bookshelves, or beside lanterns.
They add a quiet Halloween touch without making the display feel overdone.
13. Build a Mini Woodland Altar
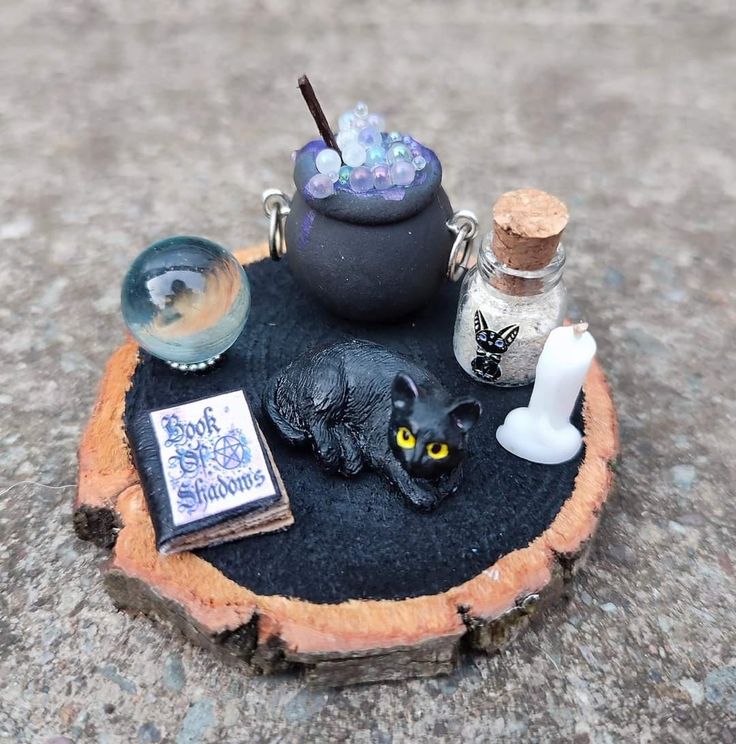
This project gives all your smaller decorations a beautiful place to shine. Start with a wooden slice, a flat piece of bark, or a small rustic tray. That simple base already brings plenty of natural texture.
Next, arrange pinecones, moss, acorns, feathers, dried flowers, and interesting stones on top. Add a candle, a tiny glass bottle, or a small pumpkin to complete the display.
I like leaving small gaps between each item because every piece deserves its own space. The finished arrangement looks collected over time instead of thrown together at the last minute.
14. Craft Bark Candle Holders

Tree bark has a rugged beauty that fits Halloween perfectly. Look for loose bark that has already fallen from a tree. Never peel bark from a living tree because it can damage it.
Wrap the bark around a glass candle holder and secure it with twine. Then tuck small sprigs of moss, dried berries, or tiny leaves beneath the string.
The bark adds warmth while the natural textures soften the glow of the candle. Place several together on a dining table or mantel for a cozy woodland display.
15. Make Hanging Twig Stars
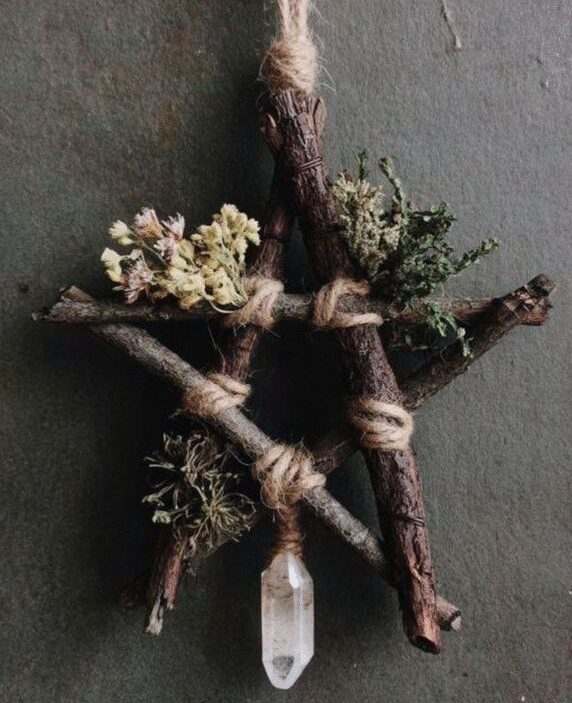
Twig stars work well because they look rustic without taking much time to build. Gather five branches with similar lengths and tie them together with jute twine to form a star.
After that, weave thin vines around the frame to hide the knots. Add a few feathers, dried leaves, or black ribbon for extra detail.
Hang several stars from tree branches, windows, or your porch ceiling. Different sizes create a layered look that catches attention without making the space feel crowded.
16. Create a Potion Garden in a Wooden Box

A shallow wooden box can become one of the most interesting Halloween decorations in your home. Fill the bottom with preserved moss first.
Then arrange bark, stones, pinecones, dried herbs, and tiny mushrooms throughout the box.
Leave space for a few miniature potion bottles or tea light candles. You can also tuck in twisted branches to add height.
I enjoy mixing different textures because smooth glass looks even better beside rough bark and soft moss. The finished box feels like a tiny forest hiding magical secrets.
17. Turn Seed Pods Into Spooky Flowers
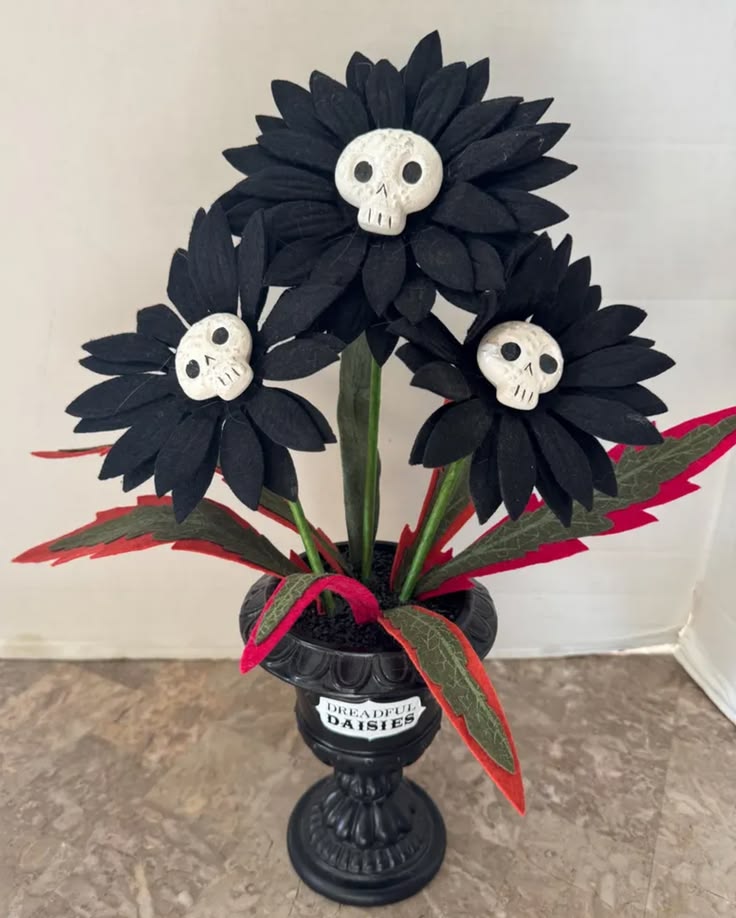
Many seed pods already have unusual shapes, so they need very little work. Collect a variety during your next nature walk and clean away any dirt.
Paint some black and leave others in their natural color. Then glue them onto floral stems or thin branches.
Mix in dried grasses and dark leaves to create a dramatic bouquet. Place everything inside an old vase or metal pitcher. The different shapes give the arrangement depth while keeping it completely natural.
18. Make a Nature-Inspired Halloween Garland
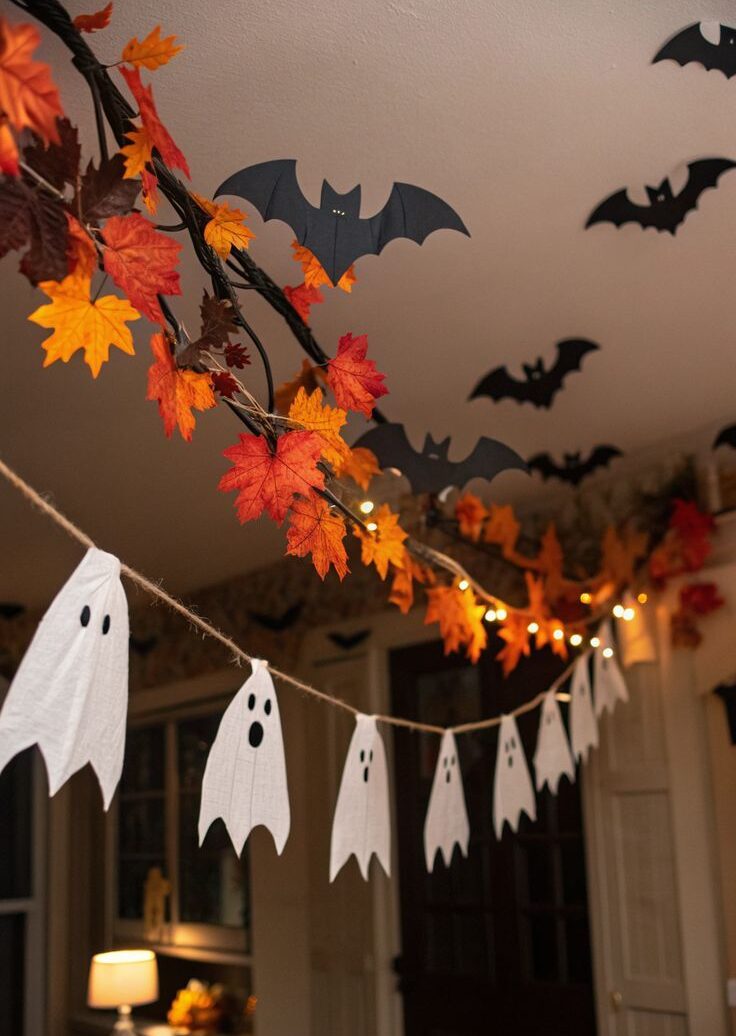
A handmade garland brings everything together without costing much. Cut a long piece of jute twine and gather leaves, pinecones, acorns, cinnamon sticks, dried orange slices, and small branches.
Tie each item onto the twine instead of placing them too close together. A little space makes every natural piece stand out.
Finish by adding a few black ribbons or tiny fabric bows. Drape the garland across your fireplace, staircase, or window.
It instantly fills the room with rustic Halloween charm while showing off all the beautiful materials you collected outside.
19. Create Floating Leaf Ghosts
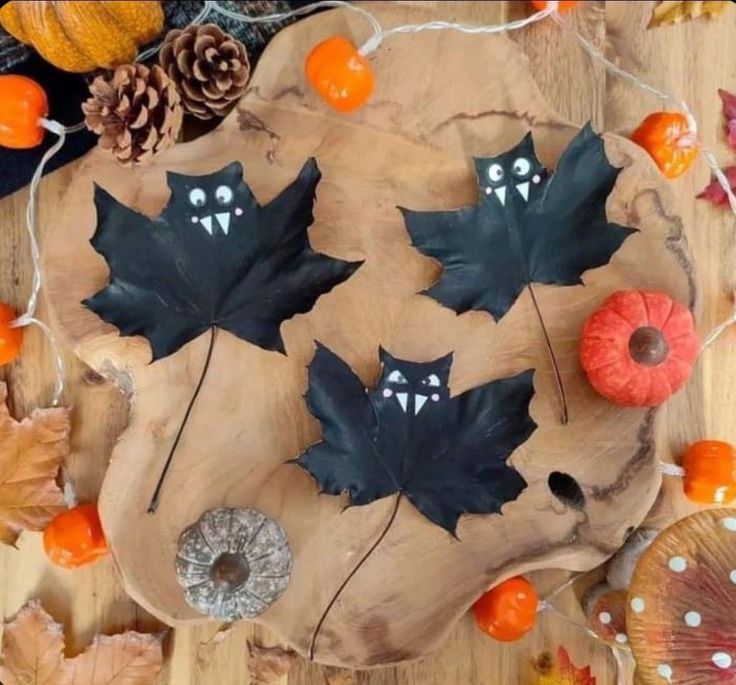
This craft proves that even a single leaf can become something unforgettable. Choose large leaves that still have a nice shape. They should feel strong enough to hold a little paint without tearing.
Paint each leaf white and let it dry completely. Then add two small black eyes and a tiny oval mouth. Tie clear fishing line to the stem so the ghosts appear to float in the air.
Hang several at different heights near a window or porch. A gentle breeze makes them move just enough to give your display a spooky touch.
20. Make a Witch’s Forest Lantern
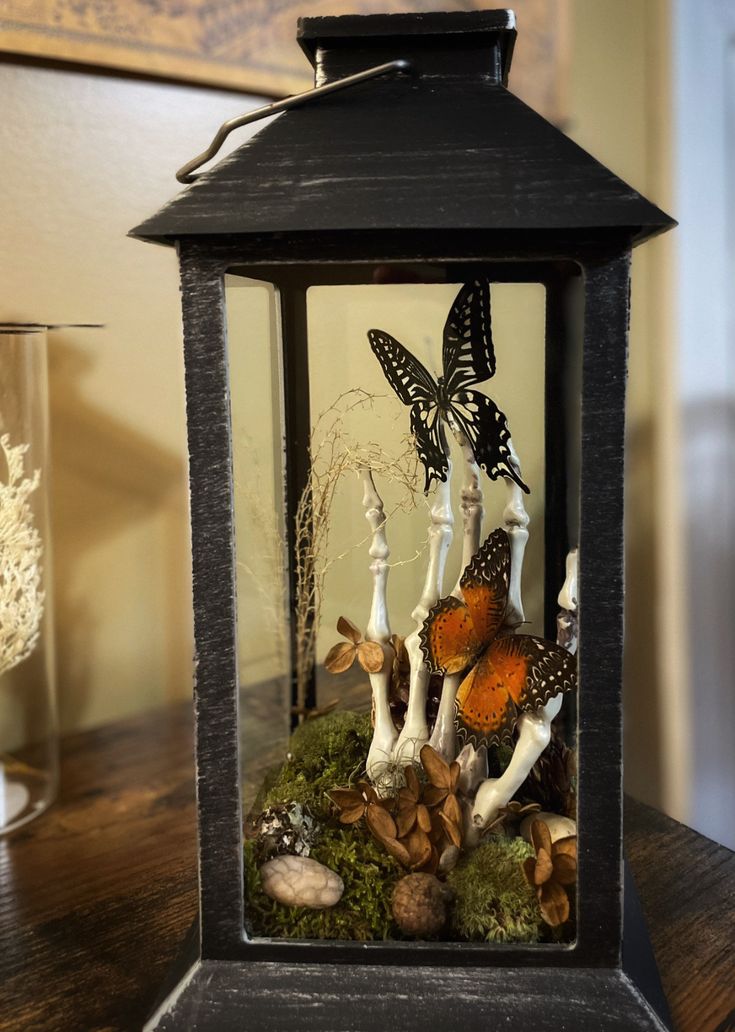
A plain lantern becomes much more interesting when you dress it with natural materials. Start by wrapping thin vines around the handle and sides.
You do not need perfect lines because the uneven look adds character.
Next, tuck moss, small pinecones, dried berries, and curled leaves into the vines. Place a battery-operated candle inside for a safe glow.
I like grouping two or three lanterns together because they create a warm Halloween corner without taking up much space.
21. Design a Moss Pumpkin
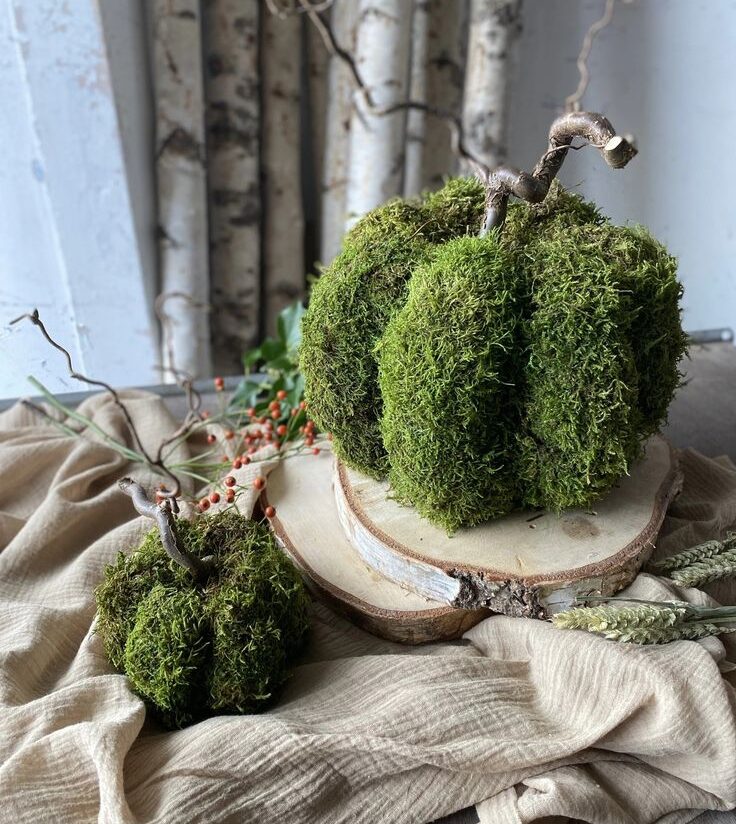
Pumpkins already belong in Halloween decorating, but moss gives them a completely different personality. Pick a real or faux pumpkin with a smooth surface before you begin.
Spread craft glue over small sections and press preserved moss into place. Keep going until most of the pumpkin is covered.
Then add tiny twigs, acorns, or dried mushrooms around the stem. The finished pumpkin looks like it came straight from the forest floor instead of a store shelf.
22. Build a Woodland Spell Book Display
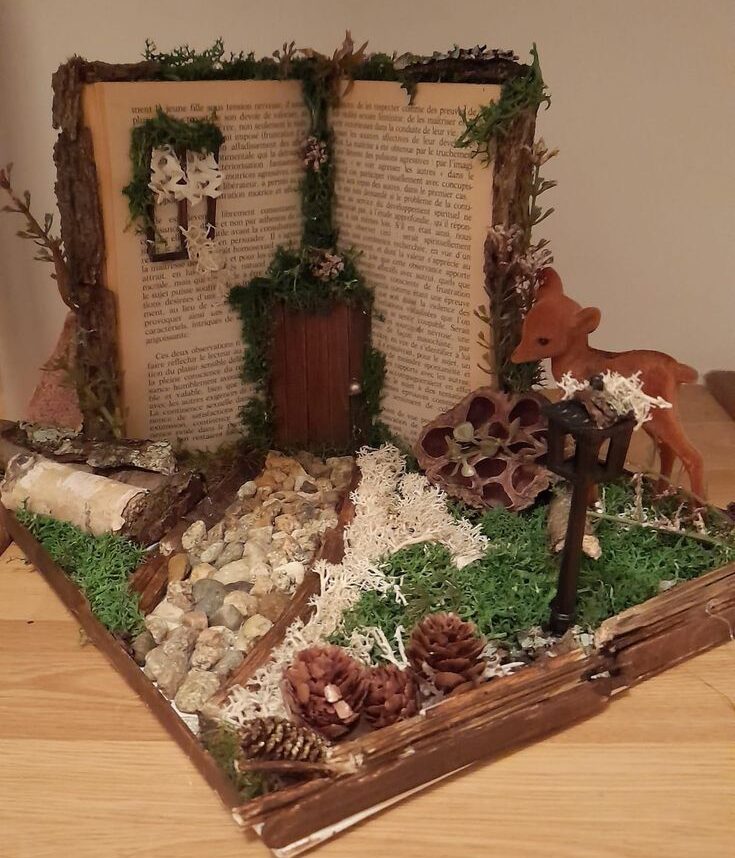
Old books and natural materials always look beautiful together. Stack a few worn books on a table or shelf to create a base for your display.
Arrange bark, feathers, pinecones, moss, dried herbs, and small branches across the stack. Add a pair of round glasses, a tiny bottle, or a candle to complete the look.
Keep the arrangement relaxed instead of perfectly neat. That little detail makes everything feel more believable and inviting.
23. Craft a Branch Halloween Chandelier
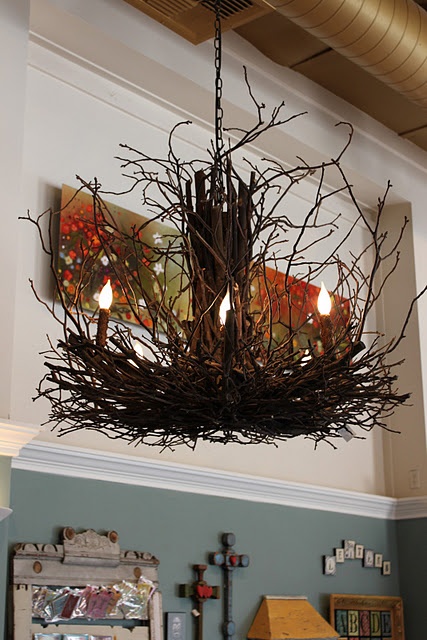
A fallen branch can become a beautiful hanging decoration with very little effort. Choose one that has several smaller branches growing in different directions. Clean it well before bringing it indoors.
Wrap sections with twine and hang small pinecones, dried leaves, feathers, wooden stars, and tiny glass bottles using string.
Leave some decorations higher than others to create movement. Hang the finished piece above a table or in a covered porch area. It fills empty space while bringing plenty of woodland charm into your Halloween décor.
24. Make Witch Bells With Natural Materials
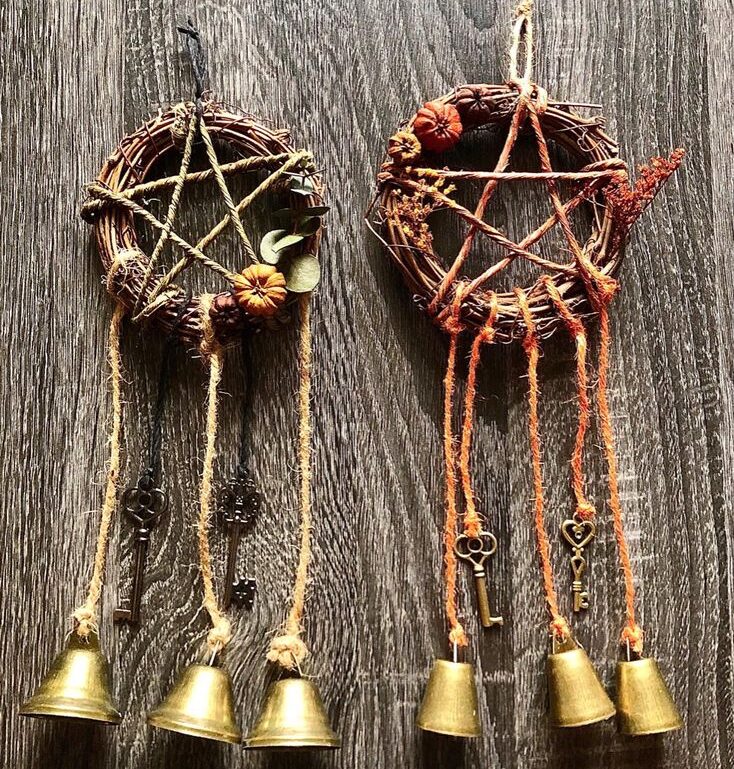
Witch bells become even prettier when you mix them with pieces from nature. Start with a sturdy stick or a small grapevine ring. Tie several pieces of jute twine underneath.
Attach tiny bells, acorns, pinecones, feathers, seed pods, and dried herbs to the ends of the strings. You can also knot black ribbon between a few of the strands for extra texture.
Hang the finished decoration near your front door or inside your entryway. Every little movement gives the bells a soft sound while the natural materials keep the display rustic and full of character.
25. Make a Haunted Branch Tree
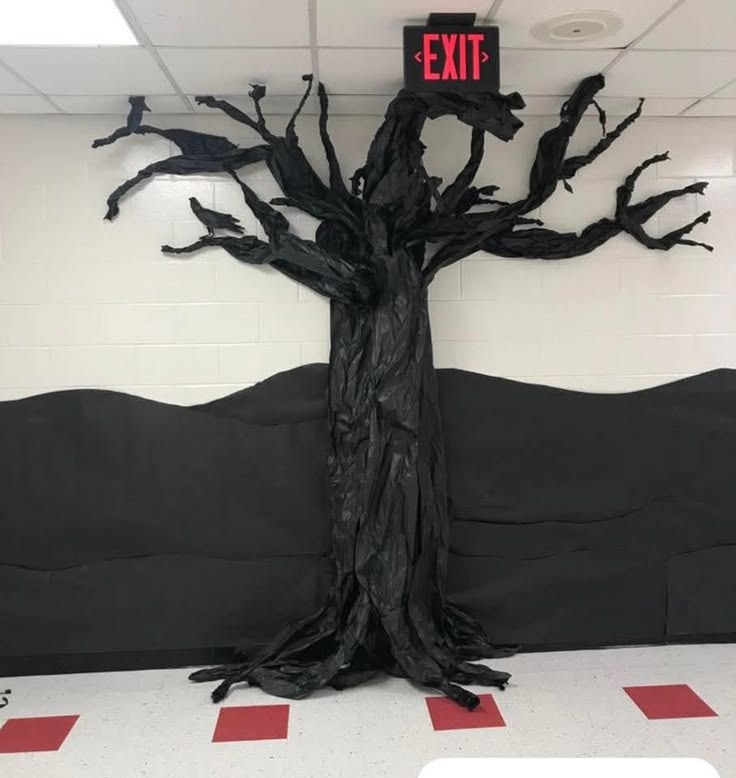
A bare branch can become one of the most striking Halloween decorations in your home.
Look for a branch with plenty of smaller limbs because it gives you more space to decorate. Place it inside a heavy vase or an old crock and fill the base with stones to keep it steady.
Now let your creativity take over. Hang tiny potion bottles, paper bats, feathers, pinecones, acorns, and little bundles of dried herbs from the branches.
You can even wrap a few fairy lights around the wood for a soft evening glow. I like keeping the decorations uneven because it makes the tree look like it grew naturally in an enchanted forest.
26. Create a Forest Apothecary Shelf
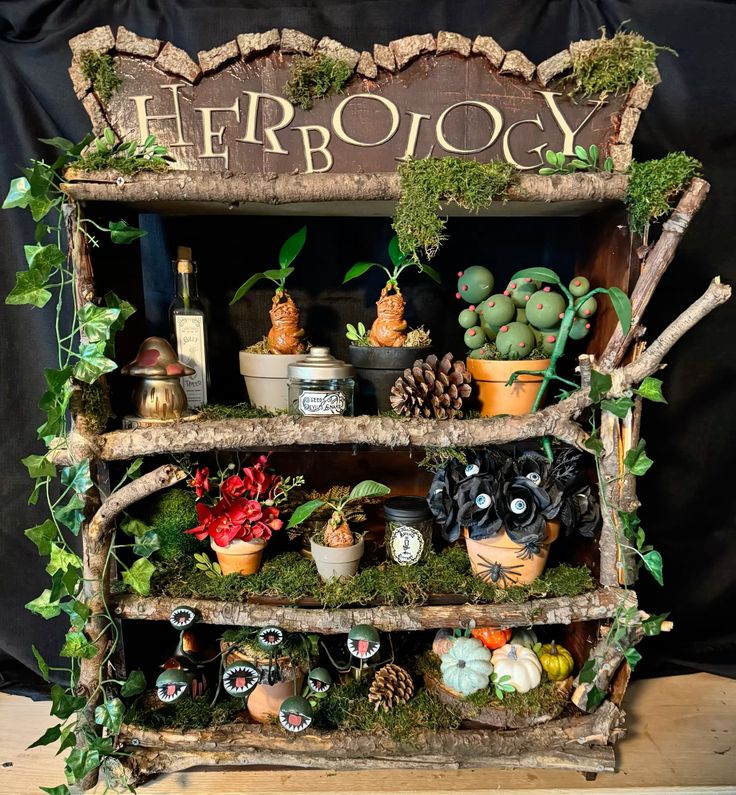
If you have an empty shelf, turn it into a Halloween display instead of filling it with random decorations. Start by gathering small glass jars and bottles in different shapes.
Fill each one with dried lavender, moss, acorns, bark, pine needles, seed pods, or tiny stones. Then place a few pinecones and branches between the jars to break up the arrangement.
Finish with a candle or two for warmth. The different heights and textures make the shelf look collected over many years instead of decorated in one afternoon.
27. Craft a Pinecone Cauldron Display

A small black cauldron becomes much more interesting when it overflows with natural treasures. Fill the bottom with crumpled paper first if the cauldron feels too deep. That way, you use fewer materials while keeping everything visible.
Cover the top with moss before arranging pinecones, acorns, dried flowers, bark, feathers, and curly vines.
Let a few pieces spill over the edge for a more relaxed look. Set the finished cauldron beside pumpkins or candles to create a centerpiece that feels rich without looking crowded.
28. Turn Driftwood Into Rustic Candle Décor
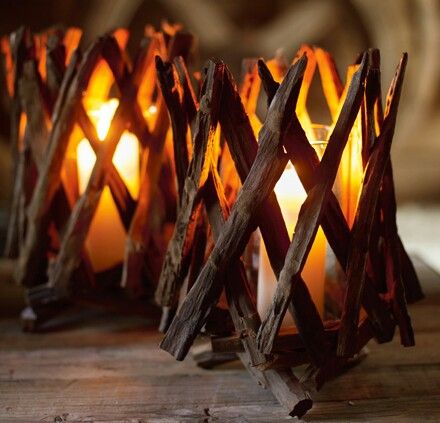
Weathered driftwood has plenty of character all on its own. A single piece can become the foundation for a beautiful Halloween centerpiece.
Lay the driftwood across your table and arrange battery-operated candles around it. Then tuck moss, pinecones, dried leaves, and seed pods into the empty spaces.
You can even weave thin vines around the wood to soften the edges. The finished display feels calm, rustic, and perfect for anyone who loves natural decorating.
29. Make a Witch’s Gathering Basket
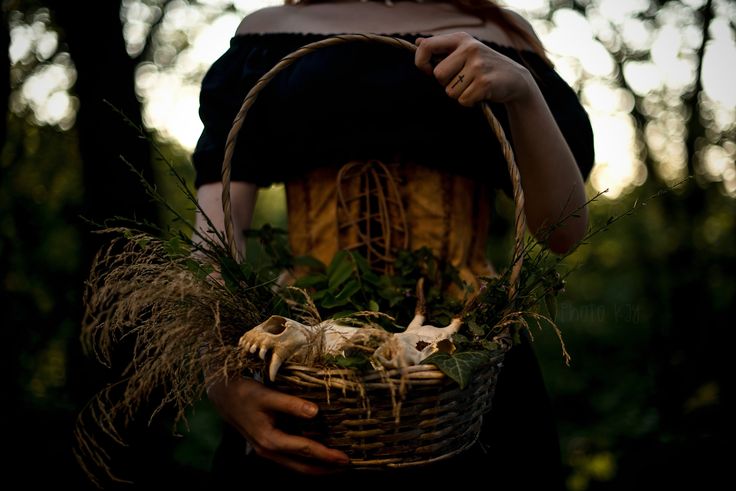
A simple woven basket can tell a whole Halloween story. Fill the bottom with moss or dried straw before adding your collected nature finds.
Layer in pinecones, branches, acorns, feathers, bark, dried herbs, and curled vines.
Leave a small glass bottle peeking through the arrangement to make it look like someone gathered ingredients for an old recipe.
Place the basket beside your fireplace, front door, or coffee table. It instantly adds warmth while celebrating everything you found outdoors.
30. Create a Woodland Witch’s Hat Display
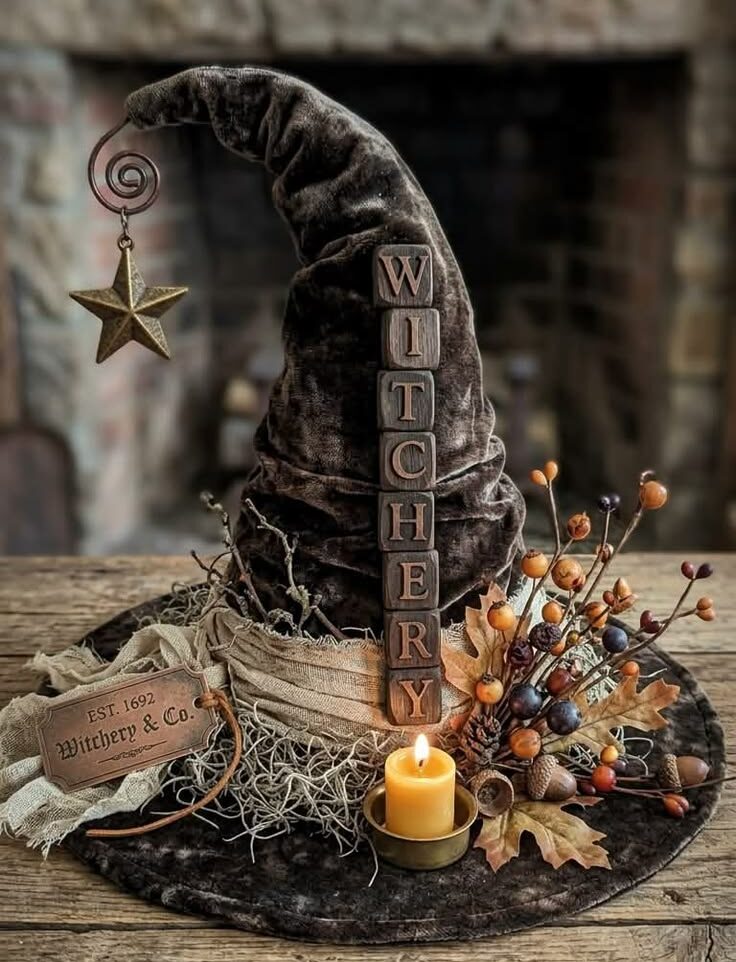
A plain witch’s hat looks much more interesting when nature becomes part of the design. Start with a black hat made from felt or sturdy fabric.
Then collect a mix of moss, tiny twigs, dried flowers, feathers, and small pinecones.
Glue the natural pieces around the base of the hat instead of covering the whole thing. That keeps the design balanced and lets every detail stand out.
Finish by wrapping a strip of burlap or velvet ribbon around the crown. Display the hat on a pumpkin, an old chair, or a stack of books.
It looks like it belongs to a woodland witch who just stepped away for a moment.
31. Make a Nature-Inspired Broom Parking Corner
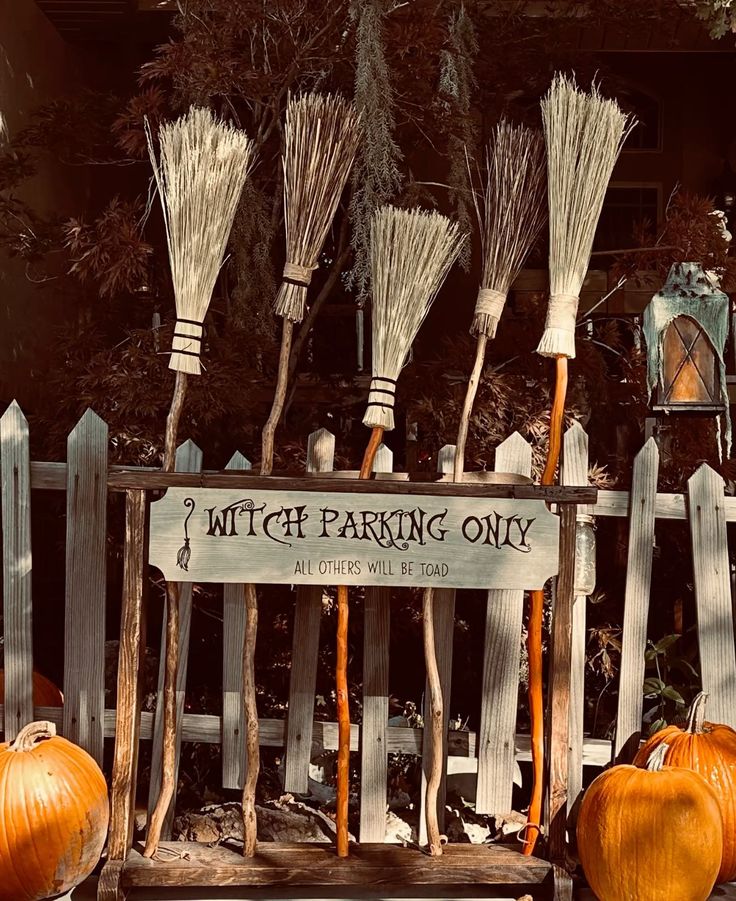
Every Halloween setup needs a fun conversation piece, and this one always gets attention. Gather three or four handmade twig brooms in different sizes. Lean them against an old wooden crate, basket, or barrel.
Now decorate the area with moss, bark, pinecones, dried herbs, and lanterns. Scatter a few acorns across the ground to make everything feel more natural.
I like adding a small chalkboard with a playful message to complete the scene. It turns an empty corner into one of the most photographed spots in the house.
32. Build an Enchanted Forest Tablescape
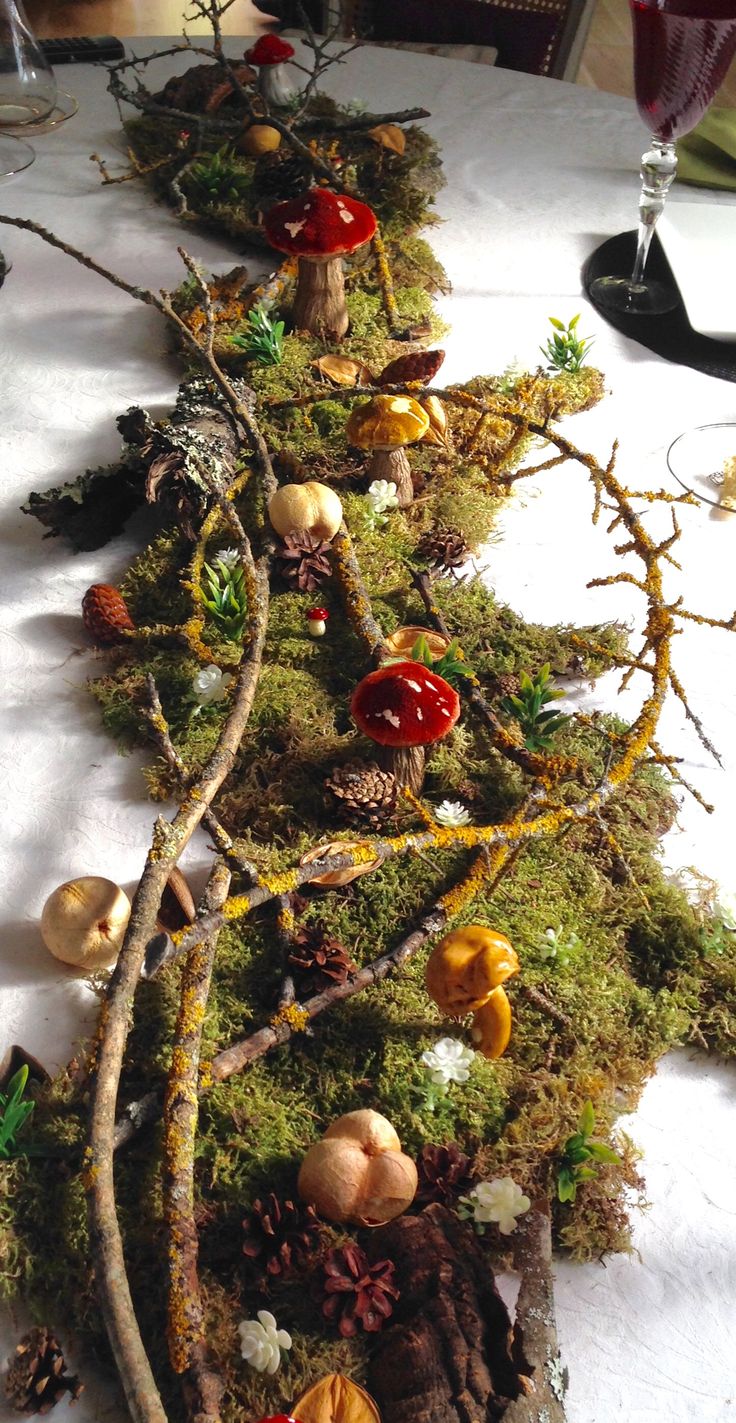
If you’re hosting a Halloween dinner, this project can completely change the mood of your table. Start with a neutral table runner made from burlap or linen.
Then arrange long branches across the center instead of using a traditional centerpiece.
Fill the empty spaces with moss, pinecones, dried leaves, feathers, acorns, and small pumpkins. Place candles throughout the arrangement to add a warm glow.
You can even tuck tiny glass bottles between the branches for extra charm. Witchy Halloween Nature Crafts like this create a table that feels cozy, mysterious, and welcoming without looking overdone.
33. Design a Seasonal Nature Shadow Box
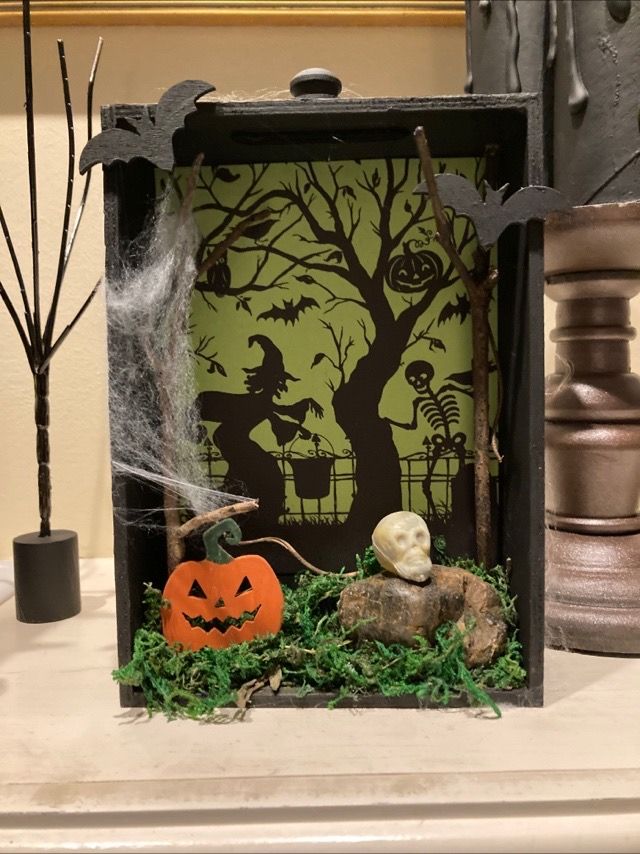
A shadow box lets you preserve your favorite Halloween nature finds long after autumn ends. Begin with a deep frame that gives you enough room for layered materials.
Arrange pressed leaves, moss, bark, feathers, tiny branches, dried flowers, seed pods, and acorns inside the frame. Move everything around until the layout feels balanced.
Then glue each piece into place one at a time. You can also add a small moon, raven silhouette, or miniature broom for a finishing touch.
Hang the completed shadow box in your entryway or living room, and enjoy a handmade decoration that celebrates the beauty of the season year after year.
Final Thoughts
One of the best things about Witchy Halloween Nature Crafts is that they remind us to slow down and notice the beauty around us.
A simple walk through your backyard, a nearby park, or a quiet trail can give you more inspiration than an afternoon at the store.
Before long, you start spotting branches with interesting shapes, pinecones with beautiful textures, and leaves that seem too pretty to leave behind.
Those little discoveries make every project feel more rewarding because you helped create it from start to finish.
I also hope this collection encourages you to experiment without worrying about perfection. Nature already gives every material its own texture, color, and shape, so your crafts do not need perfect lines or flawless details.
Mix different elements together, try new color combinations, and move pieces around until they feel right.
Witchy Halloween Nature Crafts work best when they reflect your own style instead of copying someone else’s ideas. That freedom makes every finished piece feel even more meaningful.
As you start making these projects, remember that the smallest details often leave the biggest impression. A few sprigs of moss, a handful of acorns, or a twisted vine can completely transform an ordinary decoration.
Keep collecting interesting pieces throughout the season because you never know what your next project might need.
I hope these Witchy Halloween Nature Crafts inspire you to fill your home with handmade decorations that feel warm, rustic, and full of Halloween character while creating memories you’ll look forward to repeating every autumn.