
Imagine five children standing in front of you, all waiting for their Halloween faces to be painted. One wants a cat. Another suddenly wants a vampire.
Someone else has changed their mind three times already. Meanwhile, you are holding a paintbrush and wondering how you are going to finish everyone before the party starts.
That is exactly when simple Halloween Face Painting Ideas For Kids become your best friend.
You do not need to create tiny works of art on every face. Kids are usually thrilled by a few recognizable details.
A black nose and whiskers can become a cat. Two fangs can turn a regular smile into a vampire.
Add a few orange shapes, and suddenly you have a little pumpkin staring back at you. The trick is knowing which details create the biggest effect without taking forever.
So, I put together 41 ideas that keep that reality in mind. You will find cute animals, silly monsters, classic Halloween characters, colorful designs, and spooky little details.
Some are perfect for a five-minute rush before school. Others are fun when you have more time to sit down and paint.
I will also keep the techniques approachable, because Halloween should leave you with happy kids and good memories, not a sore hand from trying to paint twenty perfect spiders.
41 Easy Last-Minute Halloween Face Painting Ideas For Kids – (See Price of Face Painting Kit on Amazon)
1. Cute Pumpkin Cheeks

Pumpkins are an easy place to start because their shapes are simple. They also give you that instant Halloween feeling without covering the whole face.
Paint a small orange pumpkin on one cheek. Give it three gentle sections with a darker orange or black line.
Add a tiny green stem at the top and two small leaves if there is enough space.
For a younger child, skip the jack-o’-lantern face. A simple pumpkin often looks sweeter and takes less time.
If the child wants something spookier, add two tiny triangle eyes and a smiling mouth.
This design works especially well with orange, black, brown, or green costumes. It also looks cute when paired with a simple Halloween shirt.
2. Friendly Little Ghost

A tiny ghost can turn a plain cheek into a Halloween scene almost instantly. Plus, you can make the shape slightly different every time.
Start with white face paint and create a small rounded ghost shape. Let the bottom edge have two or three soft curves instead of making it perfectly straight.
Once the white paint dries slightly, add two black eyes. Give the ghost a tiny round mouth or a simple smile.
You can also add three tiny dots around the ghost. They make it look like the little spirit is floating through the air.
For young children, I prefer friendly expressions. They keep the design playful without making the child uncomfortable with a scary face.
3. Simple Black Cat

A black cat is perfect when you need something quick but recognizable. You can create the entire look with a few small details.
Paint the tip of the child’s nose black. Then, draw three thin whiskers on each side of the nose.
Add a few small black dots above the mouth. These can suggest the tiny spots cats have around their whiskers.
If you have more time, paint small cat ears above the eyebrows. You can also add a little pink inside the nose.
This design becomes even cuter when the child wears cat ears. You can skip the ears if the costume already has them.
4. Spooky Spider Web
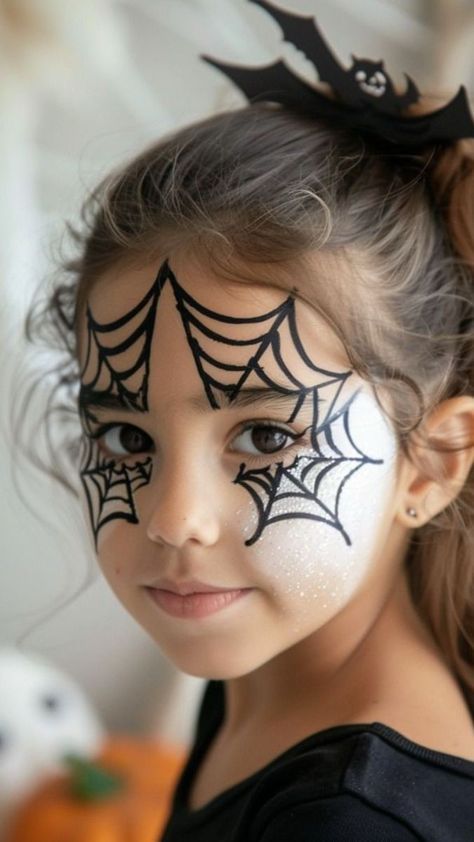
A spider web works beautifully around one eye. It creates a spooky effect without requiring much paint.
Start with several thin black lines extending from the outer corner of the eye. Keep the lines slightly curved as they move toward the temple.
Next, connect those lines with small curved sections. Work from the inside outward so the web stays neat.
You can finish with a tiny spider hanging from one strand. A small red dot on its body adds another Halloween detail.
Keep the web fairly open instead of filling every space. Thin, clean lines usually look more attractive than a crowded web.
5. Tiny Spider

For children who love creepy crawlies, a little spider makes a fun cheek design. It also takes less time than a full spider web.
Paint a small black oval for the spider’s body. Add a smaller circle above it for the head.
Next, draw four short legs on each side. They do not need to match perfectly.
Add two tiny white dots for eyes if you want a friendlier spider. A little red marking on the body gives it a spookier Halloween appearance.
You can place the spider near a small web. You can also let it stand alone if you are painting several children.
6. Little Witch Hat

A tiny witch hat gives you a Halloween look without painting an entire character. It also leaves most of the child’s face uncovered.
Start with a simple black triangle on the cheek. Add a curved black brim underneath it.
Paint a purple, orange, or green band across the hat. A tiny yellow buckle can finish the design.
If the child wants something more magical, add two or three tiny stars around the hat. You can also add a miniature moon beside it.
This idea pairs naturally with a witch costume. Still, it works just as well with an ordinary black outfit.
7. Cute Bat

A tiny bat looks more complicated than it really is. The trick is to think of the wings as two simple curved shapes.
Start with a small black body near the temple or cheekbone. Then, paint one wing on each side.
Add two little points along each wing to suggest the bat’s shape. Finish with two tiny white eyes.
For a colorful version, add purple inside the wings. You could also place a small yellow moon behind the bat.
This design is especially useful when the child wants a spooky look without anything frightening.
8. Candy Corn

Candy corn gives you an easy way to add bright Halloween colors. The basic shape only needs three sections.
Paint a small triangle with slightly rounded corners. Fill the top with white, the middle with orange, and the bottom with yellow.
Allow each section to dry briefly before adding the next color. This helps keep the colors clean.
You can outline the candy corn with a thin black line. If you are short on time, leave the outline out.
Paint one larger piece or several tiny pieces across the cheek. Both versions work well for young children.
9. Little Vampire

You do not need to paint an entire vampire face. A few recognizable details can create the look much faster.
Start with two small white fangs near the corners of the mouth. Outline them lightly with black if you want them to stand out.
Add a tiny red drop below one fang. You can also paint a small black widow’s peak above the forehead.
For a softer version, skip the blood detail. The fangs alone already give the child a playful vampire look.
This idea works especially well when the costume already includes a cape. The face paint simply completes the character.
10. Mini Frankenstein
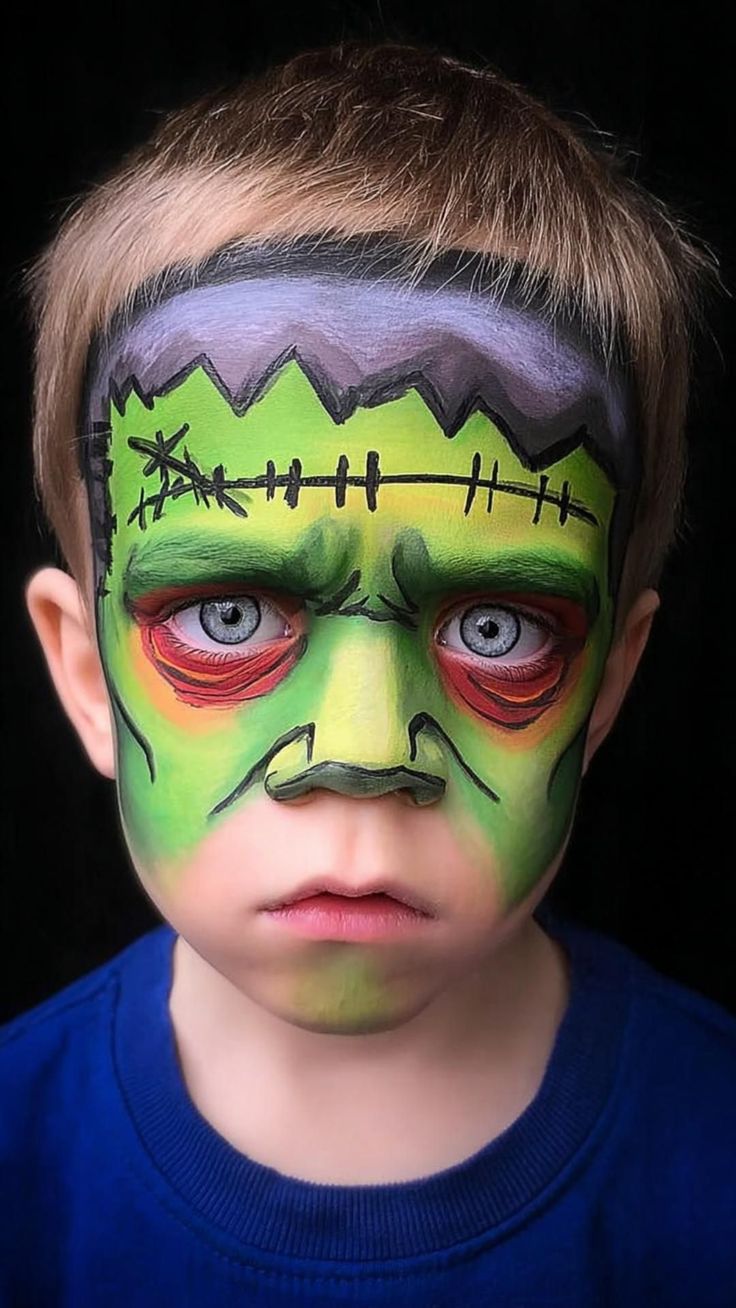
A small Frankenstein face makes a great cheek design. It gives you plenty of room to be creative without taking over the child’s entire face.
Paint a small green rectangle or rounded square on the cheek. Add black hair across the top.
Give the character two simple eyes and a straight mouth. Then, add two or three small black stitches.
You can make Frankenstein look serious, surprised, or silly. For younger children, I like a funny expression because it feels less scary.
Purple, black, or orange clothing can help bring the whole look together.
11. One-Eyed Monster

This design is perfect for children who want something silly. It also gives you more freedom than a traditional character.
Start with one large colorful eye on the cheek. Use white for the eyeball and black for the pupil.
Surround the eye with green, purple, blue, or orange paint. Add a few short lines to create a furry monster texture.
Then, give the monster two tiny teeth underneath the eye. You can even add a funny eyebrow above it.
The final monster does not need to look perfect. In fact, a slightly goofy expression makes it more charming.
12. Mummy Face

A little mummy looks spooky while still staying simple enough for young children. You can also keep most of the face free from paint.
Start with a small white oval around one cheek or near one eye. Let two tiny spaces remain for the mummy’s eyes.
Once the white base settles, add thin black or gray lines across it. Keep the lines uneven to create the appearance of wrapped bandages.
Add a tiny gray shadow around a few sections. This gives the mummy more depth without requiring complicated shading.
If the child wants more detail, add a tiny scar or loose bandage line near the temple.
13. Halloween Eyeball

An eyeball can look surprisingly impressive when you use simple circles. It is also easy to customize with the child’s favorite color.
Start with a white circle on the cheek. Add a blue, green, brown, or purple circle inside it.
Place a small black pupil in the center. Then, outline the white area with black paint.
For a spooky version, add thin red lines around the eyeball. Keep them delicate so they do not overpower the main design.
You can also add tiny eyelashes for a funny twist. This turns the spooky eyeball into something much more playful.
14. Moon and Tiny Bats

This design creates a little Halloween night scene on the face. It looks detailed, but each element uses very simple shapes.
Start with a small yellow crescent moon near the temple. Keep the moon slightly curved instead of making a perfect circle.
Add two or three tiny black bats around it. Make each bat slightly different in size.
Finish with a few tiny white or yellow stars. You can scatter them around the moon instead of placing them in a straight line.
This design looks especially pretty against dark costumes. It also works for children who prefer magical Halloween themes.
15. Witch Cat

A witch cat combines two classic Halloween favorites. It is cute enough for younger children while still feeling festive.
Begin with a small black cat face on one cheek. Add a little pink nose and three whiskers on each side.
Then, paint a tiny purple witch hat above the cat’s head. A small orange buckle gives the hat more character.
Add a few tiny stars around the hat if you have time. You can use yellow, white, or silver paint for them.
This design looks adorable with cat ears, but the face paint works on its own too.
16. Little Devil
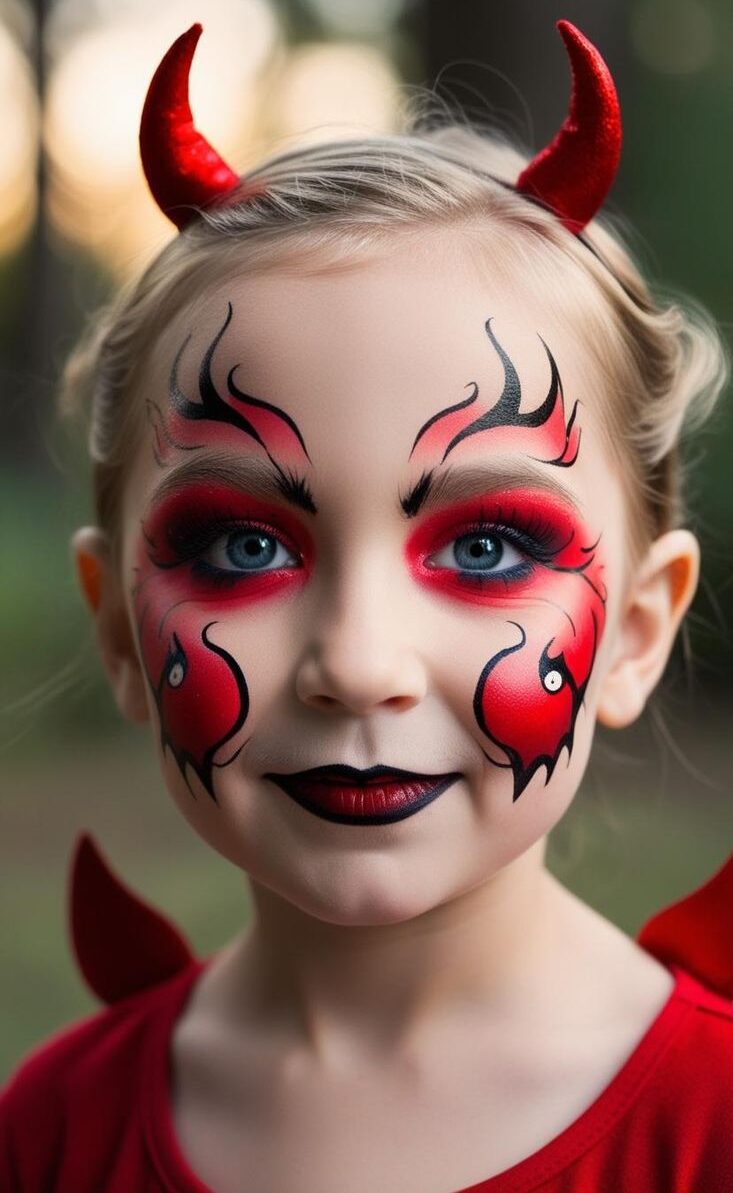
A little devil design can be playful rather than frightening. The secret is keeping the details small.
Paint two red horns above the eyebrows. Give them a simple black outline so they stand out.
Next, add a tiny red heart on one cheek. You can also paint a small pointed tail beside it.
For a more dramatic look, add a little red around the nose. Keep the rest of the face natural so the design does not become overwhelming.
This one works particularly well when the child wants a quick transformation.
17. Halloween Rainbow
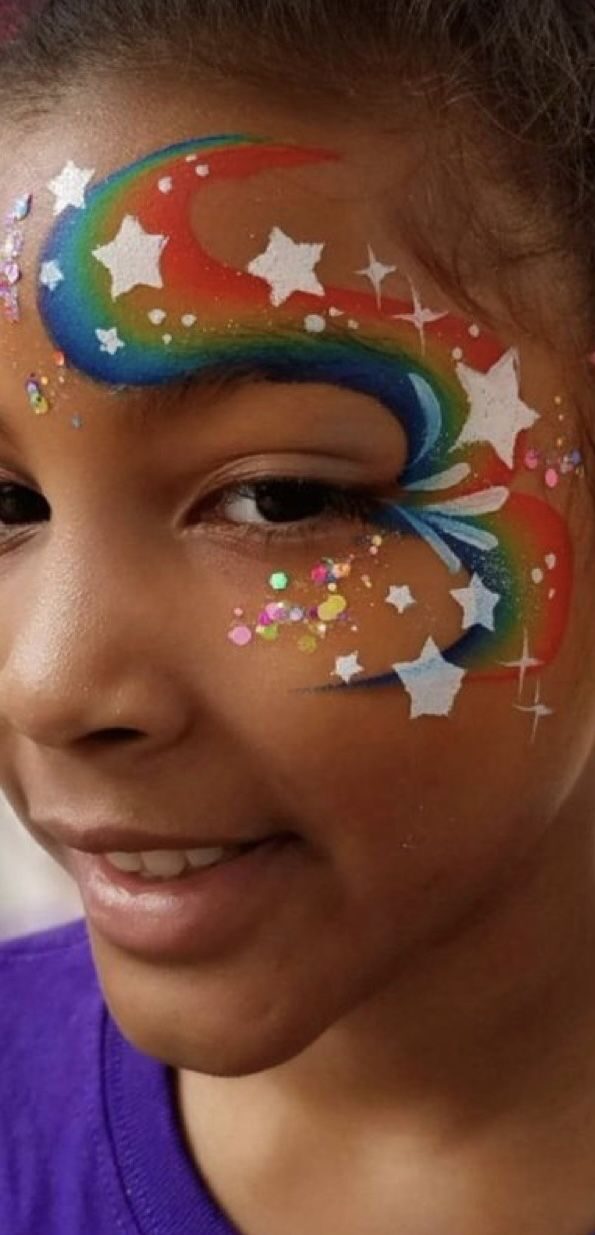
A Halloween rainbow gives you something bright when traditional spooky designs feel too dark.
Instead of the usual rainbow colors, use orange, purple, black, yellow, and white. Paint three or four curved stripes across one cheek.
Add tiny stars at one end. You can also paint a little black bat flying across the rainbow.
Keep the stripes fairly thick so the colors remain visible. You can make the design smaller if the child does not like having much paint on their face.
This idea works beautifully for colorful costumes and Halloween parties.
18. Friendly Skull

A skull can look spooky without becoming too scary for a young child. Keeping the shape small makes the design much easier.
Paint a small white skull on one cheek. Use black paint for the eye sockets and nose.
Add a simple black line for the mouth. Then, place a few short vertical lines across it to suggest teeth.
For a softer version, surround the skull with tiny purple or pink flowers. Stars also work well if the child prefers a classic Halloween look.
The rounded shape of the skull makes it easier to paint than a detailed full-face skeleton.
19. Little Owl

An owl gives you a fun animal option when a child does not want anything spooky. You can still make it feel like Halloween with the colors.
Start with two large white circles around the eyes. Add brown or gray around the edges.
Place a tiny orange triangle between the eyes for the beak. Then, add short feather strokes around the cheeks.
You can use black for the pupils and add small white highlights. Those little highlights make the eyes look lively.
This design pairs nicely with an owl costume. It also works when the child simply wants to look like a cute Halloween animal.
20. Playful Werewolf
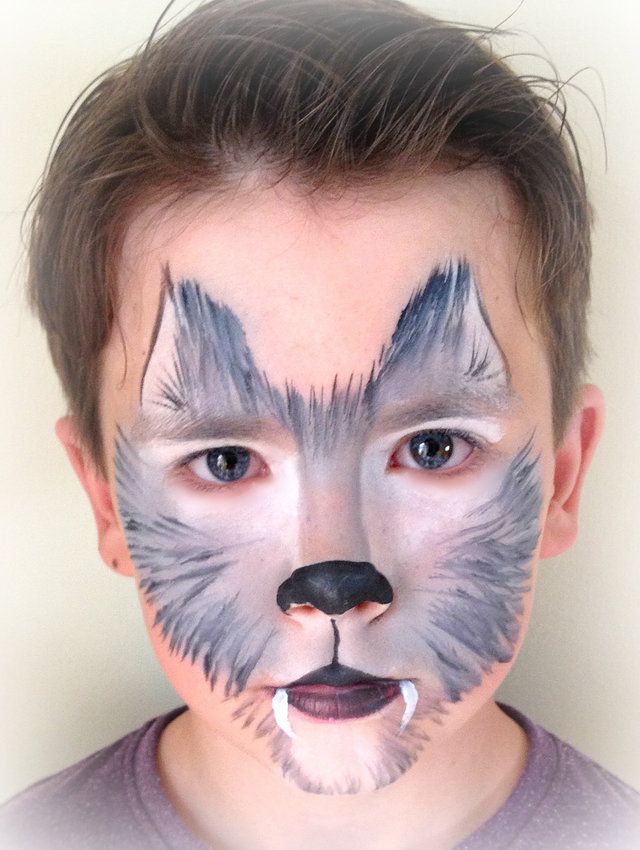
A werewolf does not need a frightening face. You can make it look more like a funny furry character.
Start with a brown or gray nose. Add thick eyebrows using short, uneven strokes.
Next, paint small fur marks along the cheeks and forehead. Keep the strokes short because long lines can make the design look messy.
Add two tiny white fangs near the mouth if the child wants a spooky touch. You can also darken the ears if the costume has them.
This design works especially well with a furry hoodie or wolf ears.
21. Halloween Butterfly

A Halloween butterfly lets you combine pretty details with spooky colors. It is also a great option for children who do not want traditional Halloween characters.
Start by painting one wing around each eye. Use orange, purple, black, or white.
Keep the wings slightly curved and add simple lines inside them. Small dots along the edges can make them look more finished.
Add a thin black body down the center of the nose. Then, paint two tiny antennae toward the forehead.
You can make the wings symmetrical or give each side slightly different details. Both approaches create a charming result.
22. Tiny Pumpkin Patch
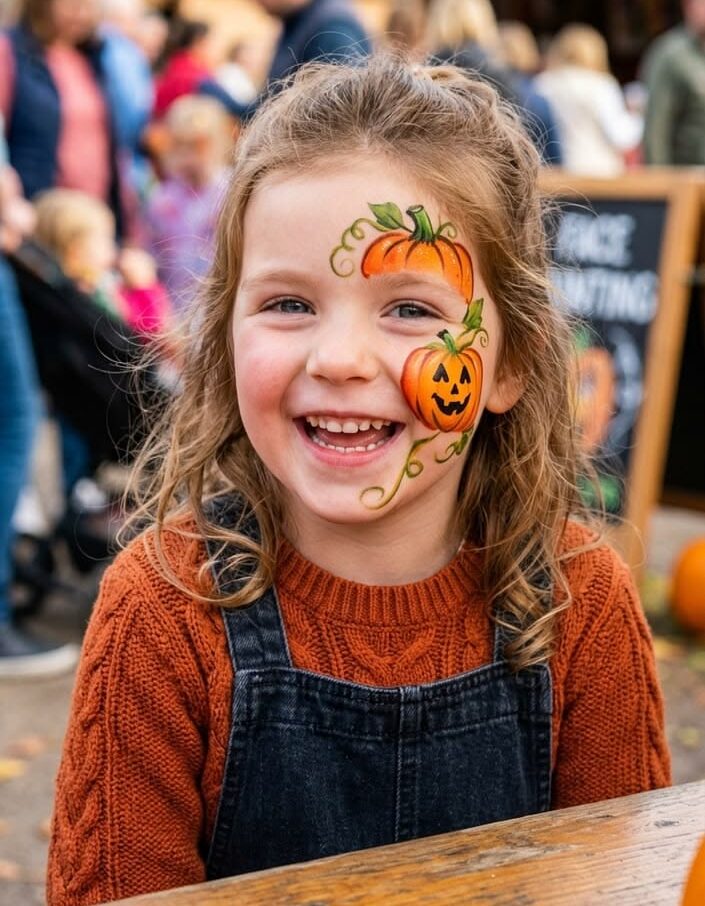
If one pumpkin feels too simple, turn the cheek into a tiny pumpkin patch. This gives you more detail without making the design difficult.
Start by painting three small orange pumpkins along the cheekbone. Make one slightly larger than the others for a more natural arrangement.
Add small green stems to each pumpkin. Then, paint a few thin green vines between them.
For extra detail, add tiny black dots around the pumpkins. You could also place one little leaf beside the largest pumpkin.
This design feels cheerful and works beautifully with orange, green, brown, or black clothing.
23. Boo Ghost Trio
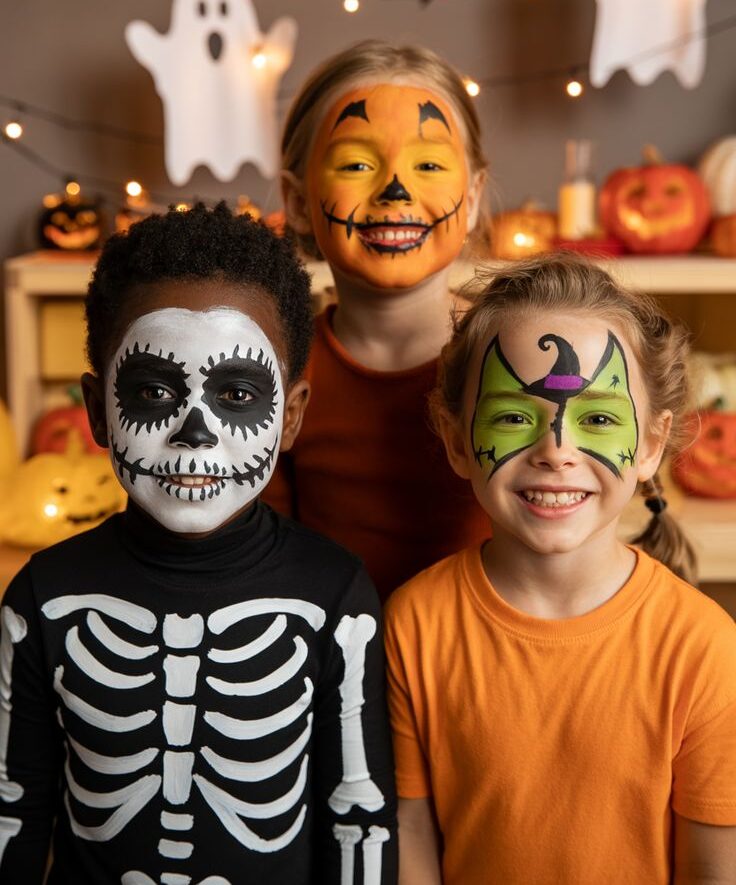
Three tiny ghosts can create a fun little Halloween scene. This idea also gives you plenty of room to play with different expressions.
Paint three small white ghost shapes across one cheek. Make each ghost a slightly different size.
Give the first one a happy face. Make the second look surprised with a round mouth. Then, give the third one sleepy eyes.
Add a few tiny black or purple dots around them. These little details make the ghosts look like they are floating together.
Young children often enjoy choosing which expression each ghost should have. That makes this design feel more personal.
24. Magical Potion Bottle

A tiny potion bottle is perfect for a child who wants a witchy look without wearing a full witch costume.
Start with a small bottle shape on the cheek. Use black paint for the outline and purple or green for the liquid inside.
Add a tiny cork or black bottle top. Then, paint two or three little bubbles above the potion.
A yellow star beside the bottle can make it look magical. You could also add a tiny swirl inside the liquid.
Keep the bottle small and simple. The bright potion color will make the design noticeable without covering much skin.
25. Black Widow Spider

This design is a little spookier than a friendly spider. Still, you can keep it simple enough for young elementary children.
Paint a small black spider near the cheekbone. Use a rounded body instead of trying to create complicated details.
Add eight thin legs and a tiny red hourglass shape on the body. You can use a red dot if the hourglass feels too difficult.
Draw a small section of spider web beside it. Keep the web open so the design does not become crowded.
This works especially well for children who want something creepy but do not want a full scary face.
26. Witchy Stars and Moons

You can create a magical Halloween look without painting a character at all. Stars and moons are quick, pretty, and easy to customize.
Start with a small crescent moon near one eye. Then, paint several purple, black, or yellow stars around it.
Mix different sizes to make the design feel more natural. Add tiny dots between the stars to fill small empty spaces.
You can also include one tiny bat if the child wants more Halloween detail.
This design works well for children who prefer pretty face paint over spooky characters.
27. Frankenstein Stitches

If your child likes Frankenstein but does not want a green face, paint only the stitches.
Start by drawing three or four short black lines across one cheek. Then, add tiny vertical lines across them.
For a stronger Frankenstein connection, add a small green patch underneath one set of stitches. You can also add a tiny black bolt nearby.
Keep the lines slightly uneven. Perfect stitches can look too neat for a fun monster design.
This is one of the quickest options when you have several children waiting for their turn.
28. Colorful Monster Spots

Not every Halloween monster needs to be green. Let the child choose a few bright colors and create a silly monster design.
Paint several round spots across one cheek and near the forehead. Use purple, orange, blue, green, or yellow.
Make some spots large and others tiny. Add little black dots inside a few of them for extra character.
You can also turn two of the spots into tiny monster eyes. Add a funny mouth underneath if you want to take the design further.
This idea is especially fun for children who enjoy choosing their own colors.
29. Ghost With a Bow

Give a classic ghost a cute little makeover with a colorful bow.
Paint a small white ghost on one cheek. Add two black eyes and a tiny smiling mouth.
Next, place a pink, purple, orange, or red bow beside the ghost’s head. You can make the bow with two simple loops.
Add a few tiny stars around the ghost if there is enough space.
This design is sweet, simple, and perfect for children who like cute Halloween decorations more than scary ones.
30. Halloween Candy Pieces

Candy is one of the easiest ways to bring bright color into Halloween face painting. You can also make several tiny pieces without spending much time.
Paint small wrapped candies across the cheekbone. Use different colors for each wrapper.
Add simple black lines to show the twisted ends. A tiny white highlight can make the candy look shiny.
You can use orange and purple for a traditional Halloween palette. Pink, blue, and yellow work nicely when the child wants something brighter.
This design pairs especially well with a candy-themed costume or colorful Halloween clothes.
31. Vampire Bite

When you need a design that takes almost no time, try a tiny vampire bite.
Paint two small fang marks near the cheek or side of the neck. Add two tiny red dots beneath them.
You can place a small black bat beside the bite for extra Halloween character. A little red heart also works for a playful version.
There is no need to paint the entire face. The small details already tell the story.
This is a great choice when you are running late but still want the child to feel dressed up.
32. Cute Zombie
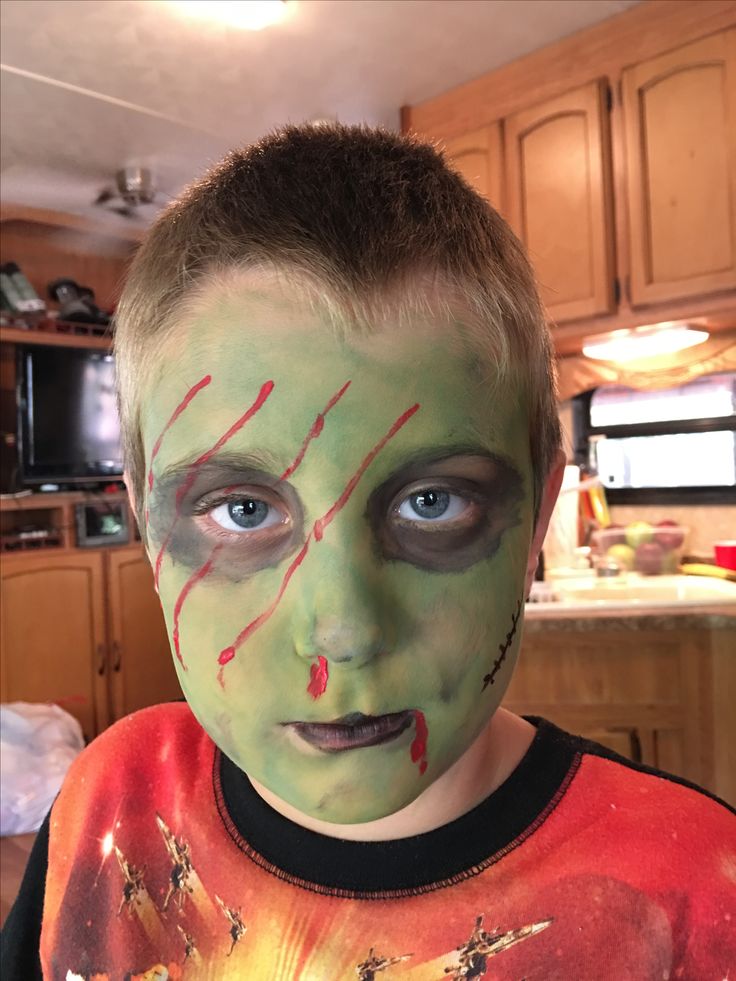
A zombie can look funny instead of frightening. That makes this version much better suited to younger children.
Paint a small green patch on one cheek. Add messy black hair, one raised eyebrow, and a silly mouth.
Give the zombie two tiny teeth. You can also add a little purple around one eye for a tired expression.
Do not worry about making the face perfectly symmetrical. A slightly messy look actually works well for a zombie.
If the child has a zombie costume, these few details can make the outfit feel complete.
33. Haunted House

A tiny haunted house creates a whole Halloween scene on one cheek. It looks detailed, but the design relies mostly on simple shapes.
Start with a small black square for the house. Add a pointed roof and a tiny crooked door.
Paint two yellow windows to make the house look like it is glowing. Then, add a small yellow moon behind the roof.
A few tiny black bats can fly around the house. You can also add a little white ghost beside the door.
Keep everything small so you have enough room for the different elements.
34. Pumpkin Nose
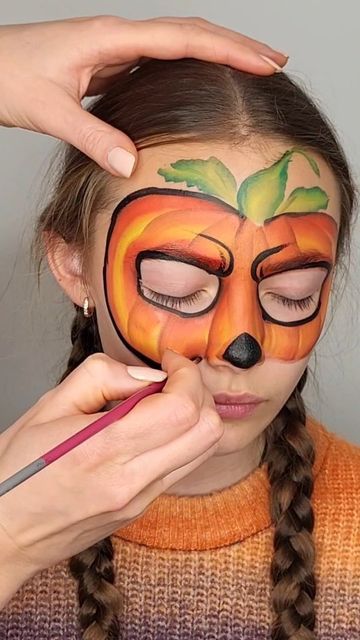
This is one of the fastest ideas in the collection. It is perfect for a child who dislikes having lots of paint on their face.
Paint the child’s nose orange. Add a tiny green stem at the top.
Next, paint two small black triangles near the outer corners of the eyes. These create a simple jack-o’-lantern effect.
You can stop there or add a tiny smile beneath the nose.
The finished look is playful without feeling heavy. It also works well when you need to paint several children quickly.
35. Cat Nose and Whiskers

Sometimes you really do not need much paint to create a costume. A black nose and whiskers can instantly suggest a little cat.
Paint the tip of the nose black. Add three thin whiskers on each side.
Then, place a few tiny black dots between the nose and whiskers. These small dots help the design feel more complete.
If you have another minute, add a little pink to the nose. You can also draw small cat ears near the forehead.
This is especially handy when the child already has cat ears, a tail, or a black outfit.
36. Little Bat Mask
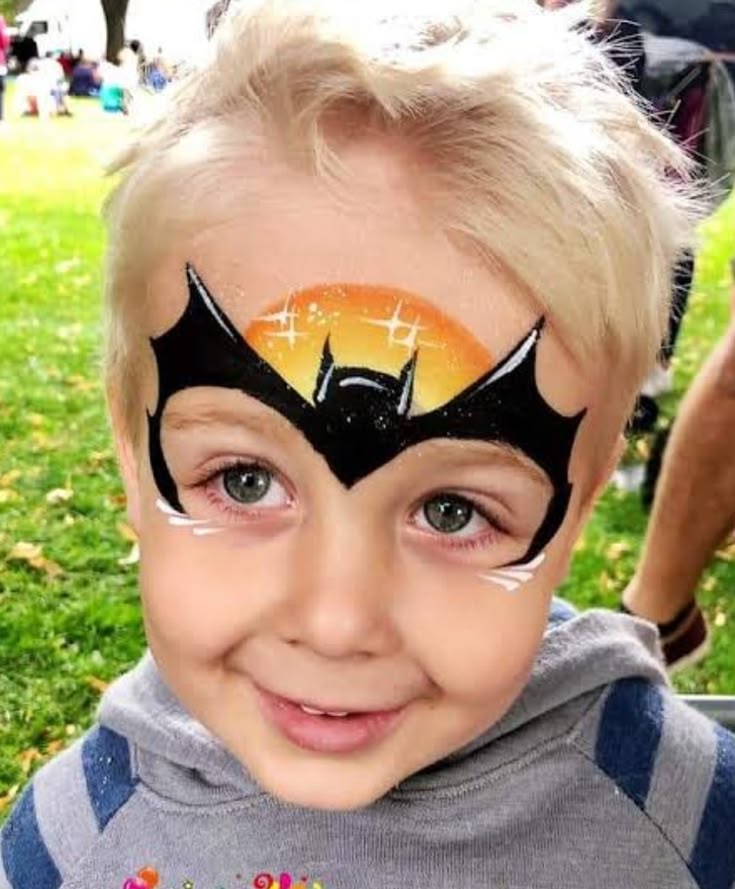
A bat mask gives you a bigger design without covering the entire face. It also looks great in photographs.
Start by painting two black wing shapes around the eyes. Extend each wing slightly toward the temples.
Add a few purple lines inside the wings to create more definition. You can also use white dots as tiny highlights.
Keep the area directly around the eyes comfortable and clear. Avoid bringing the paint too close to the eyelids.
For a sparkly version, add a few silver or white stars around the mask.
37. Halloween Flowers
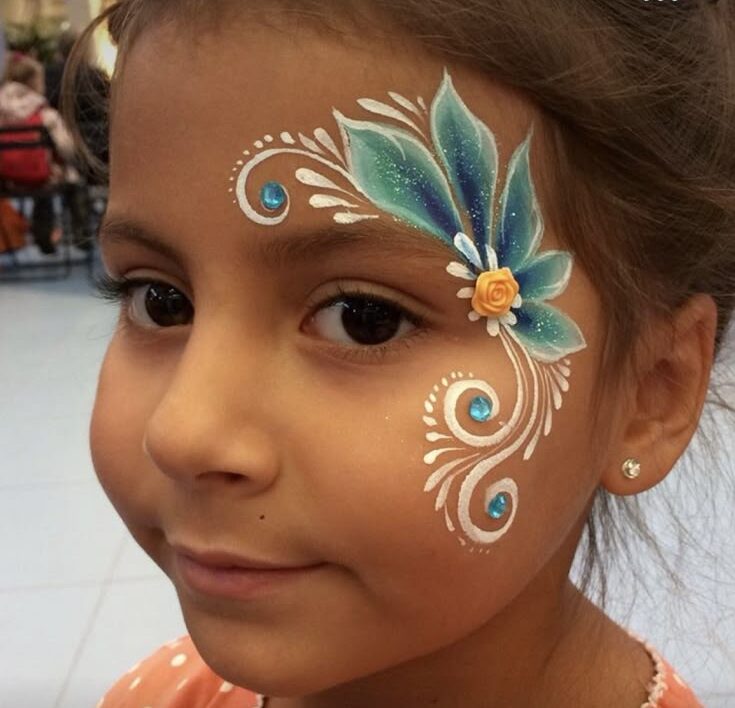
Flowers may not seem spooky at first, but the right colors can give them a Halloween twist.
Paint small flowers around one eye using orange, purple, black, and yellow. Keep each flower simple with five rounded petals.
Add tiny yellow centers to the flowers. Then, use black or green for a few small leaves.
You can place the flowers in a curved line around the eye. This creates a pretty frame without covering too much skin.
This option is lovely for children who want something festive but do not enjoy spooky designs.
38. Scary-Cute Monster Eye
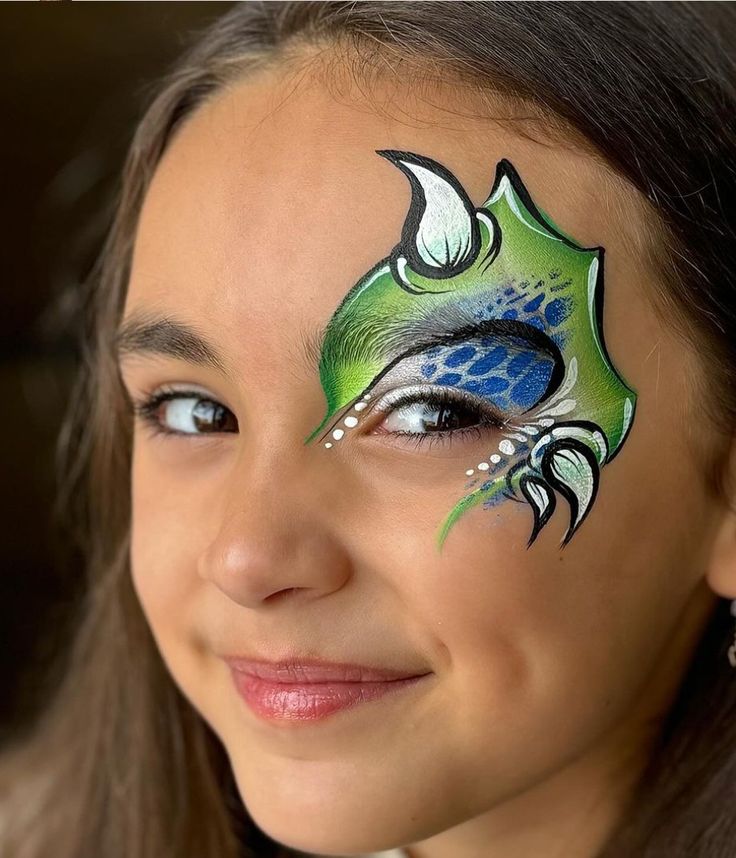
A giant monster eye can create a dramatic look using very few shapes. It is also fun because the child can choose the monster’s colors.
Start with a large white eye on one cheek. Add a colorful iris and a black pupil.
Surround the eye with green, purple, blue, or orange paint. Add a few short lines around it to suggest fur or scales.
Place two tiny teeth underneath the eye. You can also add a funny eyebrow above it.
The finished design looks unusual and playful without becoming too frightening.
39. Pumpkin With Falling Leaves

This design combines Halloween with the cozy feeling of autumn. It is especially nice for children who prefer softer seasonal designs.
Start with one small orange pumpkin near the cheekbone. Add a green stem and one tiny leaf.
Then, paint several small leaves around it. Use orange, red, yellow, and brown.
Let the leaves vary slightly in size and direction. This makes them look like they are gently falling around the pumpkin.
A tiny black outline around the pumpkin can make it stand out. Keep the leaves simple so the design stays quick.
40. Halloween Stars and Dots

When you have almost no time, you can still create something festive. A collection of tiny Halloween shapes can look surprisingly pretty.
Choose three or four colors, such as orange, purple, black, and yellow. Paint small stars, dots, moons, and tiny hearts around one eye.
Mix larger shapes with very small dots. This keeps the design from looking too uniform.
You can add one tiny bat or ghost if the child wants a recognizable Halloween character.
There is no need to make both sides match. The slightly scattered arrangement is part of the charm.
41. Mix-and-Match Halloween Face

Sometimes the hardest part is choosing just one design. In that case, let the child pick several tiny Halloween favorites.
You could paint a pumpkin on one cheek and a ghost on the other. Then, add a few stars around the eyes and a tiny bat near the temple.
Another child might choose candy corn, a spider, and a little moon. The combinations are almost endless.
Keep each element small so the face does not become overcrowded. You can also let the child choose the colors.
I especially like this option for siblings. Each child can create a completely different Halloween look while using the same basic supplies.
Final Thoughts
The fun of Halloween Face Painting Ideas For Kids is that you can create a completely different look with just a few simple details.
A tiny pumpkin can turn an ordinary outfit into a Halloween costume. A few whiskers can create a playful cat. Even a handful of colorful stars can make a child feel ready for the celebration.
I would keep your favorite quick designs saved before Halloween arrives. That way, you are not searching for ideas while a child waits with a clean face and a costume already on.
Pick two or three favorites and keep those as your reliable last-minute options.
Most of all, let the children have some say in what they wear on their faces. They may choose something completely different from what you expected.
That is part of the fun. With these Halloween Face Painting Ideas For Kids, you can create cute, spooky, and silly looks without turning Halloween morning into a stressful production.
