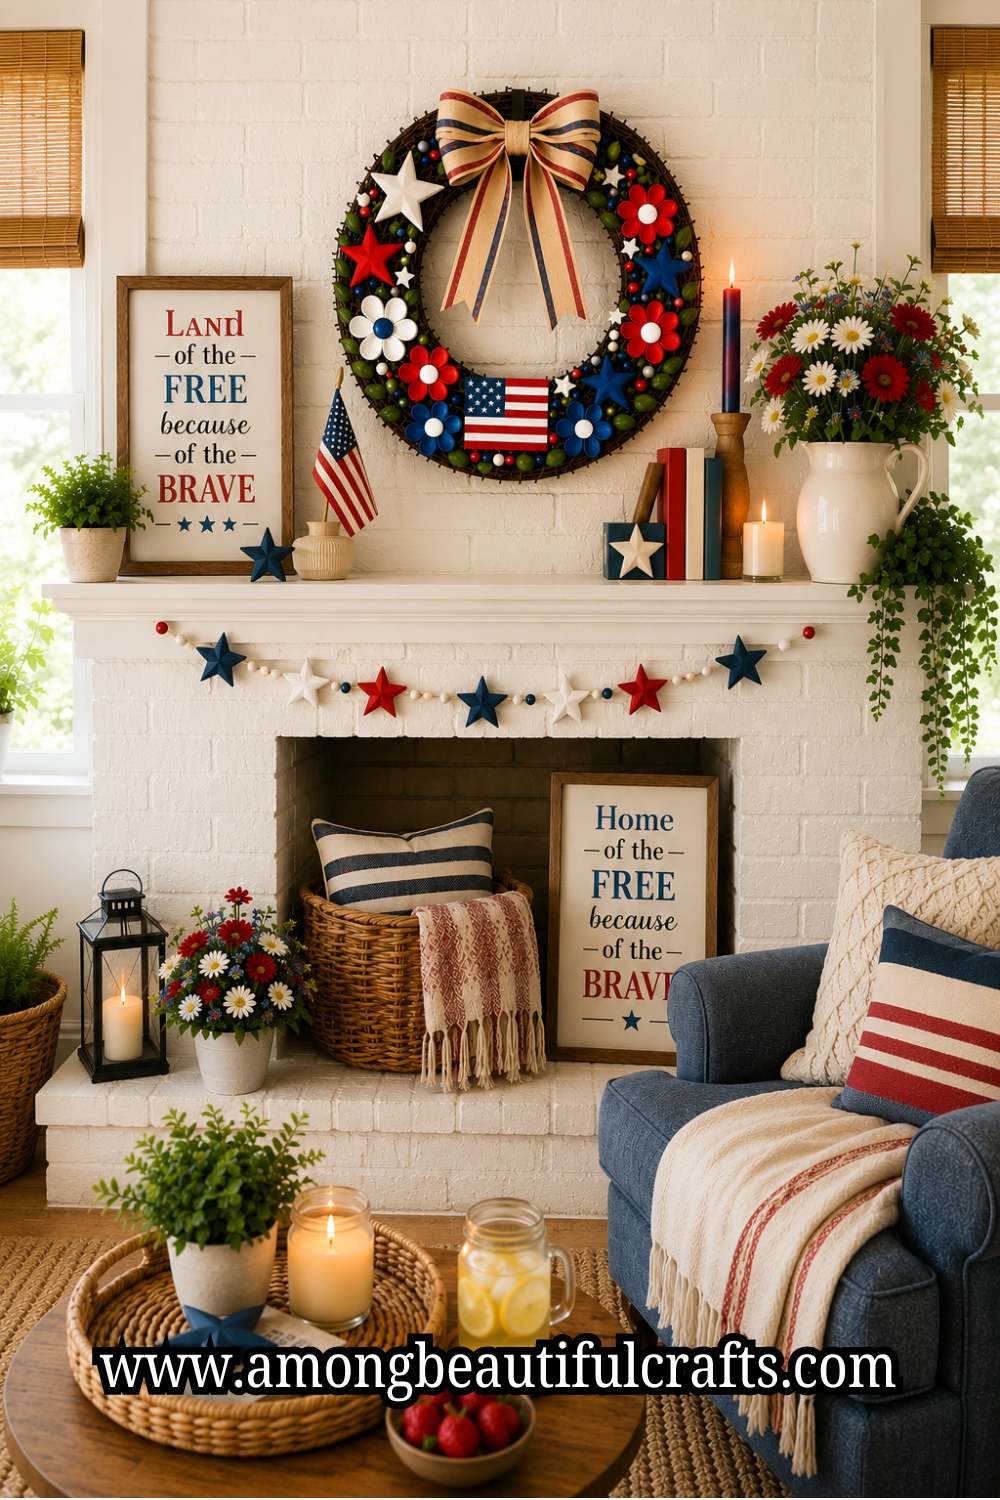
Creating seasonal decorations by hand adds a special touch that store-bought pieces often cannot match. A handmade wreath not only brings personality to your space but also allows you to showcase your creativity. If you enjoy crafting with clay, learning How to Make a Patriotic Clay Wreath can be a fun and rewarding project for the summer season. With classic red, white, and blue colors, this wreath celebrates patriotic holidays while adding charm to your front door, mantel, or gallery wall.

One of the best things about clay crafts is their durability. Unlike fresh floral wreaths that fade over time, a clay wreath can last for many summers when stored properly. Furthermore, clay offers endless design possibilities. You can create stars, flowers, flags, bows, and other festive shapes that reflect your personal style. As a result, every wreath feels unique and completely customized.
This project works well for both beginners and experienced crafters. The techniques remain simple, yet the finished wreath looks detailed and impressive. Moreover, you can adjust the size and decorations to suit your space. Whether you want a bold statement piece for your front door or a smaller decoration for an indoor display, this tutorial will guide you through each step. Follow along to create a patriotic clay wreath that you can proudly display year after year.
For another festive clay decoration that pairs beautifully with this project, check out 17 Fourth of July Clay Crafts That Double as Party Decorations.
Why You’ll Love This Project
This patriotic clay wreath combines durability, creativity, and seasonal charm in one beautiful decoration. Unlike many holiday wreaths, this design can last for years when stored properly. It also allows you to customize every detail, from the colors and shapes to the overall style. Whether you prefer a classic patriotic look or something more playful, this project gives you plenty of creative freedom. Best of all, the finished wreath works for Memorial Day, Independence Day, and the entire summer season.
Skill Level
Beginner to Intermediate
Estimated Time
3 to 4 hours, plus drying time
Supplies You’ll Need
- Air-dry clay or polymer clay
- Wreath form (foam, wire, or wooden)
- Rolling pin
- Clay cutting tools
- Star-shaped cookie cutter
- Acrylic paint in red, white, and blue
- Paintbrushes
- Craft glue
- Clear sealer
- Ribbon for hanging
- Sandpaper (optional)
How to Make a Patriotic Clay Wreath That Lasts Every Summer
Step 1: Plan Your Wreath Design

Before working with the clay, decide how you want the finished wreath to look. Some crafters prefer a design filled with stars, while others enjoy adding flowers, bows, or flag-inspired accents. Sketch a simple layout to help guide the process. This step makes it easier to balance colors and shapes across the wreath. Furthermore, having a plan helps prevent overcrowding and keeps the final design visually appealing.
If you enjoy planning patriotic decorations, 25 Patriotic Paper Craft Ideas For Festive Fourth of July Décor offers additional inspiration for coordinating your holiday display.
Step 2: Prepare and Roll the Clay

Open the clay and knead it until it feels smooth and easy to work with. Then, use a rolling pin to flatten the clay to an even thickness. Try to keep the clay consistent throughout the entire sheet. This helps the pieces dry evenly and creates a more professional appearance. If the clay sticks to your work surface, place parchment paper underneath before rolling.
Crafters who enjoy shaping and sculpting clay may also love 27 Animal Clay Crafts for Kids That Are Cute Beyond Words.
Step 3: Cut Out Decorative Shapes

Use cookie cutters or clay tools to cut stars, flowers, circles, and other decorative elements. Create a variety of sizes to add visual interest to the wreath. In addition, make extra pieces in case some break during the drying process. Lay the shapes on a flat surface and smooth any rough edges with your fingers. The variety of shapes will give the wreath more texture and personality.
Star-shaped decorations fit perfectly with ideas from How to Paint a Fourth of July Canvas Without Artistic Experience, where patriotic stars and festive colors take center stage.
Step 4: Let the Clay Pieces Dry

Arrange all the clay shapes on a flat surface and allow them to dry completely. Drying times vary depending on the type and thickness of the clay. Turn the pieces occasionally if the manufacturer recommends it. Once dry, inspect each shape for rough edges or imperfections. Light sanding can help create a smoother finish. Taking extra time during this step will improve the overall appearance of the finished wreath.
Children who enjoy working with clay often have fun creating projects from 31 Shark Clay Crafts Kids Will Love Making Again and Again.
Step 5: Paint the Clay Decorations

Once the clay pieces have dried completely, begin painting them in patriotic colors. Use red, white, and blue acrylic paint to create a festive look. Some pieces can feature solid colors, while others can include stripes, stars, or simple patterns. Allow the first coat to dry before adding additional layers if needed. Furthermore, varying the designs will make the wreath more visually interesting. As the painted pieces come together, you will start to see the patriotic theme take shape.
For more patriotic color inspiration, explore 23 Red White and Blue Painting Ideas for Your Home This Summer.
Step 6: Seal the Painted Pieces

After the paint dries, apply a clear sealer to protect the decorations. This step helps preserve the colors and adds durability, especially if you plan to display the wreath for several summers. Follow the manufacturer’s instructions and allow the sealer to dry completely. Although this step may seem small, it can significantly extend the life of the finished project. A protective finish also gives the decorations a polished appearance.
Many crafters also seal decorative pieces used in 19 Patriotic Rock Painting Ideas That Are Easy Enough for Kids.
Step 7: Attach the Clay Pieces to the Wreath Form

Arrange the painted decorations on the wreath form before gluing anything into place. Experiment with different layouts until you find a design you like. Try to distribute the colors evenly around the wreath to create balance. Once you are satisfied with the arrangement, attach each piece with strong craft glue. Continue working around the wreath until the surface feels full and cohesive. Taking your time during this step will help create a professional-looking result.
Patriotic wreaths often pair beautifully with How to DIY a Gorgeous Paper Rosette Wreath for July 4th for a layered holiday decorating theme.
Step 8: Add Final Decorative Details

Now it is time to add the finishing touches. Attach a patriotic ribbon to the top of the wreath for hanging. You can also add small clay stars, miniature bows, or other decorative accents to fill any empty spaces. Step back occasionally and view the wreath from a distance. This makes it easier to spot areas that may need additional details. Small adjustments often make a big difference in the final design.
For another handmade patriotic decoration, take a look at How to Make a Patriotic Macramé Wall Hanging for 4th of July.
Finishing Touches
Inspect the entire wreath before displaying it. Make sure every clay piece feels secure and that the colors look balanced throughout the design. If needed, add a few final decorative elements to create a fuller appearance. Once everything is dry and secure, your wreath is ready to display. The combination of clay decorations and patriotic colors creates a festive piece that can return year after year.
Styling Tips

This wreath looks beautiful on a front door, above a mantel, or as part of a gallery wall. You can also use it as a centerpiece by placing it flat on a table with a lantern or candle in the middle. Furthermore, pairing the wreath with matching patriotic decorations can create a cohesive seasonal display. Because the design is durable, it works well throughout the entire summer season rather than only on holiday weekends.
Decorating enthusiasts often combine wreath displays with 13 Fourth of July Resin Tray Ideas for Gorgeous Party Décor for coordinated entertaining spaces.
Common Mistakes to Avoid
One common mistake is making the clay pieces too thin. Thin pieces can crack more easily during drying and handling. Another issue involves overcrowding the wreath with decorations. Leaving a little space between elements often creates a cleaner and more attractive design. In addition, avoid painting before the clay dries completely. Rushing the process can affect both the appearance and durability of the finished project.
Final Thoughts
Learning How to Make a Patriotic Clay Wreath is a rewarding way to create a decoration that combines creativity with seasonal style. Instead of purchasing a wreath that looks like everyone else’s, you can design a piece that reflects your personality and crafting skills. Moreover, the combination of handmade clay decorations and patriotic colors creates a festive display that stands out throughout the summer season. The finished wreath feels both meaningful and decorative because every element has been crafted by hand.
Another reason this project is worth trying is its versatility. You can keep the design simple with a few stars and patriotic accents, or create a more detailed wreath filled with flowers, bows, and flag-inspired elements. Furthermore, you can adjust the size, colors, and arrangement to complement your existing décor. Because clay offers so many creative possibilities, no two wreaths will ever look exactly alike. That flexibility makes this project enjoyable for both beginners and experienced crafters.
If you enjoy working with clay for meaningful handmade gifts and decorations, How to Make a Clay Father’s Day Gift That Looks Thoughtful provides another creative project to explore.
Once your wreath is complete, you can proudly display it year after year as part of your summer decorating tradition. With proper storage and care, the clay decorations can remain beautiful for many seasons. In addition, the wreath can become a centerpiece for family gatherings, holiday celebrations, and patriotic events. Best of all, How to Make a Patriotic Clay Wreath is more than a simple craft project. It is an opportunity to create a lasting decoration that celebrates creativity, craftsmanship, and the spirit of summer in a truly personal way.