Imagine pouring liquid color onto a surface and watching it turn into something beautiful. The colors blend and flow into pretty patterns that look like they took a lot of skill to make.
That is exactly what resin art feels like every single time; super fun and a little bit magical. Making your very first resin art piece may sound scary at first.
But do not worry; it is much easier than it looks. This post will walk you through everything step by step, so you can follow along without any confusion.
Resin art has exploded in popularity over the last few years for very good reason. Artists, crafters, and hobbyists around the world are completely obsessed with it right now. The finished results look incredibly professional, expensive, and honestly a little unbelievable.
People use resin to make jewelry, coasters, trays, wall art, and so much more. Furthermore, each piece is totally unique because resin moves differently every single time you pour it. No two resin pieces ever look exactly alike; and that is part of the thrill.
The biggest worry most beginners have is making a giant sticky mess everywhere. Resin can indeed get messy if you are not properly prepared and set up correctly.
However, the right workspace setup makes everything dramatically cleaner and far less stressful.
Additionally, once you understand a few golden rules before starting, accidents become rare and manageable. So do not let the fear of mess stop you from trying this incredible art form today.
By the end of this post, you will feel completely ready and genuinely excited to begin.
What Exactly Is Resin?
Before jumping into the process, it helps to understand what resin actually is. Resin is a two-part liquid material that hardens into a solid, glossy finish. Part A is the resin itself, and Part B is called the hardener or catalyst. Mixing these two parts together triggers a chemical reaction called curing.
Consequently, the liquid slowly transforms into a hard, glass-like solid over time. Therefore, getting the mixing ratio exactly right is absolutely critical for good results.
Epoxy resin is the most popular and beginner-friendly type widely available today. It is clear, pourable, and produces a beautifully shiny, smooth finish when cured. Additionally, UV resin is another option that hardens quickly under ultraviolet light instead.
However, epoxy resin gives beginners far more working time and better results overall. So for your very first project, always choose a beginner-grade epoxy resin kit. Most kits come with both parts, instructions, and sometimes even basic mixing tools included.
For anyone who enjoys creating with different materials, 25 Easy Art Projects for Kids That Look Amazing on Pinterest shows how simple techniques can produce surprisingly impressive results.
Safety First; This Part Is Non-Negotiable
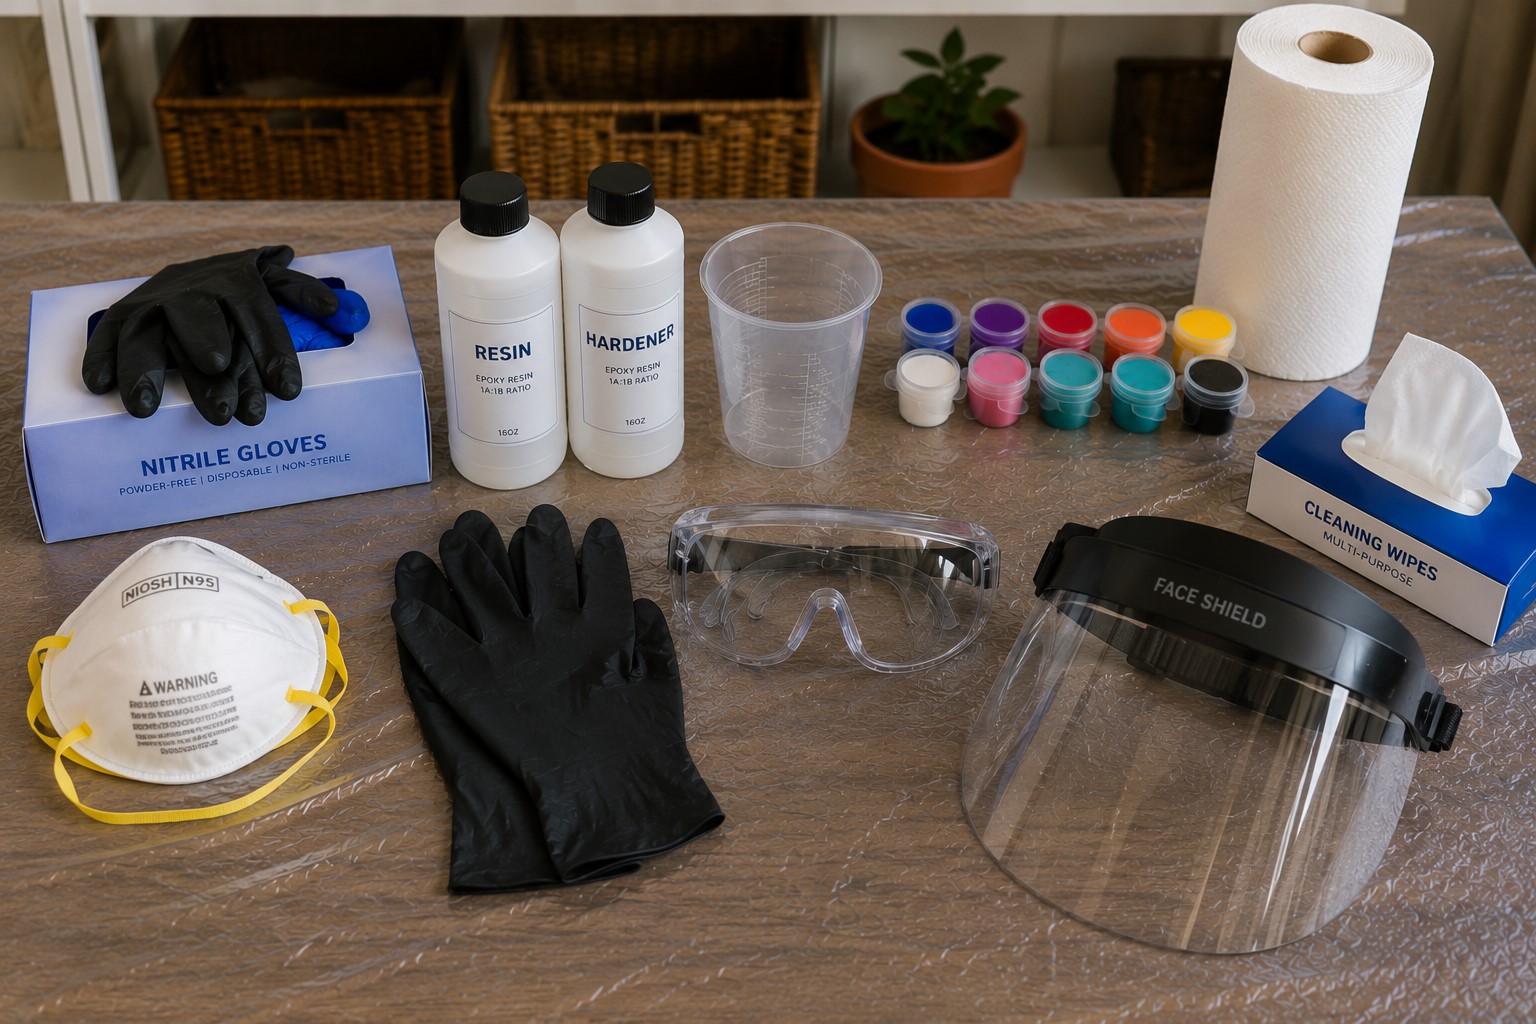
Resin is a chemical, and that means safety must always come before creativity. Never skip protective gear no matter how excited or impatient you feel inside. Here is exactly what you must wear and use every single time you work:
- Nitrile gloves: resin sticks to skin and can cause irritation over time.
- Safety glasses: protect your eyes from accidental splashes always.
- An apron or old clothes: resin stains are completely permanent on fabric.
- A respirator mask: especially important in poorly ventilated spaces indoors.
- A well-ventilated workspace: open windows and doors or work outside ideally.
Furthermore, keep resin completely away from children and pets at all times. Uncured resin is toxic and must never be touched with bare hands directly. Additionally, never pour liquid resin down any sink or drain in your home.
Dispose of mixing cups and sticks by letting them cure fully before binning them. Therefore, treating resin with respect from day one builds safe and lasting crafting habits.
Many crafters who start with resin also enjoy working with natural materials in projects like 15 Beautiful Things You Can Make With Seashells, where simple supplies become beautiful keepsakes.
Setting Up Your Workspace the Smart Way
A well-prepared workspace is the real secret behind a clean resin experience. Most beginners skip this step and then wonder why everything turns into chaos.
Consequently, spending ten minutes setting up properly saves hours of frustrated cleaning afterward. Here is how to set your space up correctly before opening a single bottle.
First, cover your entire work surface with a silicone mat or a thick plastic sheet. Resin does not stick to silicone, which makes cleanup incredibly fast and easy. Additionally, lay old newspapers or a plastic drop cloth underneath your mat as backup.
Next, gather all your tools and materials before mixing anything at all. Having everything within arm’s reach means you never have to rush or scramble mid-pour. Moreover, rushing during a resin pour almost always leads to spills, bubbles, and mistakes.
Level your work surface using a small spirit level before you do anything else. Resin is liquid and will always flow toward the lowest point on a tilted surface.
Therefore, an uneven surface means uneven resin, which ruins the final piece completely. Furthermore, work in a room with a temperature between 21 and 24 degrees Celsius ideally.
Cold temperatures slow curing dramatically and cause resin to become cloudy and thick. Warm rooms produce clearer, smoother, and more beautifully finished resin pieces overall.
Creative hobbies often overlap, and many people who enjoy experimenting with resin eventually explore 21 Creative Ways to Use Dried Flowers in Your Home Décor, where preserved natural elements become decorative accents around the home.
Everything You Need for Your First Project
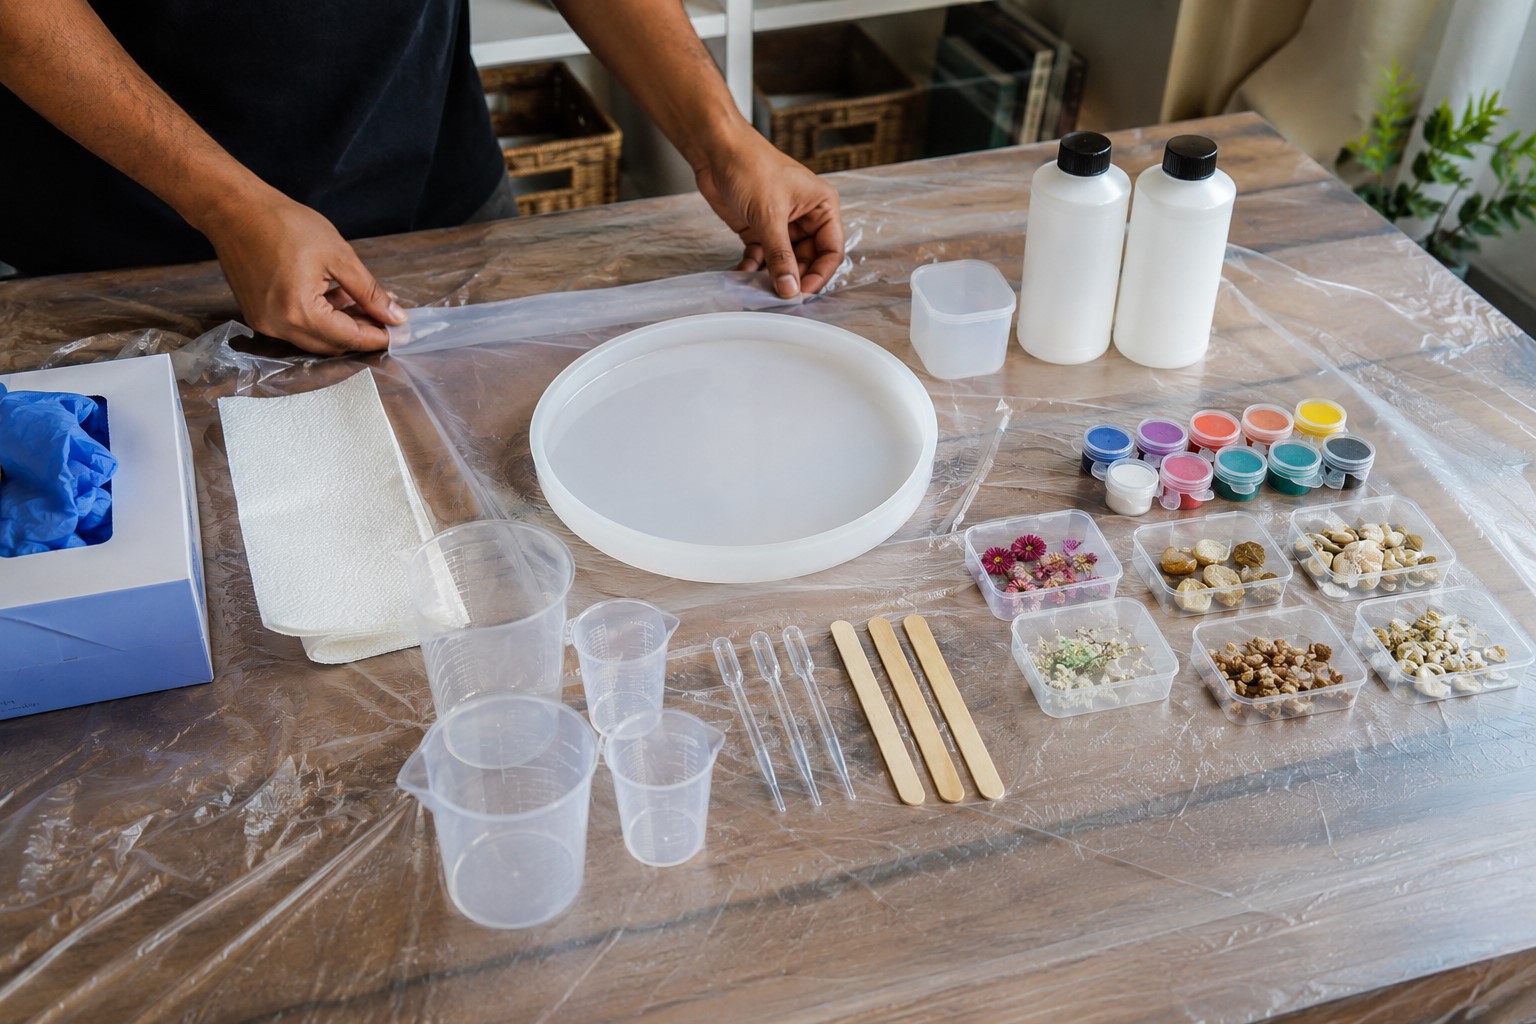
Gathering the right supplies makes how to make your first resin art piece feel effortless. Here is a simple and complete shopping list for a perfect beginner setup:
- Beginner epoxy resin kit (1:1 mixing ratio is easiest for newcomers).
- Two measuring cups with clear milliliter markings on the side.
- Several wooden stir sticks or silicone spatulas for mixing.
- Silicone moulds in simple shapes like circles, squares, or rectangles.
- Resin pigment powders or alcohol inks for color (start with two or three colors).
- A kitchen torch or lighter for popping surface bubbles after pouring.
- Tweezers for placing inclusions like glitter, dried flowers, or foil.
- Isopropyl alcohol for cleaning tools and accidental spills quickly.
Additionally, plastic cups, toothpicks, and extra gloves are always worth having nearby. Furthermore, a dust cover like a cardboard box placed over curing pieces prevents dust from settling.
Dust that lands on wet resin gets permanently trapped inside as it cures hard. Therefore, always cover your poured pieces within the first few minutes after pouring.
How to Make Your First Resin Art Piece; Step by Step
Now comes the moment you have been waiting for; actually making something beautiful! Follow these steps carefully and your first piece will turn out stunning.
Step 1: Measure Your Resin Precisely
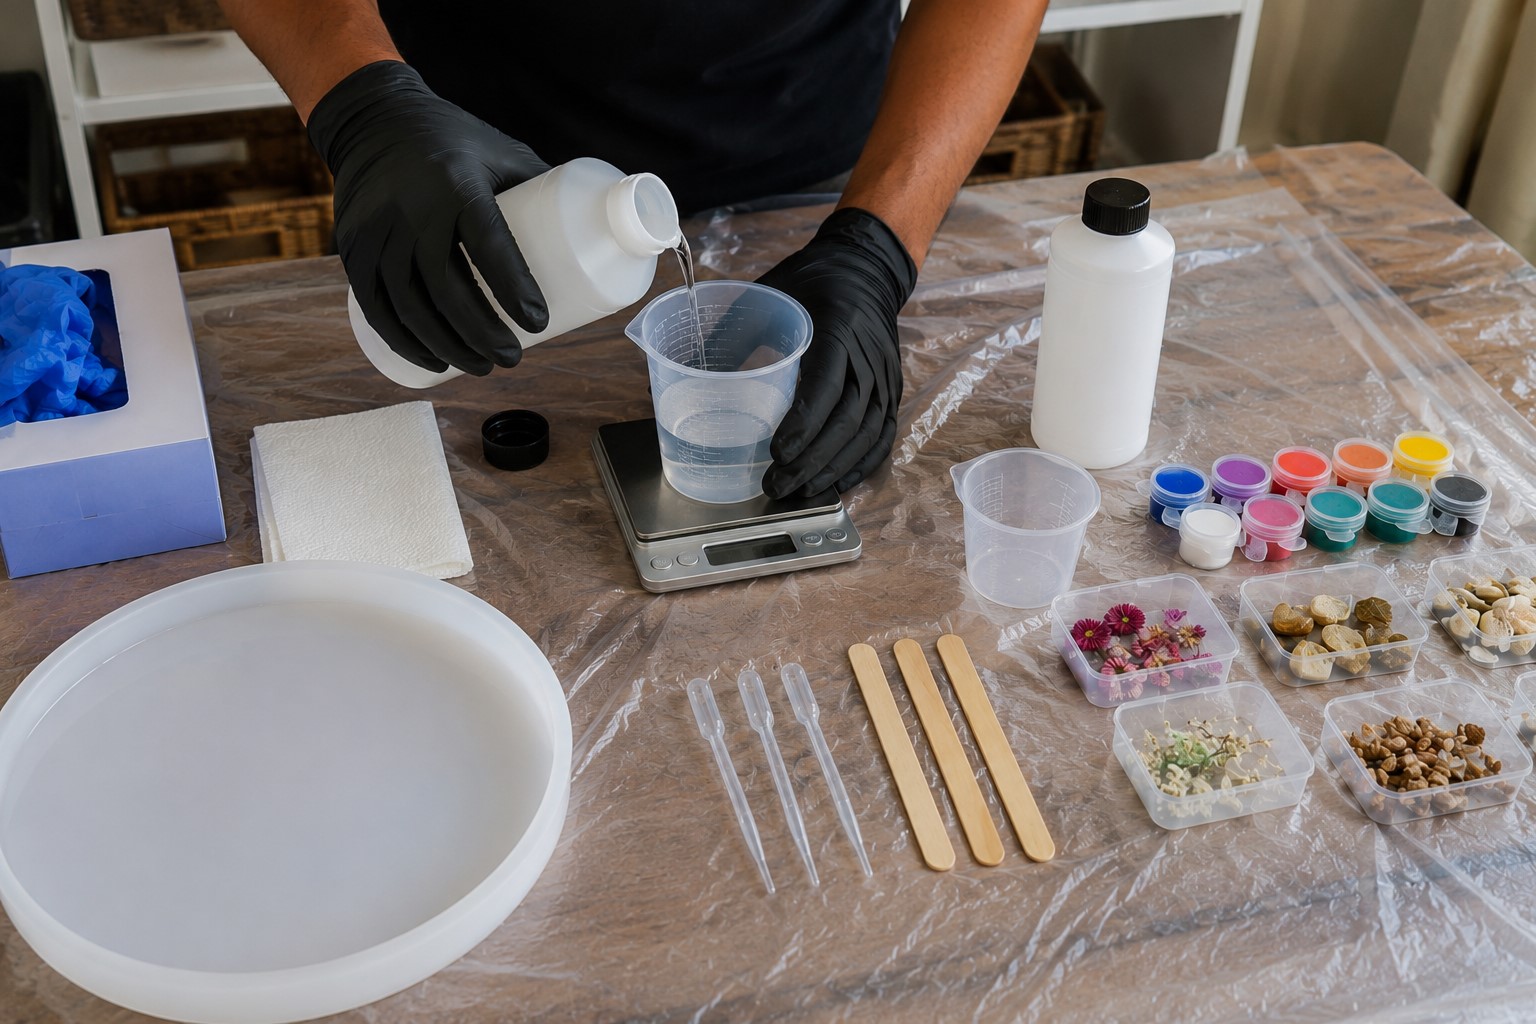
Pour equal amounts of Part A and Part B into two separate measuring cups first. Most beginner resins use a simple 1:1 ratio by volume, not by weight. Check your specific kit instructions to confirm the exact ratio required beforehand.
Getting this ratio wrong is the single most common mistake beginners make repeatedly. Therefore, use marked measuring cups and take your time being accurate here.
Step 2: Mix Slowly and Thoroughly
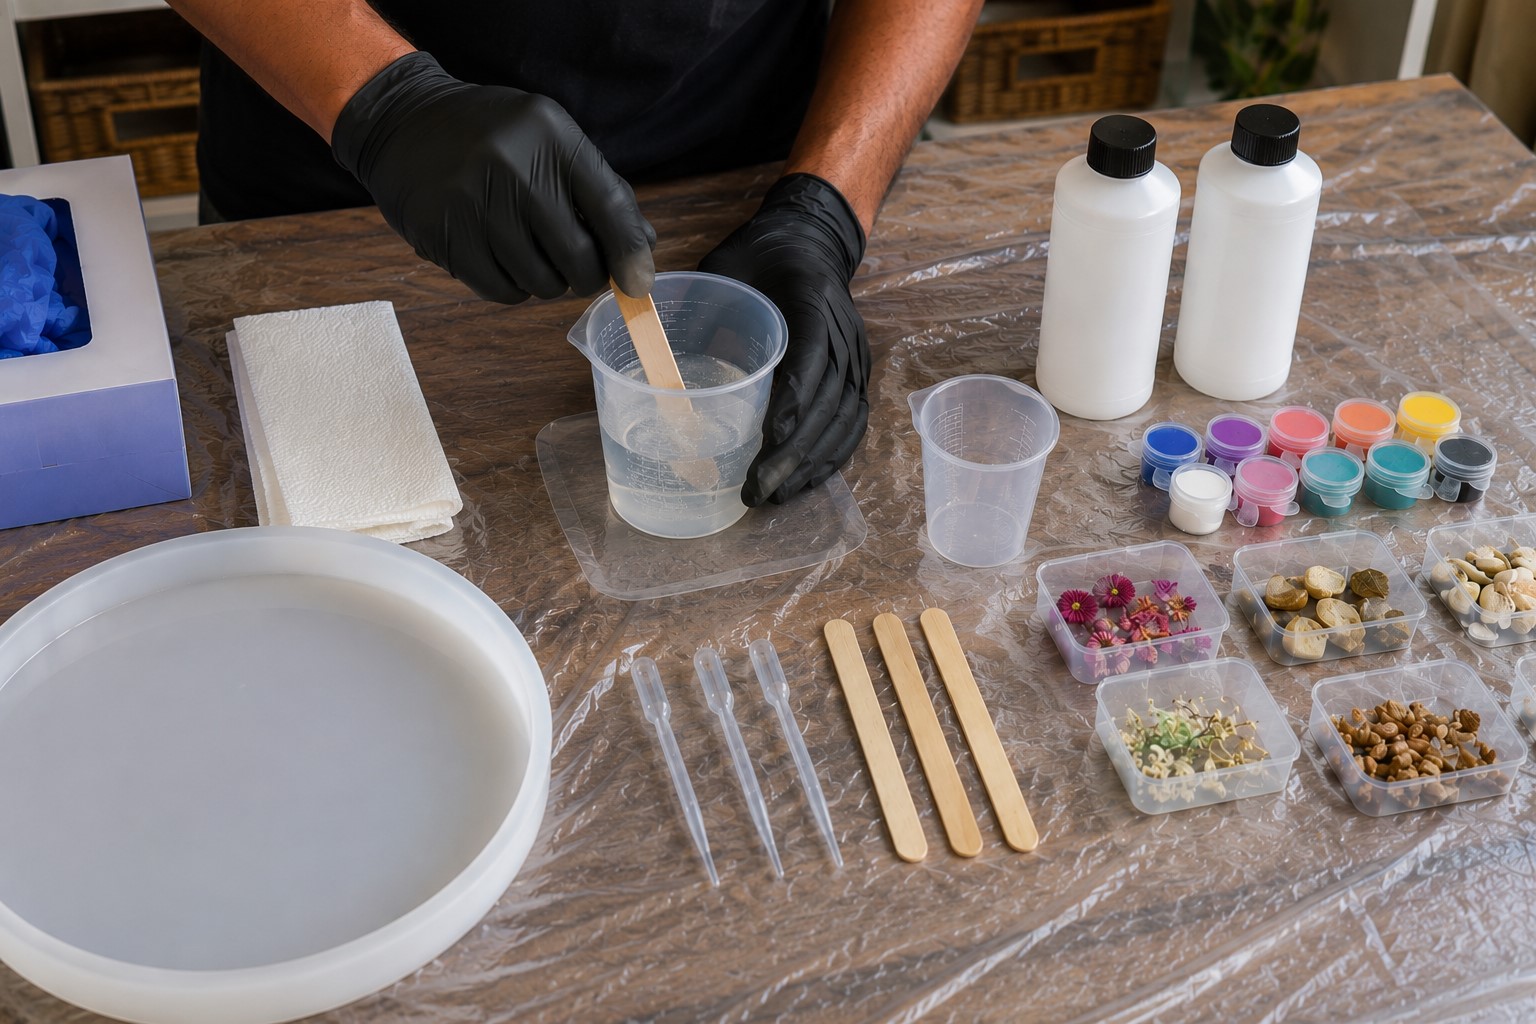
Pour both parts into one larger cup and begin stirring slowly and deliberately. Stir for a full three to four minutes without rushing or cutting corners at all. Scrape the sides and bottom of the cup regularly while you stir throughout.
Furthermore, slow stirring introduces far fewer bubbles than fast, aggressive mixing does. However, some bubbles are completely normal and totally fixable in the next step ahead. Cloudy resin after mixing is fine; it clears up beautifully as curing begins.
Step 3: Add Your Colors
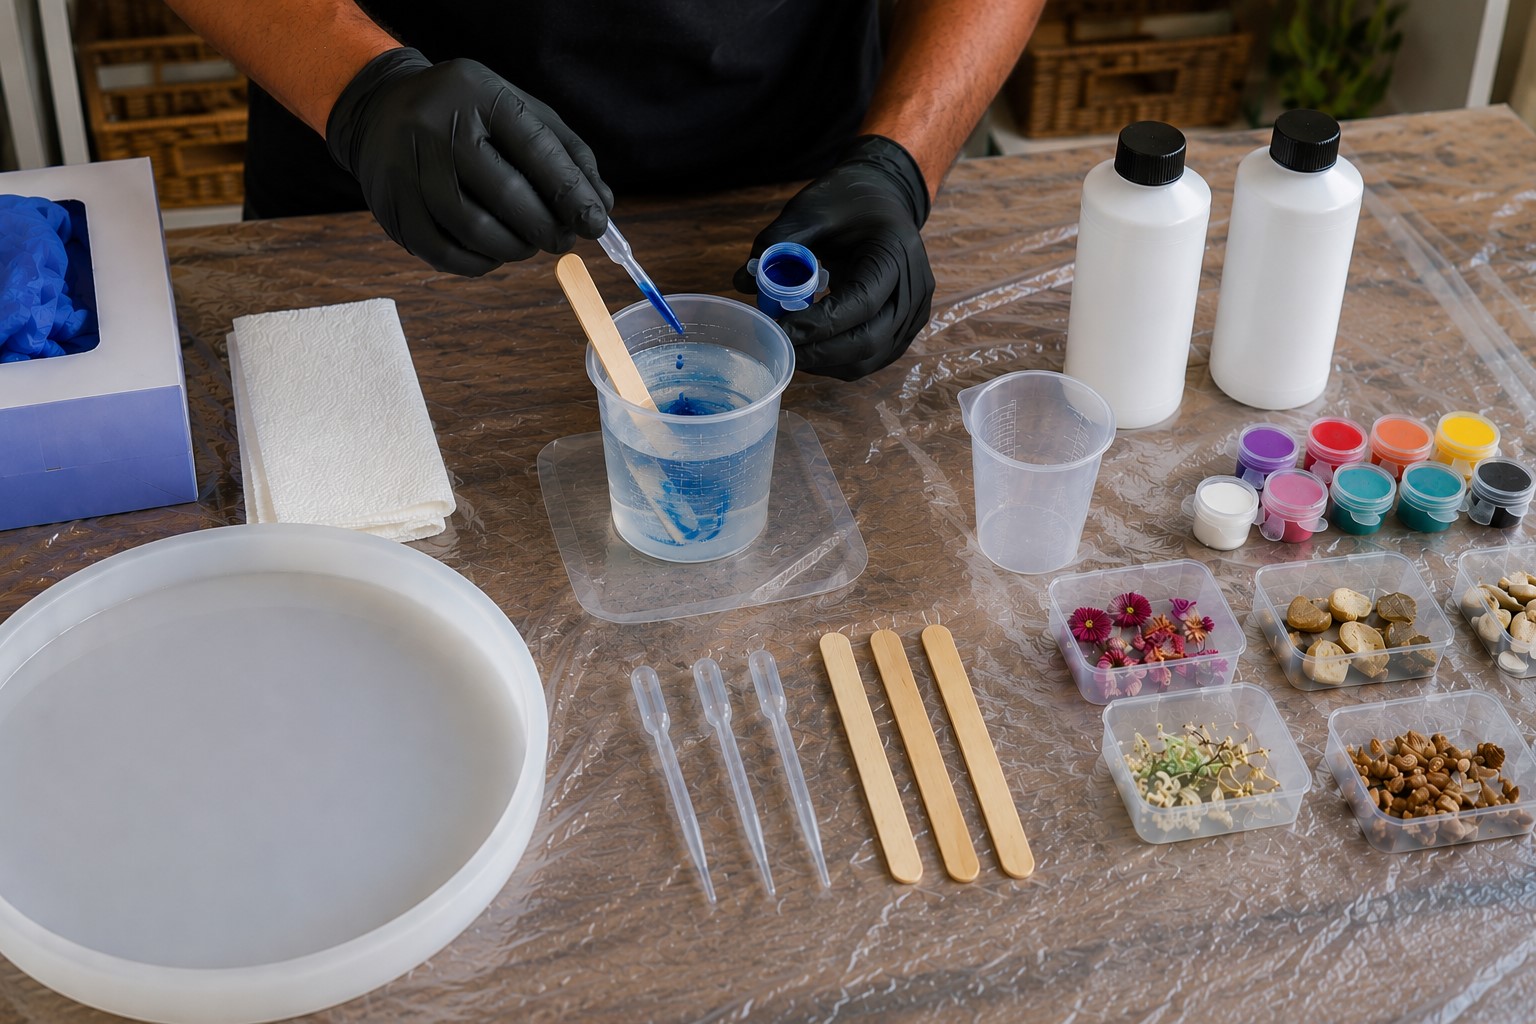
Now the truly fun part of how to make your first resin art piece begins! Add a small amount of alcohol ink or pigment powder to your mixed resin. Start with just a tiny amount because a little color goes an incredibly long way.
Additionally, divide your resin into separate small cups to create multiple different colors. Then pour each color into your mould separately for a swirled, layered effect.
Moreover, use a toothpick to gently drag colors together for stunning marble-like patterns.
Color experimentation is one reason creative people often enjoy 23 Finger Painting Ideas for Kids That Spark Big Creativity, where blending colors and exploring different effects is part of the fun.
Step 4: Pour Into Your Mould
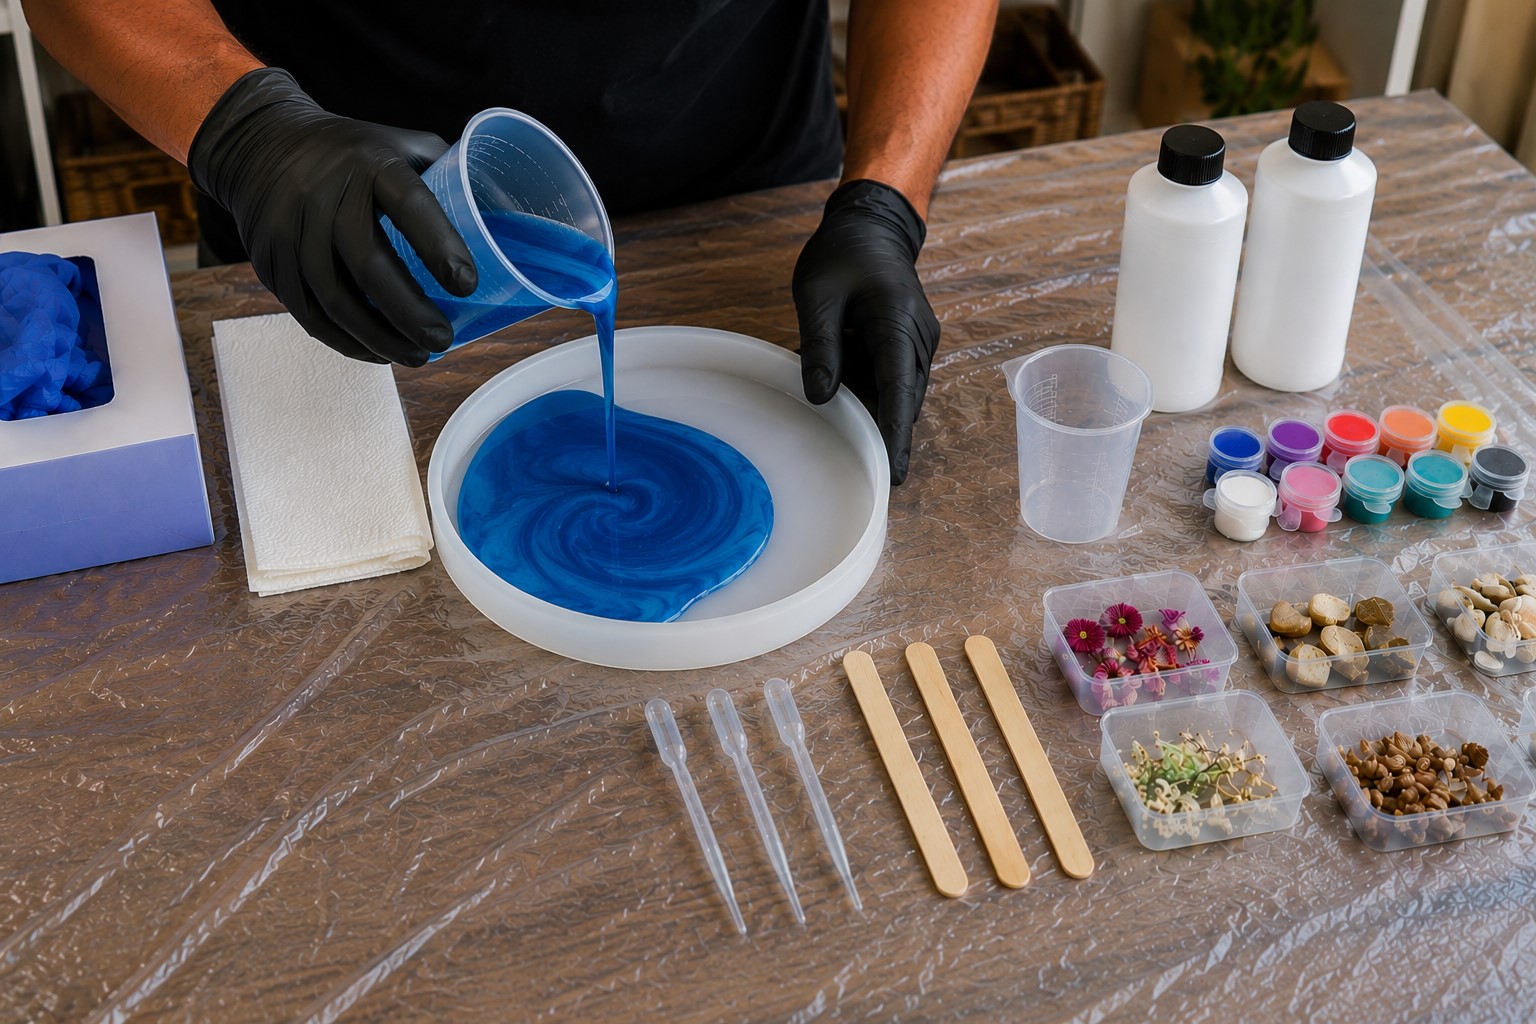
Pour your colored resin slowly and steadily into your chosen silicone mould now. Tilt the mould gently from side to side to help the resin spread evenly inside.
Furthermore, tap the mould firmly on your work surface to release any trapped air bubbles. Then use your kitchen torch held about 15 centimeters above the surface carefully.
Move the torch in slow, smooth circles over the resin for just two to three seconds. Consequently, the heat pops surface bubbles and leaves a gorgeously smooth, glass-like finish behind.
Step 5: Add Inclusions and Cover
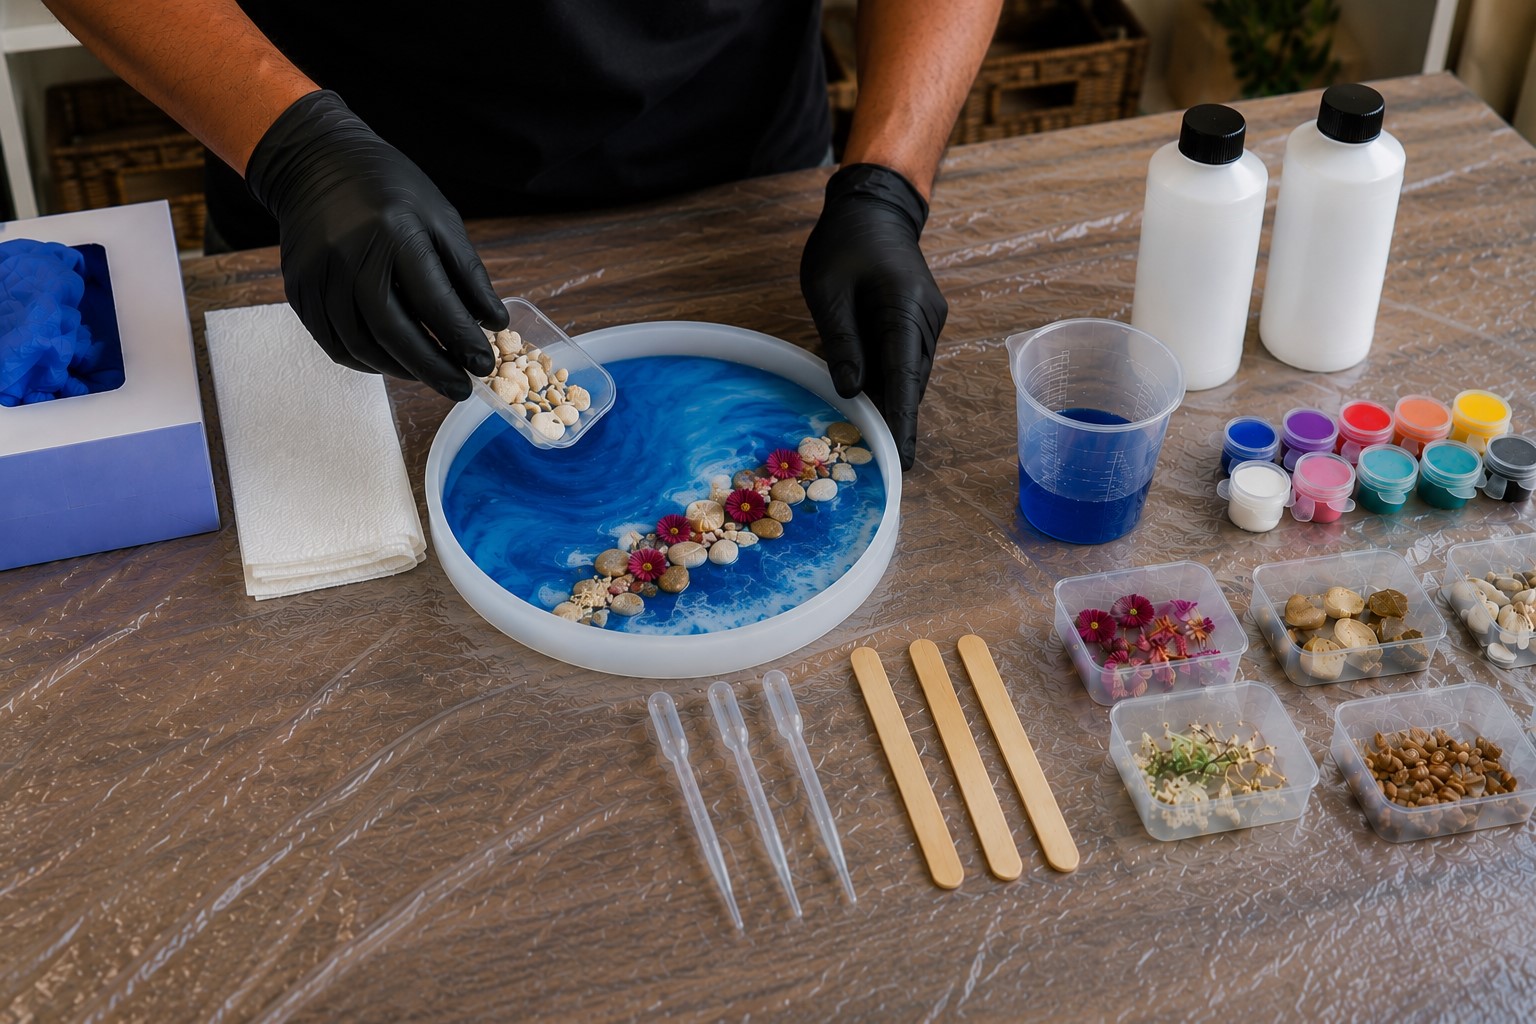
Now is the time to add any special touches to your piece before it sets. Use tweezers to gently place dried flowers, glitter, gold leaf, or shells inside.
Press them slightly below the surface so they do not stick up above the resin. After that, immediately cover your mould with a cardboard box or plastic container lid.
Leave everything completely undisturbed on your level surface for 24 to 48 hours. Therefore, patience during this curing window is absolutely essential for a perfect result.
Pressed flowers are especially popular in resin projects, which is why many beginners also enjoy 19 Stunning Pressed Flower Projects You Can Start Today for additional inspiration.
Step 6: Demould Your Finished Piece
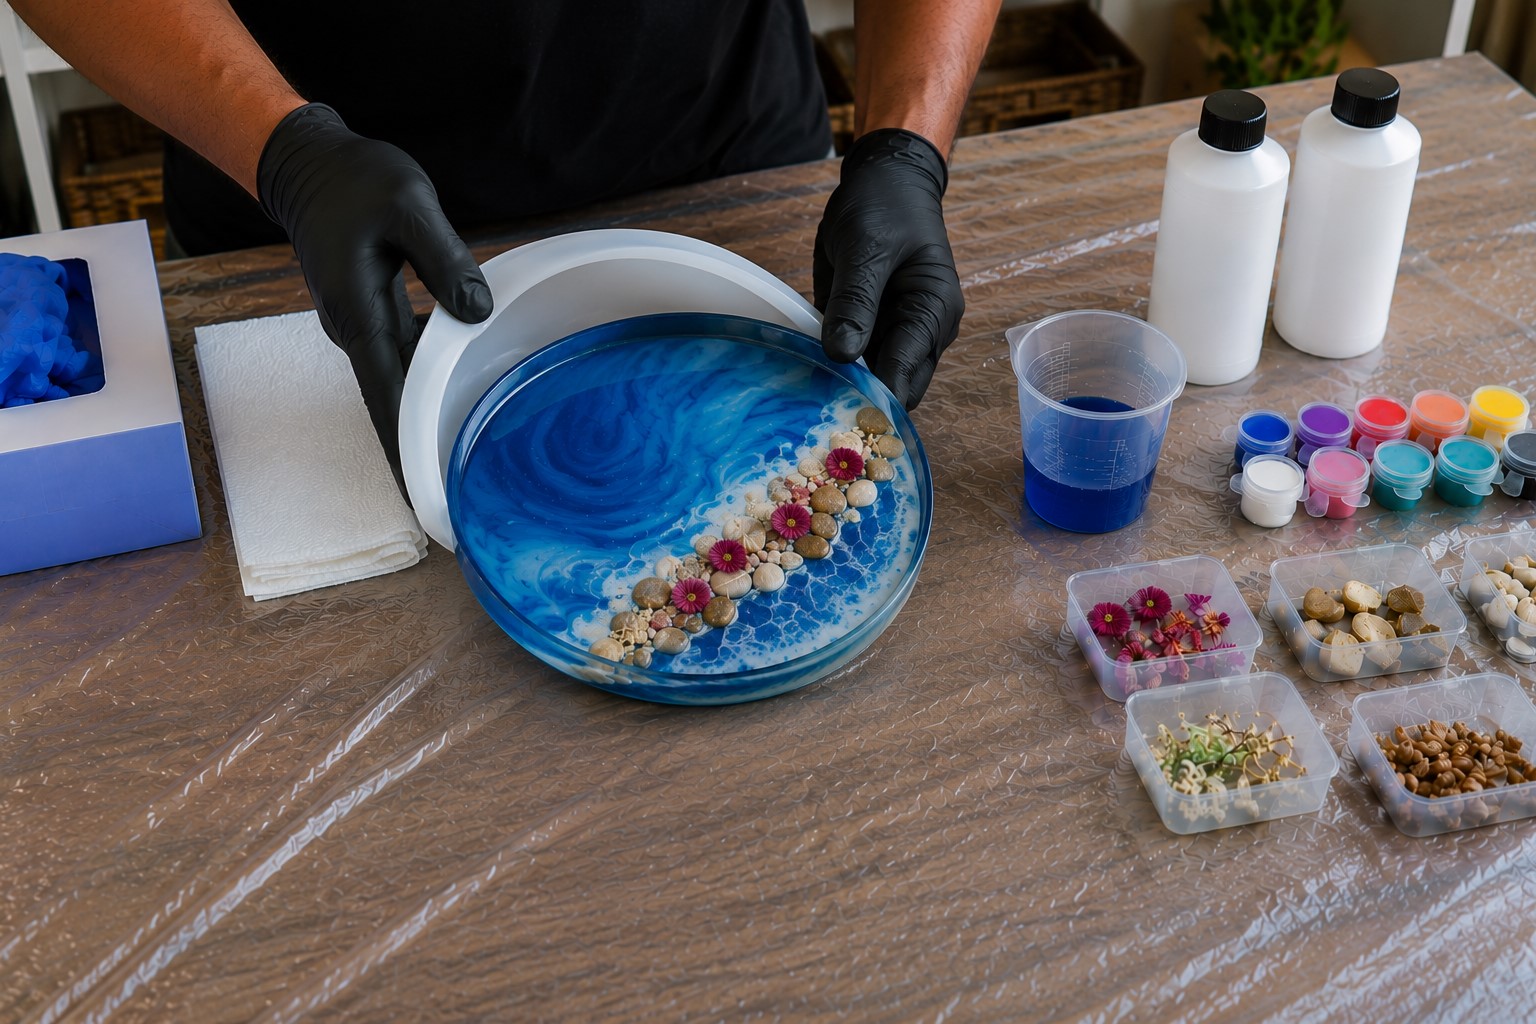
After 48 hours, your resin should be fully hard and ready to remove from the mould. Gently flex the silicone mould from the edges inward to release the piece slowly.
Never force or yank the piece out before it is completely and fully cured hard. Furthermore, if the piece still feels slightly tacky, leave it for another 24 hours before trying again.
Once out, your finished piece will have a stunning, professional-looking glossy surface. Additionally, you can sand the edges lightly with fine sandpaper for a perfectly smooth finish.
Common Mistakes and How to Avoid Every Single One
Even with great preparation, beginners still hit a few common stumbling blocks early on. Knowing about these mistakes in advance means you can sidestep them completely and confidently.
- Sticky or soft resin: almost always means the two parts were not measured accurately enough. Therefore, always use proper measuring cups rather than estimating by eye or guessing amounts.
- Cloudy or yellowed resin: usually results from working in a cold room or using old resin. Consequently, always work in a warm space and check your resin’s expiry date beforehand.
- Bubbles that won’t pop: happen when resin is mixed too fast or poured too thickly at once. Furthermore, warming your resin bottles slightly in warm water before mixing reduces bubble formation significantly.
- Resin not releasing from the mould: usually means the piece has not fully cured yet inside. Additionally, using a non-silicone mould without a release spray causes this problem very frequently. Therefore, always use proper silicone moulds or apply a mould release spray beforehand every time.
Tips for Your First Few Projects
Starting simple builds confidence and helps you understand how resin behaves naturally. Coasters are genuinely the best first project for any brand new resin beginner.
They are flat, simple, and incredibly useful once finished and fully cured hard.
Furthermore, small pendants and keyrings are quick to make and use very little resin overall. Additionally, paperweights with dried flowers suspended inside look breathtakingly professional and beautiful.
People who enjoy preserving flowers inside crafts often find How to Press Flowers at Home Without Them Turning Brown especially useful before working with floral resin projects.
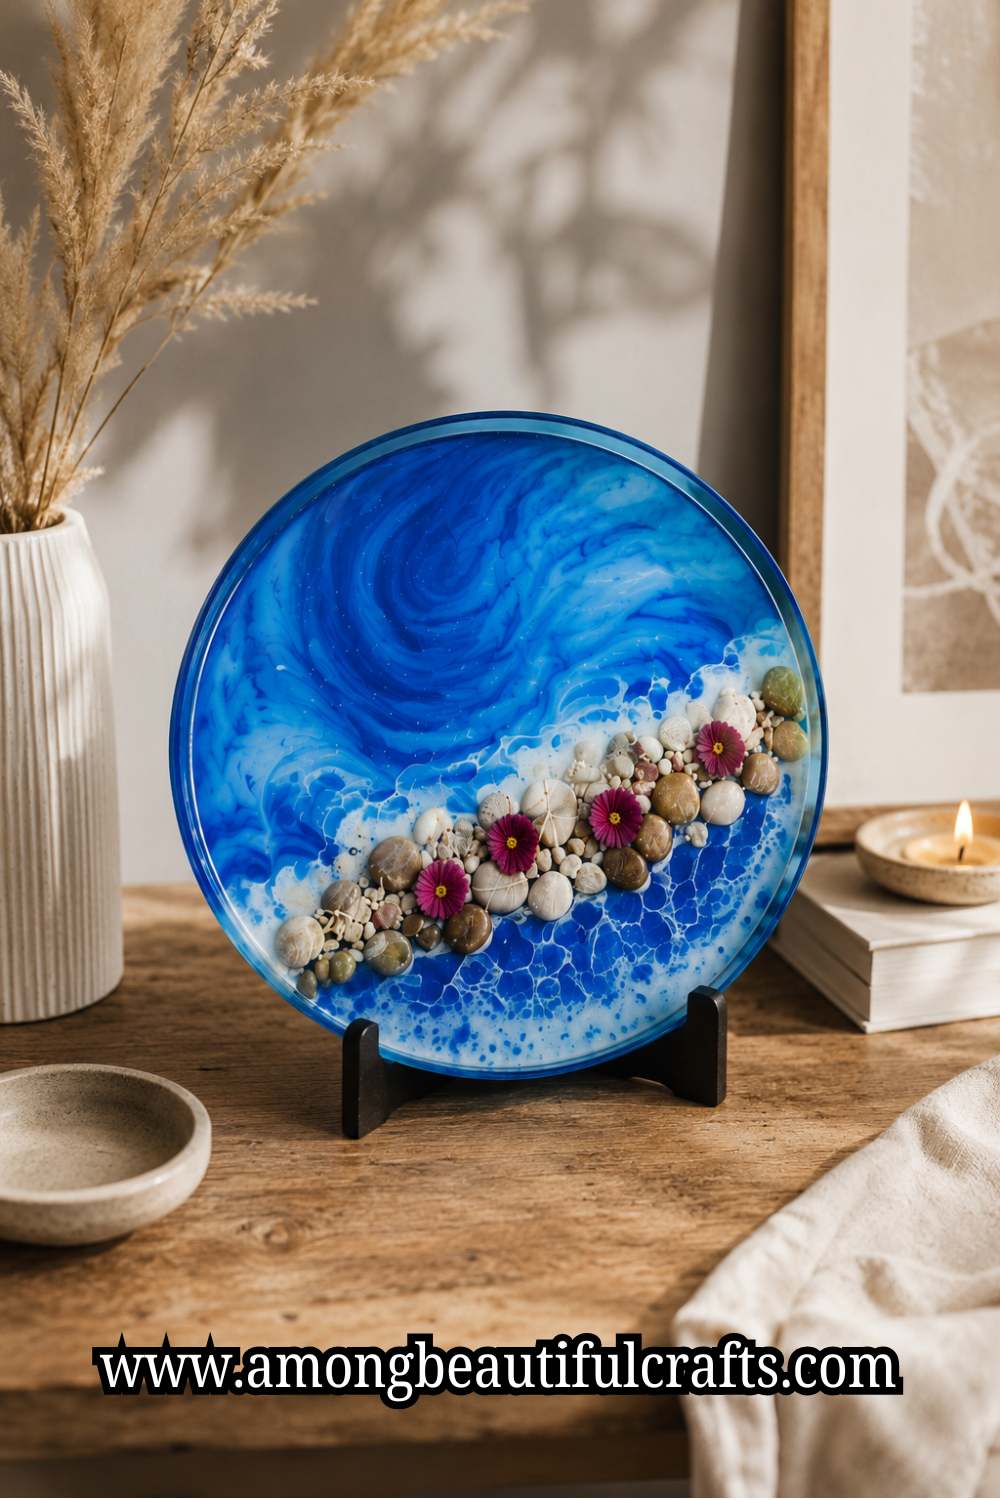
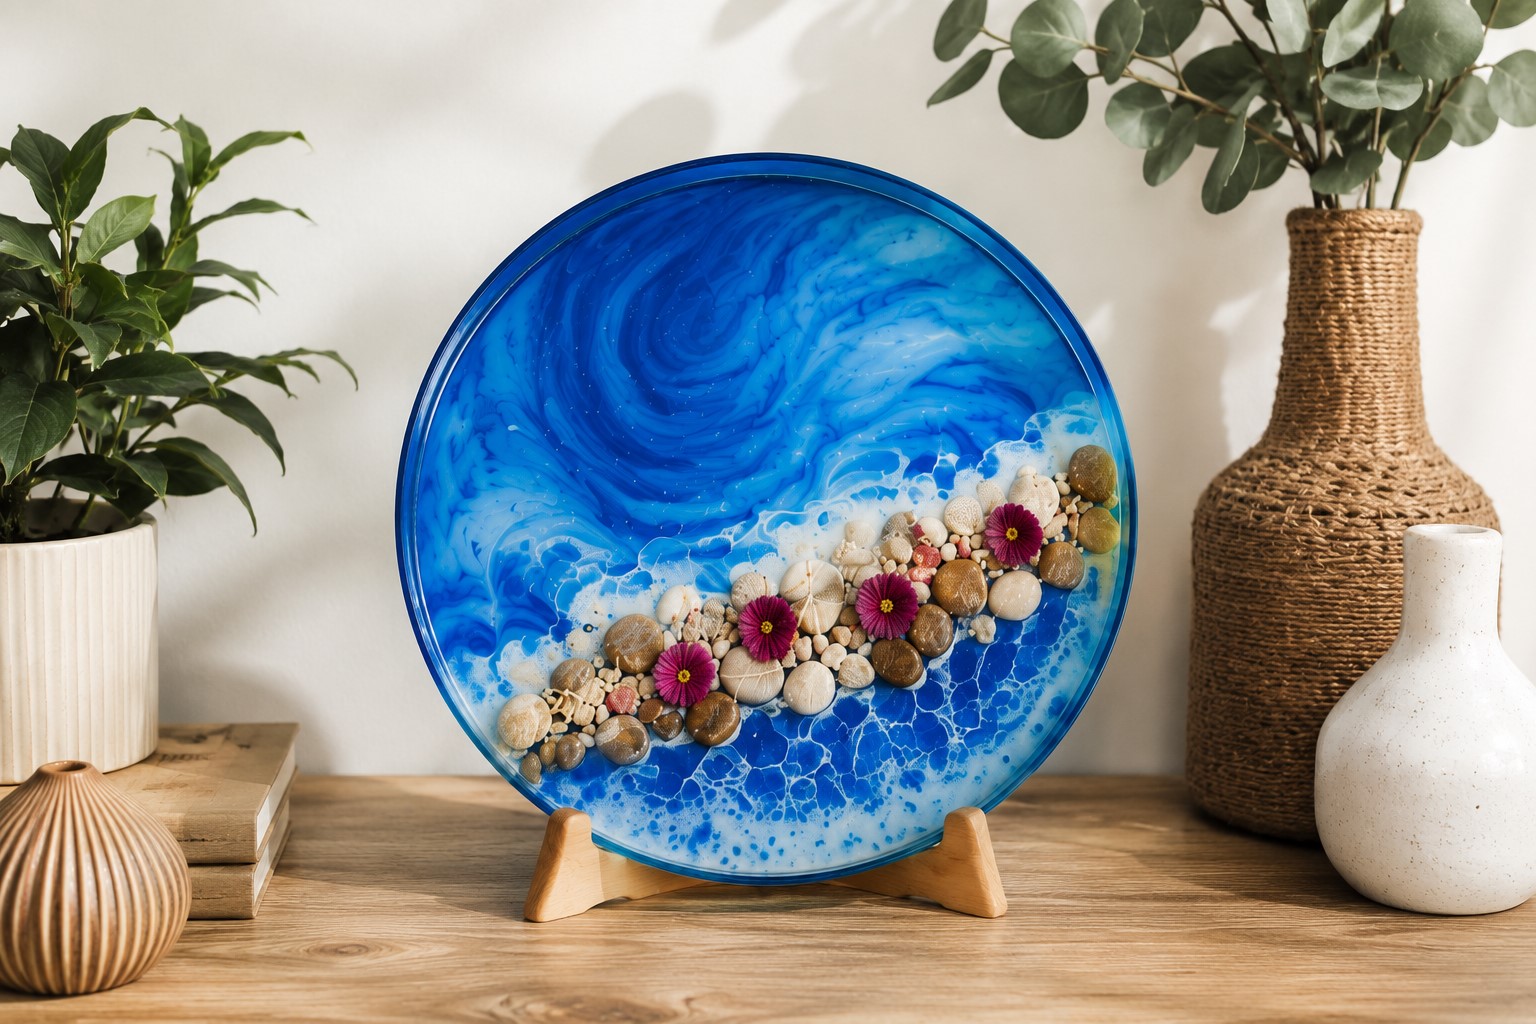
Once you feel comfortable, try pouring resin onto a canvas for fluid abstract wall art. This is where knowing how to make your first resin art piece really pays off creatively.
You can create ocean wave effects using blue and white pigments swirled together carefully. Moreover, geode-style pieces using glitter and metallic powders look absolutely jaw-dropping when finished.
Therefore, every project you complete teaches you something new and builds your skill level higher. Above all, keep experimenting fearlessly because every single pour makes you better than before.
Creative confidence grows through practice, which is also the idea behind 19 Easy Nature Crafts for Kids That Turn Outdoor Finds Into Art, where simple materials become unique creations.
Cleaning Up the Right Way
Cleaning up properly after a resin session keeps your workspace safe and ready for next time. Wipe uncured resin from tools immediately using paper towels and isopropyl alcohol.
Furthermore, silicone mats and tools can be cleaned easily once any leftover resin has fully cured. Simply peel cured resin off silicone surfaces; it comes away cleanly and satisfyingly every time.
Additionally, pour any leftover mixed resin into a silicone mould rather than wasting it unnecessarily. Consequently, you end up with extra practice pieces and absolutely zero wasted material at all.
Dispose of used gloves and paper towels in a sealed plastic bag before binning them. Never wash resin-covered items directly in your kitchen or bathroom sink at all.
Moreover, store your resin bottles tightly sealed in a cool, dark cupboard between sessions. Heat and sunlight degrade resin quality surprisingly quickly over a short period of time.
Therefore, proper storage means your resin stays usable and high quality for much longer overall.
Many crafters eventually expand into other hands-on projects such as 27 Animal Clay Crafts for Kids That Are Cute Beyond Words, where simple materials are transformed into creative handmade pieces.
You Are More Ready Than You Think
Resin art looks complicated from the outside, but the process is genuinely straightforward inside. Every single step of how to make your first resin art piece is completely learnable.
Nobody produces a perfect piece on their very first attempt; and that is absolutely fine. Moreover, the so-called mistakes often create the most interesting and unexpected results anyway.
Therefore, approach your first pour with curiosity, not pressure, and enjoy every single moment.
Go slowly, stay safe, and trust the process completely from start to finish. Above all, remember that every expert resin artist was once a nervous beginner too. Your first piece will not be perfect; but it will be yours, and that makes it priceless.
For anyone looking for another inexpensive creative outlet after learning resin, 29 Toilet Paper Roll Crafts for Kids That Are Surprisingly Cute shows how everyday household items can become surprisingly impressive projects.
