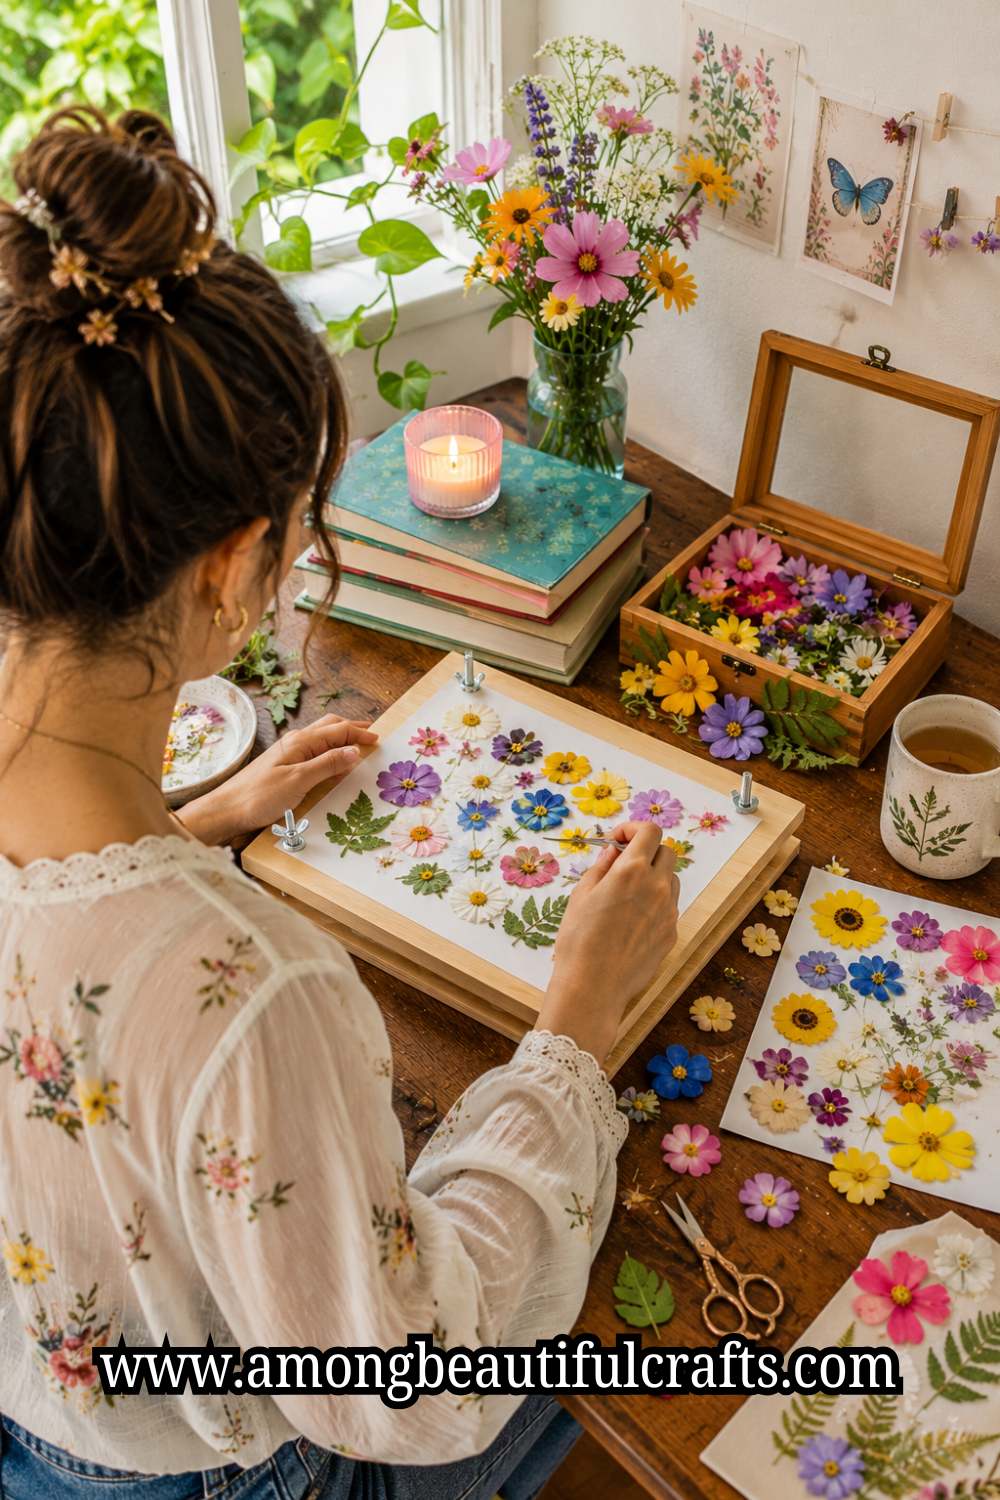
Have you ever picked a pretty flower and wished it would never fade away? You actually can make that happen! Learning how to press flowers is one of the easiest and most fun crafts you will ever try. You do not need any special skills or expensive tools to get started. All you need is a flower, some heavy books, and a little patience. Whether it is a rose from a birthday bouquet or a wildflower you found on a walk, this guide will show you exactly how to keep it beautiful forever.

Furthermore, pressing flowers at home is a wonderful activity for the whole family. Kids love collecting blooms from the garden on a sunny afternoon. Parents enjoy the quiet, calming steps of the pressing process together. Teachers even use it as a science and art project in classrooms worldwide. Above all, the results are absolutely stunning every single time. So let us get started and turn those petals into something truly extraordinary.
What Flowers Work Best for Pressing
Not every flower presses equally well, and that is important to know. Flat, thin flowers always give the best and most beautiful results. Pansies are an absolutely perfect choice for total beginners starting out. Daisies, violets, Queen Anne’s lace, and ferns also press wonderfully every time. Furthermore, small wildflowers from parks or meadows tend to work extremely well too.
Nature lovers who enjoy collecting flowers often also enjoy 19 Easy Nature Crafts for Kids That Turn Outdoor Finds Into Art, where leaves, sticks, stones, and flowers become creative projects.
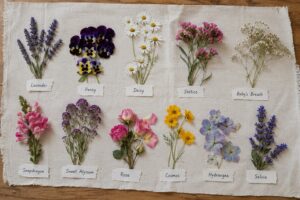
Thick flowers are trickier because moisture gets trapped inside their petals. Roses, for instance, have beautiful petals but a very bulky center. However, you can still press rose petals individually rather than the whole flower. Simply pull the petals apart and press each one separately on paper. As a result, you still get that gorgeous rose color without the thickness problem.
Also, always pick flowers at their freshest and most open stage. Wilted or half-dead blooms will not press cleanly or look good afterward. Additionally, pick them on a dry day rather than after rain or morning dew. Wet petals carry too much moisture and will turn brown and mouldy quickly. Therefore, a sunny mid-morning is truly the perfect time to go flower picking.
Decorating with preserved blooms later becomes much easier after exploring 21 Creative Ways to Use Dried Flowers in Your Home Décor, which is filled with ideas for displaying natural materials around the home.
Tools You Need to Get Started
You do not need expensive tools to press flowers successfully at home. In fact, you probably already own everything you need right now. Here is a simple list of what to gather before you begin:
- A few heavy books (old encyclopedias or textbooks work brilliantly).
- Parchment paper or plain white printer paper.
- Fresh flowers of your choice.
- A pair of scissors for trimming thick stems.
- Tweezers for handling delicate petals gently.
- Craft glue or Mod Podge for your finished projects later.
That is truly all you need to begin. Additionally, some crafters like to use a flower press kit from a craft store. These kits come with wooden boards, bolts, and pre-cut paper layers inside. However, a heavy book works just as well and costs absolutely nothing extra. So do not feel pressured to spend money before you even begin trying.
Many beginners who start with flower pressing later branch into projects like How to Make Your First Resin Art Piece Without Making a Mess, where preserved flowers can become beautiful resin artwork.
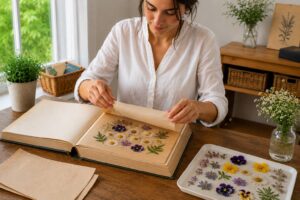
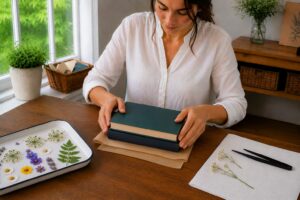
How to Press Flowers Using the Book Method
This is the easiest and most beginner-friendly method available to everyone. Here is exactly how to press flowers step by step using a heavy book.
Step 1: Prepare Your Flowers

First, trim any thick or bulky stems from your chosen flowers carefully. Lay each flower face-down flat on your parchment paper sheet. Make sure the petals are spread out naturally and not folded over. Overlapping petals will stick together and ruin the final result badly. Therefore, take your time arranging each bloom before closing the book.
Step 2: Layer Everything Properly
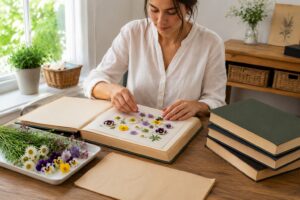
Place a sheet of parchment paper flat on an open page in your book. Then arrange your flowers face-down across the parchment paper surface. Next, lay another sheet of parchment gently over the top of them. After that, carefully close the book without shifting the flowers around inside. Finally, stack two or three more heavy books on top for extra pressure.
Simple hands-on projects like flower pressing are often a great starting point before exploring 25 Easy Art Projects for Kids That Look Amazing on Pinterest, where creativity takes many different forms.
Step 3: Wait Patiently

This is honestly the hardest step for most excited crafters to handle. Leave the flowers completely undisturbed for at least two full weeks. However, check and change the parchment paper after the very first three days. Damp paper traps moisture and causes mould to grow on your petals. Therefore, fresh dry paper helps your flowers come out crisp, flat, and vibrant.
Step 4: Remove With Care
After two weeks, slowly and carefully open your book to check the flowers. Use tweezers to lift each pressed flower gently from the parchment paper. Rushing this step will cause petals to crack, tear, or crumble apart. Additionally, handle the flowers as little as possible with your bare fingers. Natural oils from your skin can damage the delicate dried petals over time.
Pressed flowers can later be incorporated into many different craft styles, including projects inspired by 23 Finger Painting Ideas for Kids That Spark Big Creativity, where artistic experimentation is encouraged.
How to Press Flowers Using Silica Gel
Silica gel is a faster alternative that serious crafters absolutely love using. It dries flowers in just two to four days instead of two whole weeks. It also preserves colour far better than the traditional book method does. You can buy silica gel powder cheaply from most craft or garden supply stores nearby.
Here is how to use it properly and get brilliant results every time.
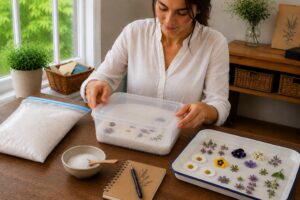
Step 1: Prepare your container
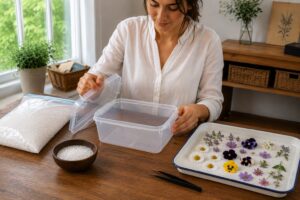
Find an airtight container that is big enough to fit your flowers without bending them. Pour a layer of silica gel about one inch deep into the bottom of the container. This bottom layer is what holds your flowers in place while they dry.
Step 2: Place your flowers
Lay your flowers face-up on top of the silica gel layer. Make sure the petals are spread out flat and not folded or overlapping. The flatter they sit, the better your pressed flowers will turn out.
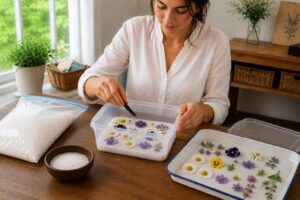
Step 3: Cover the flowers
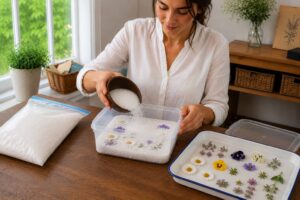
Using a spoon, slowly and gently pour more silica gel over the flowers. Do this carefully so the petals do not shift or fold. Keep spooning until the flowers are completely covered with no part sticking out.
Flower preservation techniques often lead crafters toward other decorative projects such as 15 Beautiful Things You Can Make With Seashells, where natural materials are transformed into lasting keepsakes.
Step 4: Seal and wait
Close the container tightly so no air gets in. Leave it completely untouched for two to four days. Try not to open it too early as this slows down the drying process.
Step 5: Remove the flowers
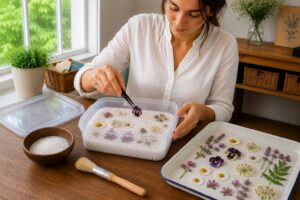
After two to four days, open the container slowly. Use tweezers or a soft paintbrush to gently lift the flowers out. Shake or brush off any silica gel crystals still clinging to the petals very carefully so nothing breaks.
Your flowers are now beautifully preserved and ready to use. The best part is that silica gel can be dried out in the oven and reused many times again. So it is a very cost-effective option for anyone who wants to press flowers regularly.
Creative hobbies often branch into other forms of crafting too, including 27 Animal Clay Crafts for Kids That Are Cute Beyond Words, which offers another fun way to create handmade keepsakes.
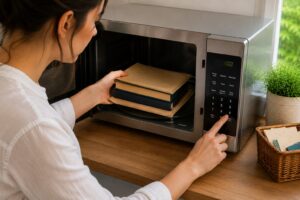
How to Press Flowers Using a Microwave
Yes, you can actually press flowers in a microwave in just minutes! This method is perfect when you want fast results without waiting days or weeks. It also works wonderfully for special occasions when you do not have much time to spare. Here is exactly what you need and how to do it the right way.
Step 1: Prepare your flower
Pick a fresh flower and make sure it is clean and dry before you start. If the stem is too long, trim it down so it fits flat on your parchment paper. Flowers with flat faces like pansies, daisies, and violets work best with this method.
Step 2: Wrap the flower in parchment paper
Lay one sheet of parchment paper on a flat surface. Place your flower face-down on top of it and spread the petals out as flat and evenly as possible. Put the second sheet of parchment paper on top to cover the flower completely. Parchment paper protects the petals and stops them from sticking to anything during the process.
Step 3: Add weight on top
Place a ceramic tile or a microwave-safe plate on top of the parchment paper sandwich. This weight is very important because it keeps the flower flat and pressed down while it dries in the microwave. Make sure the tile or plate is heavy enough to cover the flower fully.
Simple crafting methods like this are one reason projects from 21 Paper Plate Crafts for Kids That Are Cheap, Easy and Adorable remain so popular with families looking for accessible creative activities.
Step 4: Microwave in short bursts
Put everything into the microwave and set it to a low power setting, around 40 to 50 percent power. Microwave for just 30 to 40 seconds at a time. Do not go longer than this in one go because too much heat will damage the petals quickly.
Step 5: Check and cool the flower
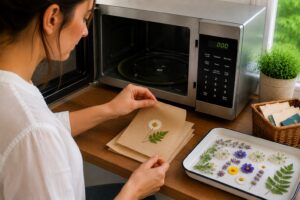
After each 30 to 40 second burst, take the flower out carefully and let it cool for a full minute before touching it. Open the parchment paper gently and check how the flower looks. The petals should be starting to feel dry and flat. If it still feels soft or damp, it needs more time.
Step 6: Repeat until fully pressed

Place the parchment paper back over the flower, put the tile on top, and microwave again for another 30 to 40 seconds. Repeat this process two to three times until the flower feels completely dry, flat, and papery to the touch. Most flowers are done after two or three rounds but thicker flowers may need one or two more.
Step 7: Let it cool completely
Once your flower looks and feels fully pressed, leave it out on a flat surface to cool down completely before you handle it. Trying to move it while it is still warm can cause the petals to break or curl at the edges.
Your flower is now pressed and ready. Just remember to always use a low power setting and never skip the cooling breaks between rounds. Too much heat at once is the biggest mistake beginners make with this method. Take your time with it and the results will be well worth it.
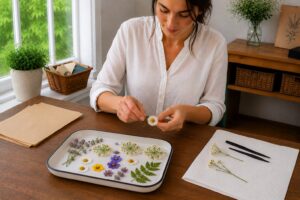
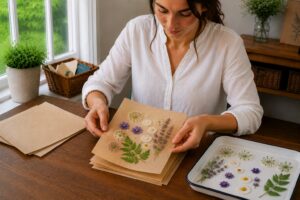
How to Preserve Your Pressed Flowers Long-Term
Pressing flowers is only half the journey toward making them last forever. Preservation is the next equally important step that most beginners often skip. Thankfully, keeping pressed flowers beautiful for years is surprisingly straightforward and simple.
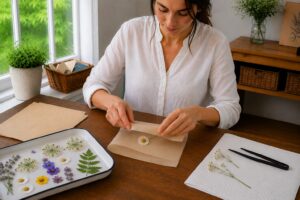
First, always store unfinished pressed flowers away from direct sunlight completely. Sunlight is the number one enemy of pressed flower color and vibrancy. Additionally, keep them in a dry location because humidity causes mould to form. A flat folder, a clean book, or a sealed envelope works perfectly for storage. Furthermore, label each envelope with the flower name and the date you pressed it.
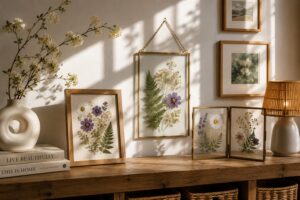
When using pressed flowers in crafts or displays, always seal them properly. Mod Podge is the most popular and beginner-friendly sealant widely available today. Simply brush a thin, even coat gently over the surface of each pressed flower. Then let it dry fully before adding a second coat on top for protection. As a result, your flowers will stay vibrant, flat, and beautiful for many decades.
Pressed flowers sealed this way can be incorporated into countless handmade projects, including some featured in 29 Toilet Paper Roll Crafts for Kids That Are Surprisingly Cute, where creative embellishments help ordinary materials stand out.
Also, framed pressed flowers should always be kept away from damp walls. Condensation from cold walls slowly damages even the best-sealed pressed flowers over time. Therefore, hang your framed pieces on interior walls inside warm and dry rooms. Additionally, use UV-protective glass in your frames to block fading from indoor lighting. Consequently, your pressed flower artwork will stay just as stunning as the very first day.
Final Tips for Perfect Results Every Time
Here are some last golden rules to always remember on your pressing journey. Always press flowers as soon as possible after picking them from outside. Fresh flowers press far more cleanly and retain color much better than older ones. Furthermore, thinner flowers will always give faster and more reliable results overall. Therefore, build your confidence with easy flowers before attempting tricky thick ones.
Also, do not get discouraged if your first few attempts are not perfect immediately. Every crafter (even experienced ones); has a flower press that goes wrong sometimes. Moreover, imperfect pressed flowers can still be used in collages and mixed-media art. So never throw away a pressed flower just because it did not turn out perfectly. Instead, find a creative way to use it and call it beautiful anyway.
Above all, remember that knowing how to press flowers is a gift you keep forever. Each pressed bloom carries a memory, a moment, and a little piece of nature inside. So go outside right now, pick something beautiful, and begin your pressing adventure today. Your future self will absolutely thank you for starting this wonderful, rewarding craft.
For even more inspiration after mastering flower pressing, 27 Easy Shark Paper Crafts Kids Can Make in 30 Minutes shows how simple materials can become creative projects with just a little imagination.
