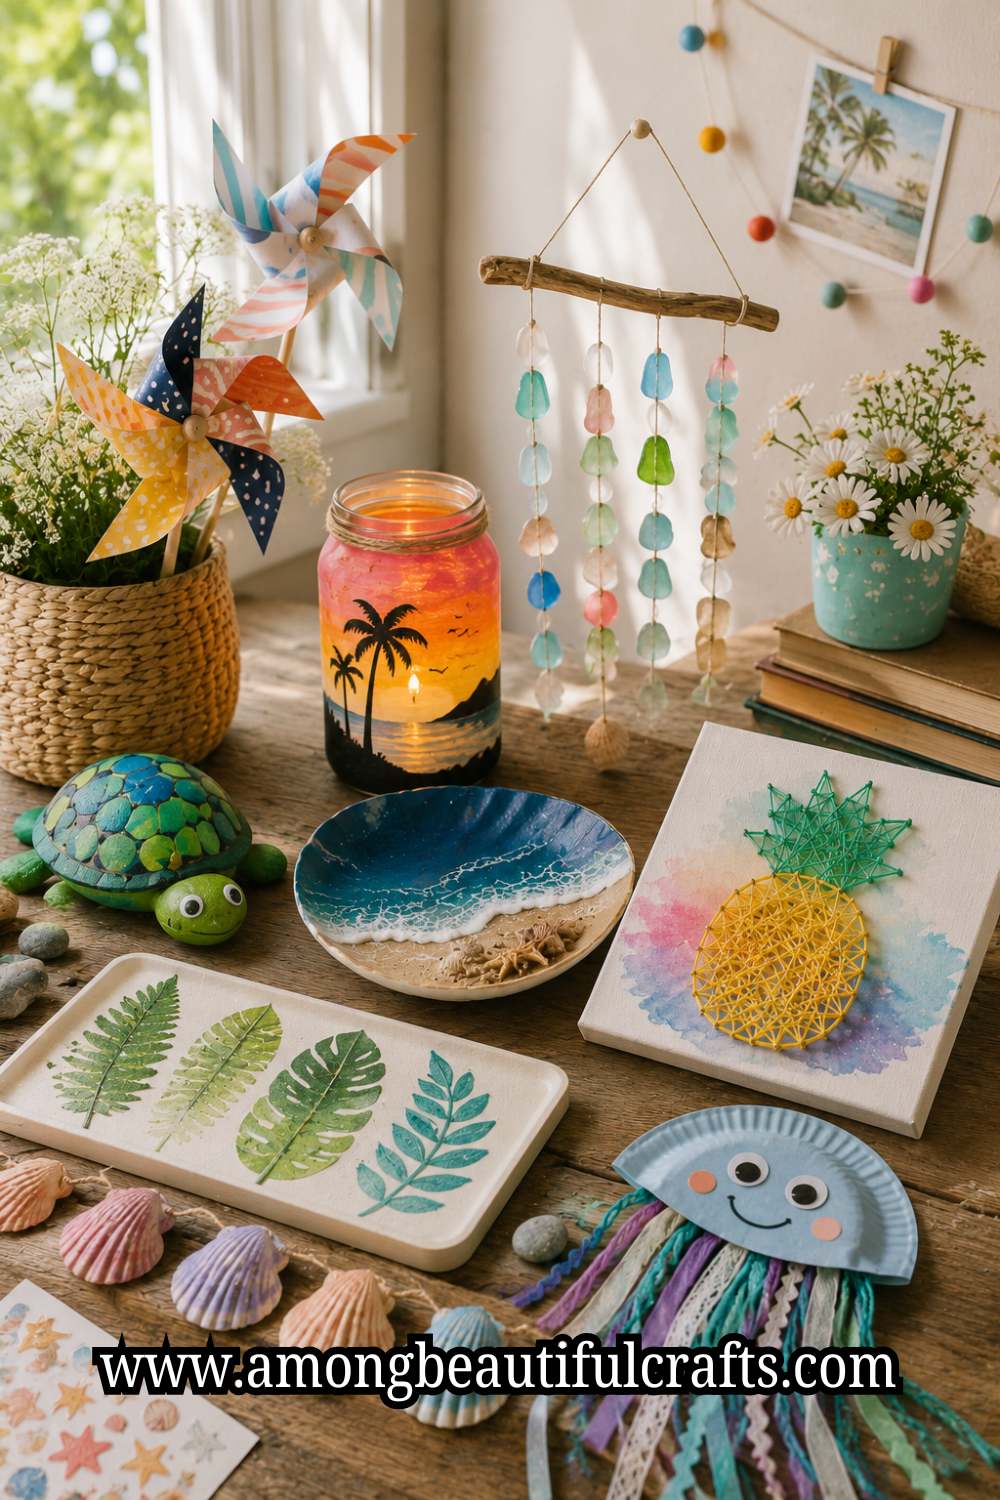
Summer break starts out dreamlike. Then day four hits and every parent hears the words nobody wants: “I’m bored.” Screens are the easy fix, but they are never satisfying. What kids actually need during long summer days is something to do with their hands; something messy, creative, and genuinely fun. Summer craft ideas for kids deliver exactly that, and the best ones keep children busy for hours without a single notification.
If your family enjoys seasonal creativity, 17 Summer Paper Craft Ideas Kids Can Make During the Holidays offers even more screen-free projects that keep children happily engaged throughout the break.

Crafting does more than fill time. It builds focus, develops fine motor skills, and gives kids a sense of accomplishment that scrolling through videos simply cannot match. When a child finishes a project and holds it up proudly, that feeling sticks with them. Moreover, the mess, the mistakes, and the creative problem-solving along the way are all quietly building skills they will use for the rest of their lives.
Every idea on this list was chosen with real kids in mind. Some are quick enough for a restless ten-minute attention span. Others are involved enough to anchor an entire rainy afternoon. All of them use simple supplies you likely already have at home. So put the tablets away, spread some newspaper on the table, and let summer get a little more creative.
15 Summer Craft Ideas for Kids to Beat Boredom Without Screens
1. Tie-Dye T-Shirts
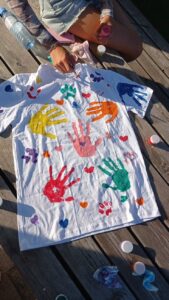
Tie-dye is the ultimate summer craft for a reason. Scrunch a damp white cotton shirt into a ball and secure it tightly with rubber bands. Squeeze different colors of fabric dye onto each section. Wrap the shirt in plastic wrap and leave it for six to eight hours. Unwrap and rinse until the water runs clear. After washing and drying, the shirt is ready to wear. Kids love seeing the unpredictable patterns that appear each time.
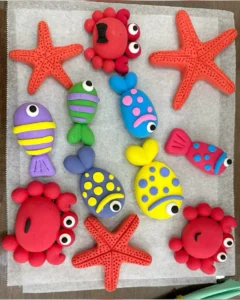
2. Painted Rock Creatures
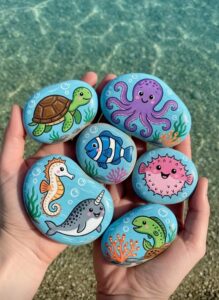
Collect smooth flat rocks from the garden or a nearby park. Wash them thoroughly and let them dry completely. Paint a base color onto each rock first and let it dry. Then paint faces, scales, spots, or stripes to turn each rock into an animal or creature. Seal with Mod Podge for durability. Use them as garden decorations or paperweights when finished.
Nature-based projects like these pair perfectly with 19 Easy Nature Crafts for Kids That Turn Outdoor Finds Into Art, where everyday outdoor treasures become creative masterpieces.
3. Cardboard Box Town
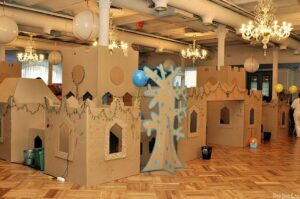
Save large cardboard boxes and let kids build their own town. Cut window and door shapes from the sides of each box. Paint the outside of each box to look like a house, store, or school. Connect boxes with paper bridges and tunnels. This is one of those summer craft ideas for kids that can grow across multiple days as new buildings get added to the town.
4. Popsicle Stick Photo Frames
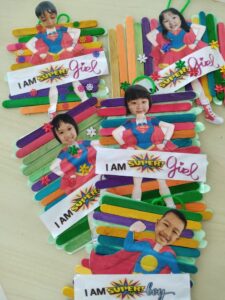
Lay four popsicle sticks in a square frame shape. Glue the corners together and let the base dry completely. Add a second layer of sticks on top for extra thickness. Decorate with paint, stickers, washi tape, or markers. Glue a small piece of cardboard to the back with a strip of cardboard propped at an angle to act as a stand. Slide a favorite summer photo inside.
5. Paper Bag Puppets
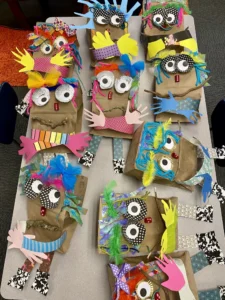
Brown paper lunch bags are the base for these easy puppets. Flatten the bag with the folded flap facing up. Draw or glue on eyes, a nose, and teeth. The flap becomes the puppet’s moving mouth when a hand is inserted into the bag. Add yarn for hair, paper ears, and pipe cleaner whiskers for different animal characters. Once kids finish making their puppets, encourage them to put on a show.
Simple paper-based activities often inspire families to try 21 Paper Plate Crafts for Kids That Are Cheap, Easy and Adorable, another collection filled with inexpensive projects for children.
6. Homemade Playdough Sculpting
Mix two cups of flour, one cup of salt, two tablespoons of cream of tartar, two tablespoons of oil, and one and a half cups of boiling water. Add food coloring before mixing. Stir until a soft dough forms and let it cool completely before handling. Kids can sculpt food, animals, miniature furniture, or anything else their imagination generates. Store in an airtight container for weeks of reuse.
Children who enjoy sculpting with homemade dough often love 27 Animal Clay Crafts for Kids That Are Cute Beyond Words, where animals become fun hands-on creations.
7. Butterfly Suncatchers
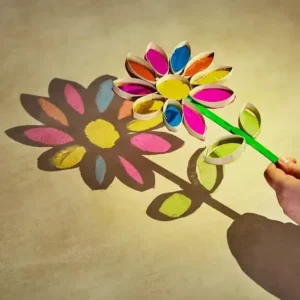
Cut butterfly wing shapes from white tissue paper. Lay the wings flat on a piece of contact paper sticky-side up. Press small pieces of torn colored tissue paper across the wings to fill them in. Cover with a second sheet of contact paper and press firmly to seal. Cut around the butterfly outline. Punch a small hole at the top and hang near a sunny window. Light passes through the tissue layers and casts soft colored patterns on the walls.
Colorful projects like this fit beautifully alongside 19 Summer Painting Ideas for Beginners to Try Before September, where bright seasonal colors inspire even more creativity.
8. Egg Carton Caterpillars
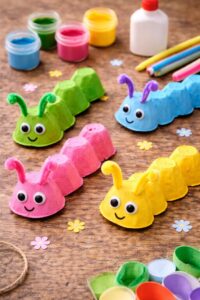
Cut a row of six to eight connected cups from an egg carton. Paint each cup a different color. Once dry, poke two small holes in the top of the first cup. Thread pipe cleaners through the holes and curl the ends into antennae. Add googly eyes and a small painted smile. These little caterpillars are quick to make and satisfying enough for younger kids to complete almost entirely on their own.
9. Watercolor Resist Art
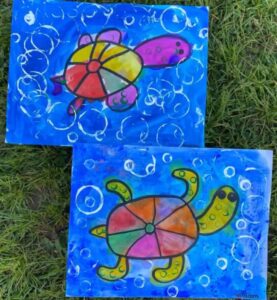
Use a white crayon to draw a design or write a secret message on white cardstock. Keep the drawing fairly simple; stars, suns, waves, or words work well. Paint over the entire page with watercolor paint in any color. The crayon marks resist the paint and the hidden design appears like magic. Younger children find this genuinely thrilling every single time.
Painting projects that encourage experimentation often lead naturally to 23 Finger Painting Ideas for Kids That Spark Big Creativity, where imagination matters more than perfection.
10. Friendship Bracelets
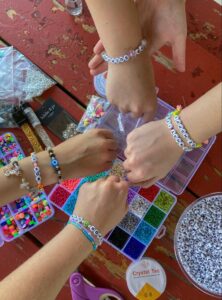
Cut six strands of embroidery thread, each about 24 inches long. Knot them all together at one end and tape the knot to a flat surface. Separate the strands into pairs of colors. Braid or knot the strands following a simple pattern. For beginners, a basic three-strand braid works perfectly. Finish with another knot at the end and tie the bracelet around a wrist. Older kids quickly move on to more complex knotting patterns once they get the hang of the basic version.
11. Nature Collage Art
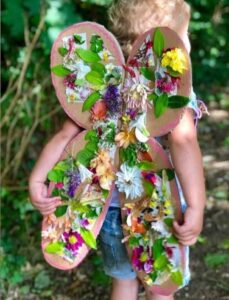
Send kids outside with a paper bag and a simple collection challenge. Ask them to gather leaves, flower petals, twigs, seeds, and interesting pebbles. Back inside, arrange the collected items on a piece of cardstock in any composition they like. Glue everything down with a generous layer of school glue. Let it dry flat overnight before hanging. Every nature collage is completely one of a kind because no two collection walks turn up exactly the same materials.
Flower-filled creations like these often inspire families to try 19 Stunning Pressed Flower Projects You Can Start Today, which transforms preserved blooms into beautiful keepsakes.
12. Tin Can Wind Chimes
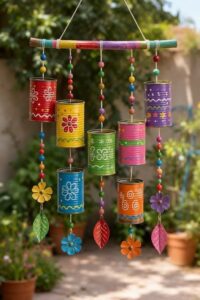
Collect four to six clean empty tin cans of different sizes. Paint the outside of each can in bright colors. Once dry, use a hammer and nail to punch a row of small holes around the bottom rim of each can. Also punch one hole at the center of the bottom. Thread a length of twine through the center hole and knot it inside. Hang the cans at varying heights from a wooden dowel using the bottom rim holes. Hang the whole assembly from a porch hook and let the breeze do the rest.
13. Air-Dry Clay Bowls
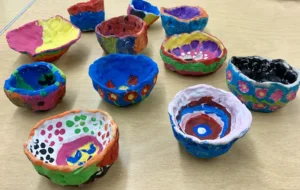
Roll a ball of air-dry clay about the size of a tennis ball. Press your thumb into the center and slowly pinch the walls upward and outward into a bowl shape. Keep the walls an even thickness as you go. Set the bowl upside down on a rounded object like a small ball to help hold its curved shape while it dries. After 24 hours, flip it right-side up and let the inside dry completely. Paint with acrylic paint and seal with Mod Podge. These bowls hold small trinkets, hair ties, or coins beautifully.
Hands-on sculpting projects like this often appeal to kids who enjoy 29 Toilet Paper Roll Crafts for Kids That Are Surprisingly Cute, where simple materials become creative treasures.
14. Paper Chain Countdown

This one is part craft and part tradition. Count the number of days until a special summer event; a birthday, a vacation, or the first day of school. Cut one strip of paper per day. Write something fun or silly on each strip before linking it into a chain. Connect all strips into a paper chain and hang it somewhere visible. Each morning, a child tears off one link and reads what is written inside. Additionally, the chain gets shorter visibly each day, which makes the countdown feel wonderfully tangible.
Paper-based projects like this pair perfectly with How to Make Paper Sunflowers That Look Beautiful All Summer Long, another fun way to keep kids creating throughout the season.
15. Pressed Flower Bookmarks

Collect small flowers and leaves on a walk. Arrange them between two sheets of parchment paper inside a heavy book. Stack more books on top and leave everything undisturbed for one week. Once the flowers are fully pressed and dry, cut cardstock into bookmark-sized rectangles. Arrange the pressed flowers on each bookmark and glue them down carefully. Cover the entire surface with a strip of clear contact paper to seal and protect the arrangement. These make wonderful gifts as well as keepsakes from a specific summer.
Pressed flower projects can also inspire older kids and adults to explore How to Make Beautiful Summer Pressed Flower Resin Jewelry, where preserved blooms become wearable works of art.
How to Keep Kids Engaged Through a Full Project
Starting a craft is easy. Finishing it is where younger kids sometimes need a little help. Here are a few strategies that genuinely work:
- Break it into stages: Tell a child you are only doing the first step together right now. Once that step is done, the next one feels much less overwhelming. Consequently, the project moves forward without anyone feeling rushed or frustrated.
- Let them make decisions: Asking a child which color they want or where they want to put a sticker gives them ownership over the project. Children stay engaged far longer when they feel in control of creative choices.
- Celebrate the messy middle: A project covered in paint smudges and uneven lines is not a failed project. It is a project in progress made by a real kid. Acknowledging that messiness is part of the process helps children push through instead of giving up.
- Work alongside them: Children are much more likely to see a project through to the end when an adult is crafting beside them. You do not need to make the same thing; just being present at the table keeps the energy going.
Creative confidence often grows through projects like 25 Easy Art Projects for Kids That Look Amazing on Pinterest, where simple ideas can lead to impressive results.
Final Thoughts
Summer should feel long in the best possible way; full of color, texture, sticky fingers, and proud little faces holding up finished projects. These summer craft ideas for kids give that feeling a structure without stealing any of the magic. Each craft on this list is a small adventure that starts with a blank page or a lump of clay and ends with something a child made entirely on their own. That experience; of making something real with your own hands; is one of the quiet gifts of a screen-free afternoon, and kids carry it with them long after the glue has dried.
The best part is that you do not need a Pinterest-perfect setup or a big budget to make any of this happen. A kitchen table, some basic supplies, and a little patience are truly all it takes. Some of the most memorable crafting moments come from the unexpected ones; the painting that went the wrong direction, the clay figure that looks nothing like a dog but means everything to the child who made it. So do not worry about perfect results. Just clear the table, lay down some newspaper, and let them create.
Many families who discover a love for crafting during the holidays eventually branch out into projects like 15 Summer Resin Craft Ideas That Make Beautiful Home Décor, proving that creative hobbies can grow well beyond childhood. The mess is temporary but the memories last a whole lot longer.
