Fresh flowers rarely stay beautiful for long. A colorful bloom can brighten your day, yet only a few days later, the petals begin to fade. That is why I love giving flowers a second life instead of throwing them away.
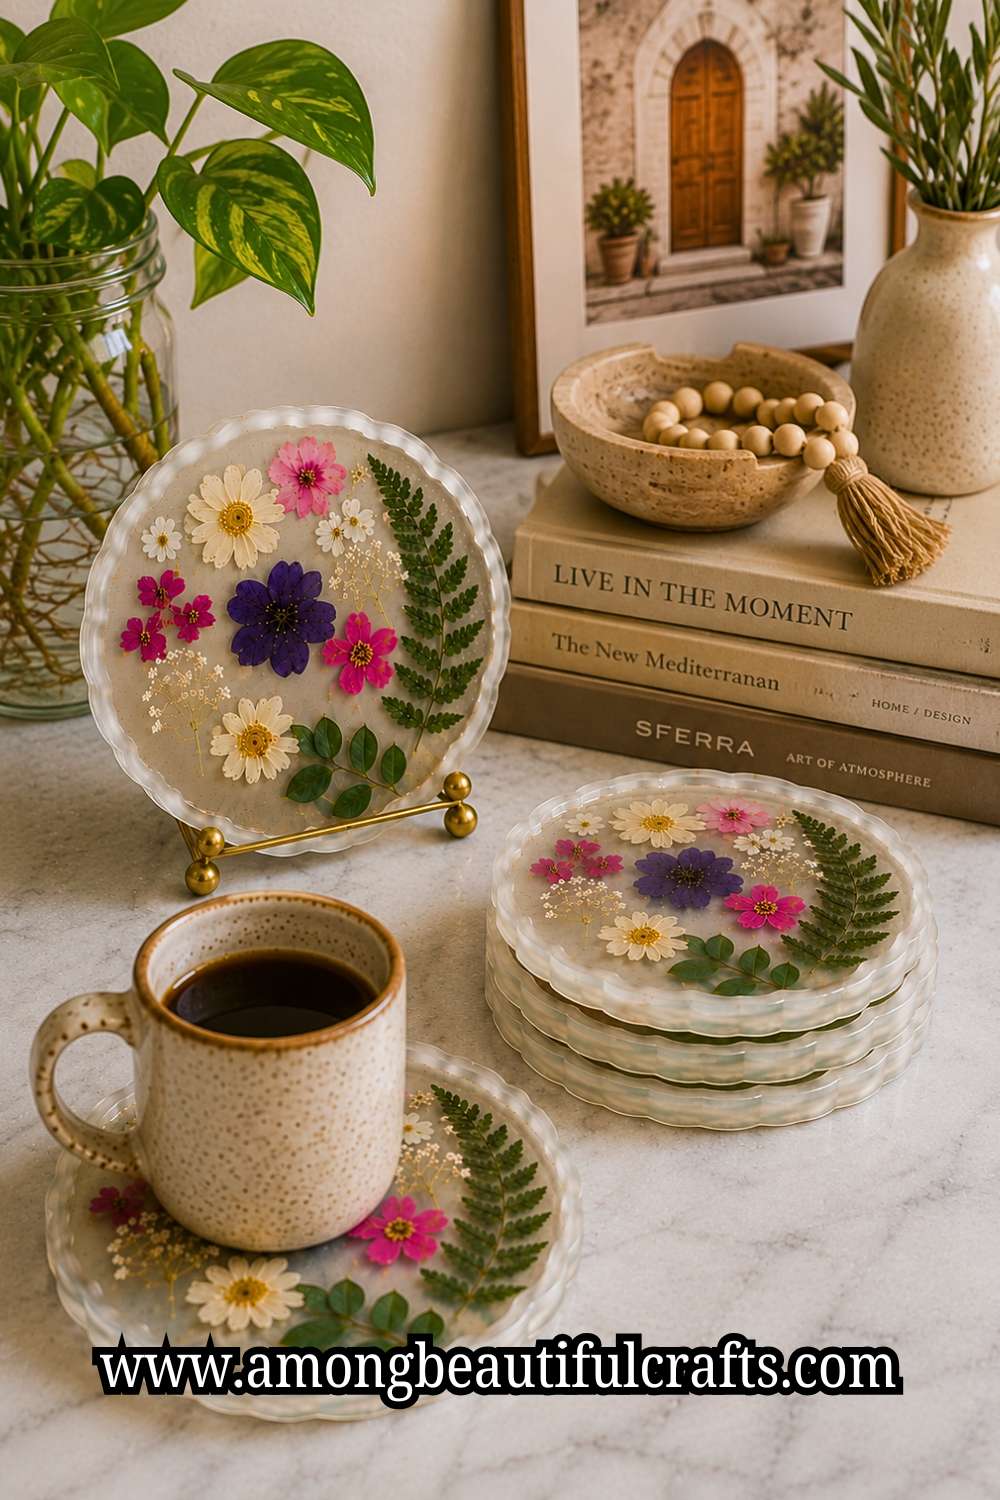
One of the easiest ways to preserve their beauty is by learning How to Make Resin Coasters With Pressed Flowers. You transform delicate blooms into something useful, timeless, and full of personality. Every coaster becomes a little piece of nature that stays with you for years instead of days.
Picture a cup of coffee resting on a coaster filled with tiny daisies from your garden. Imagine serving guests drinks on coasters made with flowers from your wedding bouquet or a memorable vacation.
Suddenly, an everyday item becomes a conversation starter. Better yet, every design tells a different story because no flower arrangement will ever look exactly the same.
That is the magic of this craft. You begin with simple materials, yet you end with something that looks elegant enough for a gift or a beautiful home display.
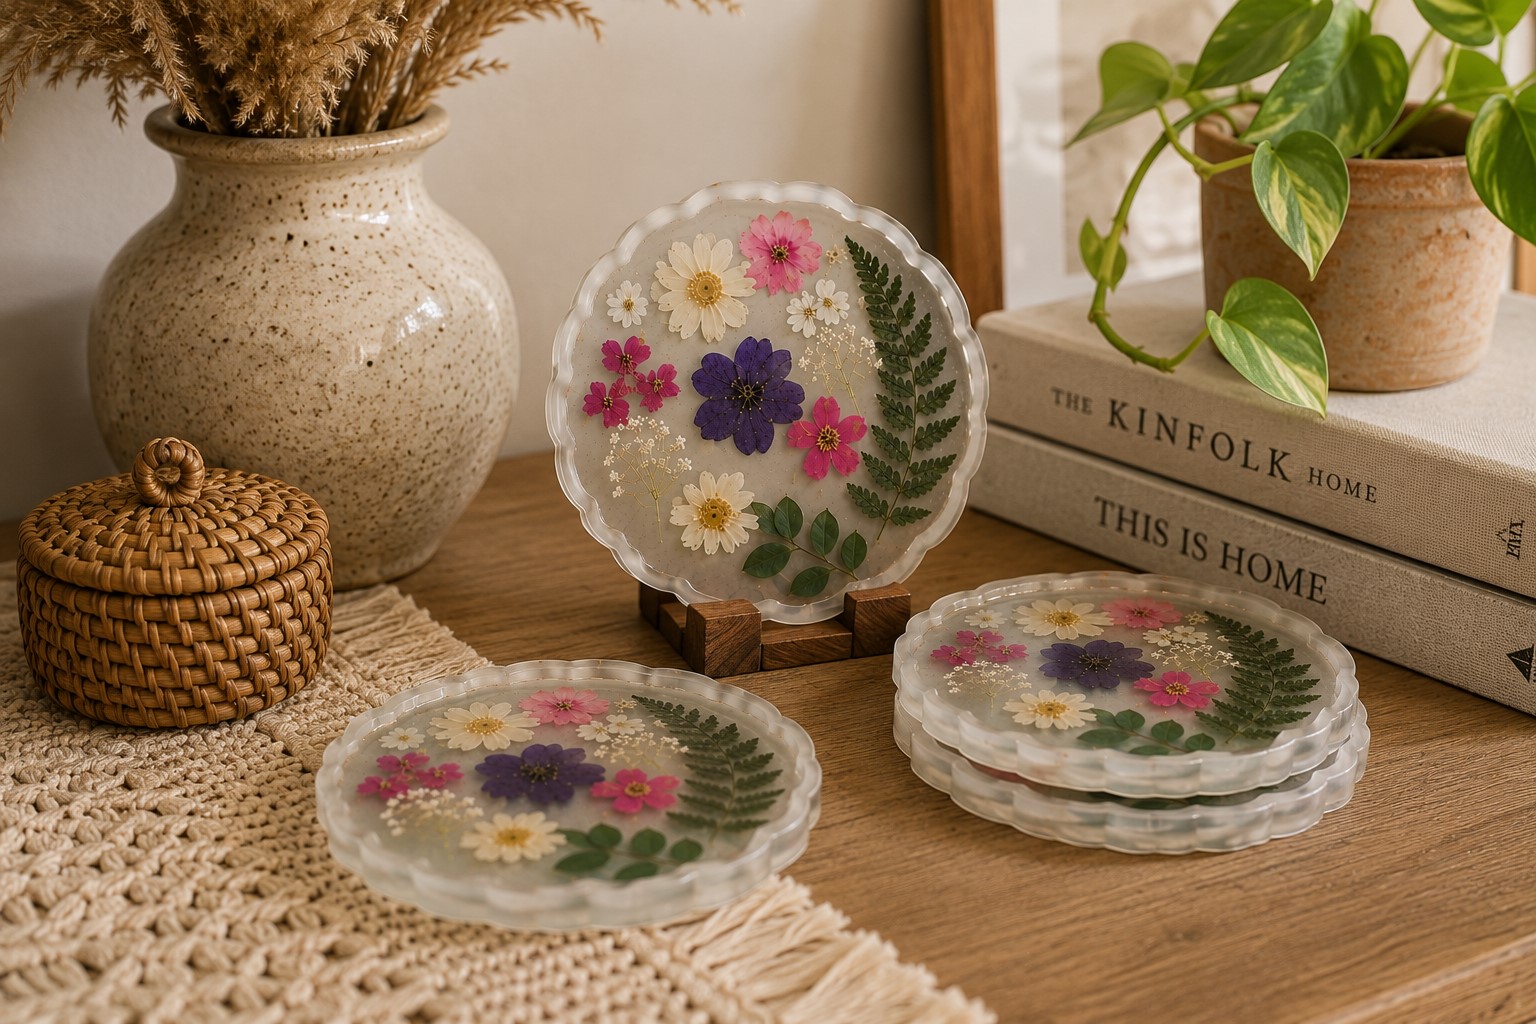
When I first discovered resin art, I thought only experienced crafters could create those crystal-clear pieces I admired online. Soon, I realized that anyone could make beautiful resin coasters with the right guidance and patience.
That is exactly what I want to share with you in this guide. I will walk you through every stage in simple English, explain every detail without skipping anything, and share practical tips I have learned along the way.
So gather your flowers, prepare your workspace, and let’s create resin coasters that look professionally made while still feeling wonderfully handmade.
Materials You Will Need
Before you begin, gather every supply and place it within easy reach. Resin starts curing as soon as you mix it, so stopping to search for tools can make the project more stressful than it needs to be. I always spend a few minutes preparing my workspace first because it allows me to focus completely on creating once I begin.
Here are the supplies you will need:
- Clear epoxy resin
- Resin hardener
- Silicone coaster mold
- Fully dried pressed flowers
- Small dried leaves or ferns if desired
- Mixing cups
- Wooden stir sticks
- Tweezers
- Small scissors
- Disposable gloves
- Silicone mat or plastic table cover
- Heat gun or small butane torch
- Toothpicks
- Dust cover or clean cardboard box
- Fine-grit sandpaper
- Resin polish for optional finishing
Choose a casting resin that dries crystal clear because the flowers should remain the main attraction. Good-quality silicone molds also make removing the cured coaster much easier.
If you can, buy fresh resin instead of using bottles that have been sitting on a shelf for years. Fresh resin usually cures more consistently and gives a clearer finish.
How to Make Resin Coasters With Pressed Flowers
Step 1: Prepare Your Flowers Before You Open the Resin
The excitement of working with resin makes many beginners want to jump straight into mixing. I completely understand that feeling. But, I’ll advice you to always prepare everything before you mix the resin.
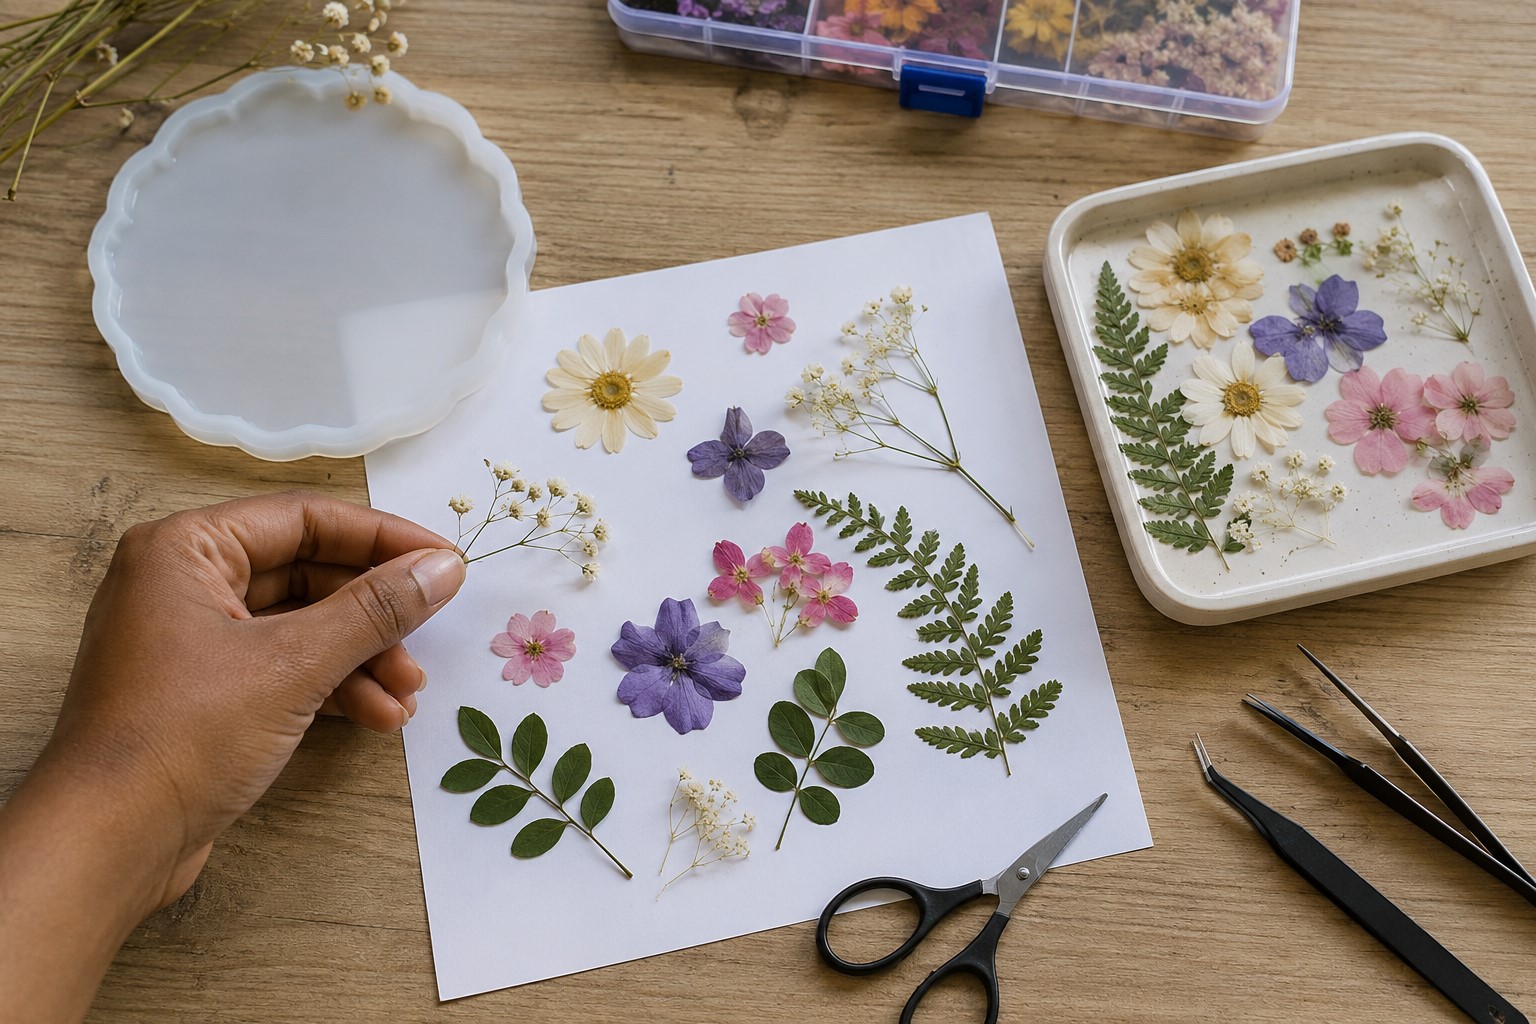
Start by laying your pressed flowers on a clean sheet of paper. Look at each flower carefully instead of grabbing the first ones you see.
Choose blooms that still have bright colors and smooth petals. Small flowers usually fit coaster molds much better than large blooms because they leave enough clear space around the design.
Delicate ferns and tiny leaves also add beautiful texture without making the coaster look crowded.
Next, check that every flower feels completely dry. This step may seem small, yet it has a huge impact on the finished coaster.
Even a little moisture can cause cloudy resin, tiny air pockets, or petals that turn brown after curing. If a flower feels soft or flexible, give it more time to dry before using it.
Finally, trim away thick stems with small scissors and arrange your chosen flowers in a small tray beside your workspace.
Keeping everything organized before you begin allows you to work calmly once the resin is mixed. That little bit of preparation often makes the difference between a stressful project and one you truly enjoy.
Step 2: Create a Safe and Organized Workspace
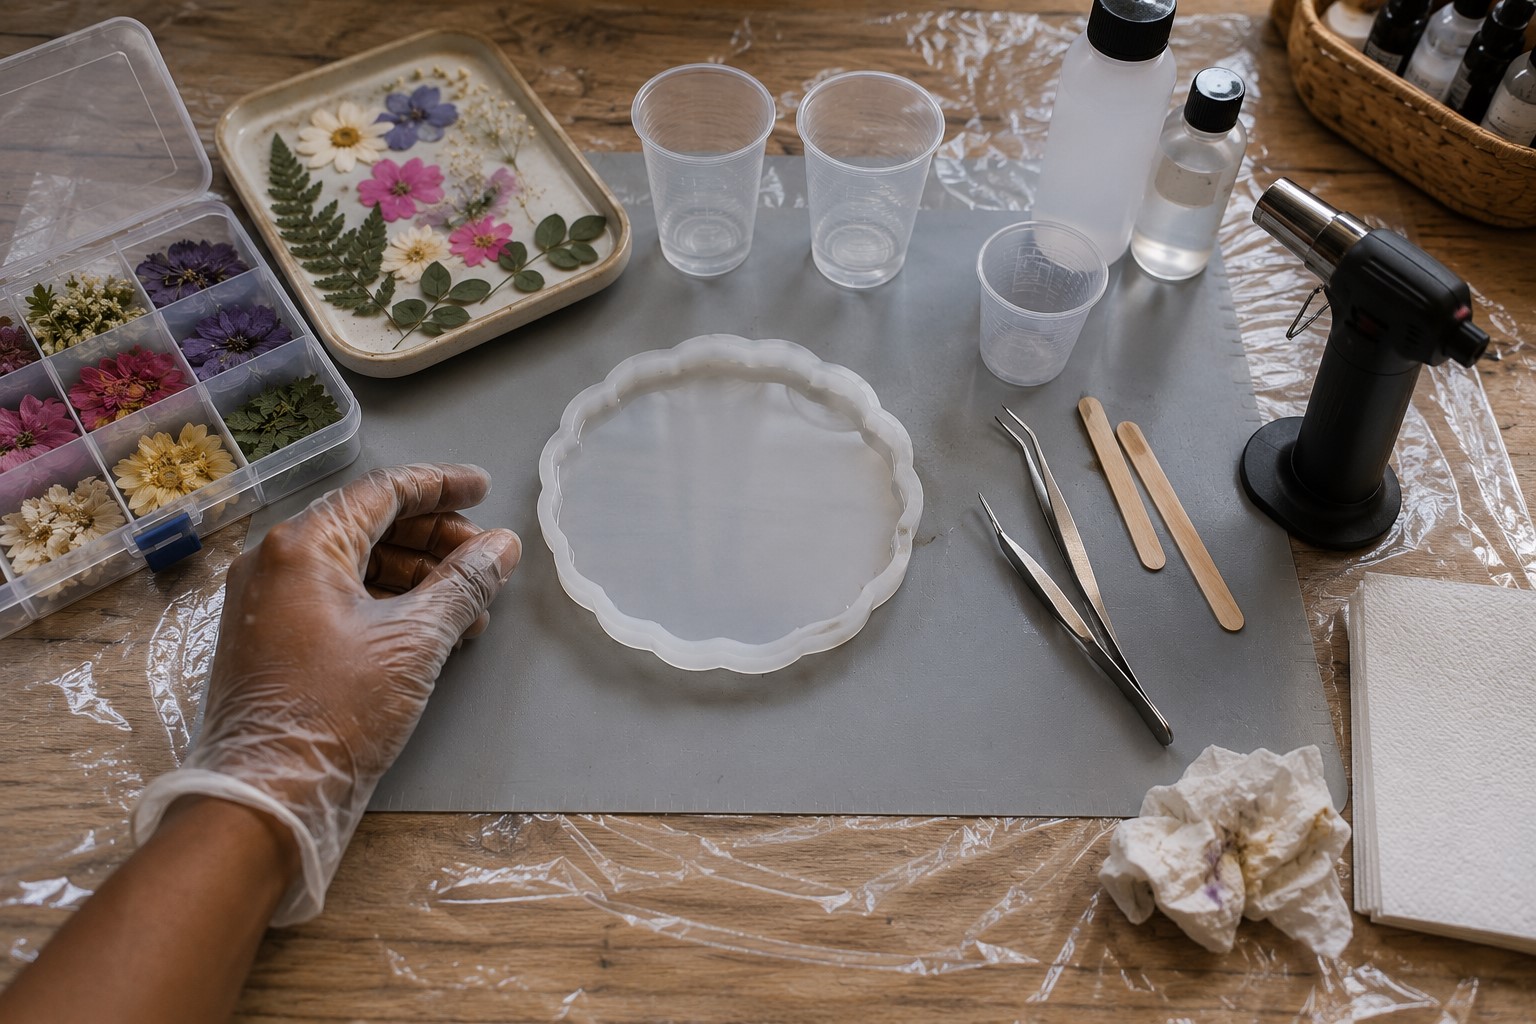
A beautiful resin coaster begins with a workspace that allows you to focus without distractions. Before opening the resin bottles, cover your table with a silicone mat or a thick plastic sheet.
Resin can drip when you least expect it, and cleaning it from furniture takes much more effort than preventing the mess in the first place.
Next, place every tool within easy reach. Set your mold, flowers, tweezers, stir sticks, mixing cups, and heat gun where you can grab them without stretching across the table.
Once the resin is mixed, you will have limited working time, so staying organized helps you work with confidence instead of rushing.
Take a moment to check that your table is perfectly level. Resin naturally settles while curing, so an uneven surface can leave one side of the coaster thicker than the other.
I also recommend working in a warm room because most epoxy resins cure more smoothly at a comfortable temperature.
Before moving on, put on your gloves and read the safety instructions that come with your resin. A few minutes of preparation will make every step that follows much easier and far more enjoyable.
Step 3: Arrange the Flowers Before You Pour the Resin
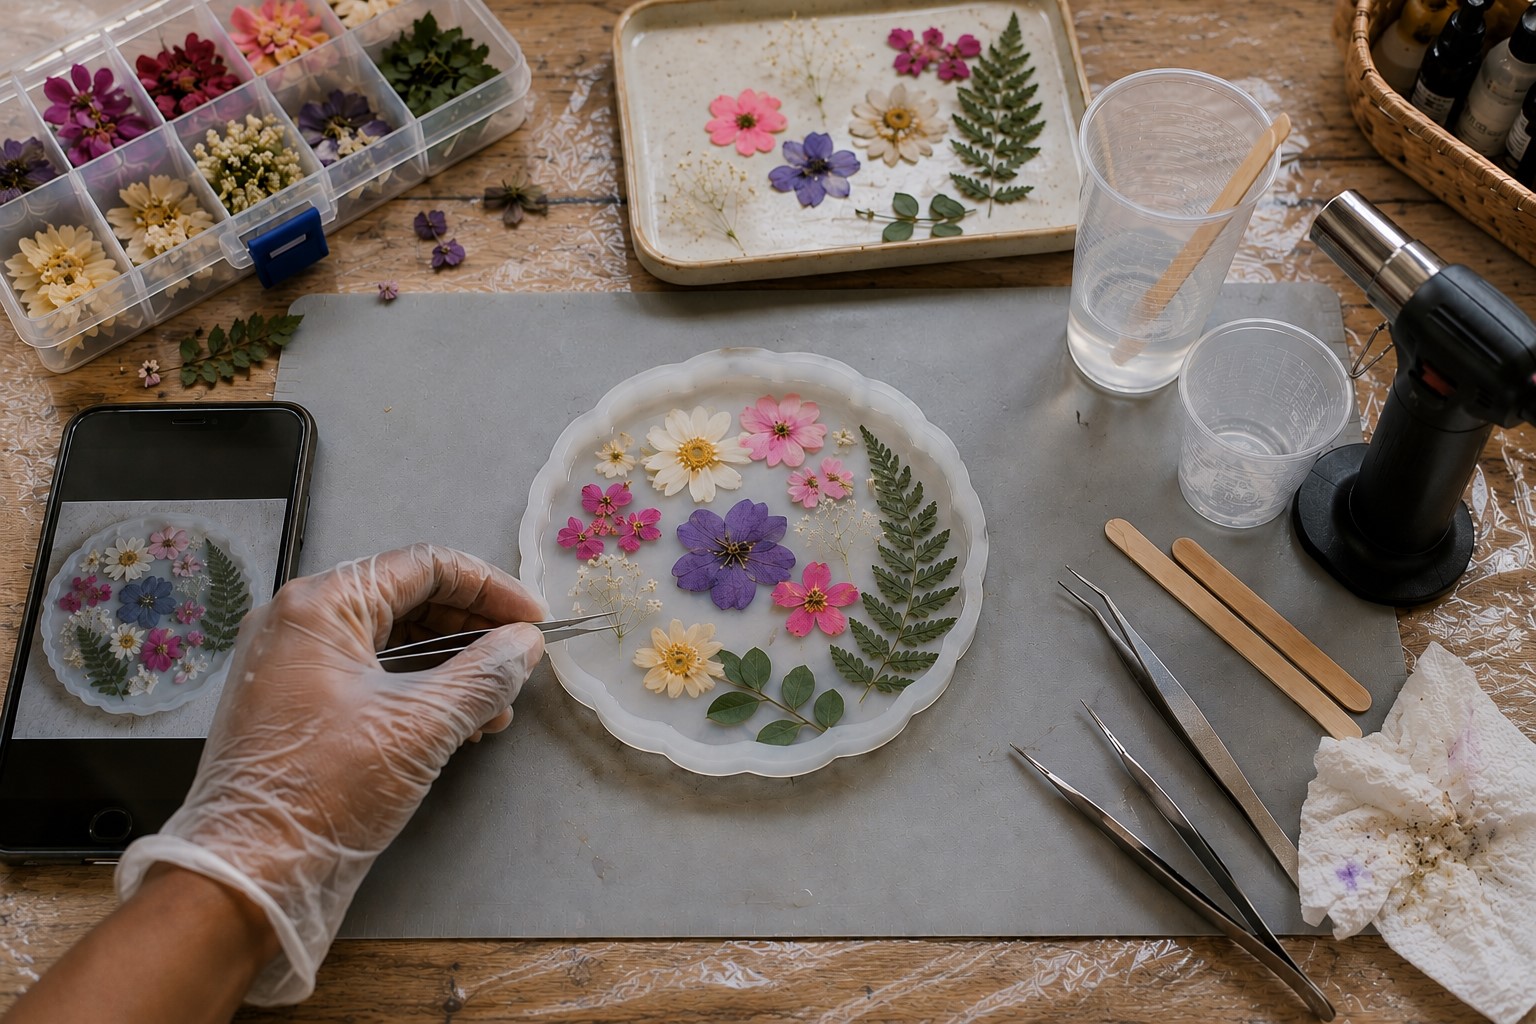
Now comes one of the most enjoyable parts of the project. Before you pour any resin, place your flowers inside the empty silicone mold.
This gives you the freedom to experiment without feeling rushed. You can move flowers around, swap colors, or remove pieces until everything looks just right.
Once resin covers the flowers, making changes becomes much harder, so take your time now.
Try to create a design that feels balanced instead of crowded. I like placing one slightly larger flower where I want the eye to focus.
Then I fill the empty spaces with smaller blooms, tiny leaves, or delicate ferns. This creates a natural arrangement instead of one that looks stiff or perfectly symmetrical.
Nature rarely grows in perfect patterns, so your coaster will often look more beautiful with a relaxed design.
As you arrange the flowers, leave a little clear space around the edges of the mold. This simple trick frames the flowers and makes the finished coaster look cleaner.
Keep checking the design from different angles because a flower that looks perfect from one side may cover another flower when viewed from another direction.
Once you feel happy with the arrangement, take a quick photo with your phone. I still do this before every resin project.
The picture becomes a helpful guide after you begin pouring the resin, and it saves you from trying to remember where every flower belonged.
Step 4: Measure and Mix the Resin the Right Way
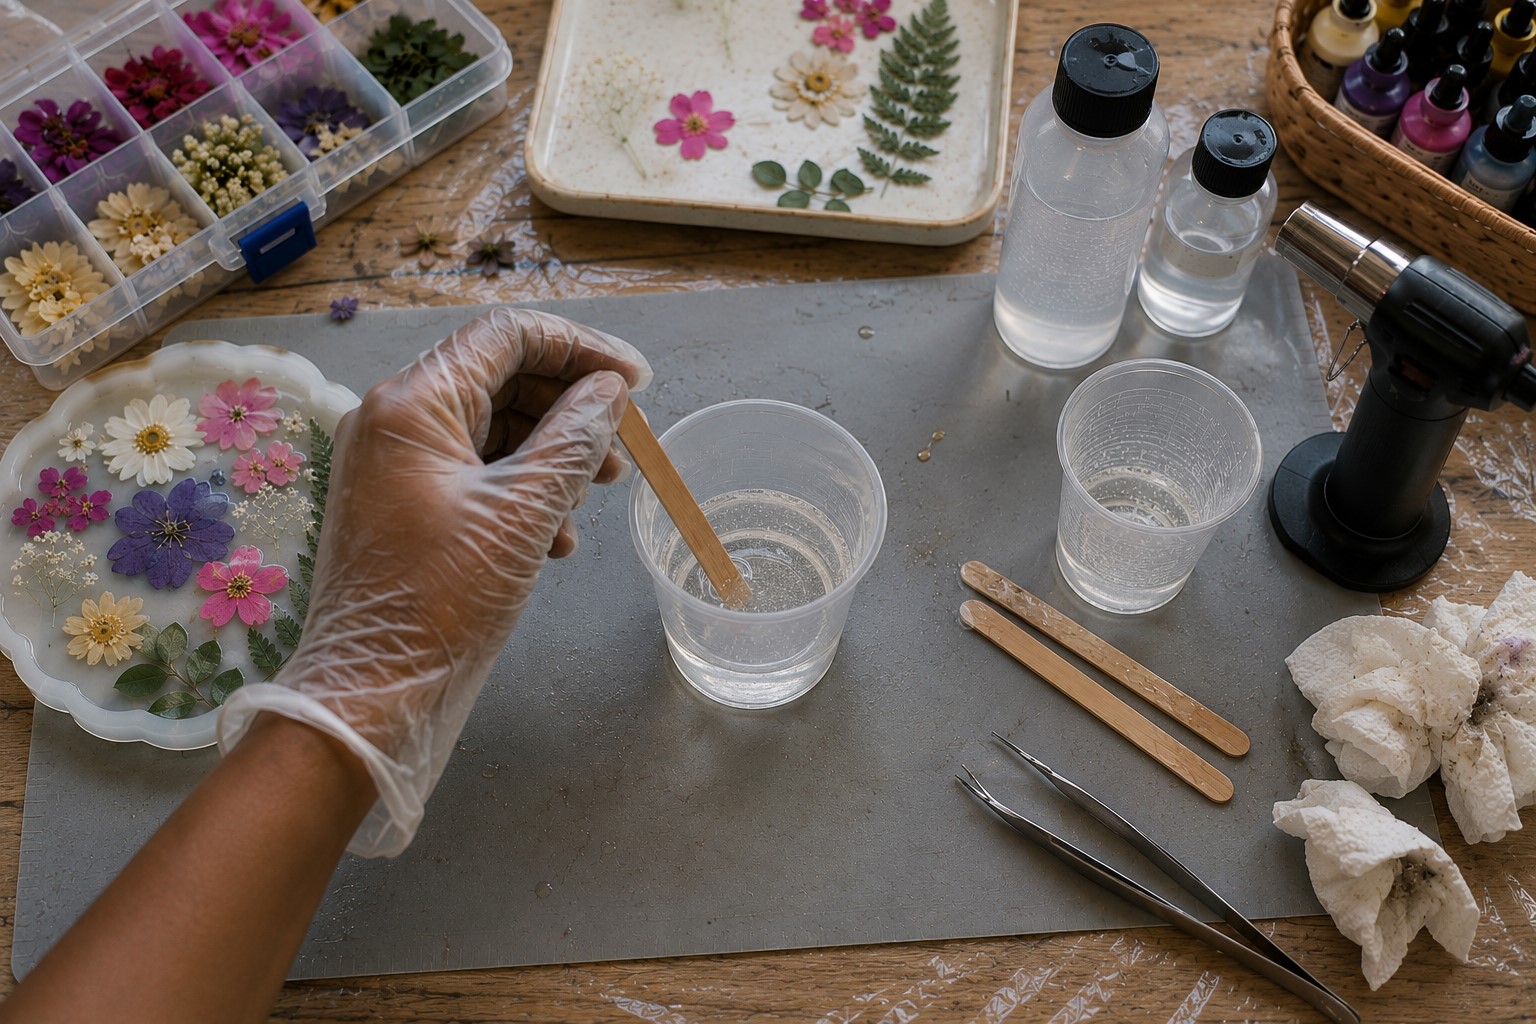
Many people believe pouring resin is the hardest part of this project. From my experience, measuring and mixing deserve much more attention.
Even the prettiest flowers cannot save a coaster if the resin does not cure properly. That is why I never rush this stage, no matter how excited I feel to start.
Begin by reading the instructions that come with your resin. Different brands use different mixing ratios, so always follow the directions on the package instead of guessing.
Measure the resin and hardener carefully into a clean mixing cup. Accurate measurements help the resin harden correctly and give your coaster a strong, glossy finish.
Next, stir the mixture slowly with a wooden stick. Scrape the sides and bottom of the cup often because unmixed resin can leave soft or sticky spots after curing.
Avoid stirring quickly since fast movements trap extra air inside the mixture. You may still notice small bubbles, and that is completely normal.
Keep mixing until the resin looks smooth and crystal clear. Then let it rest for about a minute. During that short pause, many of the tiny bubbles will rise to the surface on their own. This small habit gives you a clearer finish and makes the next step much easier.
Step 5: Pour the First Thin Layer of Resin
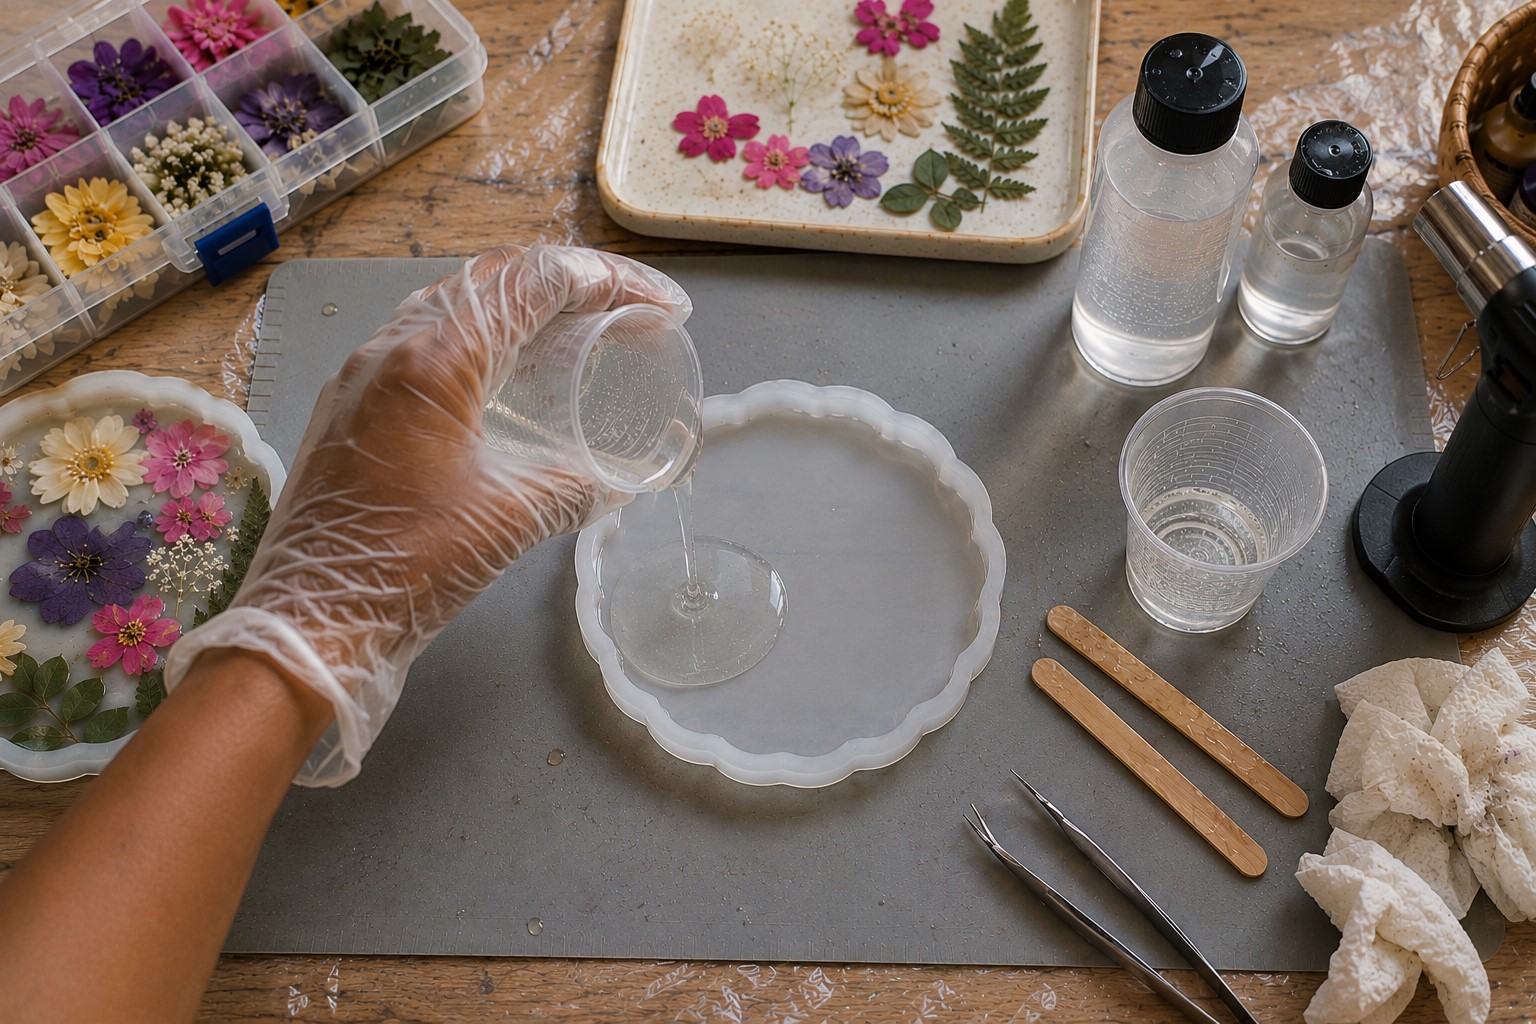
Instead of filling the mold immediately, start with a very thin layer of resin. This first layer acts like a foundation for your design. It gives the flowers something to rest on and helps reduce trapped air underneath delicate petals.
Pour slowly into the center of the mold and let the resin spread naturally. There is no need to cover the flowers yet because they have not been added.
If the resin does not reach the edges, gently guide it with a stir stick or toothpick instead of pouring too much at once.
Take a close look at the surface before moving on. You will probably notice a few bubbles sitting near the top.
Pop the larger ones with a toothpick, then pass a heat gun or small torch lightly over the resin. Keep the heat moving the entire time because holding it in one place can overheat the resin or damage the silicone mold.
Once the bubbles disappear, let the resin sit for a minute or two. This short wait allows the surface to settle and creates a smooth base for your flower arrangement.
A clean foundation helps every flower stay in place and gives the finished coaster a much more polished appearance.
Step 6: Place the Flowers Into the Resin
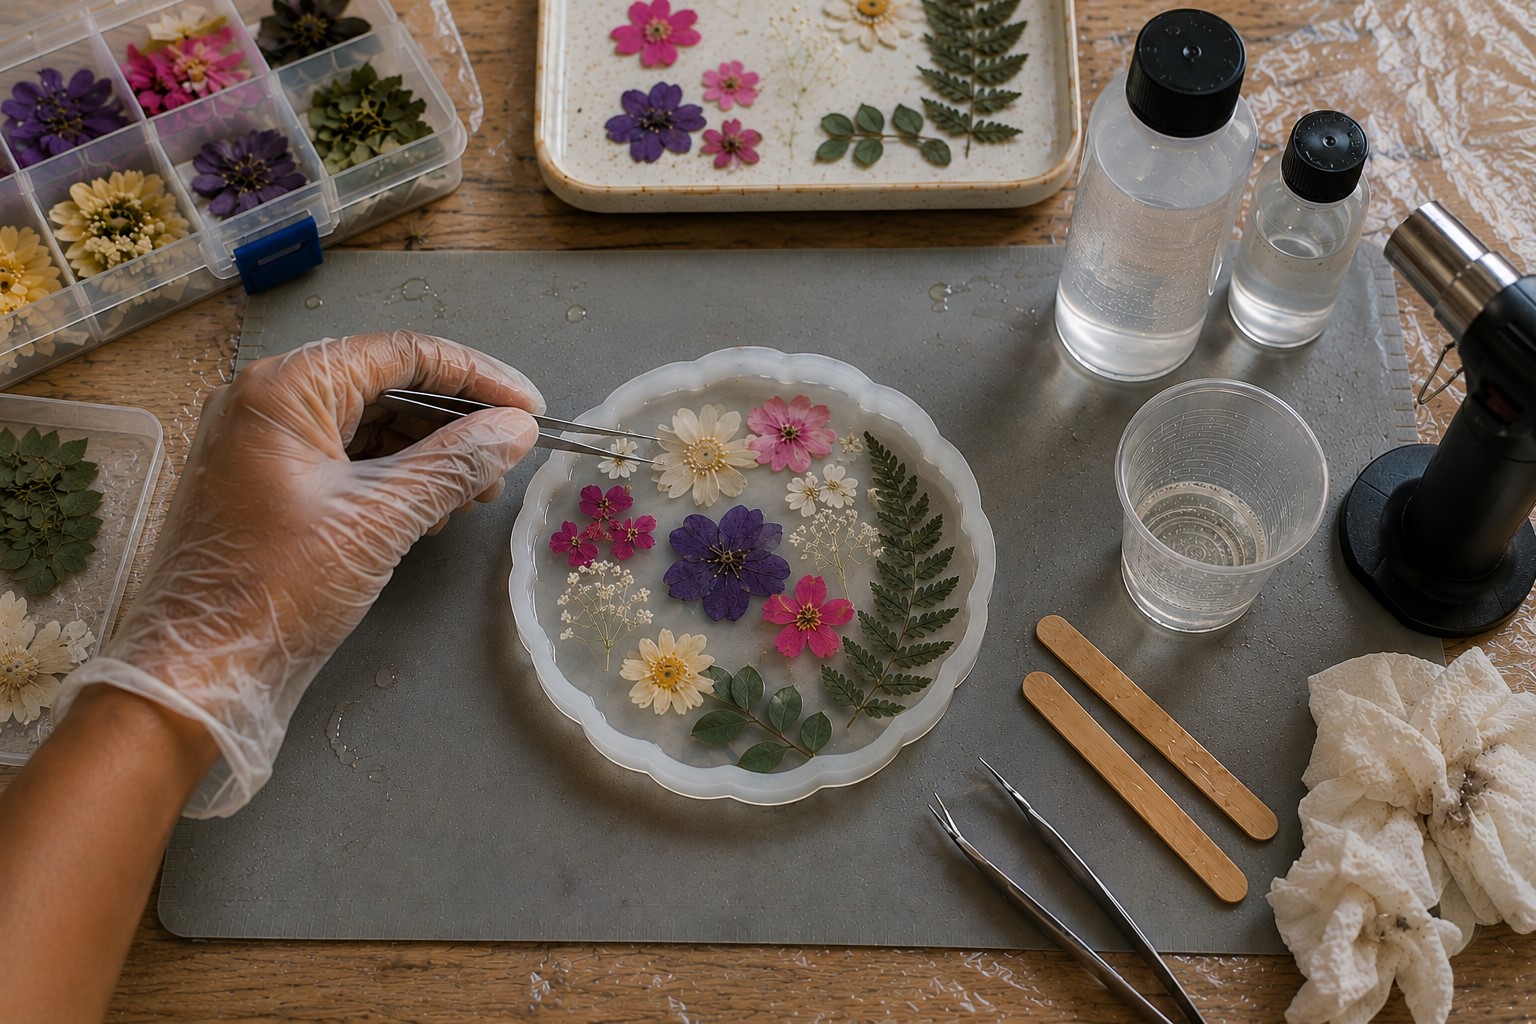
Now it is time to bring your design to life. Using tweezers, gently pick up one flower at a time and place it onto the thin layer of resin.
Work slowly because pressed flowers are delicate and can tear if you rush. I always begin with the largest flower first because it usually becomes the main feature of the coaster.
After placing the larger flowers, fill the remaining spaces with smaller blooms, leaves, or tiny pieces of greenery. Keep referring to the photo you took earlier if you want to recreate the same arrangement.
If a flower shifts out of place, gently move it with the tip of a toothpick instead of using your fingers.
Sometimes a flower curls slightly after touching the resin. If that happens, press it down gently with the tweezers until it lies flat.
Do not force it because dried petals can break easily. A little patience usually solves the problem.
Before moving to the next step, pause for a final look. Make sure no flowers touch the edge of the mold and that the design still feels balanced.
These last small adjustments often make the difference between a coaster that looks homemade and one that looks professionally crafted.
Step 7: Cover the Flowers With More Resin
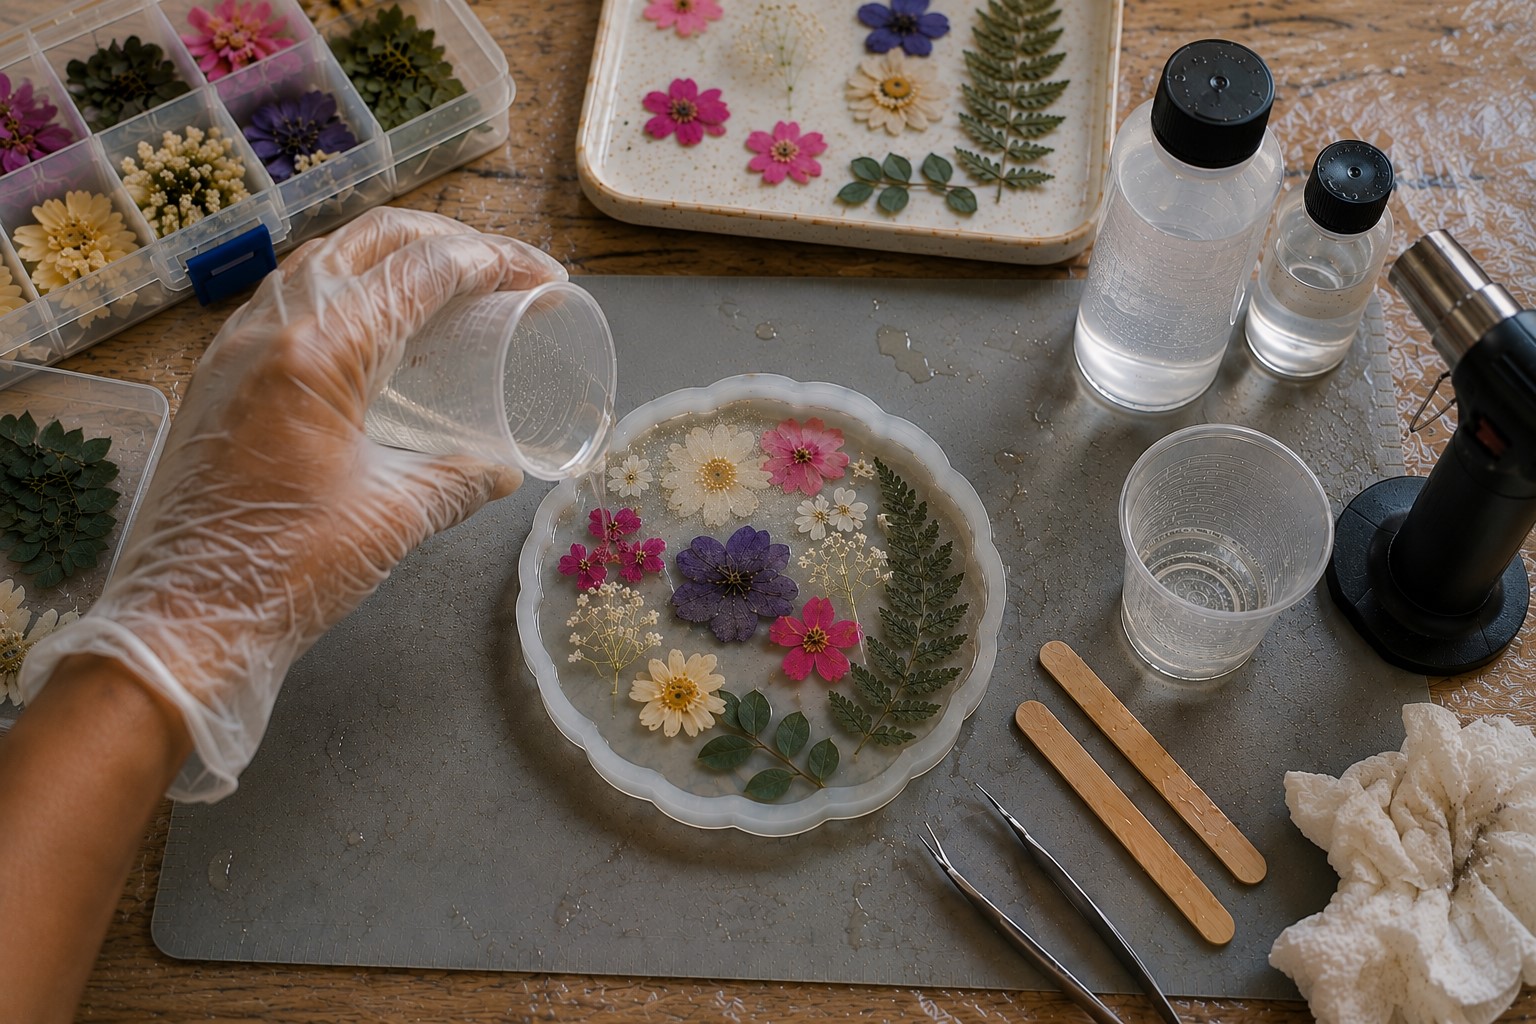
Once every flower sits exactly where you want it, you can add the final layer of resin. Pour slowly over the center of the mold instead of pouring directly onto the flowers.
This gentle approach helps keep the arrangement in place and reduces the chance of petals moving around. As the resin spreads, it will naturally cover the flowers and fill the empty spaces.
Fill the mold until the resin sits just below the top edge. Avoid overfilling because resin can spill over the sides as it settles. At the same time, do not stop too early.
If the resin level sits too low, your coaster may have a dip in the middle after it cures.
Now look closely at the flowers. Sometimes a small leaf or petal floats toward the surface. If you notice this happening, use a toothpick or tweezers to guide it back into place.
I like checking the coaster from different angles because tiny details become easier to spot that way. Spending another minute here often saves you from wishing you had fixed something later.
Step 8: Remove Air Bubbles Before the Resin Starts to Cure

Even if you mixed the resin carefully, a few bubbles will usually appear after pouring. Do not panic because this happens to almost everyone. The good news is that most bubbles are easy to remove if you catch them early.
Start by looking over the entire surface under good lighting. Small bubbles often hide around flower petals or along the edges of the mold.
Pop the larger ones with a toothpick, then pass a heat gun or small torch lightly over the surface. Keep the heat moving in smooth motions instead of holding it in one place. Within a few seconds, you should see many tiny bubbles disappear.
After that, leave the coaster alone for about five minutes. Then check it again because a few new bubbles may rise to the surface.
I usually inspect my resin two or three times during the first fifteen minutes. That little routine has helped me achieve much clearer finishes over the years.
Once you feel satisfied with the surface, stop touching the resin and let it settle naturally.
Step 9: Protect the Resin While It Cures
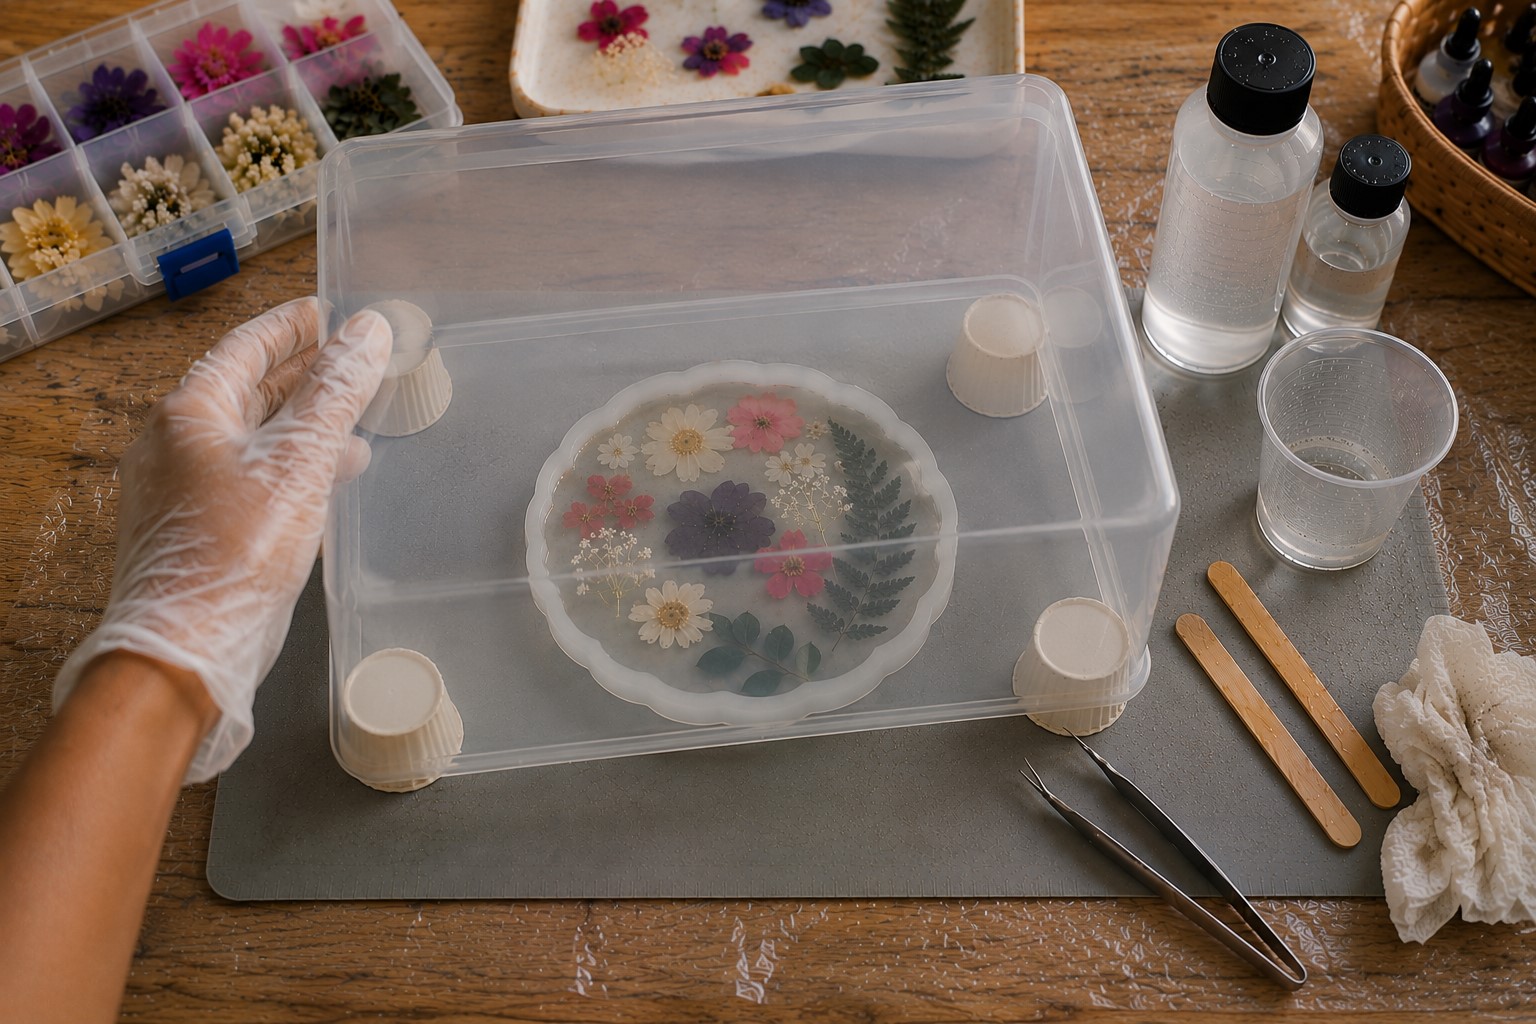
This part of the project does not feel exciting, yet it is just as important as every step before it. Fresh resin attracts dust, pet hair, and tiny bits of lint floating through the room. Even one small speck can become trapped inside the glossy finish.
As soon as you finish removing bubbles, cover the mold with a clean cardboard box, plastic container, or another dust-free cover.
Make sure the cover does not touch the resin. It only needs to protect the surface while air continues to circulate underneath.
Place the mold somewhere safe where nobody will bump the table or move the coaster. Try not to check it every few minutes because vibrations can disturb the resin before it begins to harden.
Follow the curing time recommended by the manufacturer. Some resins cure within a day, while others need a little longer.
Waiting can test your patience, especially when you feel excited to see the finished coaster. I remind myself that rushing this stage can undo all the careful work I have already done.
Giving the resin enough time to cure properly rewards you with a harder, clearer, and more durable finish.
Step 10: Remove the Coaster and Finish the Edges
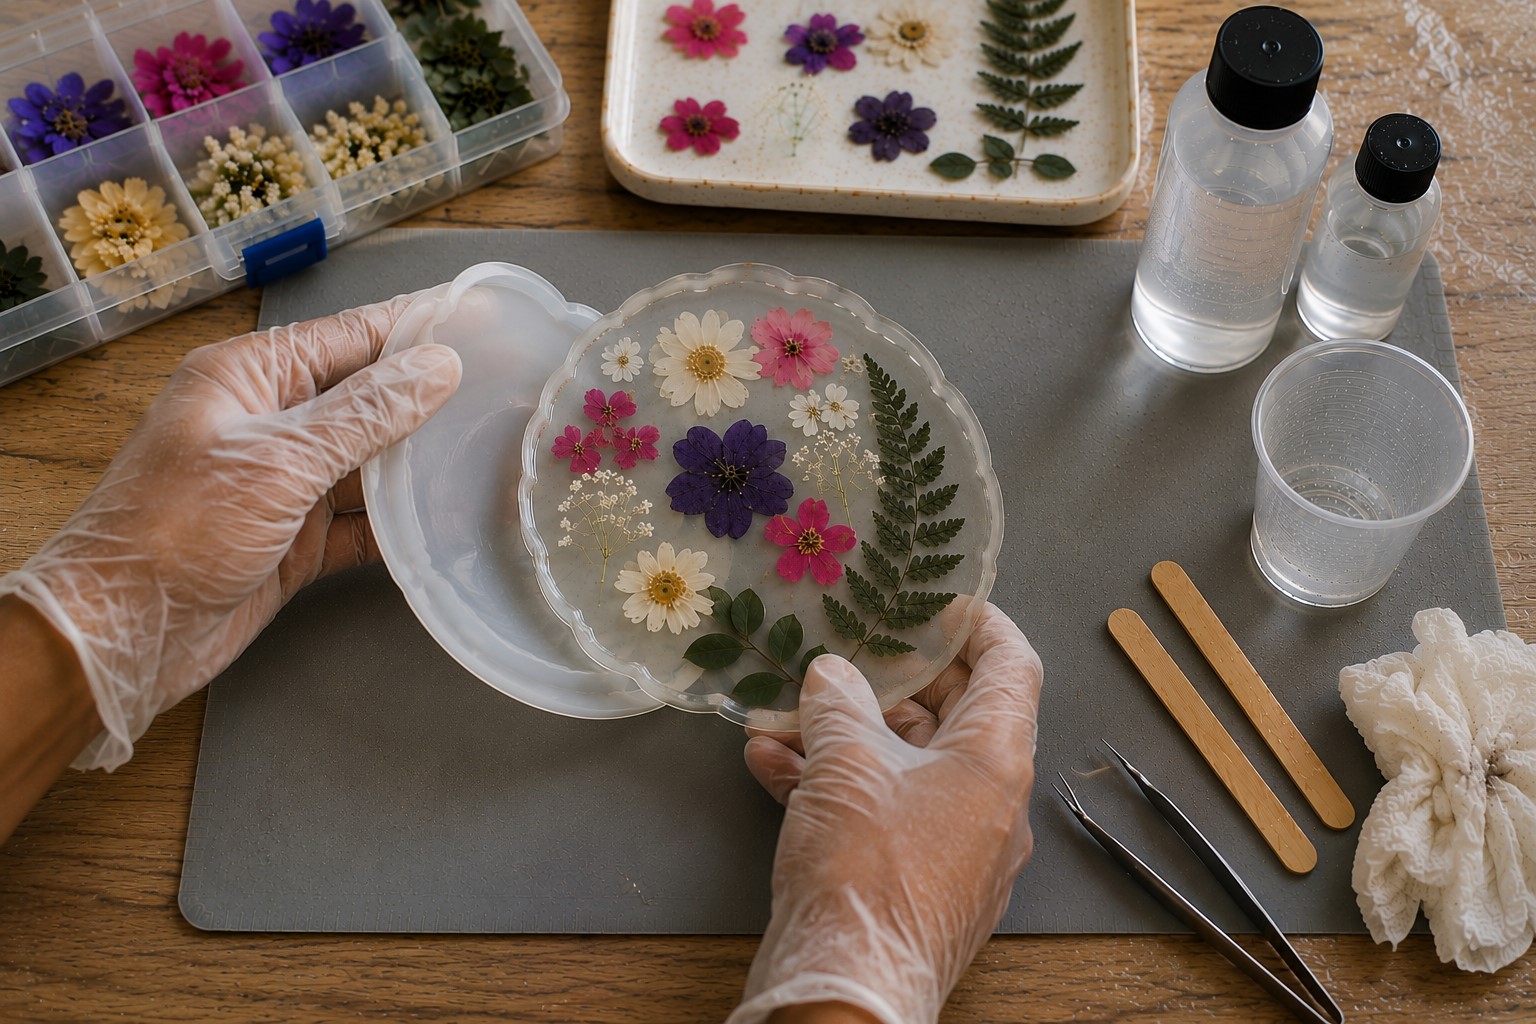
Once the resin has cured completely, you can remove the coaster from the mold. Peel the silicone mold away gently instead of pulling the coaster with force. Good-quality silicone molds release resin quite easily, so there is no need to rush.
Hold the coaster under good lighting and inspect every edge. Most of the time, the edges will already look smooth.
If you notice any sharp spots or small pieces of extra resin, smooth them carefully with fine-grit sandpaper. Sand only the areas that need attention because too much sanding can dull the glossy finish.
After sanding, wipe away any dust with a soft cloth. If you want an even shinier look, apply a resin polish according to the product instructions.
This final touch helps bring back the crystal-clear shine and gives the coaster a professional appearance.
Now take a moment to admire your work. Look closely at the flowers suspended inside the resin. They should appear bright, clear, and beautifully preserved.
It is always satisfying to see how simple pressed flowers can turn into something both practical and elegant with a little patience and care.
Common Mistakes to Avoid
Even experienced crafters make mistakes from time to time. The good news is that most resin problems have simple solutions. Keep these common mistakes in mind before you start your next project.
I. Using Flowers That Are Not Completely Dry
Moisture is one of the biggest enemies of clear resin. Flowers that still contain water can turn brown, create cloudy patches, or trap tiny air pockets inside the coaster. Always let your flowers dry fully before using them.
II. Measuring the Resin Incorrectly
It may feel harmless to estimate the measurements, yet resin needs the correct ratio to cure properly. Measure each part carefully and follow the instructions for your resin brand every time.
III. Stirring the Resin Too Quickly
Fast stirring traps unnecessary air inside the mixture. Those bubbles can stay inside the coaster even after curing. Mix slowly and scrape the sides and bottom of the cup to blend everything evenly.
IV. Overfilling the Mold
Adding too much resin may cause it to spill over the edges as it levels itself. Fill the mold just below the top edge to give the resin enough room to settle.
V. Removing the Coaster Too Soon
The surface may feel hard after several hours, but the resin may still be curing inside. Wait for the full curing time before removing the coaster from the mold. A little patience helps prevent bending or fingerprints.
VI. Leaving the Finished Coaster in Direct Sunlight
Strong sunlight can fade some flower colors over time. Display your coasters indoors or in a shaded area to help preserve their beauty for years.
Creative Ideas to Personalize Your Resin Coasters
One of my favorite things about resin crafts is that no two projects have to look alike. Once you feel comfortable with the basic process, you can experiment with different styles and create coasters that reflect your personality.
• Create a Seasonal Collection
Use bright wildflowers for spring, colorful blooms for summer, warm leaves for autumn, or evergreen sprigs for winter. A seasonal collection looks beautiful throughout the year.
• Preserve Flowers From Special Memories
Save flowers from a wedding bouquet, birthday celebration, graduation, anniversary, or family gathering. Every coaster becomes a meaningful keepsake that brings back happy memories.
• Add Metallic Accents
Sprinkle a few gold flakes, silver flakes, or rose gold foil around the flowers. A small amount adds elegance without taking attention away from the natural beauty of the blooms.
• Mix Flowers With Delicate Greenery
Pair flowers with tiny fern leaves, eucalyptus, or other dried greenery. The different textures create a fuller and more balanced design.
• Create Matching Coaster Sets
Choose one color palette and make four or six coasters using similar flowers. Keep the overall theme the same while changing the arrangement on each coaster. The finished set looks coordinated without looking identical.
• Add a Colored Resin Border
Leave the center crystal clear and tint only the outer edge with resin pigment. This simple detail frames the flowers beautifully and gives the coaster a polished look.
• Make Handmade Gifts
Wrap a matching coaster set in a gift box with tissue paper and a ribbon. Handmade resin coasters make thoughtful gifts for birthdays, weddings, housewarmings, Mother’s Day, and many other special occasions.
Final Thoughts
Learning How to Make Resin Coasters With Pressed Flowers becomes much easier when you take your time and enjoy each step.
You do not need years of experience to create something beautiful. Instead, focus on preparing your flowers, measuring the resin carefully, and working patiently.
Every coaster you make helps you build new skills, so do not let small mistakes discourage you. They are simply part of the learning process.
I hope this guide inspires you to start your own resin coaster collection with confidence. Try different flowers, experiment with new color combinations, and make each design your own.
Before you know it, you will have beautiful handmade coasters that brighten your home and make thoughtful gifts for the people you love. Most of all, enjoy the creative journey because every finished coaster tells a unique story.