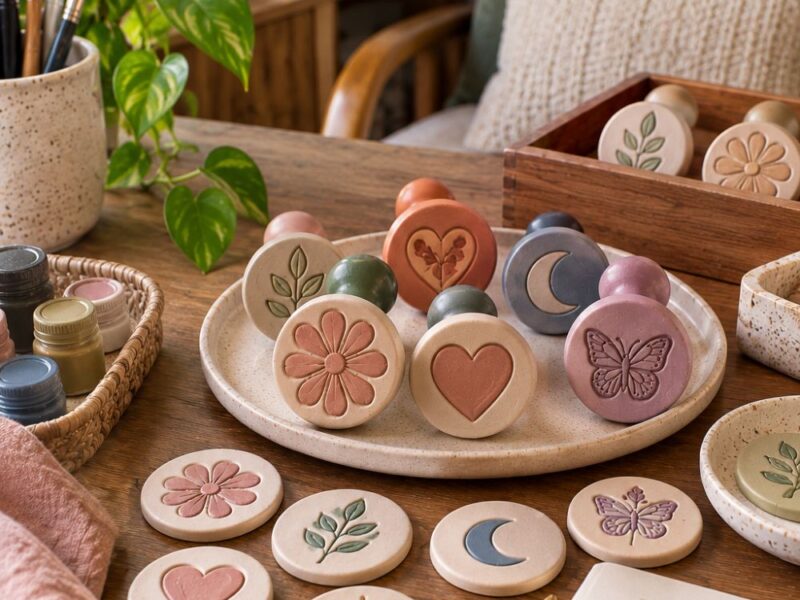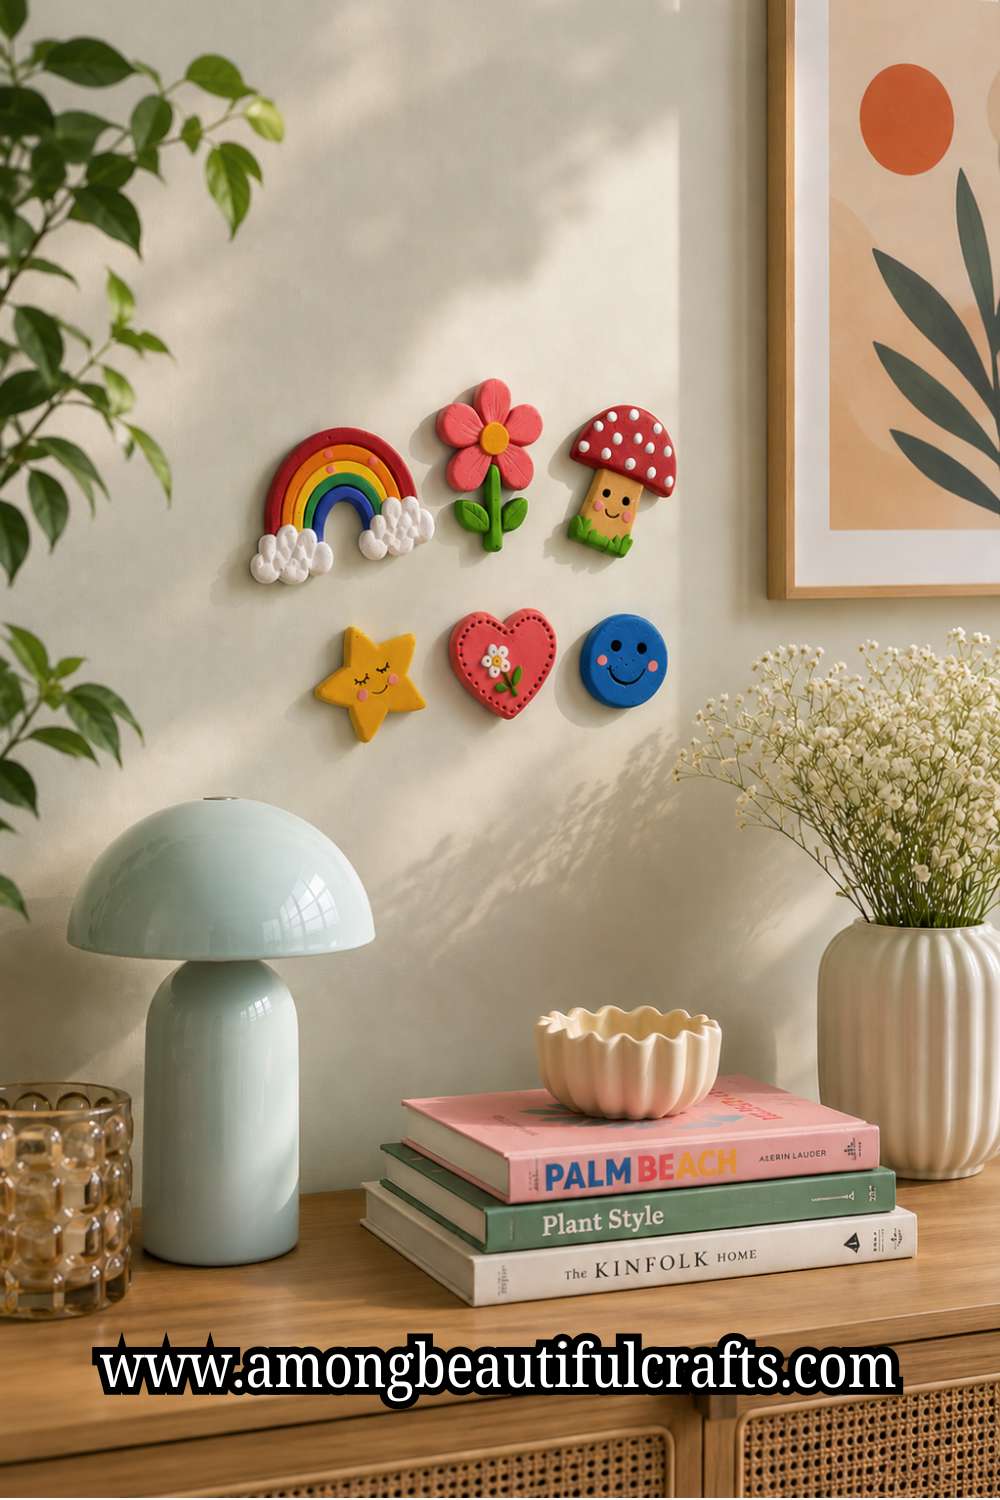
Why do handmade gifts always seem harder to throw away? I have a few clay magnets that cost almost nothing to make, yet I would never replace them with expensive ones from a store.
They have tiny flaws that no one else would notice, and I hope they stay that way. Those little imperfections remind me that I shaped each one by hand instead of picking it off a store shelf. That is exactly why you’ll enjoy learning How to Make Clay Magnets.
The same small, handmade charm shows up in How to Make Gorgeous Air Dry Clay Earrings That Don’t Crack, another quick clay project worth trying.

Sometimes, the smallest crafts leave the biggest impression. A colorful magnet holding a child’s drawing can make someone smile every morning.
A tiny flower on the refrigerator door can brighten the kitchen without taking up any space.
Even a simple heart or little animal can make an ordinary note feel less ordinary. Those are the little touches that make a house feel lived in.
They are easy to overlook, yet people often notice them without even realizing why.
That is the experience I want to share with you in this guide. I will walk you through every step just as I do it myself, from choosing the right clay to attaching magnets that stay firmly in place.
Along the way, I’ll point out the small details that make a big difference because those are the things I wish someone had told me sooner.
By the time you finish, you won’t just have a handful of adorable clay magnets.
You’ll have a new craft that is easy to come back to whenever you want to make something creative without spending a lot of time or money.
Materials You’ll Need
Before you begin, gather everything in one place. Having your supplies ready makes the whole project feel easier and helps you enjoy the process without stopping every few minutes.
You’ll need:
- Air dry clay or polymer clay – (Available on Amazon)
- Small rolling pin or smooth bottle
- Clay tools or a toothpick for details – (Available on Amazon)
- Cookie cutters or small shape cutters (optional)
- Craft knife – (Available on Amazon)
- Fine-grit sandpaper
- Acrylic paints – (Available on Amazon)
- Small paintbrushes
- Clear craft sealer – (Available on Amazon)
- Strong craft glue or epoxy
- Flat craft magnets – (Available on Amazon)
- Small bowl of water
- Baking paper or a non-stick craft mat – (Available on Amazon)
- Paper towels
Most of these supplies are inexpensive, and you can use them for many other clay projects, including the short supply list behind 19 Easy Clay and Pipe Cleaner Crafts Kids Will Want to Make.
How to Make Adorable Clay Magnets Worth Displaying
Step 1: Choose the Right Clay

The clay you choose has a big effect on your finished magnets. That is why I always decide on the clay before thinking about shapes or colors.
If you want an easy project without using an oven, air dry clay is a great choice. It feels soft, shapes easily, and dries on its own.
Many beginners enjoy working with it because the process feels simple. Polymer clay is another excellent option. It stays soft until you bake it, so you have plenty of time to shape every detail.
After baking, it becomes stronger and handles everyday use very well.
Choosing the right clay for the job matters just as much in How to Sculpt Adorable Miniature Clay Food That Looks So Real, where the wrong type can make fine detail work much harder.
No matter which clay you choose, make sure it feels fresh and smooth. Clay that has dried out can crack while you work. If it feels too hard, it will also become difficult to shape.
Think about where you plan to use your magnets. If they will hold only light papers, almost any good-quality clay will work.
If you want stronger magnets that people will handle often, polymer clay is usually the better choice.
Taking a few extra minutes to choose the right clay can save you from many problems later.
Step 2: Gather Your Supplies

Once you have your clay, collect the rest of your tools before you begin. This may seem like a small step, yet it keeps the project moving smoothly from start to finish.
Place everything within easy reach. Keep your clay tools together, your paints in one spot, and your brushes where they will stay clean.
If you plan to use cookie cutters, set them beside your rolling tool before you start.
It also helps to keep a damp cloth or paper towel nearby. Clay dust, paint, and small bits of clay can build up as you work.
A quick wipe keeps your workspace neat and prevents unwanted marks on your designs.
Take a moment to check your magnets as well. Flat magnets usually work better than rounded ones because they sit evenly against the back of the clay.
Make sure they are strong enough to hold notes without sliding down the refrigerator door.
Spending a few minutes getting organized now will make every later step much more enjoyable.
Step 3: Prepare Your Workspace

A clean workspace makes a bigger difference than many people expect. Clay easily picks up dust, pet hair, lint, and tiny crumbs.
Those little bits can become trapped in the surface and spoil an otherwise beautiful design.
Choose a flat table with good lighting. Natural daylight is wonderful if you have it, yet a bright desk lamp also works well.
Good light helps you notice uneven edges before the clay dries.
Cover the table with baking paper, a silicone mat, or another smooth surface. This keeps the clay clean and makes it easier to lift finished pieces without changing their shape.
A clean, well-prepped workspace matters just as much in How to Build a Beautiful Terrarium That Doesn’t Get Moldy, where stray dust or debris can affect the whole project.
Keep a small bowl of water nearby if you are using air dry clay. A slightly damp fingertip can smooth tiny cracks before they become bigger problems.
Just remember not to use too much water because it can make the clay sticky.
Finally, keep food and drinks away from your workspace. It only takes one accidental spill to ruin hours of careful work.
Step 4: Condition and Roll the Clay

Before you shape anything, spend a few minutes working the clay with your hands. This simple step makes the clay softer and easier to handle. It also helps prevent small cracks later.
Break off only the amount of clay you need. Then press, fold, and roll it between your hands until it feels smooth.
If you are using polymer clay, keep kneading until it becomes flexible. If you are using air dry clay, work gently so it does not dry out too quickly.
Next, place the clay on your work surface and roll it into an even sheet. A small rolling pin works well, but a smooth glass bottle can do the job too.
Try to keep the thickness even from one side to the other. If one area is much thinner, it may break more easily.
If another area is too thick, the finished magnet may feel heavy. Building a strong, even base like this is also the secret behind How to Make a Paper Mache Bowl That Dries Without Cracking.
I usually aim for about ¼ inch or 6 mm thick. That gives the magnet enough strength without making it bulky. Roll slowly and check the thickness from different angles before moving on.
Taking your time here makes the next steps much easier.
Step 5: Shape Your Magnet Designs

Now comes the fun part. This is where a flat piece of clay starts turning into something unique.
If you enjoy simple projects, begin with easy shapes like circles, hearts, stars, flowers, or rainbows. These designs are beginner-friendly and still look beautiful when painted.
If bold color combinations excite you, 21 Creative Rainbow Crafts That Brighten Any Day is a fun place to find more inspiration.
You can use cookie cutters for neat edges, or cut each shape by hand with a craft knife. There is no right or wrong choice. Both methods work well.
If you want to create animals, fruits, or other detailed designs, shape one piece at a time instead of rushing the whole project.
Build larger designs from smaller pieces. For example, make the flower first, then add each petal before finishing with the center.
Press the pieces together gently. They should stick without losing their shape. If a piece shifts, move it back before pressing again.
Every now and then, lift your design carefully from the work surface. This stops it from sticking as you continue working.
There is no need to make every magnet exactly the same. Handmade crafts look more charming when each one has its own character.
Step 6: Add Details That Bring the Design to Life

Small details can completely change the look of a clay magnet. They help simple shapes feel more interesting without making the project difficult.
Use a toothpick, dotting tool, or clay tool to add texture. Draw leaf veins on flowers, tiny lines on fruit, or little dots on mushrooms.
This same patient attention to fine detail is what makes the project on How to Make a Beautiful Origami Crane You’ll Be Proud to Display so satisfying to finish.
Even a few gentle marks can make the design look much more finished.
If you want raised details, roll tiny pieces of clay and place them on top of the base shape. You might add flower centers, animal ears, butterfly wings, or small bows.
Press each piece gently into place. Use just enough pressure to hold it firmly without flattening the design.
Step back every few minutes and look at your magnet from different angles. This makes it easier to notice if one side looks heavier than the other.
Small adjustments now can make the finished piece look much more balanced.
Remember, you do not need dozens of details. Sometimes one or two thoughtful touches make the biggest difference.
Step 7: Smooth the Edges

Many beginners skip this step because they want to move on quickly. I understand the excitement, yet this is one of the easiest ways to improve your finished magnets.
Run your fingertip gently around every edge. Feel for rough spots, bumps, or tiny cracks. If you find one, smooth it before the clay dries.
For air dry clay, lightly dampen your finger with water. Then rub the area using small circular motions. The surface should become smoother within a few seconds.
Keeping distinct sections neat and separate matters here too, much like it does in How to Make Sand Art in a Bottle Without the Colors Mixing.
For polymer clay, use a clean fingertip or a soft silicone tool. Gentle pressure is usually enough to remove small marks.
Also check the front and back of every magnet. Fingerprints often appear without you noticing while shaping the clay. Smoothing them now saves time later.
Do not rush this step. Spending an extra five minutes here can make your finished magnets look much cleaner and more professional.
Step 8: Dry or Bake the Clay the Right Way

Once your designs are finished, resist the urge to paint them right away. The clay needs enough time to become completely firm first.
If you are using air dry clay, place each piece on a flat surface with a little space between them. Leave them alone until they dry completely.
The exact drying time depends on the clay brand and the thickness of your designs.
Turn each piece over halfway through the drying time if the instructions recommend it. This helps both sides dry more evenly.
Similar small, patient magnet projects show up in 23 Adorable Farm Animal Crafts That Bring the Barnyard to Life, where painted pebbles get the same magnet treatment.
If you are using polymer clay, follow the baking instructions that come with your clay. Place the magnets on a baking tray lined with baking paper.
Bake them for the recommended time and temperature.
When the baking time is over, let the pieces cool naturally. Avoid touching them while they are still hot because they may feel softer than usual.
Patience really pays off here. Clay that dries or bakes properly stays stronger and lasts much longer.
Step 9: Sand Away Rough Spots

Once your clay has dried or cooled completely, take a close look at each magnet. You might notice a few rough edges or tiny bumps. That is completely normal.
Even experienced crafters end up with small imperfections now and then.
Pick up a piece of fine-grit sandpaper and work slowly. Sand one area at a time using light, gentle strokes. There is no need to press hard.
Let the sandpaper do the work. As you go, run your fingers over the surface. It is often easier to feel rough spots than to see them.
A little sanding and prep work go a long way here too, similar to what you’d do in How to Paint Shoes at Home and Get a Professional Look.
Pay extra attention to the edges. Smooth edges make the magnets feel nicer when someone picks them up. They also give the finished design a cleaner look.
If you find a deep crack, do not try to sand it away. Instead, fill it with a little fresh clay if you are using air dry clay, or make a new piece if the damage is too noticeable.
When you finish sanding, wipe away all the dust with a soft, dry cloth. A clean surface helps the paint stick better and gives you a smoother finish.
Step 10: Paint Your Clay Magnets

This is the step where your magnets really come to life. Even the simplest shape can look bright and cheerful with the right colors.
Start with a thin coat of acrylic paint instead of a thick one. Thin layers dry faster and leave a smoother finish. If the color looks a little light, let it dry first.
Then add another coat. Two or three thin coats usually look much better than one heavy coat.
Use a larger brush for the main color and switch to a smaller brush for tiny details. This gives you more control around edges and small shapes.
If you enjoy this kind of design work, 25 Aesthetic BTS Painting Ideas Every ARMY Should Try has plenty of fun, colorful inspiration for your next batch of magnets.
If you make a mistake, do not panic. Let the paint dry, then paint over it with the correct color.
Think about color combinations before you begin. Bright colors look playful, while soft colors create a calm and modern style. You can also mix both for a fun collection.
Try adding tiny white dots, simple lines, rosy cheeks, or little eyes if they suit your design. Those small touches often make the biggest difference.
Once you finish painting, place the magnets somewhere safe and let them dry completely before moving to the next step.
Step 11: Seal the Surface

After spending time painting your magnets, you will want to protect all that hard work. A clear sealer helps keep the colors looking fresh and makes the magnets easier to clean later.
Choose a sealer that works well with your type of clay and paint. Some leave a glossy finish, while others dry with a soft matte look. Pick the one that matches the style you like best.
A clear, glossy protective coat is also what gives How to Make Stunning Resin Coasters With Pressed Flowers its polished, long-lasting finish.
Apply a thin, even coat with a clean brush. Try not to let the sealer collect around small details because it can dry unevenly. If you notice a drip, smooth it out right away.
Set the magnets aside and let the first coat dry completely. If you want extra protection, apply one more thin coat instead of one thick coat.
Thin coats usually give better results and reduce the chance of streaks.
Leave the magnets alone until the sealer feels completely dry. It may be tempting to touch them, yet waiting a little longer will help you avoid fingerprints and smudges.
Step 12: Attach the Magnets
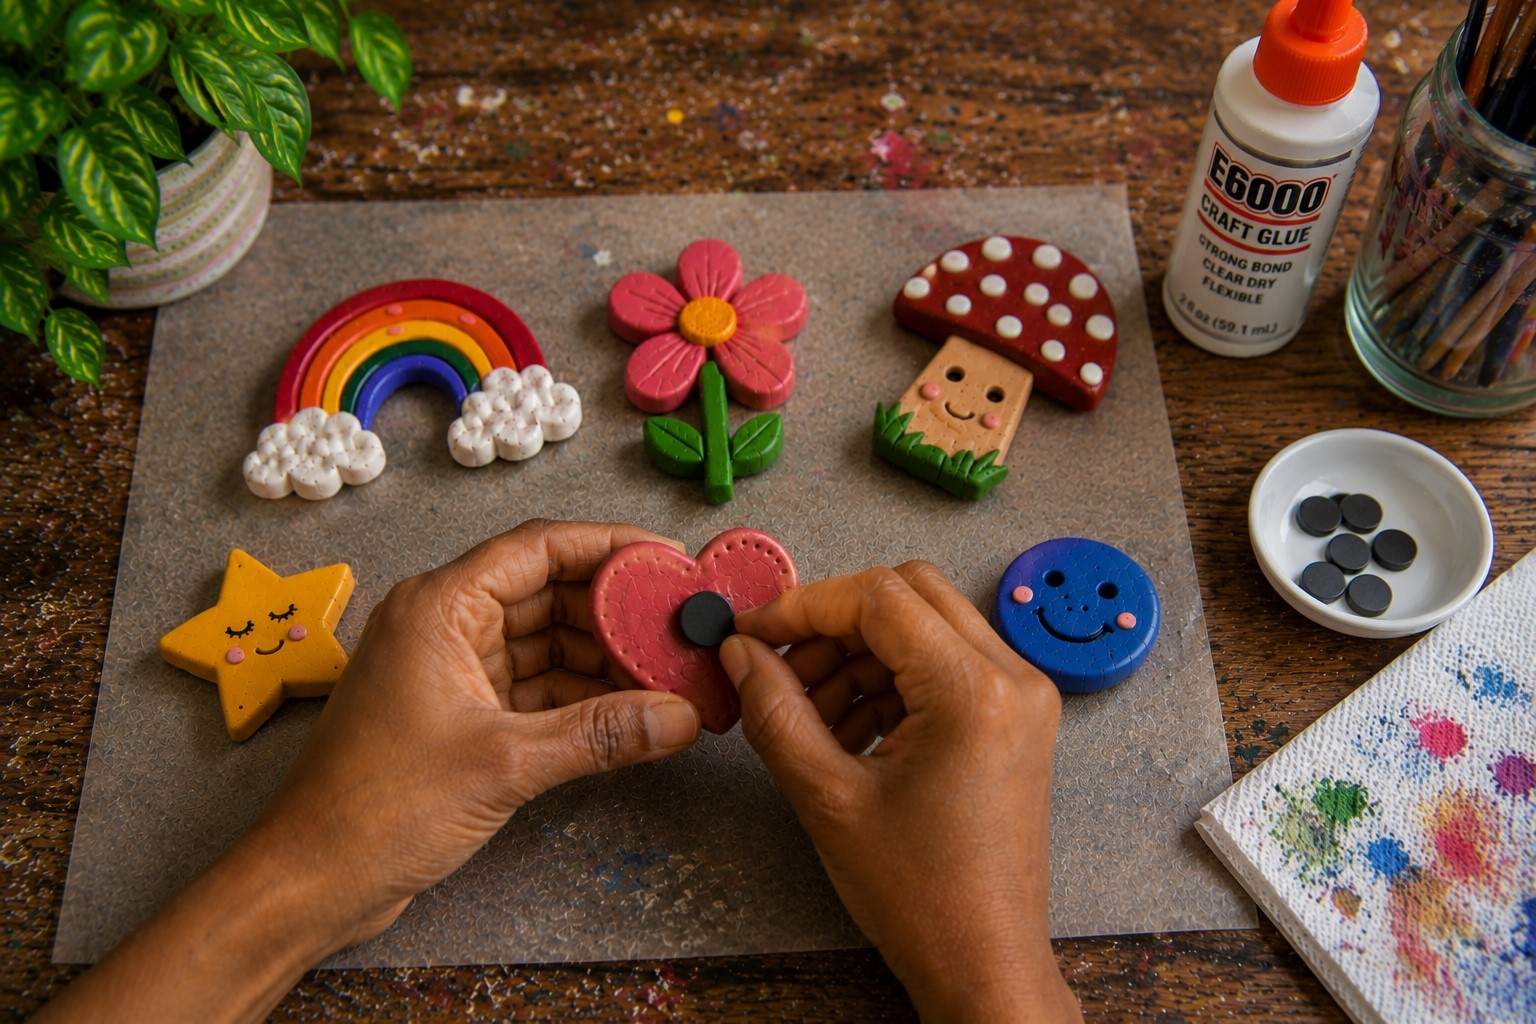
Now it is time to turn your clay pieces into real magnets.
Flip each design over and find the center of the back. Place the magnet there before adding any glue. This quick check helps you see if the size looks right.
If the magnet sits too close to one edge, the finished piece may hang unevenly.
Add a small amount of strong craft glue or epoxy to the back of the magnet. You do not need a large amount. Too much glue can squeeze out around the edges and leave a messy finish.
Press the magnet firmly onto the clay for a few seconds. Then place the piece on a flat surface and leave it alone. The glue needs time to create a strong bond.
If you move the magnet too soon, it may shift out of place.
After the glue has fully cured, test each magnet with a single sheet of paper. Then try a thicker note or photo. If everything stays in place, your magnet is ready to use.
Small, giftable keepsakes like this are also what make the project on How to Make a Pressed Flower Frame That Looks Boutique-Worthy such a thoughtful handmade present.
Looking at the finished collection is always my favorite part. What started as a small piece of clay has become something useful, colorful, and completely handmade.
It is a simple reminder that beautiful crafts do not have to be complicated to make a lasting impression.
Quick Tips for Beautiful Clay Magnets
Before you finish your project, keep these simple tips in mind. They can help your magnets look better and last much longer.
- Avoid common mistakes; Keep the clay at an even thickness, let it dry completely, smooth rough edges, use strong magnets, and apply only a small amount of glue. These simple habits can prevent many beginner problems.
- Try different designs; Flowers, fruits, animals, rainbows, mushrooms, hearts, and seasonal shapes are all fun to make. You can also personalize your magnets with names, initials, or short words for thoughtful handmade gifts.
- Take good care of your magnets; Wipe them with a soft cloth when they get dusty, keep them away from too much moisture, and avoid dropping them on hard floors. If a magnet comes loose, simply glue on a new one instead of throwing the whole piece away.
Final Thoughts
Making something with your own hands always feels rewarding, especially when you can enjoy it every single day.
Clay magnets may be small, yet they add color, charm, and personality to spaces that often go unnoticed. Every finished piece reminds you that creativity does not have to be complicated or expensive.
If you want a quicker project to try in between batches of magnets, How to Paint a Watercolor Bookmark in Under 30 Minutes is a nice change of pace.
I hope this guide has shown you that anyone can create beautiful magnets with a little patience and the right approach.
Take your time with each step, enjoy the process, and do not worry if your first few designs are not perfect. Every project teaches you something new, and each magnet helps you build more confidence.
Before long, you may find yourself making magnets for every season, every holiday, and everyone you know.
If you own a cutting machine, 27 Cute BTS Cricut Ideas That Make Perfect ARMY Gifts has more fun gift ideas worth exploring alongside your magnet collection.
They are fun to create, thoughtful to give, and lovely to display around your home. So gather your clay, try a few simple ideas, and let your creativity grow one magnet at a time.