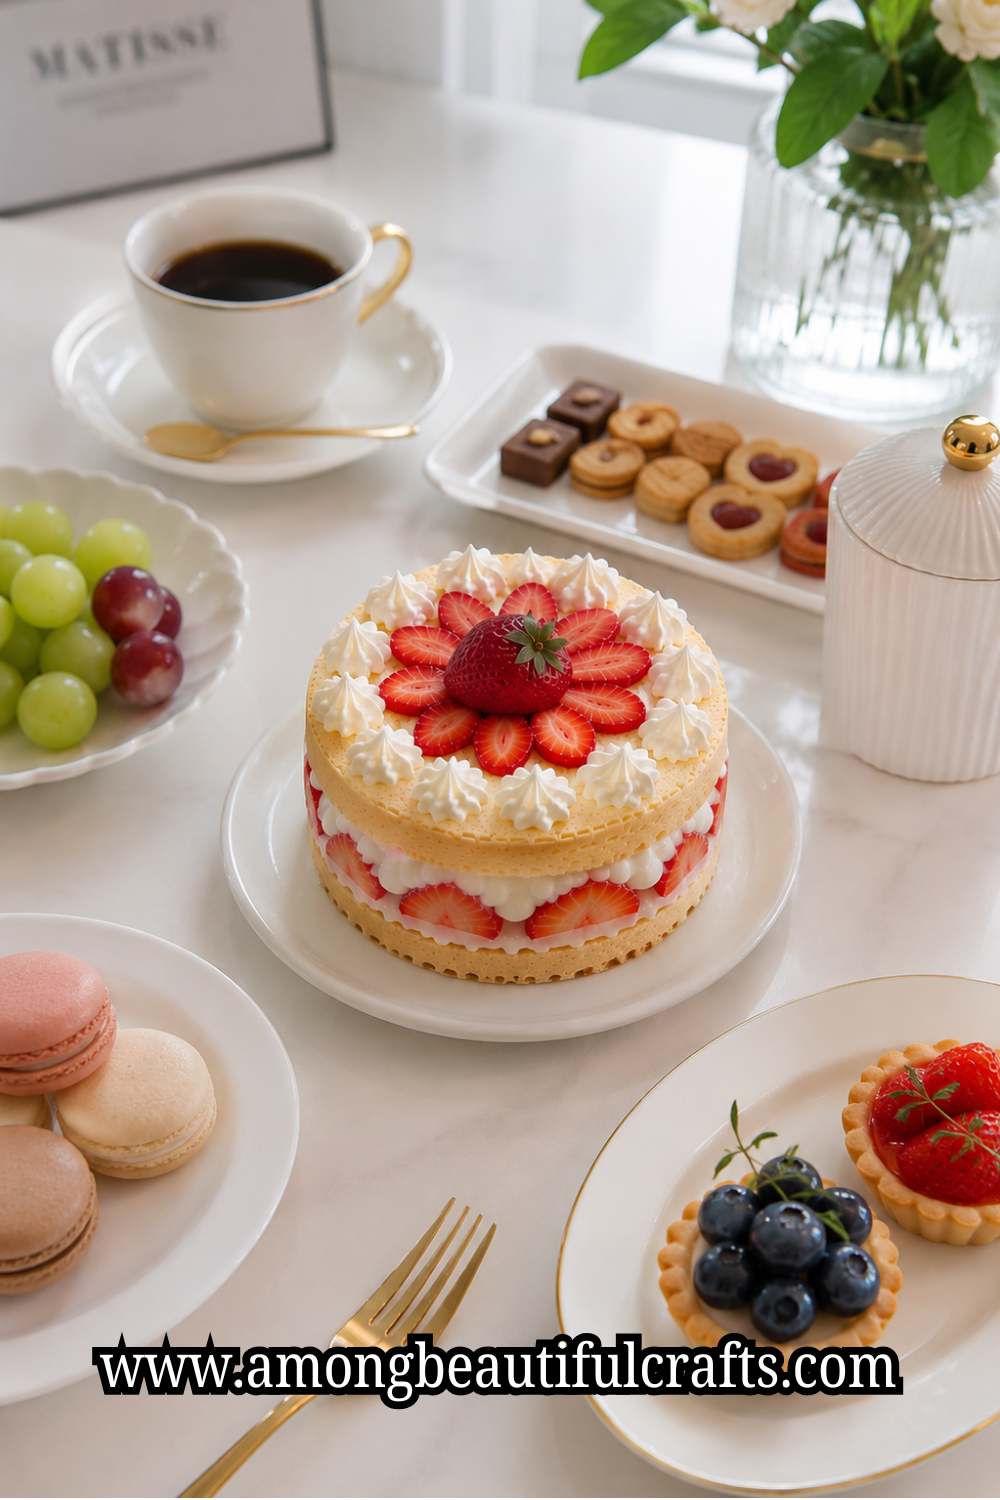
Tiny clay food always catches people’s attention. The first time I made a miniature clay donut, I could not stop looking at it. It sat on my desk for a while because it looked almost real.
Since then, I have spent many afternoons learning How to Sculpt Miniature Clay Food that looks detailed, colorful, and surprisingly realistic.
If you enjoy shaping small clay pieces like this, 23 Adorable Farm Animal Crafts That Bring the Barnyard to Life is another fun way to practice similar sculpting skills.
The best part is that you do not need special talent to get started. A little patience and a few simple tools can help you create tiny foods that look ready to eat.
Many beginners think realistic miniature food feels difficult. I used to think the same thing.
Then I learned that most miniature artists build their projects one small step at a time. A tiny cupcake starts with a simple shape. A miniature pizza begins with a flat circle.
Once you understand the process, each piece becomes much easier to create. Soon, you start noticing realistic details everywhere. Even a simple burger can teach you new sculpting skills.

In this tutorial, I will share the methods that helped me improve my miniature food projects.
Along the way, you will learn how to shape clay, add texture, create realistic colors, and finish your pieces neatly.
You will also discover common mistakes and easy ways to avoid them.
By the end, you will feel confident making adorable miniature foods that look realistic enough to impress family, friends, and fellow craft lovers.
Why Miniature Clay Food Is So Fun to Make
One reason I love miniature clay food is that every project feels achievable. You do not need a large workspace or expensive supplies.
In fact, some of my favorite projects started with a few small pieces of clay and a toothpick. A tiny donut or cupcake may seem simple, yet the finished result often looks impressive.
On a similar small scale, How to Make Adorable Clay Magnets Worth Displaying is another project that proves tiny things can make a big impression.
Another thing I enjoy is the challenge of recreating real food in a tiny size. Every time I sculpt a cookie, burger, or slice of cake, I pay attention to details I would normally ignore.
I notice textures, layers, colors, and even small imperfections. Because of that, miniature sculpting feels relaxing and rewarding at the same time.
Many beginners worry about making mistakes. I felt the same way when I started. My first miniature foods looked more like toys than realistic treats.
Still, every project taught me something useful. Before long, I learned how to shape clay more neatly and add realistic details.
That is why I always encourage beginners to enjoy the learning process. Each piece helps you improve.
Materials You Need Before You Begin
Before learning How to Sculpt Miniature Clay Food, gather your supplies and prepare your workspace. Having everything nearby makes the process smoother and more enjoyable.
Here are the materials I use most often:
- Polymer clay in several colors – (Available on Amazon)
- Sculpting tools – (Available on Amazon)
- Toothpicks
- Craft knife – (Available on Amazon)
- Needle tool
- Small paintbrushes – (Available on Amazon)
- Acrylic paint – (Available on Amazon)
- Aluminum foil
- Gloss varnish – (Available on Amazon)
- Baking tray – (Available on Amazon)
- Oven for curing polymer clay
Do not worry if you do not own every item on this list. When I started, I used simple household tools. A toothpick created textures.
A sewing needle added tiny details. An old toothbrush worked perfectly for bread and cookie surfaces.
The same resourceful approach works well in 19 Easy Clay and Pipe Cleaner Crafts Kids Will Want to Make, which also relies on simple supplies most people already have at home.
I also recommend working on a clean surface with good lighting. Tiny projects require attention to detail.
Good lighting helps you notice mistakes before they become problems. Plus, it makes sculpting much more comfortable.
Easy Miniature Clay Food Ideas for Beginners
If you are completely new to miniature sculpting and want to learn How to Sculpt Miniature Clay Food, begin with foods that have simple shapes.
If you enjoy playing with bright, cheerful colors while you practice, 21 Creative Rainbow Crafts That Brighten Any Day is a fun detour before you get back to sculpting.
Some beginner-friendly projects include:
- Donuts
- Chocolate chip cookies
- Bread rolls
- Pancakes
- Macarons
- Cupcakes
- Pizza slices
- Strawberries
- Ice cream cones
- Hamburgers
- Hot dogs
- Simple layer cakes
I usually recommend donuts as a first project. They have a simple shape, yet they offer many opportunities for decoration.
You can add icing, sprinkles, chocolate drizzle, or colorful toppings.
Cookies also make excellent beginner projects. They teach texture without requiring complicated sculpting.
Meanwhile, hamburgers introduce layering techniques that help with more advanced foods later.
Try a few different foods before choosing a favorite style. Some people enjoy sculpting desserts. Others prefer realistic fast food.
Either way, every project helps you develop useful skills that carry into future creations.
How to Sculpt Adorable Miniature Clay Food That Looks So Real
Step 1: Choose a Food Reference

Before touching the clay, spend time studying real food. This step may seem simple, but it can dramatically improve your results.
I learned this lesson after several disappointing projects. Early on, I relied on memory. My cupcakes looked strange. My cookies lacked realistic texture.
Something always seemed wrong, even when I could not identify the problem.
Then I started using reference photos.
Immediately, I noticed details I had overlooked. A cookie often has uneven edges. Bread contains tiny cracks and bumps.
Strawberries have visible seeds across the surface. Real food includes countless small details that make it look believable.
Choose a clear photo of the food you want to sculpt. Then spend several minutes studying it.
Pay attention to:
- Shape
- Thickness
- Colors
- Layers
- Texture
- Decorations
I usually keep the photo beside my workspace while sculpting. That simple habit helps me stay accurate throughout the project.
The more carefully you observe the food, the more realistic your miniature version will look.
Working from a reference matters just as much in How to Paint a Watercolor Bookmark in Under 30 Minutes, where a quick glance at the wrong reference can throw off the whole piece.
Step 2: Prepare Your Clay Properly

Now gather the clay colors you need and prepare them for sculpting. Many beginners skip this step because they feel eager to start.
I understand the excitement. Still, properly conditioned clay is much easier to work with.
Take each color and knead it gently in your hands. Continue until the clay feels soft and smooth.
This process helps:
- Prevent cracks
- Improve flexibility
- Create smoother shapes
- Make blending easier
If your food requires custom colors, mix them now. For example, bread often looks better with a warm tan color rather than plain brown.
Likewise, strawberries benefit from a blend of red and pink rather than a single shade.
Proper clay conditioning matters just as much for How to Make Gorgeous Air Dry Clay Earrings That Don’t Crack, where skipping this step is one of the most common causes of cracking.
When I first started mixing colors, I worried about making mistakes. Then I realized that real food rarely contains perfect colors. Small variations actually make miniature food appear more realistic.
Spend a little extra time preparing your clay. The effort pays off during every later step.
Step 3: Create the Main Shape

Once your clay feels ready, begin forming the basic shape. At this stage, ignore small details. Focus only on creating a strong foundation.
A donut starts as a circle. A cookie begins as a flattened ball. A cupcake forms from a simple cylinder. Every food starts with a basic shape.
Many beginners rush through this step because they want to add decorations immediately. I made that mistake countless times.
Then I discovered that realistic details cannot save a poorly shaped base.
The same lesson applies when you make a paper mache bowl that dries without cracking; a weak base ruins the whole piece no matter how nicely you finish it.
Take your time. Turn the piece from different angles and check its appearance. Compare it to your reference photo frequently. If the shape looks wrong, fix it now rather than later.
A well-formed base makes every following step easier. Better yet, it helps the finished project look more realistic from every angle.
Step 4: Check the Size and Proportions

Now that you have the main shape, take a moment to check the proportions before moving forward.
This step may not sound exciting, yet it prevents many common mistakes. When I first started making miniature food, I often focused so much on details that I forgot about size.
My burger buns looked too thick. Cookies looked oversized. My cupcakes seemed tall enough for giants.
Because of that, I developed a simple habit. Before adding texture or decorations, I compare my clay piece with the reference photo again.
Precise proportions matter just as much in How to Make a Beautiful Origami Crane You’ll Be Proud to Display, where a single uneven fold can throw off the whole shape.
Look at:
- Height
- Width
- Thickness
- Shape balance
Ask yourself if the food looks believable. A miniature donut should not look as thick as a hamburger bun. A cookie should not look taller than a cupcake.
Sometimes I place several miniature foods together during this stage. Doing that helps me spot proportion problems quickly.
If one piece looks noticeably larger than the others, I adjust it before continuing. Take your time here. Small corrections now can save a lot of frustration later.
Step 5: Add Realistic Texture

This is where the food starts coming to life. When learning How to Sculpt Miniature Clay Food, texture often makes the biggest difference between a basic clay shape and a realistic miniature food.
When I first learned this technique, I was surprised by how much texture mattered. A smooth bread roll looked like a toy.
The same bread roll became realistic after adding a few small marks. Different foods need different textures.
Natural texture makes just as much difference in How to Build a Beautiful Terrarium That Doesn’t Get Moldy, where uneven layers help everything look more organic.
Bread and Pastries
Use an old toothbrush to create a slightly rough surface. Gently tap the clay rather than pressing hard. The tiny marks help mimic baked dough.
Cookies
Use a toothpick or needle tool to create small cracks and crumb-like details. Real cookies rarely look perfectly smooth. A few imperfections make them look more natural.
Strawberries
Press tiny seed marks around the berry using a needle tool. Try to keep the marks evenly spaced without creating perfect rows.
Cakes
Use a pointed tool to create soft sponge-like texture along exposed cake layers. This simple step helps cakes look fluffy instead of solid.
One mistake beginners often make involves adding too much texture. Less usually works better. Real food contains details, but it does not look heavily damaged.
So work slowly and build the texture little by little.
Step 6: Build Layers and Toppings

Many foods contain multiple parts. This step focuses on assembling those pieces. I always tell beginners to think of food like a puzzle.
Instead of making everything at once, create each section separately. Then put the pieces together.
This same layer-by-layer thinking is exactly what makes How to Make a Stunning Layered Paper Shadow Box From Scratch such a satisfying project to build.
For example, a hamburger may include:
- Bottom bun
- Lettuce
- Cheese
- Tomato
- Patty
- Top bun
A cupcake may include:
- Cake base
- Frosting
- Sprinkles
A layer cake may include:
- Cake layers
- Filling
- Frosting
Working this way gives you more control over the final result. When I sculpt miniature burgers, I usually create every layer separately before assembling them.
That approach allows me to adjust thickness and proportions as I go.
As you add layers, compare the piece to your reference photo often. Make adjustments whenever necessary. The goal is balance.
Each layer should support the overall appearance without overpowering the rest of the food.
Step 7: Add Tiny Details That Make People Look Twice

Tiny details often become the most memorable part of a miniature food project. At this stage, your food already looks recognizable. Now you want to make it look convincing.
This is one of my favorite parts of How to Sculpt Miniature Clay Food because small details bring personality to every piece.
Delicate finishing touches like these are also what make How to Make a Pressed Flower Frame That Looks Boutique-Worthy feel so polished in the end.
Consider adding:
- Chocolate chips
- Sprinkles
- Sesame seeds
- Cookie crumbs
- Fruit slices
- Icing drips
- Candy decorations
When I make miniature donuts, I spend extra time on the toppings. A few colorful sprinkles can completely transform the finished piece.
Likewise, tiny sesame seeds help a hamburger bun look realistic. Small chocolate chips make cookies look freshly baked.
Pay attention to placement. Decorations should look natural rather than perfectly arranged. Real food contains slight imperfections. Those imperfections help create realism.
At the same time, avoid overloading the piece with details. Too many decorations can make the food look cluttered. Choose a few strong details and let them stand out.
Step 8: Cure the Clay Correctly

After finishing the sculpting stage, it is time to cure the clay. Many beginners underestimate this step. Yet proper curing plays a huge role in the durability of the finished piece.
Always check the manufacturer’s instructions before baking. Different brands may require different temperatures and baking times.
I like to prepare everything before turning on the oven. That way, I do not rush or forget anything important.
Patience during a finishing stage pays off in the same way with How to Create Impressive Paper Quilling Designs as a Beginner, where rushing the glue-drying step can undo hours of careful coiling.
Keep these tips in mind:
- Preheat the oven first.
- Use the recommended temperature.
- Place pieces on a baking surface.
- Avoid overcrowding the tray.
- Allow pieces to cool completely.
Sometime ago, I ruined several miniature foods by trying to speed up the baking process. The pieces became discolored and brittle. Since then, I have learned that patience produces much better results.
Once the clay cools, it becomes strong enough for painting and finishing.
Step 9: Paint Small Details for More Realism

Some miniature foods look great without paint. Others benefit from a little extra color. Painting allows you to add depth, shadows, and realistic highlights.
For example, bread often looks more realistic when the edges appear slightly darker. Cookies can benefit from subtle browning.
Cakes may need highlights on frosting or decorations. Building up thin, careful layers of color is also the secret behind How to Paint Shoes at Home and Get a Professional Look, where heavy paint tends to backfire the same way it does here.
Use thin layers of acrylic paint rather than thick coats. I usually build color gradually. This approach gives me more control and creates a softer, more natural finish.
You can use paint to add:
- Toasted bread edges
- Chocolate shading
- Fruit highlights
- Golden pastry tones
- Cookie browning
One trick I use often involves dry brushing. I place a small amount of paint on the brush and remove most of it first.
Then I lightly brush the surface. This technique creates soft color transitions that look much more realistic than heavy paint application.
Take your time during this stage. Small changes can make a huge difference.
Step 10: Apply the Final Finish

The final finish helps bring everything together. At this point, your food should already look complete. The finish simply enhances the realism. Different foods require different finishes.
Use gloss varnish for:
- Chocolate syrup
- Fruit glaze
- Candy
- Frosting
- Jam
Use a matte finish for:
- Bread
- Cookies
- Cake
- Crackers
- Pastries
I learned this lesson after accidentally making bread shiny. It looked more like plastic than food.
Since then, I always think about how the real food reflects light. A glazed donut shines. A cookie usually does not.
Apply the finish carefully and allow it to dry completely. Once everything dries, step back and admire your work.
You will probably notice how much the piece transformed from a simple lump of clay into a realistic miniature food.
More importantly, you will have gained valuable experience for your next project. Every miniature food teaches new skills, and each project becomes easier than the last.
Common Mistakes Beginners Make When Sculpting Miniature Clay Food
When learning How to Sculpt Miniature Clay Food, a few mistakes show up again and again. I made most of them myself when I started.
The good news is that they are easy to fix once you know what to watch for.
Rushing the Basic Shape
Many beginners jump straight into decorations. As a result, the finished food looks unbalanced. Spend extra time shaping the foundation before adding details.
Making Everything Too Smooth
Real food has natural imperfections. Cookies have small cracks. Bread has tiny bumps. Cakes have textured edges. Adding a little texture helps miniature food look much more realistic.
Using Only One Color
Food rarely has a single solid color. Mix a few shades together to create more natural-looking results. This simple step can instantly improve realism.
Adding Oversized Details
Tiny foods need tiny decorations. Large sprinkles, chocolate chips, or fruit slices can throw off the proportions. Compare your details to reference photos often.
Using Too Many Decorations
It is tempting to add extra toppings. Still, too many decorations can make the food look cluttered. Choose a few details and let them stand out.
Skipping Reference Photos
This mistake slowed my progress more than anything else. Reference photos help you notice realistic shapes, colors, and textures. Even experienced miniature artists use them regularly.
Fun Ways to Use Your Miniature Clay Food
Once you finish your miniature foods, you can do much more than place them on a shelf. Here are some fun ideas to try:
Make Cute Keychains
Attach a small eye pin before baking. Then turn donuts, cookies, and cupcakes into adorable keychains.
Create Dollhouse Accessories
Miniature food works perfectly in dollhouse kitchens, bakeries, and dining rooms. Small details make miniature scenes feel realistic.
Turn Them Into Jewelry
Tiny food charms make fun:
- Necklaces
- Bracelets
- Earrings
- Bag charms
Decorate Everyday Items
Glue miniature foods onto:
- Pencil holders
- Trinket boxes
- Picture frames
- Phone stands
These simple additions make ordinary items feel unique.
Build a Mini Bakery Display
This is one of my favorite ideas. Arrange several miniature foods inside a shadow box or display case.
You can create:
- A bakery
- A dessert shop
- A coffee shop
- A candy store
Give Them as Handmade Gifts
Friends and family often appreciate handmade gifts because they feel personal. A miniature food keychain or charm can make a thoughtful surprise.
Sell Them at Craft Fairs
If you enjoy making miniature food, you may eventually want to sell your creations. Many collectors love realistic miniature items, especially unique handmade pieces.
Final Thoughts
The first time I attempted How to Sculpt Miniature Clay Food, I expected perfect results right away. Instead, I created cookies that looked strange and cupcakes that seemed out of proportion.
At first, that felt discouraging. Then I realized every project was teaching me something valuable. Little by little, my skills improved, and the process became much more enjoyable.
If you’d like a change of pace from clay, How to Make Moss Wall Art That Stays Green Without Watering rewards that same kind of patience with a completely different material.
If you are just starting your miniature food journey, focus on learning rather than perfection. Begin with simple foods and practice basic techniques.
Pay attention to shapes, textures, colors, and proportions.
Most of all, use reference photos and take your time with each step. Those small habits can make a huge difference in the quality of your finished work.
Before long, you will feel much more confident creating realistic miniature treats.
I hope this guide on How to Sculpt Miniature Clay Food inspires you to pick up some clay and start creating. Remember that every experienced crafter started as a beginner.
When you’re ready for a softer project between sculpting sessions, How to Make Full and Fluffy Tissue Paper Flowers That Impress is a nice change of texture.
Keep practicing, experiment with different foods, and enjoy the creative process.
Soon, you will have a collection of tiny handmade foods that look realistic enough to make people do a double take.