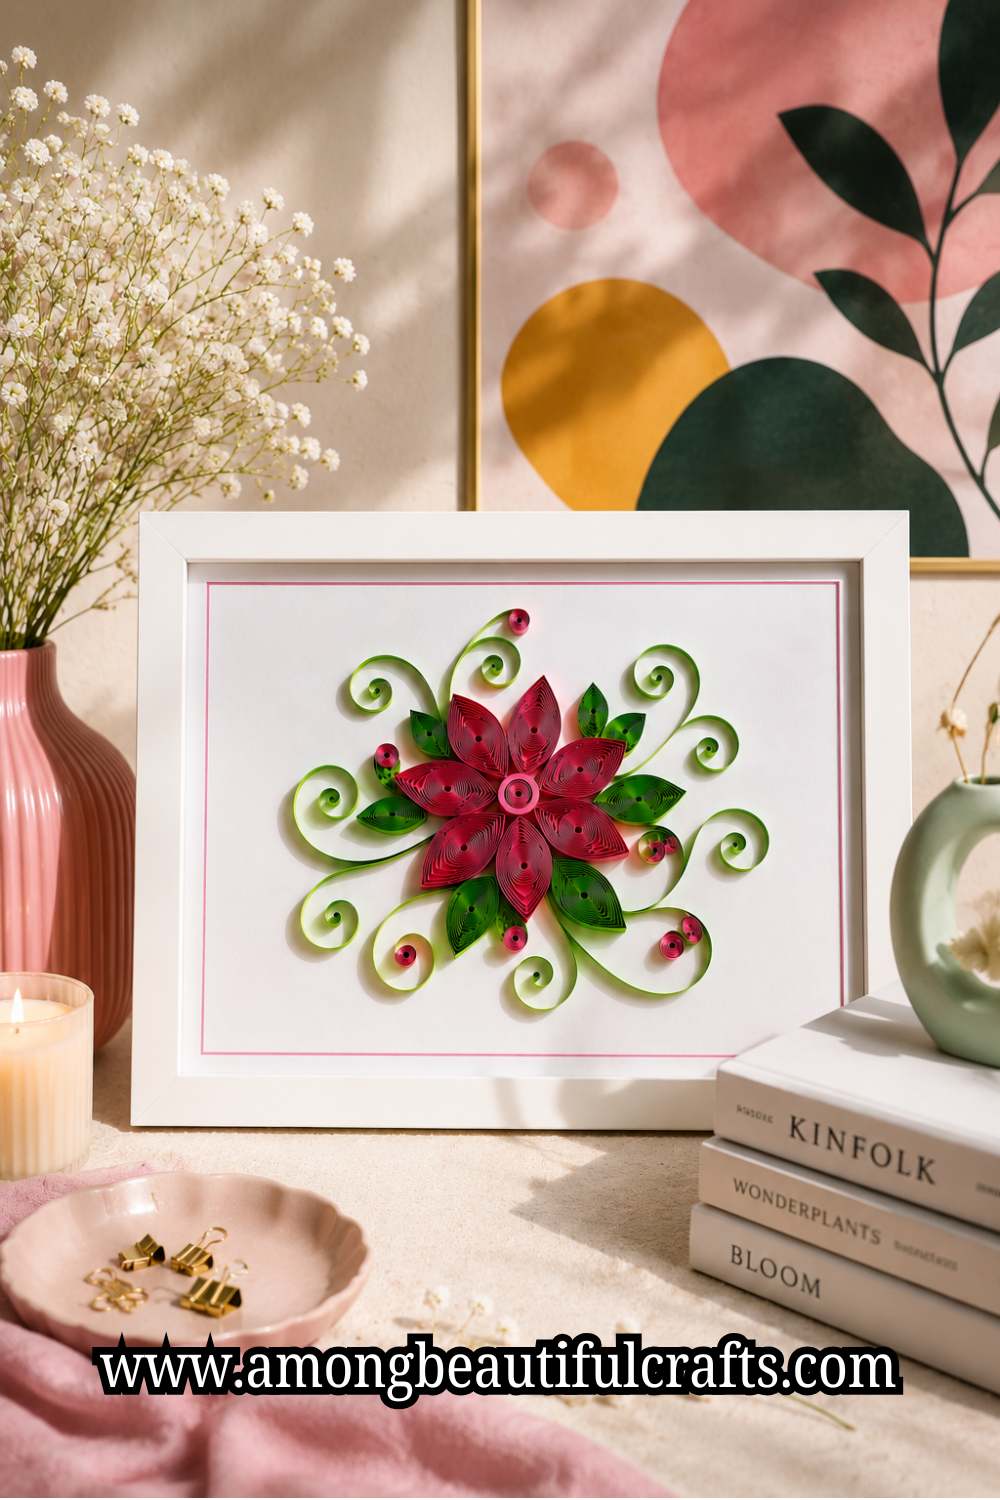
Before now, if someone had shown me a beautiful quilled flower framed on a wall, I would have guessed it took weeks to make. The delicate petals, flowing curves, and tiny details looked far too complicated for a beginner.
Then I learned something surprising. Most paper quilling projects start with the same handful of basic shapes. Once that clicked for me, this craft stopped feeling intimidating and started feeling fun.
The same patient, fold-by-fold mindset is what makes How to Make a Beautiful Origami Crane You’ll Be Proud to Display such a rewarding paper craft too.
That is why I love introducing beginners to paper quilling. People often assume they need artistic talent, steady hands, or years of practice before they can create something worth displaying.
In reality, you can make attractive designs much sooner than you think. The secret is learning the right techniques in the right order.
When you understand How to Create Paper Quilling Designs, you stop guessing and start building each project with confidence.
Over time, I have noticed that beginners struggle with many of the same things. Their coils come out uneven. Their shapes look inconsistent. Glue ends up where it should not be. I made all those mistakes myself when I started.
So in this guide, I will walk you through every step as clearly as possible. We will cover the tools, materials, basic shapes, assembly methods, and finishing techniques that make a real difference.
By the time you finish reading, you will know exactly how to start your first quilling project and create designs that look far more impressive than their simple materials suggest.

What You Need Before You Start – (Buy Paper Quilling Kit on Amazon)
Before we begin, gather a few basic supplies. You will need paper quilling strips (Available on Amazon), a slotted quilling tool, craft glue (Available on Amazon), scissors, tweezers (Available on Amazon), and a clean work surface.
These simple materials are enough for most beginner projects. As you gain experience, you can add more specialized tools to your collection.
It is the same story with 19 Easy Clay and Pipe Cleaner Crafts Kids Will Want to Make, where a handful of basic supplies is really all you need to get started.
For now, keep things simple and focus on learning the technique.
Understand the Basic Shapes First
One lesson I learned early is that impressive quilling designs do not require dozens of complicated shapes.
Most projects use a small group of basic shapes arranged in different ways. Once you master those shapes, you can create flowers, animals, cards, wall art, and many other designs.
Think of these shapes as building blocks. Just as letters form words, basic quilling shapes form larger designs. Building confidence through small, quick wins is also how How to Paint a Watercolor Bookmark in Under 30 Minutes works so well for beginners.
The most common ones include the tight coil, loose coil, teardrop, marquise, square, triangle, and half circle.
We will start with the simplest shape and build from there. Learning these foundational shapes is one of the most important parts of How to Create Paper Quilling Designs successfully.
How to Create Impressive Paper Quilling Designs as a Beginner
Step 1: Make Your First Tight Coil

The tight coil serves as the foundation of paper quilling. Many other shapes begin with this simple roll, so it is worth practicing until you feel comfortable.
Take one paper strip and insert one end into the slot of your quilling tool. Hold the strip gently and begin turning the tool.
Roll slowly and keep the paper aligned as you work. When you reach the end of the strip, place a tiny dot of glue on the tip and secure it.
When I first tried this step, I rushed through it because I felt eager to see a finished design. My coils ended up uneven and messy.
After slowing down and paying attention to each roll, I noticed a huge improvement. A neat coil may seem small, yet it makes every later step easier.
Step 2: Create a Loose Coil

Once you can make a tight coil, you can move on to a loose coil. This shape appears in countless paper quilling projects because it allows you to create many other forms.
Start by making a tight coil. Instead of gluing it immediately, remove it from the tool and place it on your work surface.
Let the paper relax naturally until it expands. Once it reaches the size you want, glue the end in place. There’s something similar in how How to Make Moss Wall Art That Stays Green Without Watering lets natural material settle into its own shape rather than forcing it.
The first time I made a loose coil, I expected it to stay perfectly round on its own.
Soon enough, I realized that gentle handling makes a big difference. Try not to squeeze the coil too much. A light touch will help it keep its shape.
Step 3: Shape a Teardrop

The teardrop shape is one of the most useful shapes in paper quilling. You can use it for flower petals, leaves, butterflies, and many decorative patterns.
Begin with a loose coil. Hold it between your fingers and gently pinch one side.
The round coil will transform into a teardrop shape. That single pinch creates a shape that appears in many beginner and advanced designs.
If real flower petals appeal to you more than paper ones, How to Make a Pressed Flower Frame That Looks Boutique-Worthy is a lovely alternative to try.
At this stage, do not worry if every teardrop looks slightly different. Mine certainly did when I started.
Focus on making each one a little more consistent than the last. Small improvements add up quickly in paper quilling.
Step 4: Learn the Marquise Shape

Once you feel comfortable making teardrops, the marquise shape becomes very easy to learn.
This shape looks like an eye with pointed ends, and you will see it in countless quilling projects.
Start with a loose coil. Instead of pinching one side, pinch both sides at the same time.
The round coil will stretch into a pointed shape on each end. Try to keep both points balanced so the shape looks symmetrical.
That same careful, layer-by-layer precision is what makes How to Make a Stunning Layered Paper Shadow Box From Scratch such a satisfying project once it comes together.
I spent a lot of time practicing this shape when I first started. At first, one end always looked larger than the other.
After a few practice sessions, my fingers learned how much pressure to apply. Give yourself permission to practice several times before expecting perfect results.
Step 5: Practice a Few More Basic Shapes

Before creating a full design, it helps to learn a few additional shapes. The good news is that most of them begin with a loose coil.
To create a square, start with a loose coil and pinch four corners. For a triangle, pinch three points and flatten the sides gently.
To make a half circle, flatten one side of a loose coil while keeping the opposite side rounded. Keeping each shape distinct and well-defined matters here in the same way it does in How to Make Sand Art in a Bottle Without the Colors Mixing, where clean separation is the whole point.
As you work through these shapes, pay attention to consistency. Try making several copies of each shape rather than just one.
This simple exercise trains your hands and improves your control. Soon, you will notice that your shapes begin looking more uniform.
Step 6: Plan Your Design Before Gluing

Many beginners feel excited to start assembling their artwork right away. I understand the temptation because I made the same mistake myself.
More than once, I glued pieces down too quickly and later wished I had arranged them differently.
Instead, place your shapes on the surface without glue first. Move them around until you find a layout you like.
Experiment with spacing, colors, and positioning. This step may seem small, yet it often determines how polished the finished design looks.
Playing with color combinations before committing is half the fun in 21 Creative Rainbow Crafts That Brighten Any Day as well.
For your first project, choose something simple. A flower is a great option because it uses basic shapes and teaches important assembly skills.
A butterfly, heart, or simple monogram also works well for beginners.
Step 7: Assemble a Simple Quilled Flower
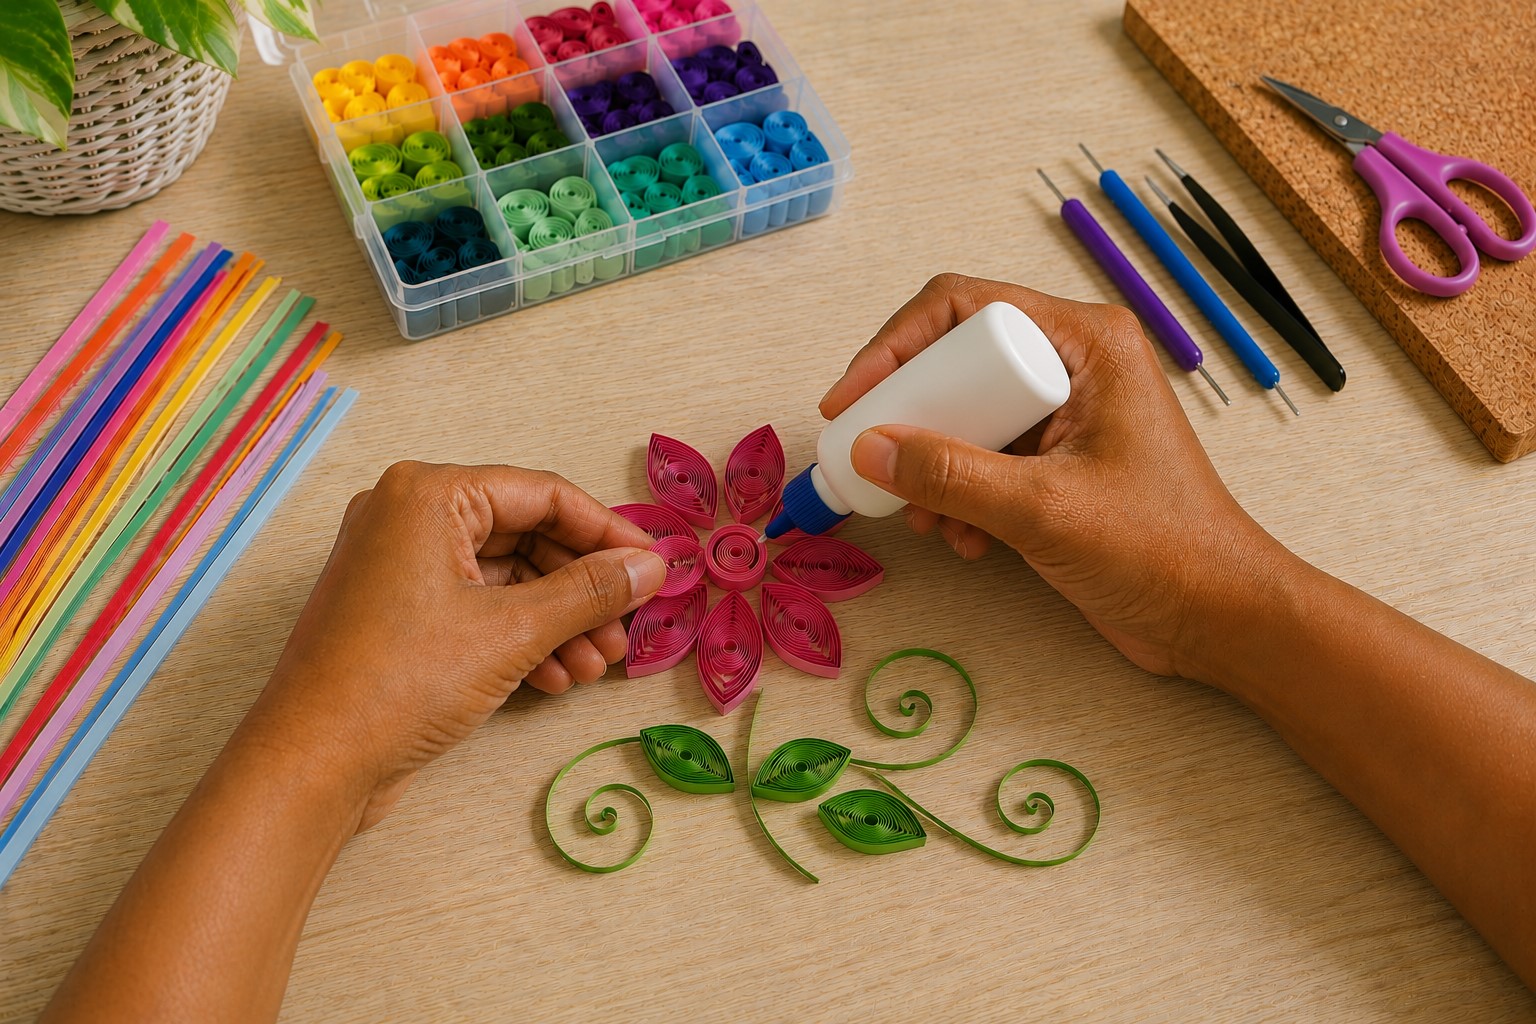
A flower makes an excellent first project because it combines several beginner-friendly techniques. It also gives you a beautiful finished piece that builds confidence.
Start by creating five or six teardrop shapes for the petals. Next, make one tight coil for the flower center.
Arrange the teardrops around the center coil until you like the layout. Assembling small, detailed pieces one at a time is also the heart of How to Sculpt Adorable Miniature Clay Food That Looks So Real, if you enjoy this kind of hands-on building.
Once everything looks right, apply a small amount of glue where the pieces touch. Press them together gently and allow the glue to set.
Then add a few marquise shapes beneath the flower to create leaves.
The first flower I completed looked far from perfect. Some petals were larger than others, and the spacing felt uneven.
Even so, seeing those simple shapes come together felt incredibly rewarding. That project gave me the confidence to keep practicing.
Step 8: Use the Right Amount of Glue

One of the biggest beginner mistakes involves using too much glue. It seems harmless at first. Then small glue marks begin appearing around the design.
Paper quilling works best with tiny amounts of adhesive. A little glue goes a long way. Use just enough to hold the pieces together.
Getting the glue-to-material ratio right matters just as much in How to Make a Paper Mache Bowl That Dries Without Cracking, where too much moisture causes its own set of problems.
If excess glue appears, wipe it away immediately before it dries.
I often apply glue with a toothpick because it gives me better control. This simple habit helps keep designs neat and professional-looking.
Step 9: Build Designs Layer by Layer

As your confidence grows, you can start creating more detailed projects. Instead of trying to complete everything at once, work in sections.
Begin with the main shape or focal point. After that, add supporting elements such as leaves, borders, swirls, or decorative accents.
Working section by section is exactly how How to Make Full and Fluffy Tissue Paper Flowers That Impress comes together too, one layer at a time.
Working in layers helps you stay organized and prevents accidental mistakes.
This approach also makes larger projects feel less overwhelming. Rather than focusing on the entire design, you can concentrate on one small section at a time.
Before long, those sections come together to form a beautiful finished piece.
Step 10: Add Simple Details That Make a Big Difference

This is the stage where many projects begin to look truly impressive. The basic shapes create the structure, yet the small details bring the design to life.
Try adding loose swirls around flowers, extra leaves between petals, or tiny coils in empty spaces. Small, standalone details like these are also what make How to Make Adorable Clay Magnets Worth Displaying so much fun to create in a single sitting.
These details help fill gaps and create a more balanced appearance. At the same time, avoid overcrowding the design.
Leaving some open space often makes the artwork look cleaner.
When I first started quilling, I thought every empty area needed another shape. As a result, my projects sometimes looked busy and cluttered.
Later, I learned that a little breathing room helps the important parts stand out.
Step 11: Check Your Design Before Finishing

Before calling your project complete, take a few minutes to inspect it carefully.
Look for loose pieces, uneven spacing, or shapes that seem out of place. Sometimes a small adjustment can improve the entire design.
This same careful final check is worth doing with How to Make Gorgeous Air Dry Clay Earrings That Don’t Crack, where a loose piece is much easier to fix before it fully sets.
Rotate your project and view it from different angles. You may notice details that were easy to miss while working.
I often step away from a project for a few minutes before doing this final check. When I return, I see the design with fresh eyes.
That simple habit has saved me from many small mistakes over the years.
Step 12: Let Everything Dry Completely

After you finish arranging and gluing the pieces, give the project enough time to dry.
Many beginners feel excited to handle their artwork right away. I understand the feeling because I have done it myself.
Unfortunately, moving the project too soon can shift shapes or weaken glued areas.
Place the design on a flat surface and allow it to dry completely. The drying time will depend on the glue you use, but patience is always worth it. A fully dried project stays stronger and looks much cleaner.
Common Beginner Mistakes to Avoid
Every paper quiller makes mistakes while learning. In fact, mistakes often teach the most valuable lessons. The goal is not to avoid every error. Instead, learn from them and keep improving.
One common mistake is rushing through the rolling process. Fast rolling often creates uneven coils.
Slow, controlled movements usually produce better results.
Another mistake is using too much glue. Excess glue can leave visible marks and reduce the clean appearance of the design.
Many beginners also skip practice and jump straight into complicated projects. While ambitious projects look exciting, simple designs build the skills needed for larger creations later.
Some people become discouraged when their first project does not look perfect. I always remind beginners that paper quilling is a skill.
Like any skill, it improves with repetition. Every project teaches something new.
Tips That Helped Me Improve Faster
One of the best decisions I made while learning How to Create Paper Quilling Designs was practicing individual shapes before attempting full designs.
Spending a few minutes making coils, teardrops, and marquise shapes helped me develop better control.
I also started keeping my completed practice pieces. Looking back at older projects allowed me to see how much I had improved.
That progress motivated me to keep going.
Another helpful habit involved working with limited color palettes. Too many colors sometimes made my designs look chaotic.
A few well-chosen colors often produced a more polished result.
Most importantly, I learned to enjoy the process. Paper quilling rewards patience. The more relaxed I became, the better my projects turned out.
Beginner Project Ideas to Practice Your Skills
Once you understand How to Create Paper Quilling Designs, you can explore many beginner-friendly projects.
- Greeting cards make an excellent starting point because they require only a small number of shapes.
- A simple flower or heart can transform an ordinary card into something special.
- Bookmarks offer another fun option. They allow you to practice arranging shapes while creating something useful.
- Monograms are also popular among beginners.
- A decorated letter gives you plenty of room to experiment with coils, teardrops, and swirls.
- You can also create simple wall art, gift tags, picture frame decorations, and seasonal ornaments.
Each project gives you another opportunity to strengthen your skills while expressing your creativity.
How Your Skills Will Grow Over Time
The first few projects may take longer than expected. That is completely normal.
At first, you focus on every roll, pinch, and placement. Then something interesting happens. Your hands begin remembering the movements.
The shapes become easier to create. The designs start coming together more naturally.
Before long, you will recognize patterns, combine shapes with confidence, and experiment with your own ideas.
That is one of my favorite parts of paper quilling. The possibilities keep expanding as your skills grow.
Many of the quillers whose work inspires people today started exactly where you are now. They learned one coil, one shape, and one project at a time. You can do the same.
Final Thoughts
Learning How to Create Paper Quilling Designs may seem challenging at first, yet the process becomes much easier when you break it into simple steps.
Start with the right supplies, practice the basic shapes, and focus on consistency rather than perfection. Every coil you roll helps build the skills needed for more advanced projects.
If you’d enjoy a break from paper strips altogether, 23 Adorable Farm Animal Crafts That Bring the Barnyard to Life offers a fun change of pace with a similar beginner-friendly approach.
As you continue practicing How to Create Paper Quilling Designs, remember that progress happens gradually.
Some projects will turn out better than others, and that is perfectly normal. What matters most is showing up, practicing regularly, and enjoying the creative journey. Small improvements often lead to big results over time.
I hope this guide has shown you that figuring out How to Create Paper Quilling Designs is something anyone can learn with patience and practice.
Once you’re comfortable with these techniques, How to Make Stunning Resin Coasters With Pressed Flowers is a great next project for putting delicate paper and flower work under a glossy, lasting finish.
Begin with simple projects, celebrate your progress, and do not be afraid to experiment.
Before you know it, those simple paper strips will become impressive designs that you feel proud to display, gift, and share with others.

