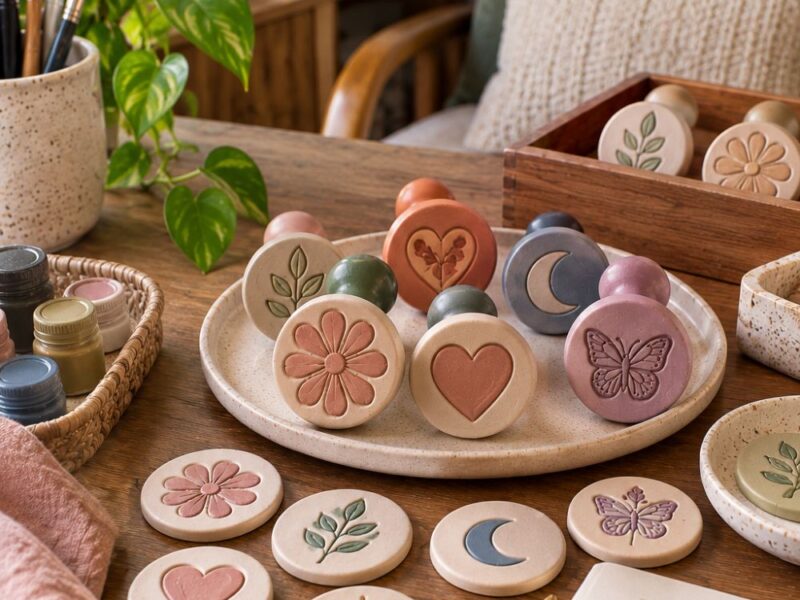
Every time someone tells me their air dry clay earrings cracked, I usually ask the same question. “Did you rush any part of the process?” Most people smile because they already know the answer.
We all get excited when a project starts looking beautiful. We want to finish it quickly and wear it right away.
I felt exactly the same when I first learned How to Make Air Dry Clay Earrings. I wanted perfect results with very little waiting.
If you enjoy small, quick clay projects like this, How to Make Adorable Clay Magnets Worth Displaying is another fun one to try.
Instead, I ended up with tiny cracks, uneven edges, and earrings that broke before I could even add the hooks.
That experience taught me something important. Beautiful clay earrings depend much more on good technique than artistic talent.
Since then, I have made many pairs for myself, for friends, and as handmade gifts. Along the way, I discovered that every small step matters.
The way you knead the clay affects air bubbles. The thickness changes how evenly each piece dries.
Even the place where you leave your earrings to dry can decide if they stay smooth or develop cracks. These details sound small at first.
Yet together, they make the difference between earrings that look homemade and earrings that look like they came from a boutique.
That is why I never skip explaining the little things when I teach someone this craft.

In this guide, I will walk you through every part of the project just as I would if we were crafting together across the same table.
We will choose the right supplies, prepare the clay properly, shape clean designs, dry every piece the right way, and finish everything with a smooth professional look.
I will also explain why each step works, point out mistakes before you make them, and share simple tricks that have saved many of my own projects.
By the time you finish, you will feel confident enough to create gorgeous air dry clay earrings that stay smooth, stay strong, and make you excited to start your next pair.
What You Will Need
Before we start, gather everything in one place. I always do this because it keeps the project relaxing. I never enjoy stopping halfway just to search for a tool.
A few minutes of preparation makes the whole experience smoother. You can also focus better on shaping beautiful earrings instead of feeling distracted.
Here are the basic supplies:
- Air dry clay – (Available on Amazon)
- Acrylic roller or smooth glass bottle – (Available on Amazon)
- Clay cutter or craft knife
- Earring cutters or small cookie cutters – (Available on Amazon)
- Straw or small hole punch – (Available on Amazon)
- Fine-grit sandpaper
- Small bowl of water
- Soft paintbrush – (Available on Amazon)
- Acrylic paints or clay paints – (Available on Amazon)
- Clear matte or glossy sealer
- Jump rings – (Available on Amazon)
- Earring hooks or studs – (Available on Amazon)
- Jewelry pliers
- Wax paper, silicone mat, or ceramic tile – (Available on Amazon)
Choose good-quality air dry clay if possible. Cheap clay often dries faster than you can shape it. It may also contain more lumps, which can lead to cracks later.
The same basic tool list works well for 19 Easy Clay and Pipe Cleaner Crafts Kids Will Want to Make, so it’s worth keeping stocked for both.
Spending a little more usually saves both time and frustration.
How to Make Gorgeous Air Dry Clay Earrings That Don’t Crack
Step 1: Prepare Your Workspace Before Opening the Clay
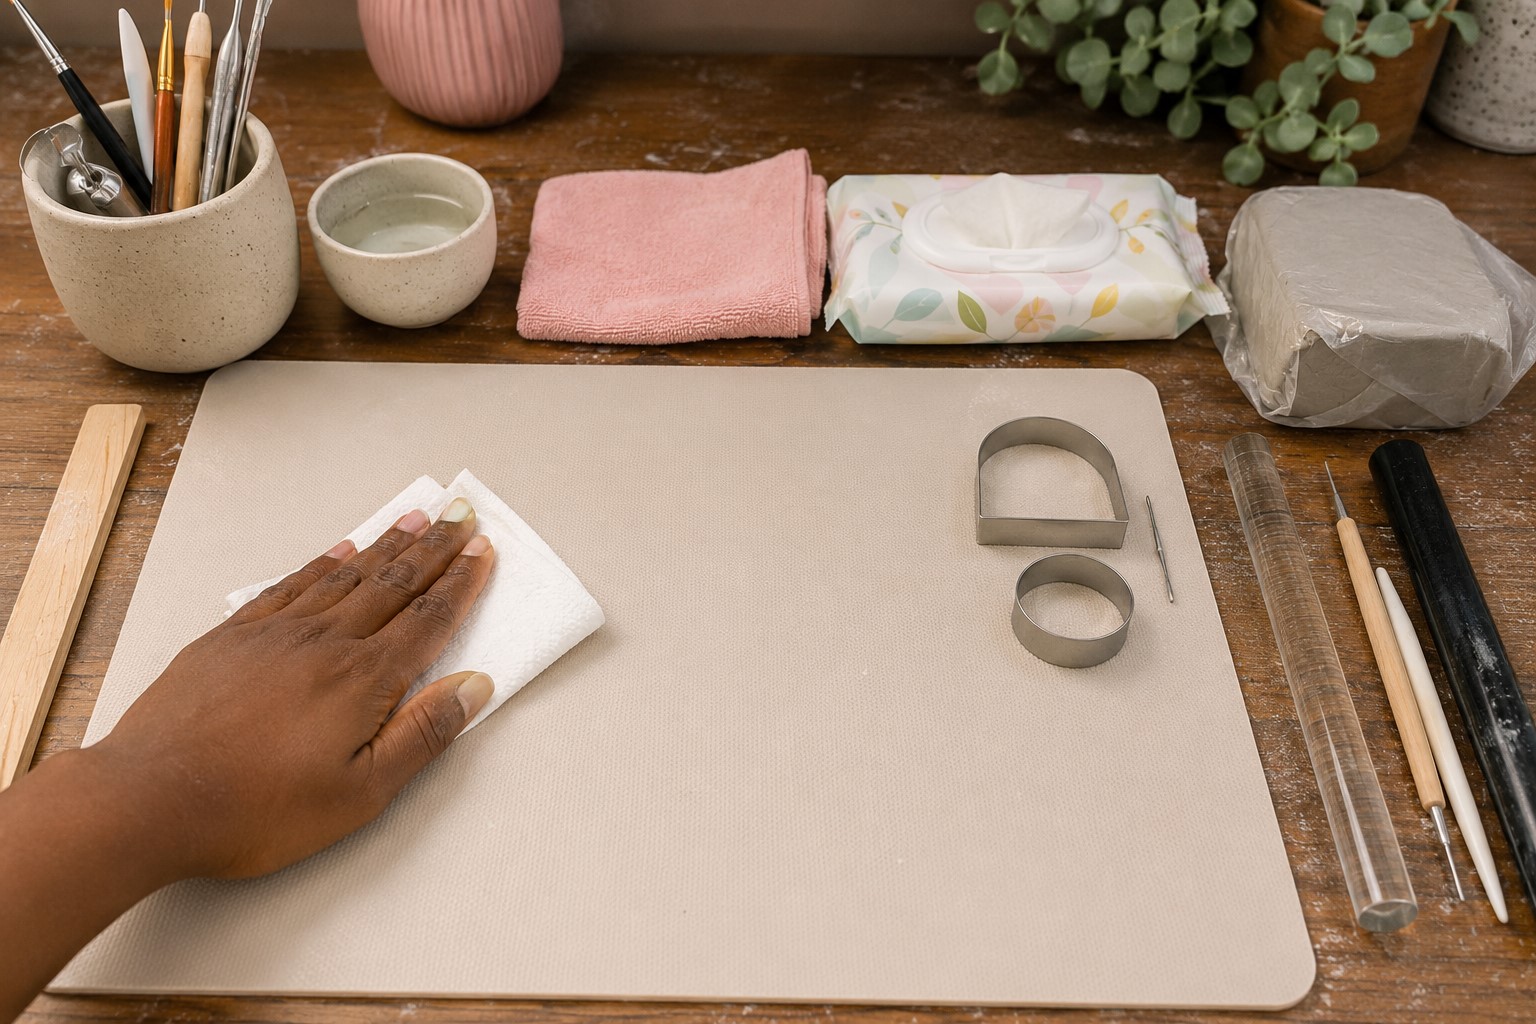
A clean workspace gives you a much better start. Dust, pet hair, and tiny crumbs can easily stick to soft clay.
Once they get trapped inside, removing them becomes difficult. That is why I always wipe my table before I begin.
Next, place a silicone mat, ceramic tile, or sheet of wax paper on your table. This creates a smooth surface that keeps the clay from sticking.
It also makes moving your earrings much easier later.
Keep all your tools within easy reach. Put a small bowl of water nearby and keep a clean cloth beside it.
I also like keeping baby wipes close because they clean my hands quickly between colors.
Finally, wash and dry your hands well. Natural oils from your skin can transfer to the clay. Clean hands help keep light-colored clay looking fresh from the beginning.
Working with clean hands and a tidy table matters just as much in How to Sculpt Adorable Miniature Clay Food That Looks So Real, where small details make or break the finished piece.
Step 2: Condition the Clay Until It Feels Soft and Smooth

Many beginners skip this step because the clay already feels soft. I never recommend that. Air dry clay needs a little work before it becomes ready for shaping.
Break off the amount you need first. Leave the remaining clay sealed inside its package. Air dry clay starts losing moisture as soon as it meets the air. Keeping the extra clay covered prevents it from drying too soon.
Now knead the clay slowly with your hands. Fold it over several times and press it firmly. Then repeat the process for several minutes.
Soon the clay will feel smoother and much easier to roll.
Watch closely for dry spots or tiny cracks while kneading. If you notice either one, dip your fingertip into clean water and gently smooth the area.
Use only a tiny amount. Too much water makes the clay sticky and difficult to control.
This step also helps remove trapped air pockets. Those hidden bubbles often become cracks after drying. Taking your time now saves plenty of disappointment later.
Getting rid of trapped air matters just as much in How to Make a Paper Mache Bowl That Dries Without Cracking, where the same kind of hidden weak spot can ruin the finished piece.
Step 3: Roll the Clay to an Even Thickness

Now that your clay feels smooth, it is time to roll it out. This step looks simple, yet it has a huge effect on the finished earrings.
Uneven clay dries at different speeds. As a result, thicker areas shrink differently from thinner ones, and cracks often appear.
Place the clay in the middle of your work surface. Start rolling from the center, then move outward in different directions.
Turn the clay every few rolls so it keeps an even shape. This simple habit also prevents the clay from sticking to the mat.
Aim for a thickness of about 3 to 4 millimeters. That thickness feels lightweight without becoming fragile. If the clay becomes too thin, the earrings can snap easily.
If it stays too thick, the earrings may feel heavy when worn.
I like using rolling guide sticks because they keep every section the same height. If you do not have them, stack two wooden craft sticks on each side of the clay.
The roller will rest on them and create an even sheet every time.
Look across the surface before moving on. If you notice small dents, gently roll over them again.
Do not press too hard. Slow, gentle pressure creates a much smoother finish than trying to flatten everything at once.
Step 4: Cut Your Earring Shapes Carefully

This is usually the most exciting part of the project. You finally get to see your designs come to life. Even so, taking your time here gives much cleaner results.
Press your cutter straight into the clay. Avoid twisting it because that can stretch the edges. Lift the cutter straight back up, then remove the extra clay around the shape.
If you use a craft knife, make one smooth cut instead of several short ones. A clean cut leaves fewer rough edges, which means less sanding later.
This same steady, careful cutting is what makes How to Create Impressive Paper Quilling Designs as a Beginner look so neat too.
Before lifting the shapes, check that every edge looks clean. If you spot a tiny rough area, smooth it gently with your fingertip or a silicone shaping tool. You can also use a barely damp brush to soften the edge.
Do not waste the leftover clay. Gather the scraps, knead them together, and roll them out again. If the scraps have already started drying, mix them well before using them again. Dry pieces mixed into soft clay can cause weak spots.
Step 5: Add the Hanging Holes Before the Clay Dries

Many beginners remember this step too late. Once the clay dries, making a clean hole becomes much harder. That is why I always add the holes immediately after cutting the shapes.
Use a straw, small hole punch, skewer, or needle tool. Place the hole about 2 to 3 millimeters from the edge. This gives enough space for the jump ring while keeping the clay strong.
Press the tool straight down without twisting too much. Then lift it gently. If a small ridge forms around the hole, smooth it with your fingertip or a damp brush.
Precise, small details like this are also what make How to Make a Beautiful Origami Crane You’ll Be Proud to Display turn out so cleanly.
Double-check every piece before moving on. Missing one tiny hole means drilling later, which increases the chance of cracking the finished earring.
I also compare matching earrings at this stage. The holes should sit at the same height on both pieces. This small detail helps the earrings hang evenly once you attach the hardware.
Step 6: Smooth Every Edge Before Drying

This is one of the easiest steps to overlook. Still, it makes a huge difference in the finished earrings. Rough edges become much more noticeable after painting. They also take longer to sand later.
Pick up each earring gently and inspect it from every angle. Turn it slowly under good lighting. Small bumps often hide until the light catches them.
Dip a soft paintbrush or your fingertip into clean water. Then remove most of the water before touching the clay. The brush should feel damp, not wet. Too much water can soften the edges and change the shape.
Now glide the brush around the entire edge. Use light strokes instead of rubbing hard. This same gentle touch is exactly what keeps petals intact in How to Make a Pressed Flower Frame That Looks Boutique-Worthy.
If you notice fingerprints on the front, smooth them gently with the same damp brush. Work patiently because rushing can leave new marks behind.
I always spend a few extra minutes here. It saves much more time during sanding. Better yet, the earrings already look cleaner before they even start drying.
Step 7: Dry the Earrings Slowly to Prevent Cracks

This step decides the success of your project more than many people realize. Air dry clay shrinks as it loses moisture. If one side dries much faster than the other, the stress can create small cracks.
Place the earrings on a flat ceramic tile, wooden board, or sheet of parchment paper. Leave a little space between each piece so air can move around them evenly.
Keep them away from direct sunlight, heaters, fans, and open windows. Fast drying sounds helpful, yet it often causes problems.
Slow drying allows the moisture to leave the clay more evenly. Patience with a slow, natural process pays off just as much in How to Build a Beautiful Terrarium That Doesn’t Get Moldy.
After several hours, gently turn each earring over. This helps both sides dry at a similar rate. Depending on your clay and room temperature, complete drying may take 24 to 48 hours.
Try not to touch the earrings too often during this time. Soft clay bends more easily than you think. Let patience do the work. Every extra hour of proper drying helps create stronger earrings.
Step 8: Sand Until the Surface Feels Silky Smooth

Once the clay feels completely dry, check every piece carefully. If any area still feels cool or slightly soft, wait a little longer. Sanding damp clay can damage the surface.
Start with fine-grit sandpaper around 400 grit. Sand using small circular motions with very light pressure. Focus first on the edges because they usually need the most attention.
Keeping fine grains under control here is a bit like the challenge in How to Make Sand Art in a Bottle Without the Colors Mixing, where a light touch keeps everything neat.
Next, smooth the front and back. You do not need to remove much material. Your goal is simply to erase tiny bumps, fingerprints, and rough spots.
For an even softer finish, switch to 600 or 800 grit sandpaper. This extra step creates a beautiful surface that accepts paint much more evenly.
After sanding, wipe away every bit of dust with a soft dry cloth. I never skip this part because leftover dust can leave a rough texture under the paint. Clean clay always produces cleaner results.
Step 9: Paint Thin, Even Coats for a Professional Finish

Now comes the fun part. Your earrings already have their final shape, and paint brings them to life. This step gives you endless creative options.
You can keep the colors soft and natural or choose bright shades that stand out.
Before painting, remove any remaining sanding dust with a clean, dry brush or lint-free cloth. Even tiny particles can create a rough finish.
I always inspect each piece one last time because this is my final chance to catch small imperfections.
Use a soft paintbrush and apply a thin coat of acrylic paint. Resist the urge to cover everything at once.
Thick paint takes longer to dry and can hide beautiful details. Instead, spread the paint evenly across the surface using smooth strokes.
Building up color in thin layers is the same trick that works so well in How to Paint Shoes at Home and Get a Professional Look.
Allow the first coat to dry completely before adding another. Most earrings need two or three thin coats for solid color.
While you wait, paint another pair or organize your jewelry findings. This keeps the project moving without rushing the drying time.
If you enjoy patterns, add them after the base color dries. Tiny dots, simple lines, gold accents, or delicate flowers can completely change the look.
Just remember to let each layer dry before adding the next. Your patience will show in the final result.
Step 10: Seal the Earrings to Protect Your Hard Work

Many people feel tempted to skip sealing because the earrings already look finished. I never recommend that.
A good sealer protects the paint, keeps moisture away, and helps the earrings stay beautiful longer. This same protective final layer is what gives How to Make Stunning Resin Coasters With Pressed Flowers its glossy, long-lasting finish.
Choose either a matte or glossy sealer based on the style you want. Matte gives a soft, modern look, while glossy creates more shine. Both work well as long as you apply them correctly.
Brush on a very thin layer across the front, back, and edges. Keep your strokes smooth and even. Thick sealer can leave drips or cloudy spots, so less is always better.
Let the first coat dry completely. Then apply a second thin coat if needed. Two light coats usually protect the earrings better than one heavy coat.
Place the sealed earrings on a clean surface while they dry. Avoid touching them until the finish feels completely hard. Fingerprints can easily mark fresh sealer, even when it looks dry.
Step 11: Attach the Jewelry Hardware

Once the sealer has cured, your earrings are ready for assembly. This final step transforms simple clay shapes into wearable jewelry.
Open a jump ring by twisting it sideways with jewelry pliers. Avoid pulling it apart from front to back because that can weaken the metal.
Slide the jump ring through the hole you made earlier.
Next, attach the earring hook or stud finding. Then twist the jump ring back until the ends meet neatly. A tight closure helps keep the hardware secure during wear.
Repeat the process for the matching earring. Before you finish, compare both pieces side by side. Make sure the hooks face the same direction and the earrings hang evenly.
Hold them up for one final inspection. This is always my favorite moment because the project finally comes together.
After all the careful work, you now have a beautiful handmade pair that looks polished, lightweight, and ready to wear or gift.
Common Mistakes That Cause Air Dry Clay Earrings to Crack
Even experienced crafters make mistakes from time to time. The good news is that most cracks have simple causes. Once you know what to watch for, you can avoid them with confidence.
Not kneading the clay enough
Clay often contains tiny air pockets straight from the package. If you skip kneading, those pockets can expand during drying and create cracks. Spend a few minutes conditioning the clay before rolling it.
Rolling uneven thickness
Thin areas dry much faster than thick ones. This uneven drying creates stress inside the clay. Always check that the sheet stays the same thickness from edge to edge.
Using too much water
A little water smooths the surface beautifully. Too much weakens the clay and changes its texture. Keep your brush only slightly damp whenever you smooth the edges.
Drying too quickly
Heat may seem like a shortcut, but it usually creates problems. Avoid placing your earrings near heaters, direct sunlight, or strong fans. Slow drying almost always produces stronger results.
Moving the earrings too often
Fresh clay bends easily. Every unnecessary movement increases the chance of warping or creating tiny cracks. Let the earrings rest while they dry.
Painting before the clay dries completely
Even if the surface feels dry, moisture may still remain inside. Painting too soon traps that moisture and can lead to cracking later. Always allow enough drying time before decorating.
Skipping the sealer
A sealer cannot repair cracks, but it helps protect the finished earrings from everyday wear. It also keeps painted designs looking fresh for much longer.
Patience with each finishing step matters just as much in How to Make Full and Fluffy Tissue Paper Flowers That Impress, where skipping a step early on shows up in the final result.
Tips for Making Boutique-Quality Air Dry Clay Earrings
- Small details separate handmade earrings from pieces that look professionally made. Over the years, these simple habits have helped me create cleaner, stronger, and more polished results.
- Choose simple shapes when you are learning. Circles, arches, teardrops, and ovals help you practice clean cuts and smooth edges. After you build confidence, try layered designs or more detailed patterns. If you enjoy painting small, meaningful designs, 25 Aesthetic BTS Painting Ideas Every ARMY Should Try is a fun source of inspiration for earring patterns too.
- Always make an extra pair during each crafting session. Sometimes a piece breaks or develops a flaw. Having a spare pair saves you from starting over.
- Keep your work area clean throughout the project. Tiny bits of dried clay can stick to fresh clay and leave unwanted marks. I wipe my mat often because it only takes a few seconds.
- Store unopened clay inside an airtight bag or container. If air reaches the clay, it starts drying long before you are ready to use it. Good storage keeps the clay soft for future projects.
- Use sharp cutters instead of dull ones. Sharp edges create cleaner shapes with less effort. You will spend much less time sanding later.
- Do not rush between steps. Every stage builds on the one before it. A few extra minutes of patience usually create much better results than trying to finish quickly.
- Practice color combinations on scrap clay first. This lets you experiment without risking your finished earrings. Sometimes two colors look very different after they dry.
- Finally, enjoy the learning process. Every pair teaches you something new. Even projects that do not turn out perfectly help you improve your skills.
Frequently Asked Questions
Why do my air dry clay earrings crack while drying?
The most common causes include uneven thickness, trapped air bubbles, drying too quickly, or clay that was not conditioned well enough.
Slow drying and careful preparation greatly reduce the chance of cracks.
How thick should air dry clay earrings be?
A thickness of about 3 to 4 millimeters works well for most designs. This creates earrings that feel lightweight while staying strong enough for everyday wear.
Can I use a hair dryer to speed up drying?
I do not recommend it. Fast heat dries the outside much quicker than the inside. That uneven drying often leads to cracks or warped earrings. Let the clay dry naturally for the best results.
What paint works best on air dry clay?
Acrylic paint works beautifully because it offers strong color, dries quickly, and comes in many finishes. Apply several thin coats instead of one thick coat for a smoother appearance.
Do I really need to seal the earrings?
Yes, sealing protects both the clay and the paint. It also helps your earrings resist small scratches and everyday moisture.
A thin layer of sealer adds very little time to the project but provides lasting protection.
How long do air dry clay earrings last?
With proper care, they can last for years. Store them in a dry place and avoid soaking them in water. Handle them gently, and they will continue looking beautiful for a long time.
Final Thoughts
Making beautiful jewelry does not require expensive equipment or years of experience. It starts with learning the basics and giving each step the attention it deserves.
Once you understand how the clay behaves, the entire process feels much easier. You stop guessing and start creating with confidence.
That is exactly why I enjoy teaching this project so much. If you want a colorful new craft to try next, 21 Creative Rainbow Crafts That Brighten Any Day is a fun one to explore.
I have watched complete beginners surprise themselves after finishing their very first pair. You can absolutely do the same.
As you keep practicing, your hands will naturally become steadier, your shapes will grow cleaner, and your finishes will look even more polished.
Do not worry if your first pair is not perfect. Mine certainly was not. Each project teaches you something valuable, and every lesson makes the next pair even better.
Before long, friends and family may start asking where you bought your earrings. That moment always feels rewarding because you know you made them yourself.
If you’d like a quicker project to enjoy between clay sessions, How to Paint a Watercolor Bookmark in Under 30 Minutes is a nice change of pace.
Now you know How to Make Air Dry Clay Earrings from start to finish without skipping the important details. Take your time, trust the process, and enjoy every stage along the way.
Soon you will have gorgeous handmade earrings that stay smooth, resist cracking, and show off your creativity with pride. The more you practice How to Make Air Dry Clay Earrings, the easier each new design becomes.
I hope this guide inspires you to keep experimenting, create pieces that reflect your style, and have fun every time you sit down with a fresh piece of clay.