
If you find leftover craft supplies hiding in a drawer, do not throw them away just yet. Small pieces of paper, short bits of yarn, extra paint, and even old buttons can become something fun.
All they need is a little color and a simple idea. That is one reason Creative Rainbow Crafts are always worth trying.
They give forgotten supplies a fresh purpose and turn them into projects that look bright and cheerful.
If you love the idea of low-maintenance color on a wall, How to Make Moss Wall Art That Stays Green Without Watering brings that same cheerful energy indoors in a completely different way.
Many people think rainbow crafts are only for little children. After making a few, they quickly change their minds.
These projects work well for kids, teens, and adults because you can keep them as simple or as creative as you like.
You can make decorations for your home, gifts for someone special, classroom projects, or fun activities for a quiet afternoon. Every finished craft brings a little more color into your space.

This guide will walk you through rainbow craft ideas that are easy to make and enjoyable from start to finish. I will explain each one in a simple way and share tips that make the process easier.
You do not need special skills to get good results. Just gather the supplies you already have, follow along one step at a time, and enjoy creating colorful projects that you will feel proud to display.
21 Creative Rainbow Crafts That Brighten Any Day
1. Paper Strip Rainbow Wall Hanging

A paper strip rainbow looks bright on any wall. It also gives you a chance to use leftover colored paper.
Cut paper into long strips with the same width. Arrange the colors into a rainbow before you glue anything down.
Next, stick each strip onto a piece of cardstock. Leave a little space between the colors if you want a modern look.
After that, add cotton balls for fluffy clouds. Punch two small holes at the top and tie a string through them. Then hang your artwork where everyone can enjoy it.
This project works well for children because the steps stay simple. Adults also enjoy making different color combinations for home décor.
2. Rainbow Popsicle Stick Picture Frame

Popsicle sticks can become a colorful photo frame within a short time. This craft also makes a thoughtful handmade gift.
Paint several sticks in rainbow colors. Let them dry completely before putting the frame together. Glue four sticks into a square shape. Then add another layer behind them for extra strength.
Next, decorate the corners with buttons, felt flowers, or tiny beads. Finally, glue your favorite photo behind the opening.
Thinking about how a finished piece will be framed and displayed is also central to How to Make a Stunning Layered Paper Shadow Box From Scratch.
This frame looks lovely on a desk, shelf, or bedside table. It also reminds you that simple materials can create beautiful keepsakes.
3. Rainbow Yarn Wrapped Letter

This project adds color to a bedroom, playroom, or craft room. You can even make the first letter of someone’s name.
Cut a letter from thick cardboard. Then choose yarn in rainbow colors. Start wrapping one color around a small section.
Keep the yarn tight as you work. Add the next color once you finish the first section.
Soon the plain cardboard will disappear under the bright yarn. Secure the end with glue whenever you change colors.
You can also attach pom-poms, felt flowers, or wooden shapes. Small details make the finished letter look even more cheerful.
Kids who enjoy this kind of hands-on wrapping and shaping also tend to love 19 Easy Clay and Pipe Cleaner Crafts Kids Will Want to Make.
4. Rainbow Paper Plate Sun Catcher

This simple project catches the light beautifully near a window.
Cut the middle from a paper plate. Leave only the outer ring. Paint the ring with rainbow colors and allow it to dry.
Now glue pieces of colored tissue paper across the opening. Slightly overlap the pieces to remove empty spaces.
Once the glue dries, the colors shine when sunlight passes through them.
Tie a ribbon at the top and hang the sun catcher in a bright spot. Children love watching the colors change throughout the day.
If you own a cutting machine, 27 Cute BTS Cricut Ideas That Make Perfect ARMY Gifts can help you cut a perfectly neat ring shape for a project like this.
5. Rainbow Clay Magnets

If you enjoy working with clay, this idea belongs on your list. These tiny magnets also brighten refrigerators and office boards.
Roll small pieces of air dry clay into thin ropes. Bend each rope into a rainbow shape. Add tiny white clouds on both ends before the clay dries.
Smooth the edges with your fingers. Then leave everything to dry fully. Paint each rainbow with bright colors if needed.
Glue a small magnet onto the back once the clay hardens. Soon you will have colorful decorations that also hold notes and photos. For the full step-by-step process, see How to Make Adorable Clay Magnets Worth Displaying.
Many people start with one magnet. Then they keep making more because each one looks a little different.
6. Rainbow Button Canvas

Old buttons deserve another chance instead of staying inside a forgotten container.
Draw a simple rainbow on a blank canvas. Next, sort your buttons by color. Begin with the largest buttons first. Fill empty spaces with smaller ones as you continue.
Take your time while placing every button. A balanced layout always looks better than a rushed one.
This same careful, one-piece-at-a-time placement is what keeps How to Make Gorgeous Air Dry Clay Earrings That Don’t Crack looking clean instead of rushed.
Once everything looks right, glue the buttons in place. Leave the canvas flat until the glue dries.
Hang the finished artwork in a hallway, bedroom, or craft room. It adds texture as well as color.
7. Rainbow Coffee Filter Flowers

Coffee filters create soft flowers that almost look like watercolor paintings. This project feels relaxing from beginning to end.
Flatten several coffee filters on a table. Color them with washable markers in rainbow shades. Then lightly spray each filter with water.
Watch the colors blend together. This part always feels fun because every flower turns out differently.
Allow the filters to dry completely. Fold each one into a flower shape and secure the center with a pipe cleaner.
If you enjoy this kind of soft, layered flower craft, How to Make Full and Fluffy Tissue Paper Flowers That Impress is another fun one to try.
Finally, arrange several flowers inside a small jar or vase. They stay colorful for a long time without any care.
These Creative Rainbow Crafts also bring plenty of color without needing expensive supplies.
8. Rainbow Handprint Canvas
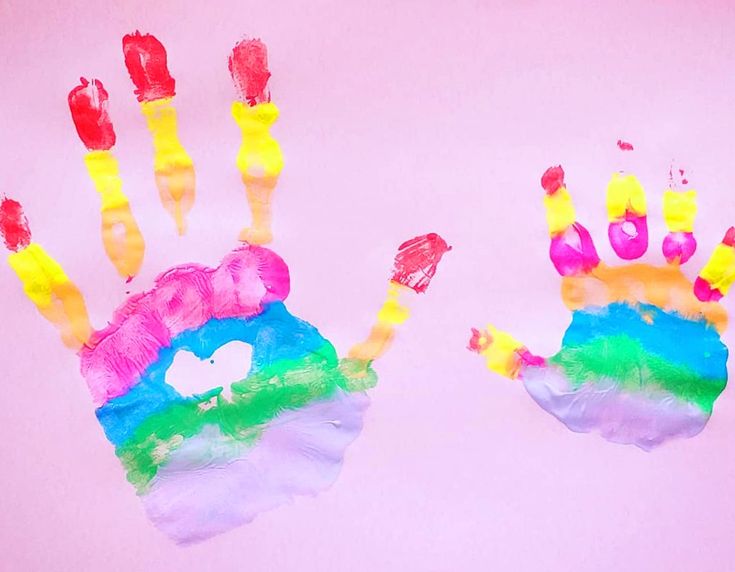
This craft creates a keepsake that families enjoy for years. It also lets little hands become part of the artwork.
Paint each finger with a different rainbow color. Then gently press the hand onto a blank canvas. Lift the hand straight up to keep the print clear.
Let the paint dry before adding details. You can draw fluffy clouds, a smiling sun, or tiny hearts around the handprint.
Write the date at the bottom if you want to remember when you made it. The finished canvas looks lovely in a child’s bedroom or playroom.
9. Rainbow Bead Wind Chime
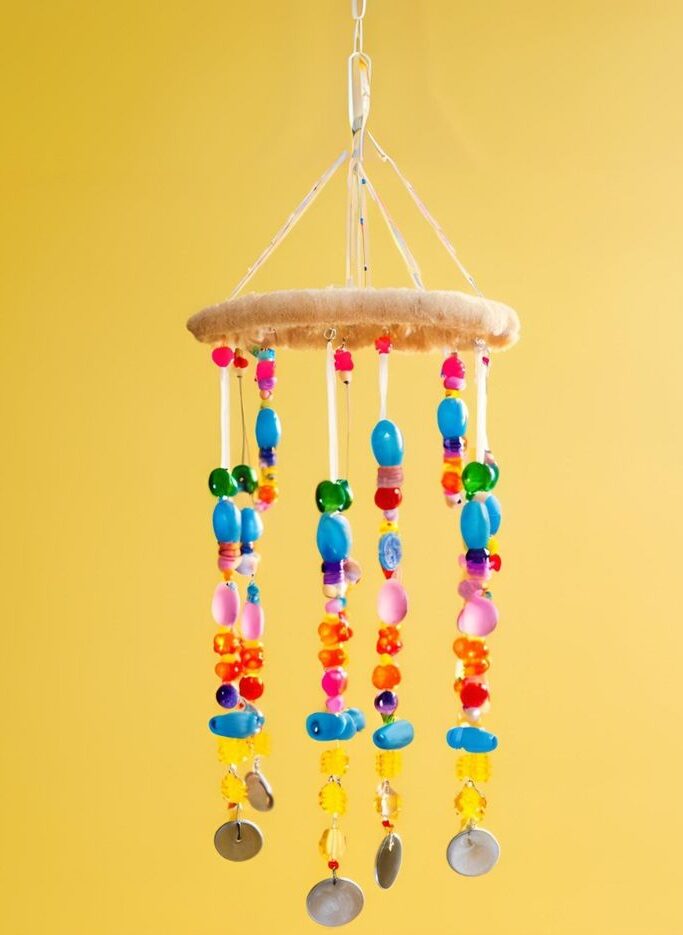
A colorful wind chime adds movement to your porch or garden. It also gives you a fun way to use extra beads.
Cut several pieces of string with the same length. Thread rainbow-colored beads onto each one. Tie a knot at the bottom to keep them in place.
Next, tie every string onto a wooden hoop or sturdy stick. Spread them out evenly before hanging the wind chime.
Keeping each colorful strand distinct and separate matters here too, the same way it does in How to Make Sand Art in a Bottle Without the Colors Mixing.
Finally, add a ribbon at the top. Every breeze will make the beads move and sparkle in the light.
10. Rainbow Cardboard Tube Binoculars

Instead of throwing away cardboard tubes, turn them into a fun pretend play toy.
Glue two empty tubes together side by side. Wrap colored paper around each section to create rainbow stripes.
Punch a hole on both sides. Thread yarn through the holes to make a neck strap.
You can also decorate the binoculars with stars, stickers, or glitter foam. Children enjoy using them during indoor adventures or backyard games.
Kids who love inventing pretend-play props like this often also enjoy 21 Easy Minecraft Paper Crafts Kids Can Finish in One Sitting.
This project shows that Creative Rainbow Crafts can also inspire hours of imaginative play.
11. Rainbow Felt Garland

A felt garland brings color to a room without taking much time to make.
Cut felt into rainbow shapes with the same size. Make enough pieces to create a long garland.
Next, place the rainbows in the order you like. Leave a small gap between each one.
Glue or sew every rainbow onto a long piece of string. Keep checking the spacing as you work.
Hang the garland across a window, bookshelf, or party table. It also looks beautiful in a nursery or craft room.
12. Rainbow Rock Painting

A smooth rock can become a tiny piece of art with only a little paint.
Wash each rock before you begin. Let it dry completely. Then paint a rainbow across the front using small brushes.
Allow one color to dry before adding the next. This step keeps the colors neat. Building up thin, careful layers of color is the same trick behind How to Paint Shoes at Home and Get a Professional Look.
After that, paint little clouds or stars around the rainbow. Finish with a clear sealer if you want the design to last longer.
Hide the rocks around your neighborhood or place them in your garden. They often bring smiles to people who find them.
13. Rainbow Cupcake Liner Flowers

Cupcake liners work for much more than baking. They also turn into colorful flowers within minutes.
Flatten several liners on the table. Layer different colors together to create full flowers.
Poke a pipe cleaner through the center. Twist it underneath to hold everything together.
Fluff each layer with your fingers until the flower looks full. Then place several flowers inside a jar or small basket. These flowers never wilt, so they stay bright all year.
14. Rainbow Sponge Painting

Sponge painting creates fun textures that brushes cannot make. Cut a clean sponge into small pieces. Pour rainbow paint onto separate plates.
Dip one sponge into one color at a time. Press it gently onto paper instead of dragging it.
Keep building the rainbow until every color appears. Add white clouds after the paint dries.
Children love this project because every print looks different. Even simple designs turn out colorful and cheerful.
15. Rainbow Mason Jar Lantern
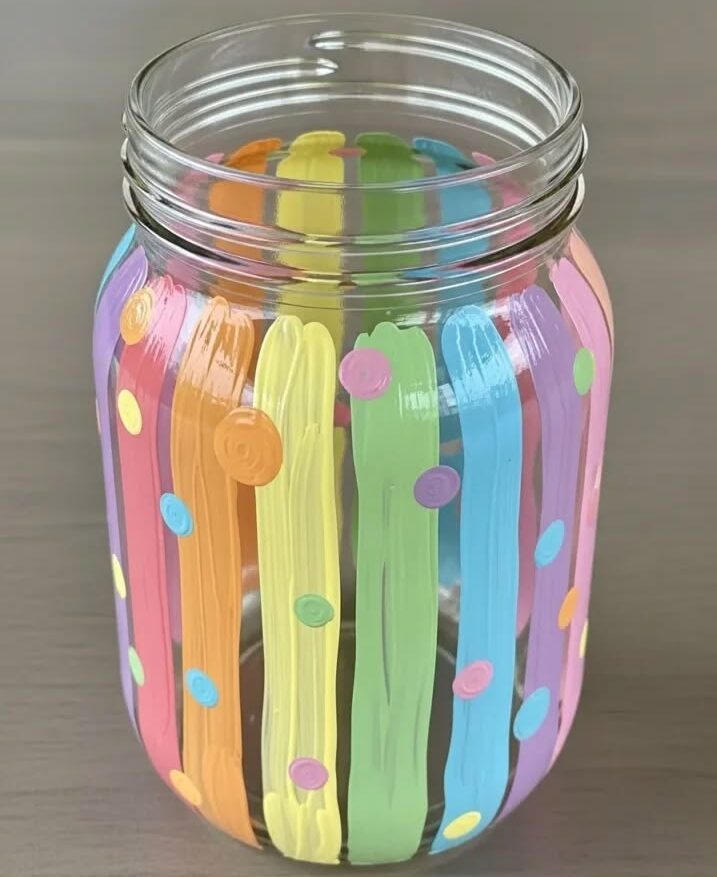
Turn an ordinary jar into a decoration that glows beautifully during the evening.
Cover the outside of a clean jar with thin tissue paper in rainbow colors. Overlap each piece slightly as you glue it down.
Allow the glue to dry fully. Then tie ribbon around the top of the jar. Place a battery-operated tea light inside. The colors shine softly once you switch on the light.
A glossy, glowing finish like this is also what makes How to Make Stunning Resin Coasters With Pressed Flowers look so striking.
Set the lantern on a table, shelf, or covered patio. It creates a warm and welcoming display.
These Creative Rainbow Crafts look impressive, yet the steps stay easy for beginners.
16. Rainbow Cotton Ball Cloud

This soft craft looks adorable in a child’s room or classroom. It also takes very little time to finish.
Cut a rainbow from thick cardstock. Make it as big or as small as you like. Then glue cotton balls along both ends to create fluffy clouds.
Next, glue a piece of string to the back if you want to hang it. You can also tape it to a wall or window.
Simple, gentle handmade pieces like this are just as rewarding to display as How to Make a Beautiful Origami Crane You’ll Be Proud to Display.
For extra fun, add small paper stars, hearts, or raindrops below the rainbow. Those little details make the craft feel more complete.
This project proves that Creative Rainbow Crafts do not need many supplies to look beautiful.
17. Rainbow Egg Carton Caterpillar

An empty egg carton can become a cheerful caterpillar in only a few steps.
Cut one row from the egg carton. Trim the edges until every section looks neat. Then paint each section in rainbow colors.
Let the paint dry before adding the face. Glue on two googly eyes and draw a smiling mouth with a marker.
Twist two pipe cleaners into simple antennae. Push them into the top of the head section.
Children enjoy making different facial expressions. Some even give their caterpillars funny names after they finish.
18. Rainbow Paper Chain

A rainbow paper chain adds color to birthdays, classrooms, and family celebrations.
Cut colored paper into strips with the same size. Roll the first strip into a circle and glue the ends together.
Slide the next strip through the first loop before gluing it. Keep repeating the same step with every color.
Soon the chain will grow longer. Keep going until you reach the length you want.
Hang it across a wall, doorway, or party table. You can even make several chains and join them together.
19. Rainbow Bookmark
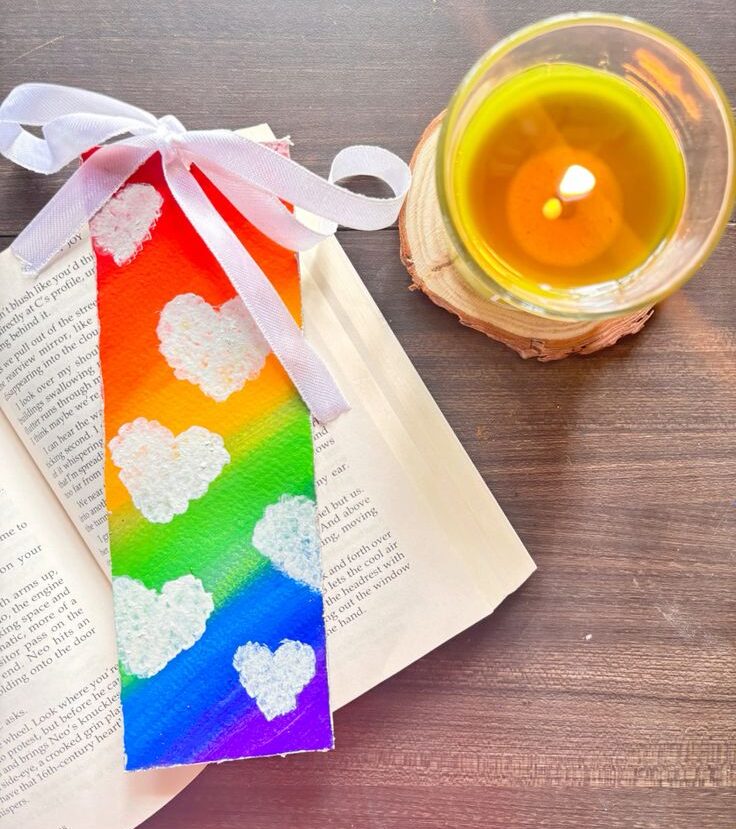
A handmade bookmark makes reading even more enjoyable. It also becomes a thoughtful gift for someone who loves books.
Cut a strip from thick cardstock. Round the corners with scissors if you like.
Paint or color a rainbow across the bookmark. Then draw little clouds near the bottom. Punch a hole at the top. Tie colorful ribbon or yarn through the hole.
If you’d rather paint a full watercolor scene instead of a simple rainbow, How to Paint a Watercolor Bookmark in Under 30 Minutes walks through that technique step by step.
You can also laminate the bookmark if you want it to last longer. Slip it inside your favorite book once it dries.
20. Rainbow Finger Painting

Finger painting lets children enjoy colors without worrying about perfect lines.
Pour small amounts of paint onto separate plates. Show children how to dip one finger into one color.
Start with red and continue across the rainbow. Leave a little space between each color if needed.
After that, add clouds, flowers, or smiling faces around the rainbow. Every picture will look unique.
Keep wipes or a bowl of water nearby for quick cleaning. That small step makes the activity much easier.
21. Rainbow Wreath

A rainbow wreath welcomes guests with bright colors before they even step inside.
Cut a wreath shape from thick cardboard. Paint it white first if the cardboard looks dark.
Cover the wreath with rainbow paper circles, felt pieces, pom-poms, or fabric scraps. Mix different textures to create more interest.
Keep checking the colors as you work. Spread them evenly around the wreath for a balanced look.
Finish by tying a ribbon at the top. Then hang your wreath on a door, wall, or craft room shelf.
This project brings many small supplies together in one beautiful decoration. It also gives leftover materials a brand-new purpose.
Mixing different natural textures like this is also the fun part of 23 Adorable Farm Animal Crafts That Bring the Barnyard to Life.
Final Thoughts
Rainbow crafts do much more than fill a quiet afternoon. They help you use simple supplies in fun and creative ways.
You also get the chance to slow down, make something with your hands, and enjoy every colorful step. Even the smallest project can brighten a room and leave you with something worth keeping.
I hope this collection gives you plenty of ideas to try throughout the year. Start with the project that feels easiest, then work your way through the rest.
Before long, you will discover new color combinations and little details that make every craft your own.
If you’re looking for more colorful painting inspiration, 25 Aesthetic BTS Painting Ideas Every ARMY Should Try is a fun place to explore next.
That is one reason Creative Rainbow Crafts stay enjoyable for beginners and experienced crafters alike.
Most importantly, do not worry about making every rainbow look perfect. The fun comes from creating something with your own hands and enjoying the process from beginning to end.
Gather your favorite supplies, invite family or friends if you like, and keep experimenting with new ideas.
Every finished project adds a little more color, creativity, and happiness to an ordinary day.
