Making something useful with simple supplies always feels rewarding. A stack of old newspapers often sits around without much attention, yet those forgotten pages can become something beautiful.
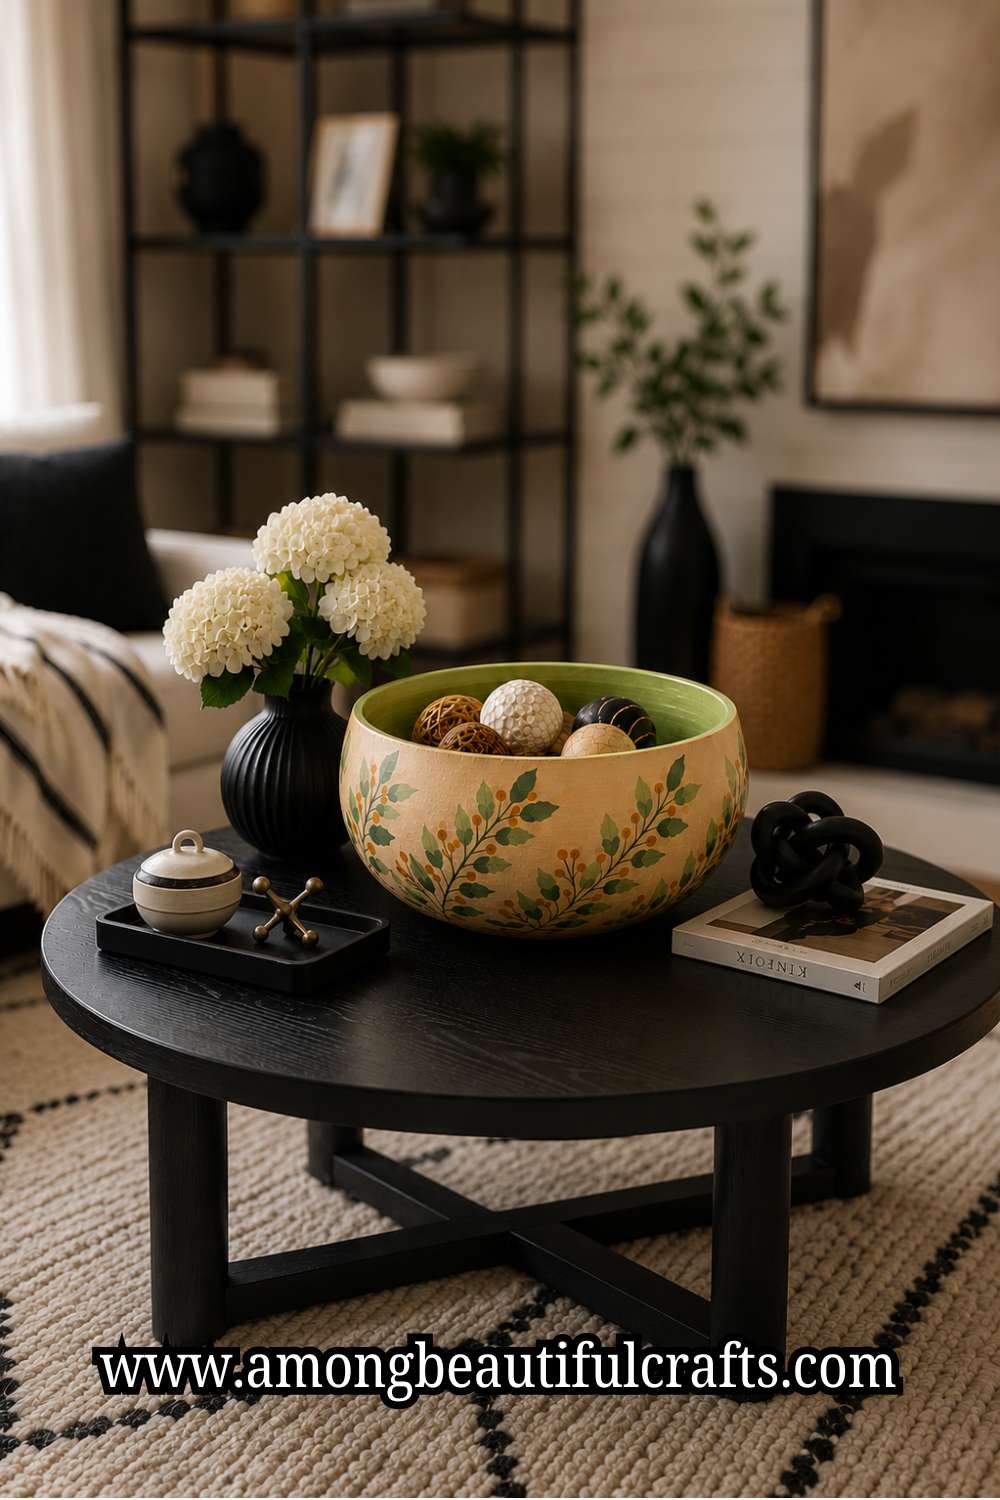
One afternoon they might fill a recycling bin, and the next they could sit on a shelf as a handmade bowl holding keys, dried flowers, or little keepsakes.
That simple change is one reason so many people enjoy learning How to Make a Paper Mache Bowl.
The funny thing about Paper Mache is that it seems easy at first. You tear paper, add paste, and keep layering until it feels right.
Then the drying begins, and that is where many projects lose their charm. Small cracks appear from nowhere. The edges curl.
Sometimes the bowl sticks to the mold after hours of waiting. None of those problems happen because the craft is difficult. They usually come from tiny details that are easy to miss.
A good Paper Mache bowl simply needs the right order, a little patience, and a few tricks that many quick tutorials skip.
I will walk you through each stage the same way I would if we were crafting together at the same table.
We will take our time, pay attention to the small details, and create a bowl that dries smoothly, stays strong, and looks like something you would happily keep on display.
Supplies You Will Need
Before you begin, gather everything in one place. Doing this keeps the project moving without unnecessary breaks. If you prepare them first, you can focus on shaping the bowl instead of searching for missing items halfway through.
You will need:
- Old newspapers or plain paper
- A medium-sized bowl to use as a mold
- All-purpose flour
- Water
- A mixing bowl
- A spoon or whisk
- Plastic wrap or a thin layer of petroleum jelly
- Scissors for trimming excess paper if needed
- Fine-grit sandpaper
- Acrylic paint
- Paintbrushes
- Clear acrylic sealer or craft varnish
- A clean cloth or paper towels
Choose a sturdy bowl with a smooth surface. It will hold its shape while you work. A glass, ceramic, or stainless steel bowl usually works better than a flexible plastic one. Good preparation makes the work much easier because every supply has a purpose.
How to Make a Paper Mache Bowl That Dries Without Cracking
Step 1: Choose and Prepare Your Bowl Mold
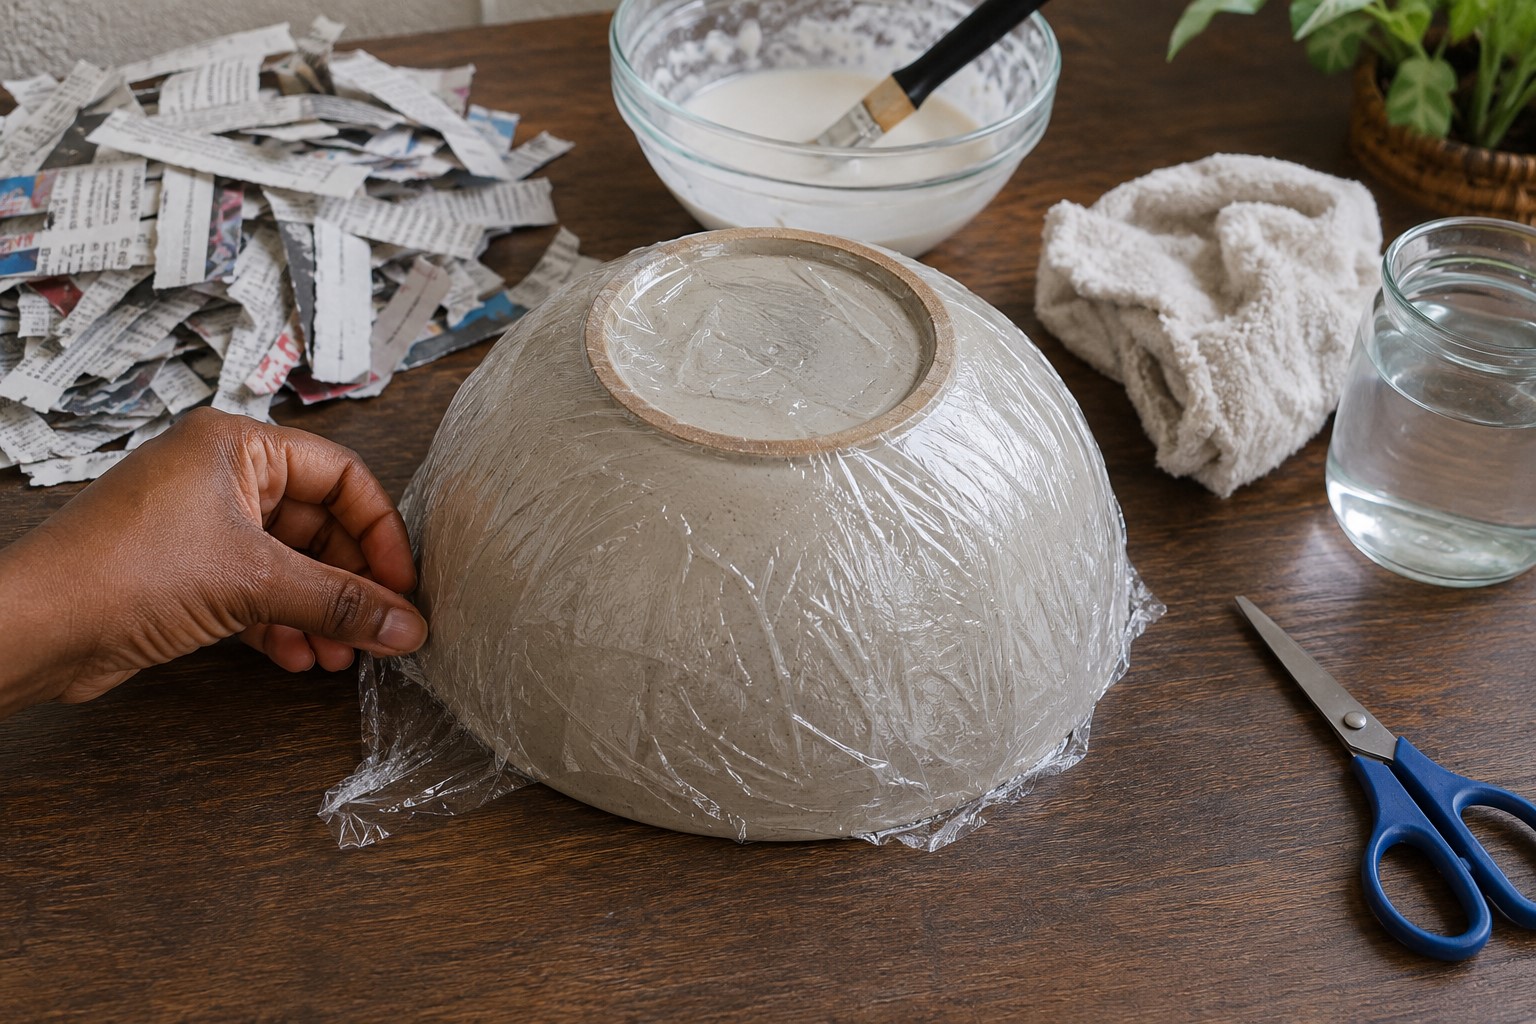
The mold decides the shape of your finished bowl, so choose it carefully. A shallow bowl works well for holding keys or jewelry.
A deeper bowl creates more storage for craft supplies, dried flowers, or decorative pieces.
Next, wash the bowl and dry it well. Dust, grease, or water can affect how the paper sticks during the first layer.
A clean surface gives you better control from the beginning.
Now cover the outside of the bowl with plastic wrap. Pull it tight so large wrinkles do not form.
If you prefer, spread a very thin layer of petroleum jelly over the outside instead. Both methods help the paper release after drying.
Take a moment to smooth the plastic wrap with your hands. Small folds can leave marks on the finished bowl. This simple step saves extra sanding later.
Set the prepared bowl on a stable table before moving to the next step. A bowl that slides around makes layering much harder.
Step 2: Tear the Paper and Mix the Paste
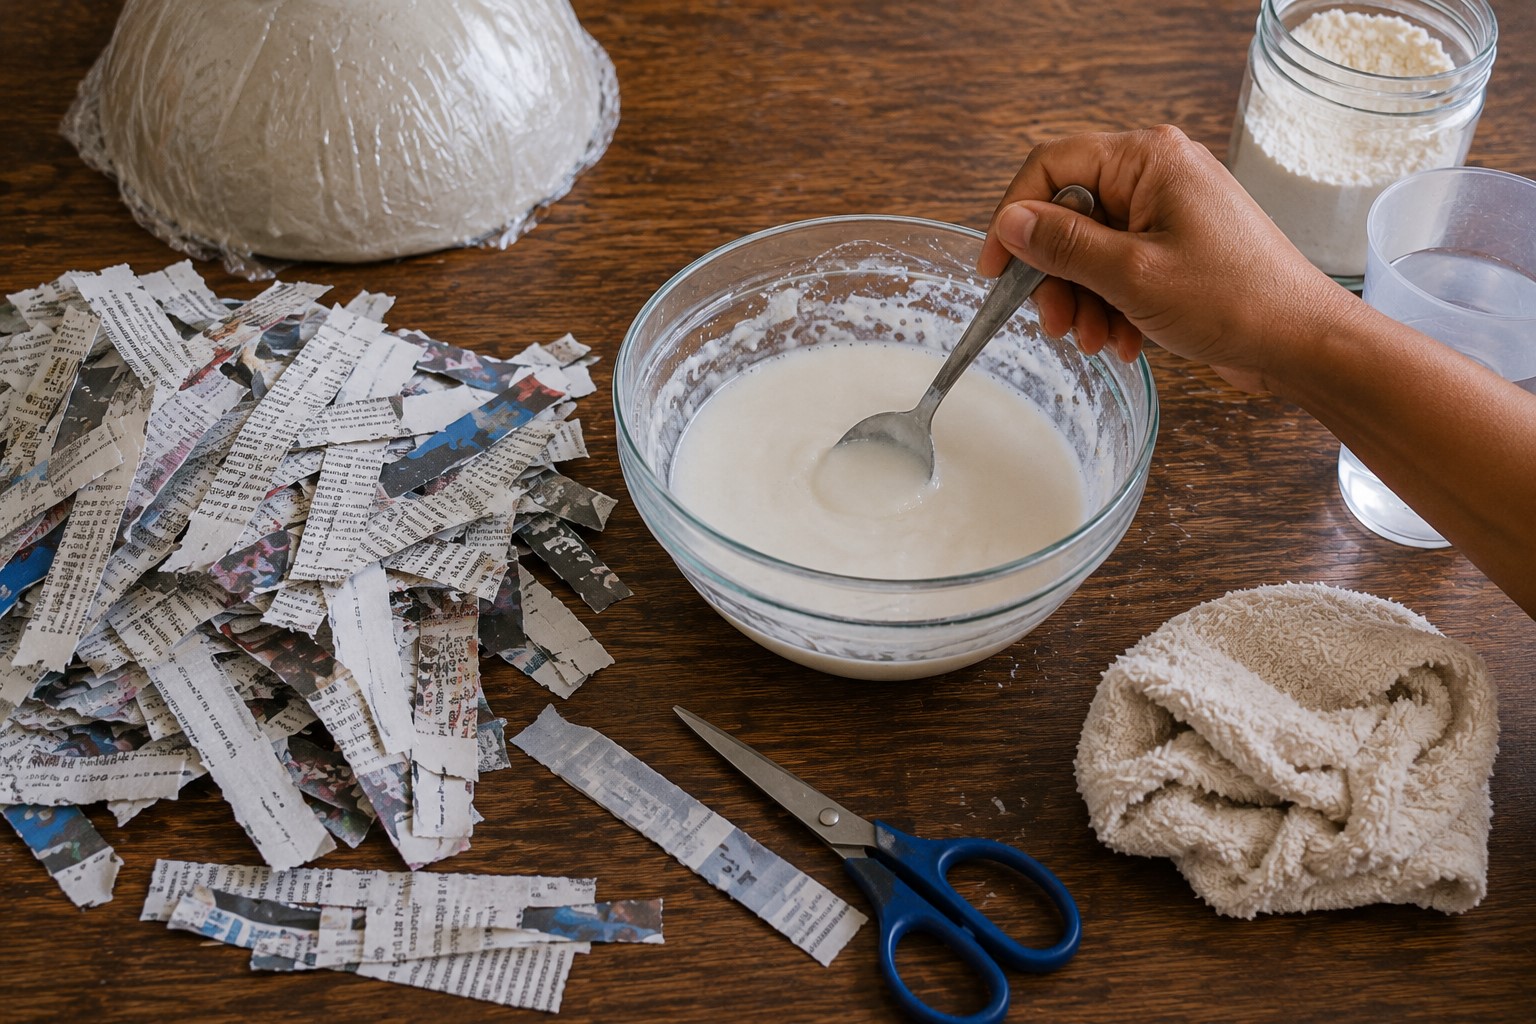
Start tearing your newspaper into strips instead of cutting it with scissors. Torn edges overlap better and blend together more smoothly.
That helps create a stronger bowl with fewer visible seams.
Keep the strips around one to two inches wide. You can make shorter pieces for the curved areas near the bottom.
Different sizes help you cover every part without creating thick lumps.
Now make the paste. Mix one cup of all-purpose flour with one and a half cups of water. Stir until the mixture becomes smooth.
Break up every lump before you begin using it.
The paste should feel like heavy cream. If it looks too thick, add a little water. If it seems too runny, mix in a small amount of flour.
Take your time because the right consistency makes every layer easier to apply.
Avoid making more paste than you need. Fresh paste works best and gives cleaner results.
Step 3: Apply the First Layer
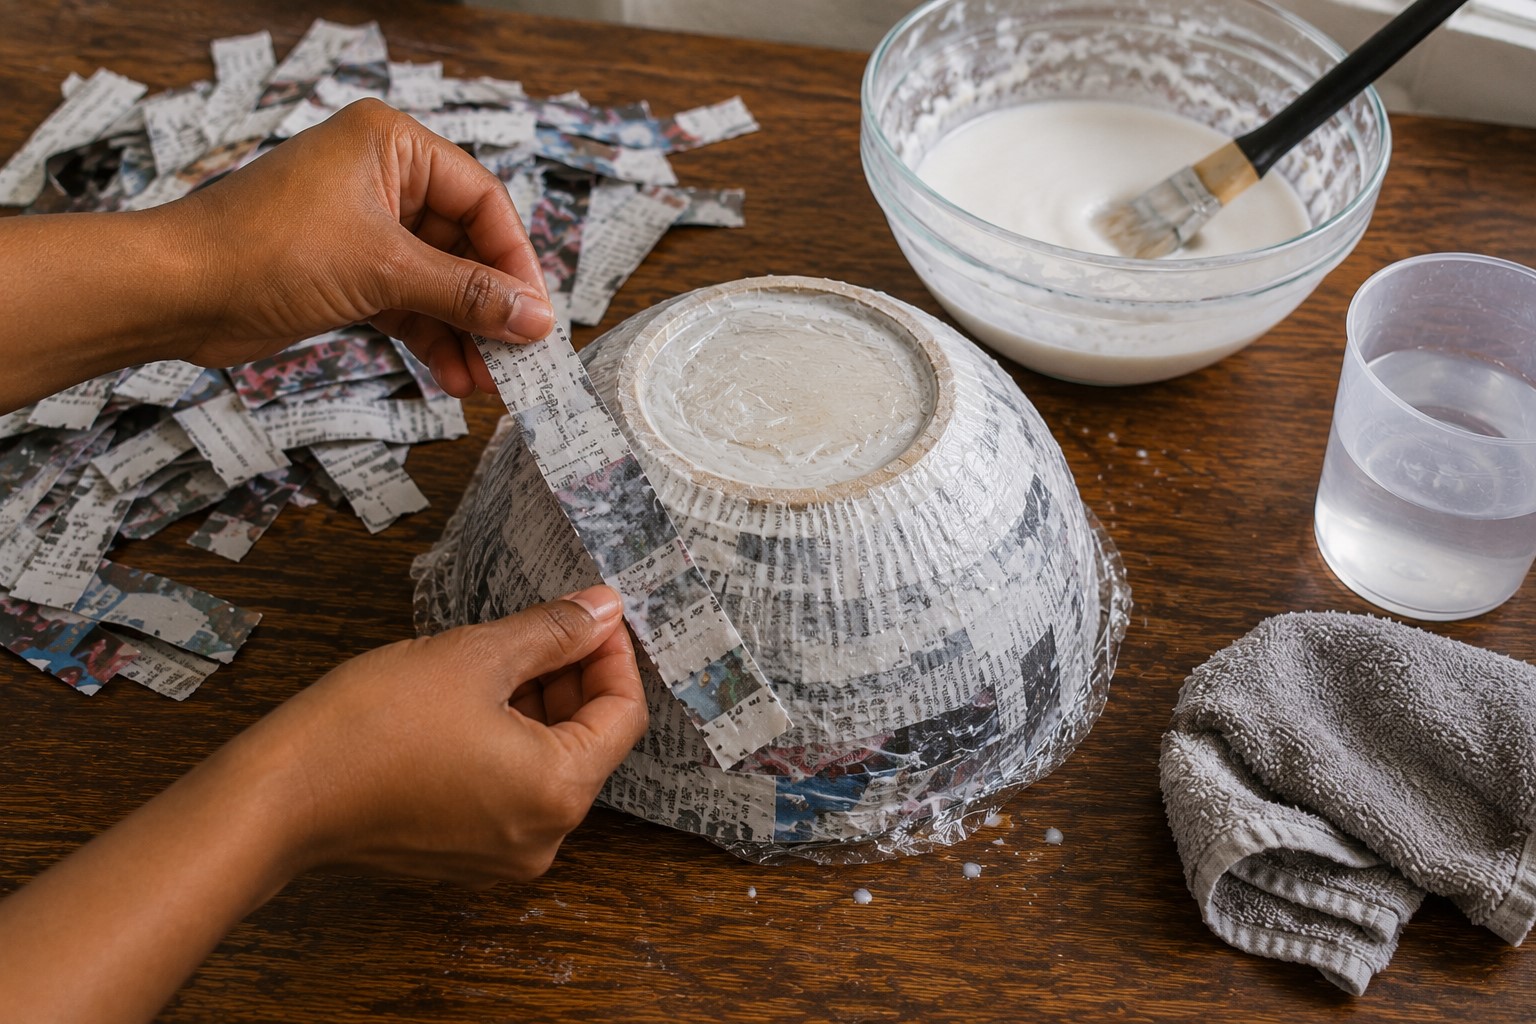
Dip one paper strip into the paste. Then slide your fingers along the strip to remove the extra paste. The paper should feel wet but not dripping.
Lay the strip across the outside of the bowl. Smooth it gently with your fingers. Add another strip beside it and overlap the edges slightly.
Continue covering the bowl one strip at a time. Change the direction of some strips as you work. This simple habit makes the first layer stronger.
Do not rush through this stage. The first layer acts as the base for every layer that follows.
If it sits neatly, the rest of the project becomes much easier.
Check every section before moving on. Press down raised edges while the paste still feels wet.
A few extra seconds now can save plenty of repair work later.
Step 4: Build Strong Layers
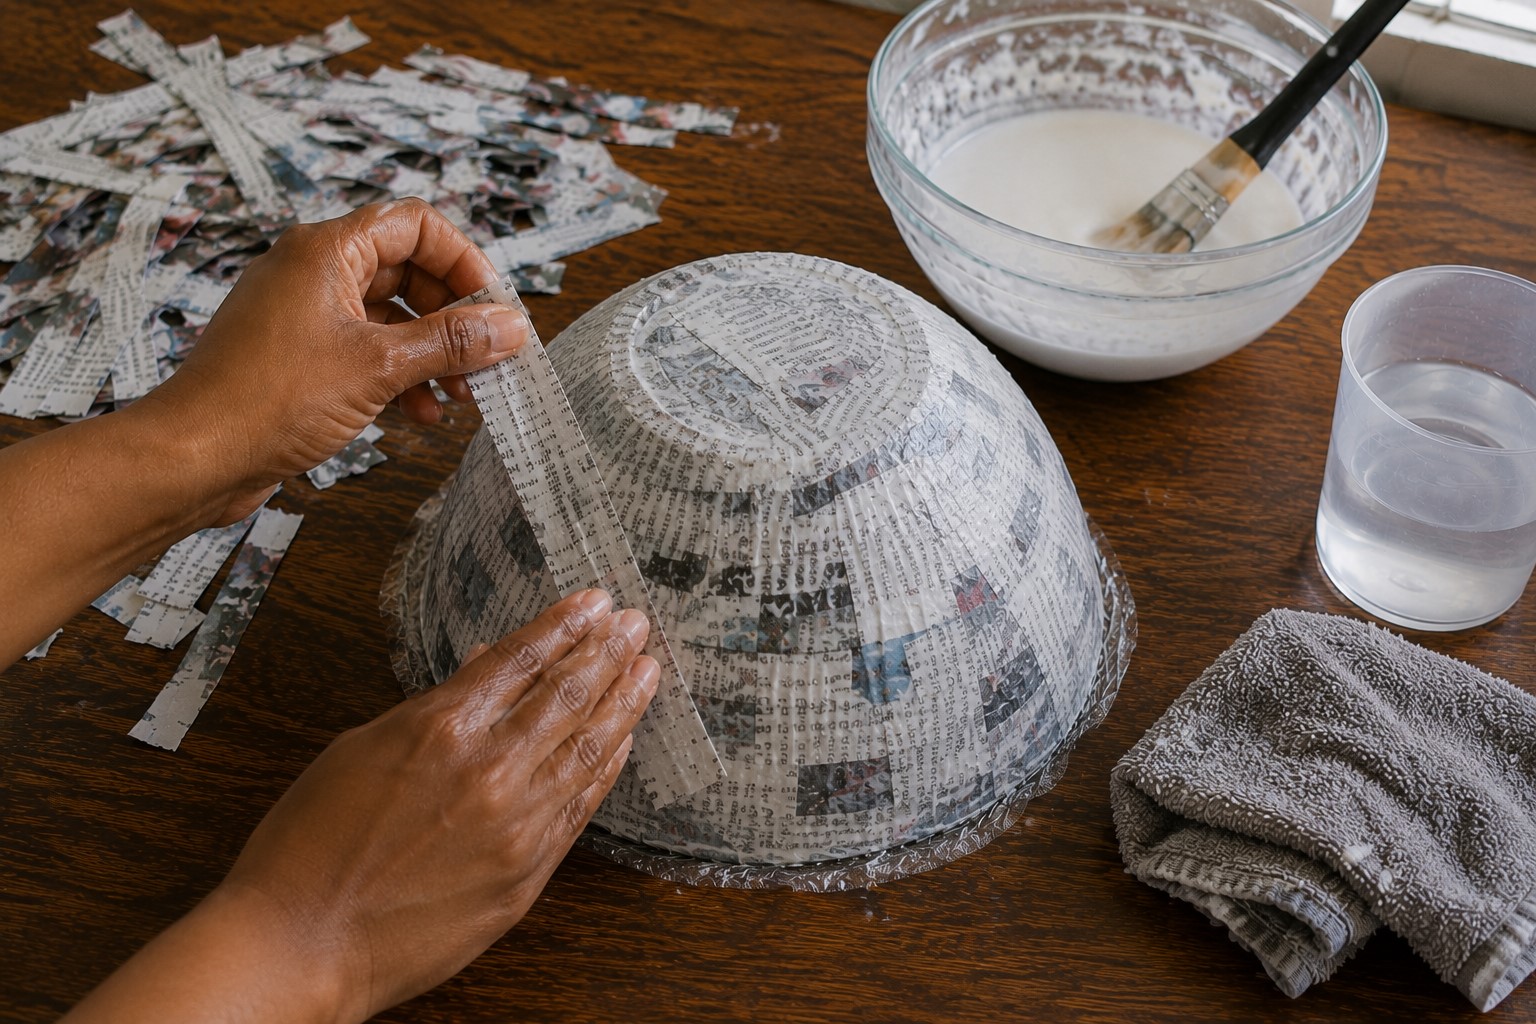
Once the first layer covers the whole bowl, begin adding more layers the same way.
Do not wait for each layer to dry before adding the next one. The damp layers stick together better and create a stronger shell.
Turn the direction of the paper strips with each new layer. For example, place one layer from left to right.
Then place the next layer from top to bottom. This crisscross pattern helps the bowl keep its shape.
Keep each layer even from the rim to the bottom. Some areas naturally need more attention, especially around the curves.
So slow down and check that every part has similar thickness.
Three to five layers usually work well for a decorative bowl. If you want a larger bowl, add another layer or two after checking the thickness.
At the same time, avoid piling on too much paper because extra-thick layers take much longer to dry.
Every few minutes, step back and look at the bowl from different angles. You will notice uneven spots more easily.
If one side looks thicker than the other, add a few strips to balance it before moving on.
Pay close attention to the rim as well. A weak rim can bend after drying. Add small strips around the edge until it feels just as strong as the rest of the bowl.
Step 5: Smooth the Surface as You Work
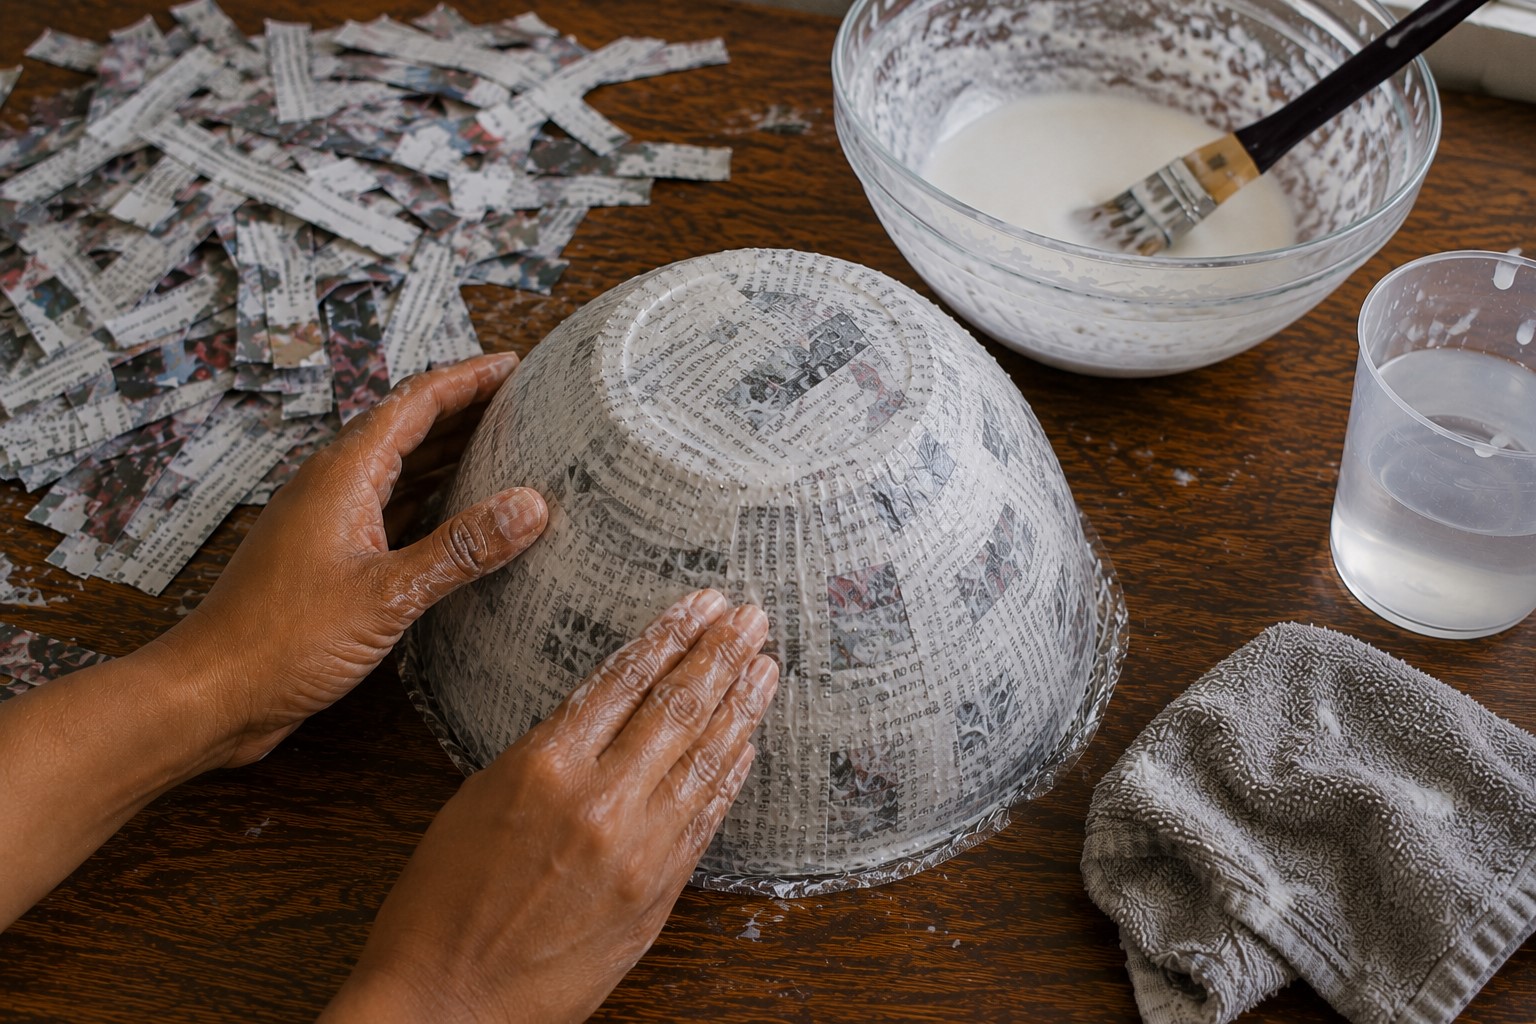
Now that the layers are building up, keep smoothing the surface after every few strips. This habit makes a big difference later.
Run your fingertips gently across the paper. If you feel trapped air, press it toward the edge until it disappears.
Air bubbles often create weak spots that may crack while drying.
Next, flatten any wrinkles before the paste begins to set. Small wrinkles may not seem important now, yet they become much harder to fix later.
If a strip lifts at the edge, press it back into place with a little fresh paste. Then smooth it again until it blends with the surrounding paper.
Look around the bowl for thin areas where the mold still shows through. Cover those places with another strip before continuing.
An even thickness helps the bowl dry at the same rate.
Do not worry if the bowl looks slightly rough at this stage. The goal now is strength, not perfection.
You will smooth the surface even more after it dries.
Step 6: Dry the Bowl the Right Way
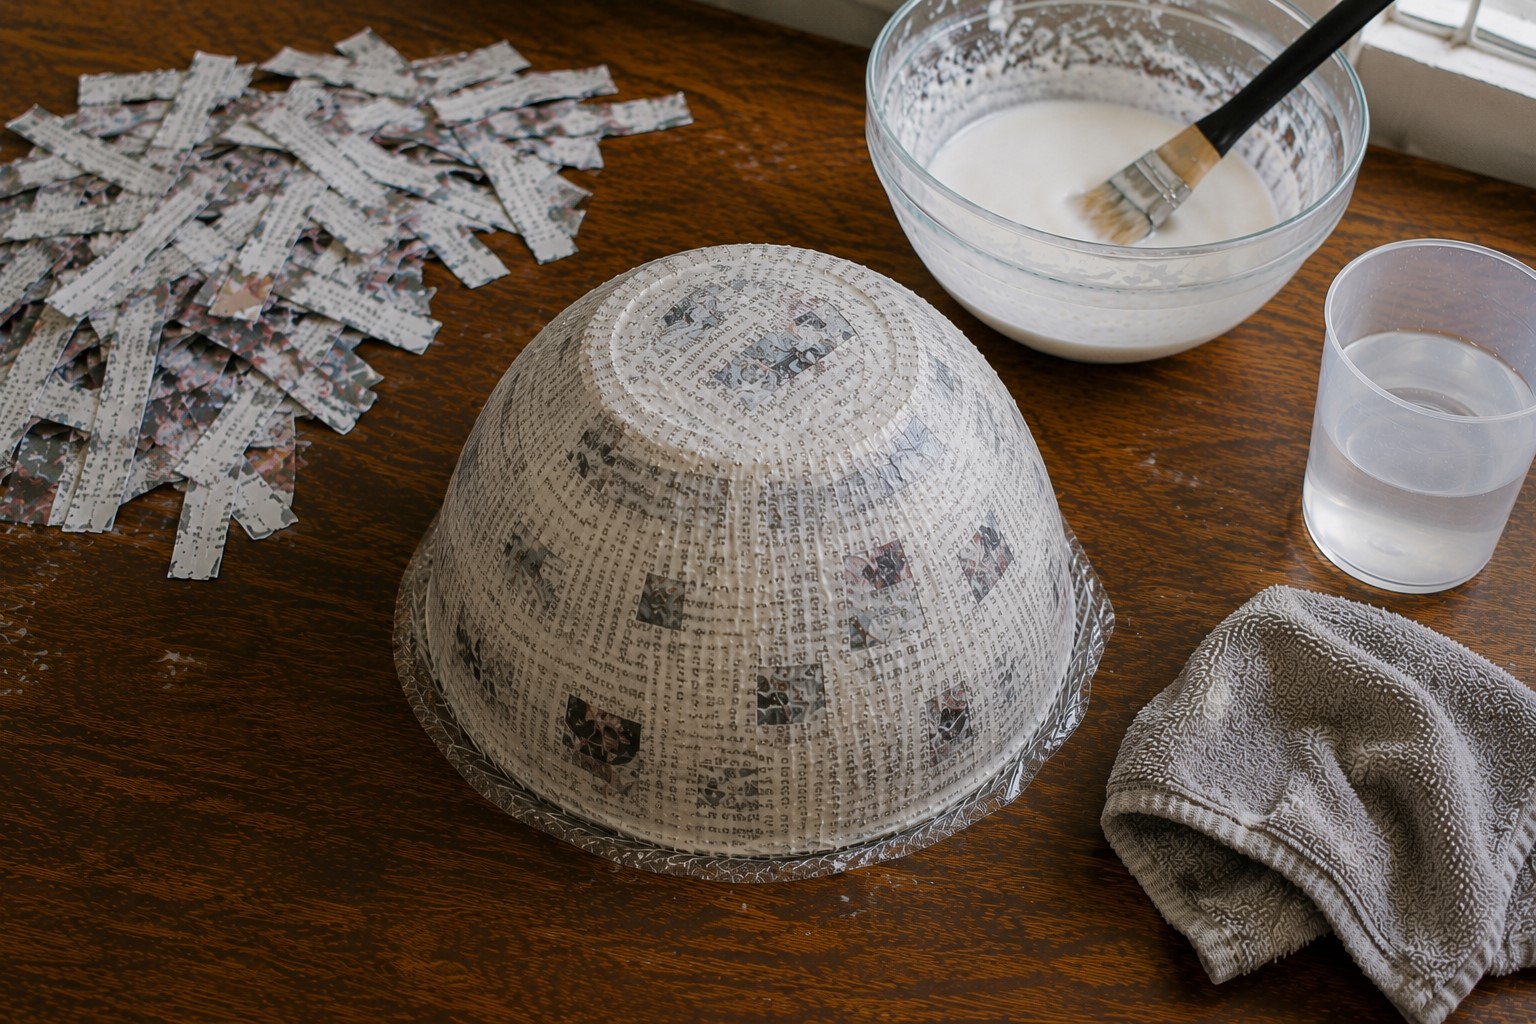
Drying is the stage that many people underestimate. Even a well-made bowl can crack if it dries too quickly.
Place the bowl in a room with good airflow. Fresh air helps moisture leave the paper little by little.
That steady drying process keeps stress away from the layers.
Keep the bowl away from direct sunlight. Strong sun dries the outer surface much faster than the inside.
As a result, cracks can appear before the center finishes drying.
Skip hair dryers, heaters, and ovens as well. They seem like quick solutions, yet they often create the same problem.
Slow drying always gives better results.
Leave the bowl alone until it feels completely dry. Depending on the weather and the number of layers, this may take one to three days. Humid days usually need more time.
Touch the surface gently before removing it from the mold. If any part feels cool or slightly soft, let it dry longer. A fully dry bowl feels firm all over.
Patience matters more than speed at this point. Many people think they have finished once the layers are complete.
In reality, careful drying is one of the biggest reasons a bowl stays smooth instead of cracking.
Step 7: Remove the Bowl From the Mold
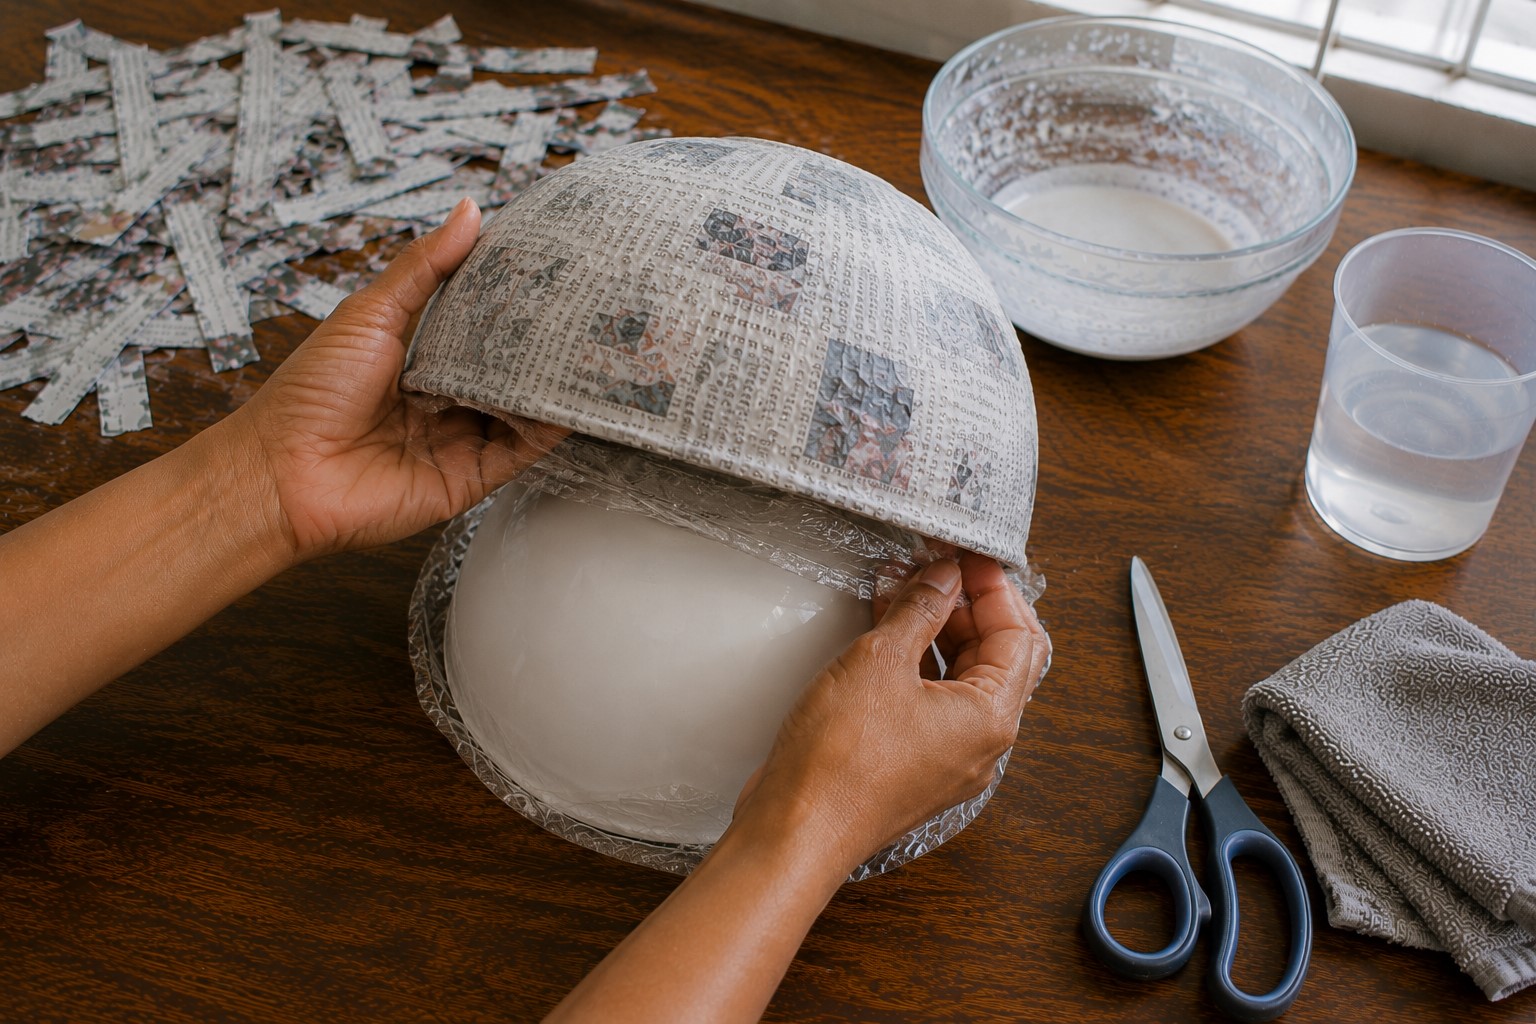
Once the bowl feels completely dry, it is time to separate it from the mold. Do not pull too hard because that can crack the rim.
Start at one edge and lift it gently with your fingers. If you used plastic wrap, the bowl should come away without much effort.
Keep working around the edge until the whole bowl lifts free.
If the bowl feels stuck, stay patient. Slide your fingers between the mold and the Paper Mache instead of forcing it. A slow, gentle motion works much better than a quick pull.
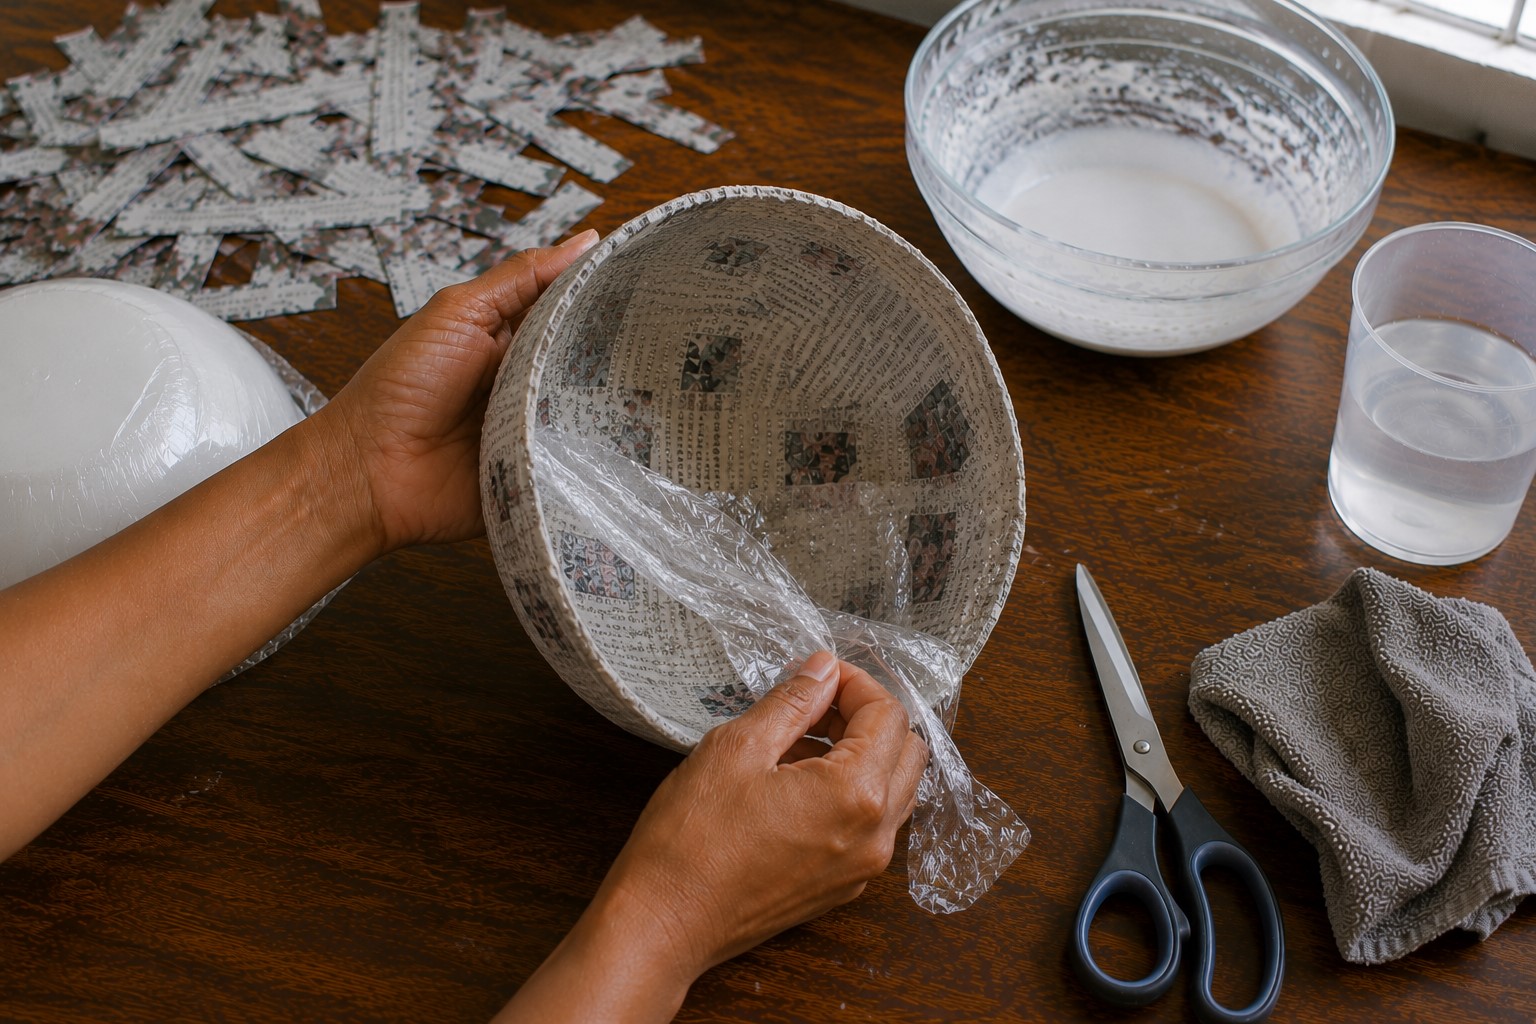
After removing the bowl, peel away the plastic wrap. If you used petroleum jelly, wipe away any remaining residue with a clean cloth.
Now inspect the inside and outside. You may notice a few rough edges around the rim. Trim loose paper with scissors before moving on.
Set the bowl on a flat surface and check that it sits evenly. If it rocks from side to side, look for a small bump underneath.
You can smooth that area during the next step.
Step 8: Repair Weak Spots and Add a Final Layer
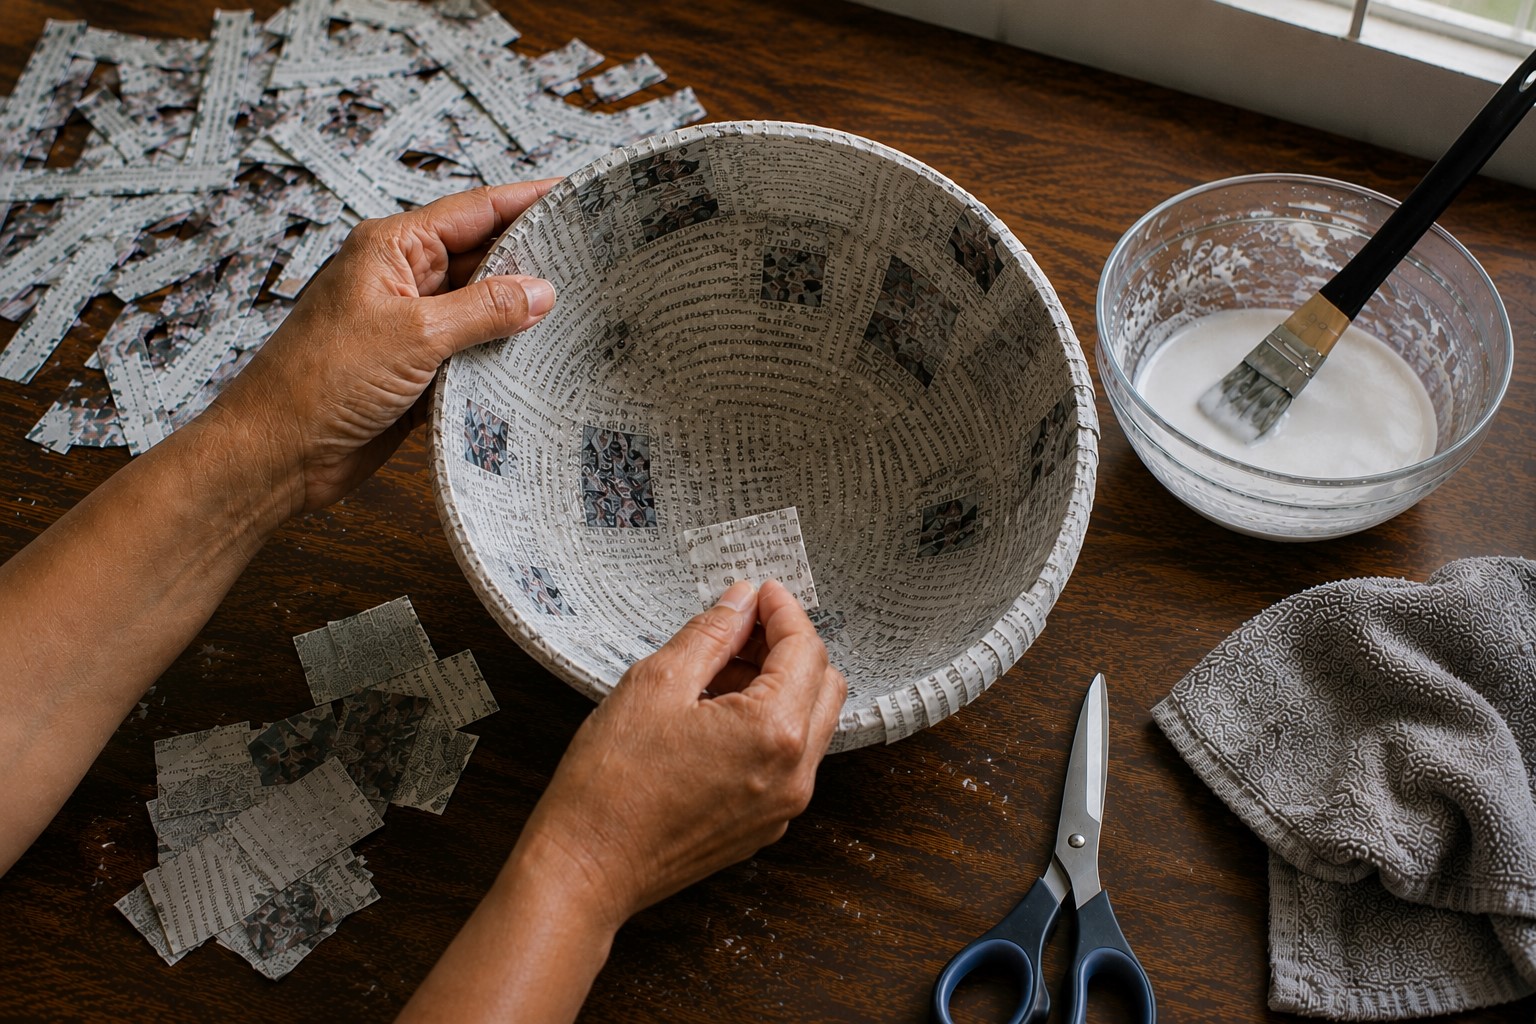
This step gives you the chance to improve the bowl before decorating it. Spend a few minutes checking every inch instead of rushing ahead.
Hold the bowl under good lighting. Thin spots often become easier to notice.
If light shines through any area, cover it with another paper strip and a little paste.
Next, look for tiny dents or uneven places. Add small pieces of paper over those areas and smooth them with your fingers.
Blend the edges so they disappear into the surface.
If part of the rim feels weak, strengthen it with a few narrow strips. Wrap them neatly around the edge and press them down well.
Keep the repairs light. Thick patches can stand out after painting. Small adjustments usually look much better.
After finishing the repairs, let the bowl dry completely again. Give it enough time because even a small patch holds moisture.
Step 9: Sand the Bowl Until It Feels Smooth
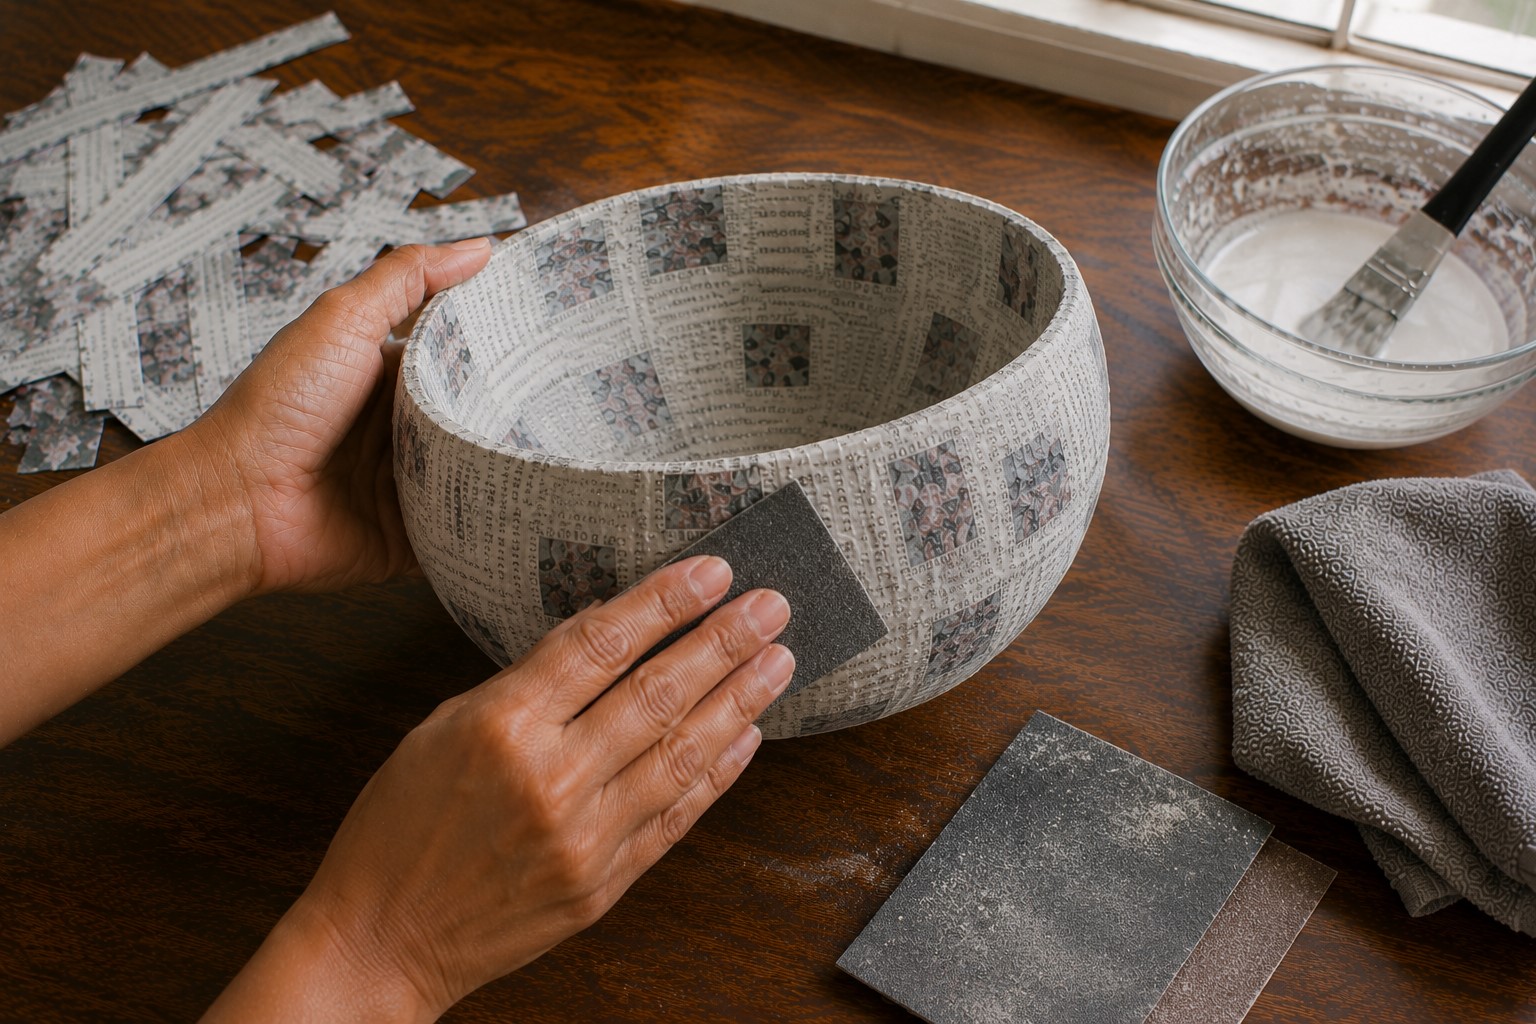
When the bowl has dried again, lightly sand the surface with fine-grit sandpaper. Gentle sanding removes rough fibers without damaging the paper layers.
Move the sandpaper in small circles. Press lightly as you work. Too much pressure can wear through the outer layer.
Pay extra attention to the rim. A smooth edge gives the bowl a neat, finished look and makes it more comfortable to handle.
Keep brushing away the sanding dust with a dry cloth. This helps you see your progress and prevents dust from collecting in small corners.
Run your hand over the bowl every few minutes. Your fingers can feel bumps that your eyes may miss. If you notice a rough area, sand it a little more.
Do not try to make the surface perfectly smooth like ceramic. Paper Mache has a handmade texture, and that is part of its charm.
The goal is simply to create a clean surface that is ready for paint.
Step 10: Paint and Decorate Your Bowl
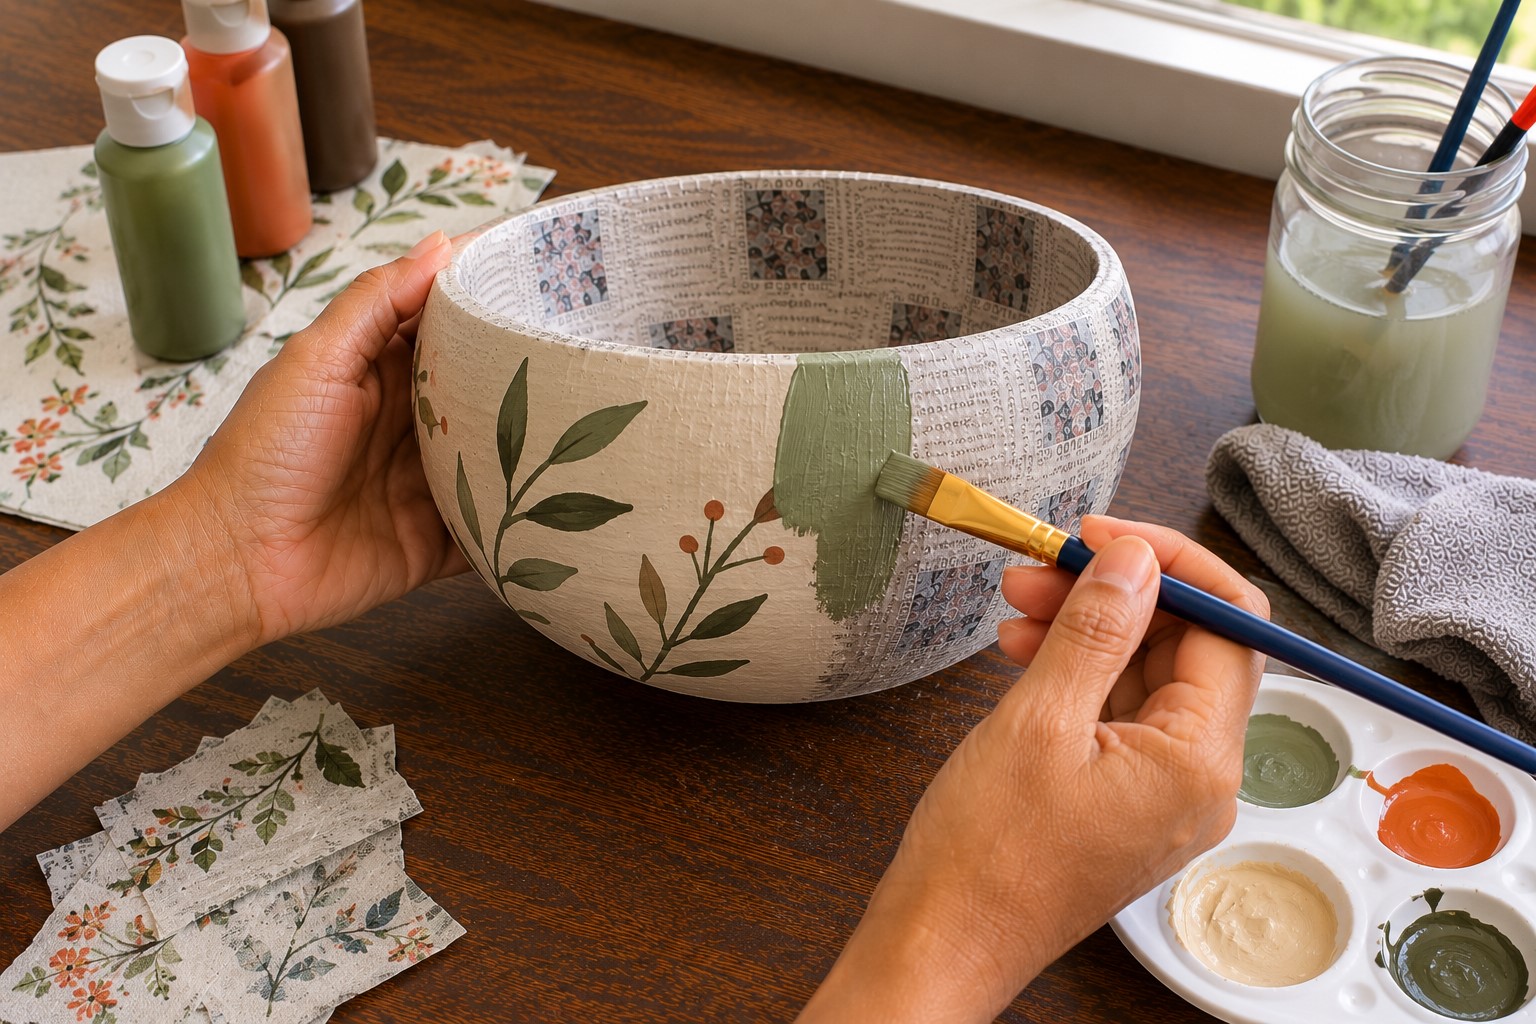
Now comes the most enjoyable part of the project. You can keep the design simple or make it as colorful as you like.
Start with a thin coat of acrylic paint. Light coats dry faster and help create a cleaner finish. Let each coat dry before adding the next one.
Choose colors that match the place where you plan to display the bowl. Soft earth tones create a natural look.
Bright colors make the bowl stand out. Metallic paints also add a beautiful touch.
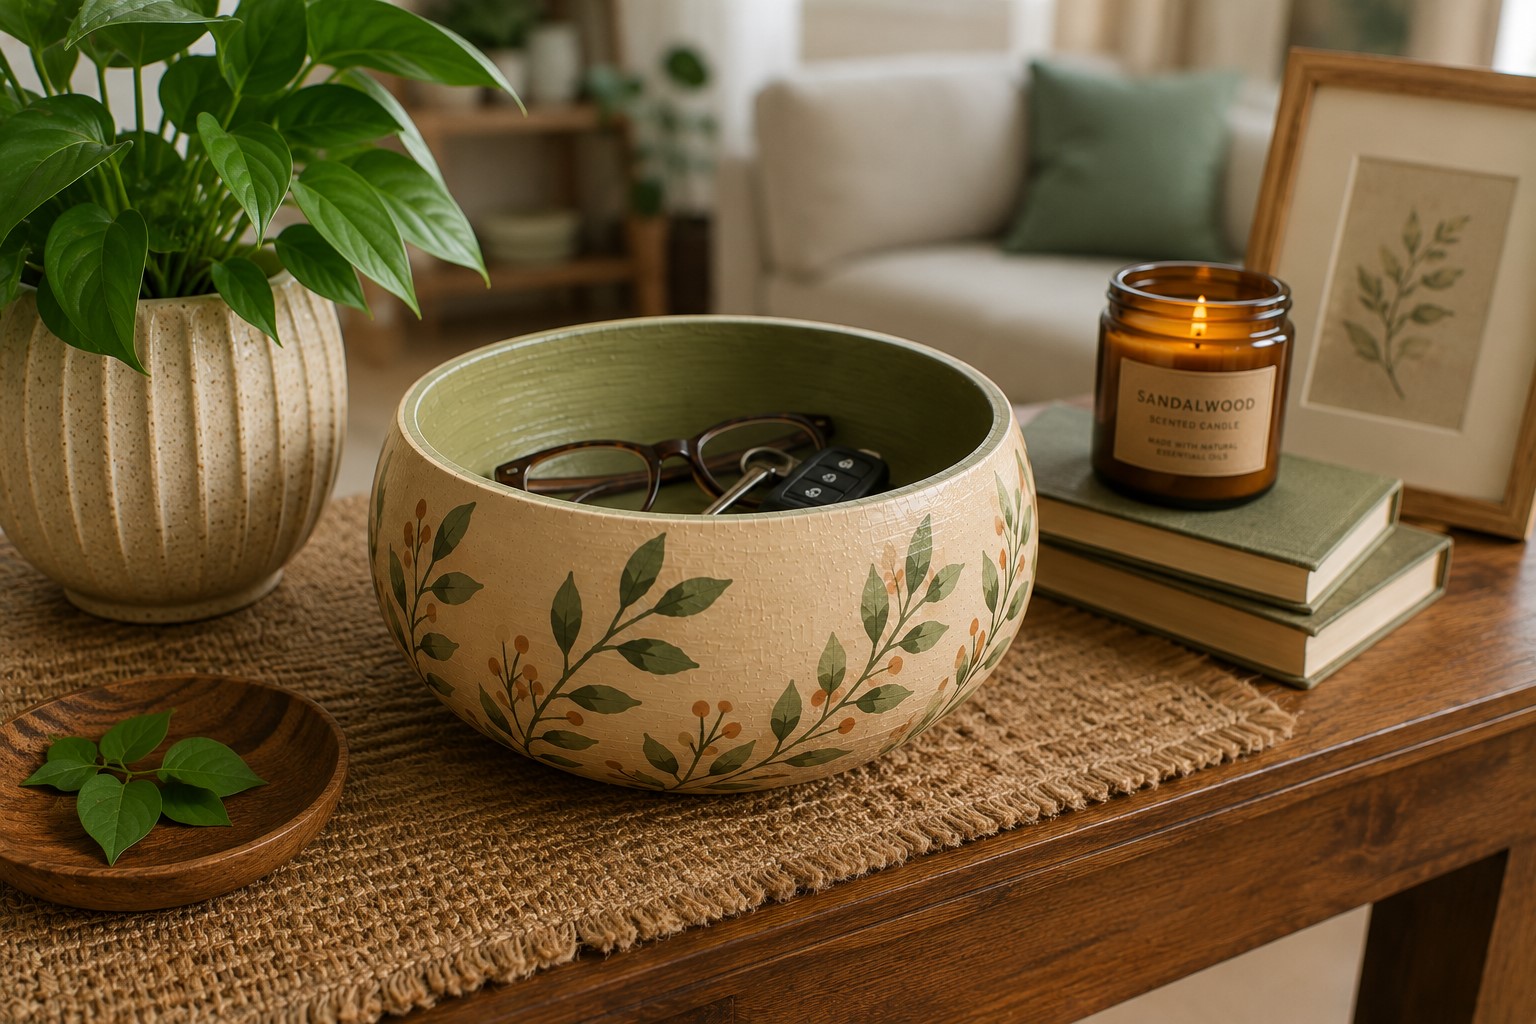
If you enjoy patterns, paint simple stripes, dots, leaves, or flowers. You do not need advanced painting skills. Small details often make the biggest impact.
You can also decorate the bowl with decoupage paper, pressed flowers, lace, or small fabric pieces. Glue each decoration neatly and let it dry before continuing.
Keep turning the bowl as you paint. Looking at it from different angles helps you spot missed areas before the paint dries.
Once you finish decorating, leave the bowl alone until every coat feels completely dry. This extra patience helps protect all the work you have done so far.
Step 11: Seal the Finished Bowl
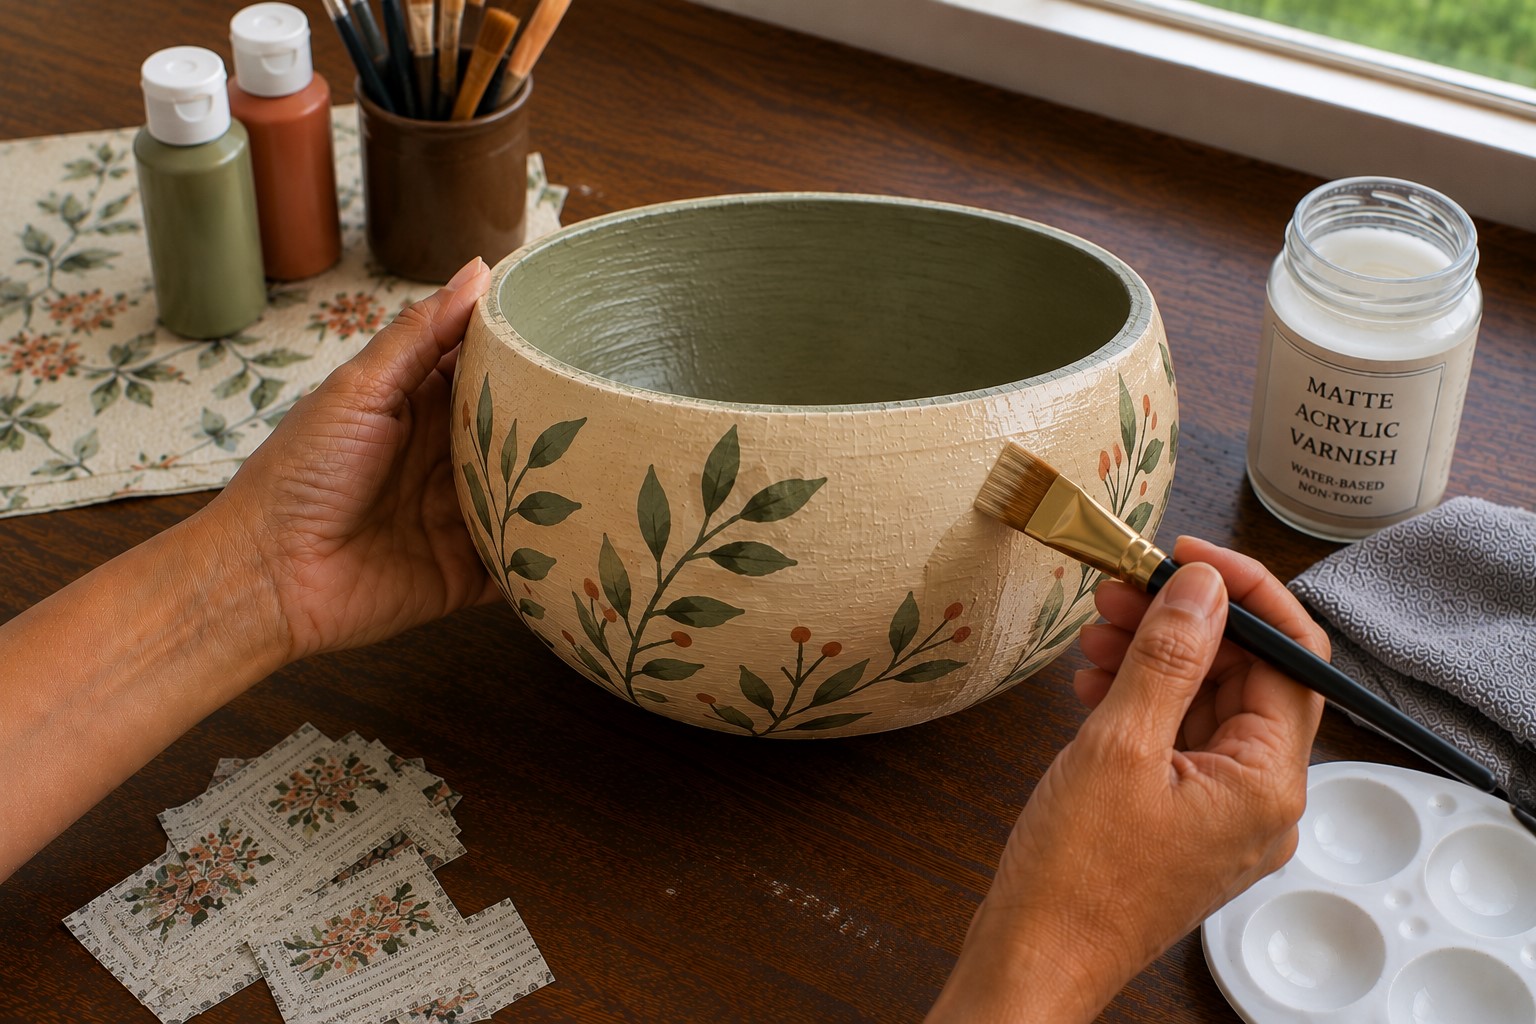
Your bowl already looks beautiful, yet it still needs a protective finish. A good sealer helps the paint last longer and keeps light moisture away from the surface.
Choose a clear acrylic sealer or a craft varnish that works well on paper projects. You can pick a matte finish for a natural look or a glossy finish for extra shine.
Apply a thin, even coat with a clean brush. Start from the inside and then move to the outside. Watch for drips around the rim and smooth them right away.
Let the first coat dry completely. Then apply a second thin coat for better protection. Two light coats usually look much nicer than one thick coat.
Keep the bowl in a dust-free place while the sealer dries. Dust can stick to the wet surface and leave small bumps.
Remember that a Paper Mache bowl is still a decorative item. Do not fill it with water or use it for food.
It works best for dry items and everyday decorations.
Step 12: Give Your Paper Mache Bowl a Final Check
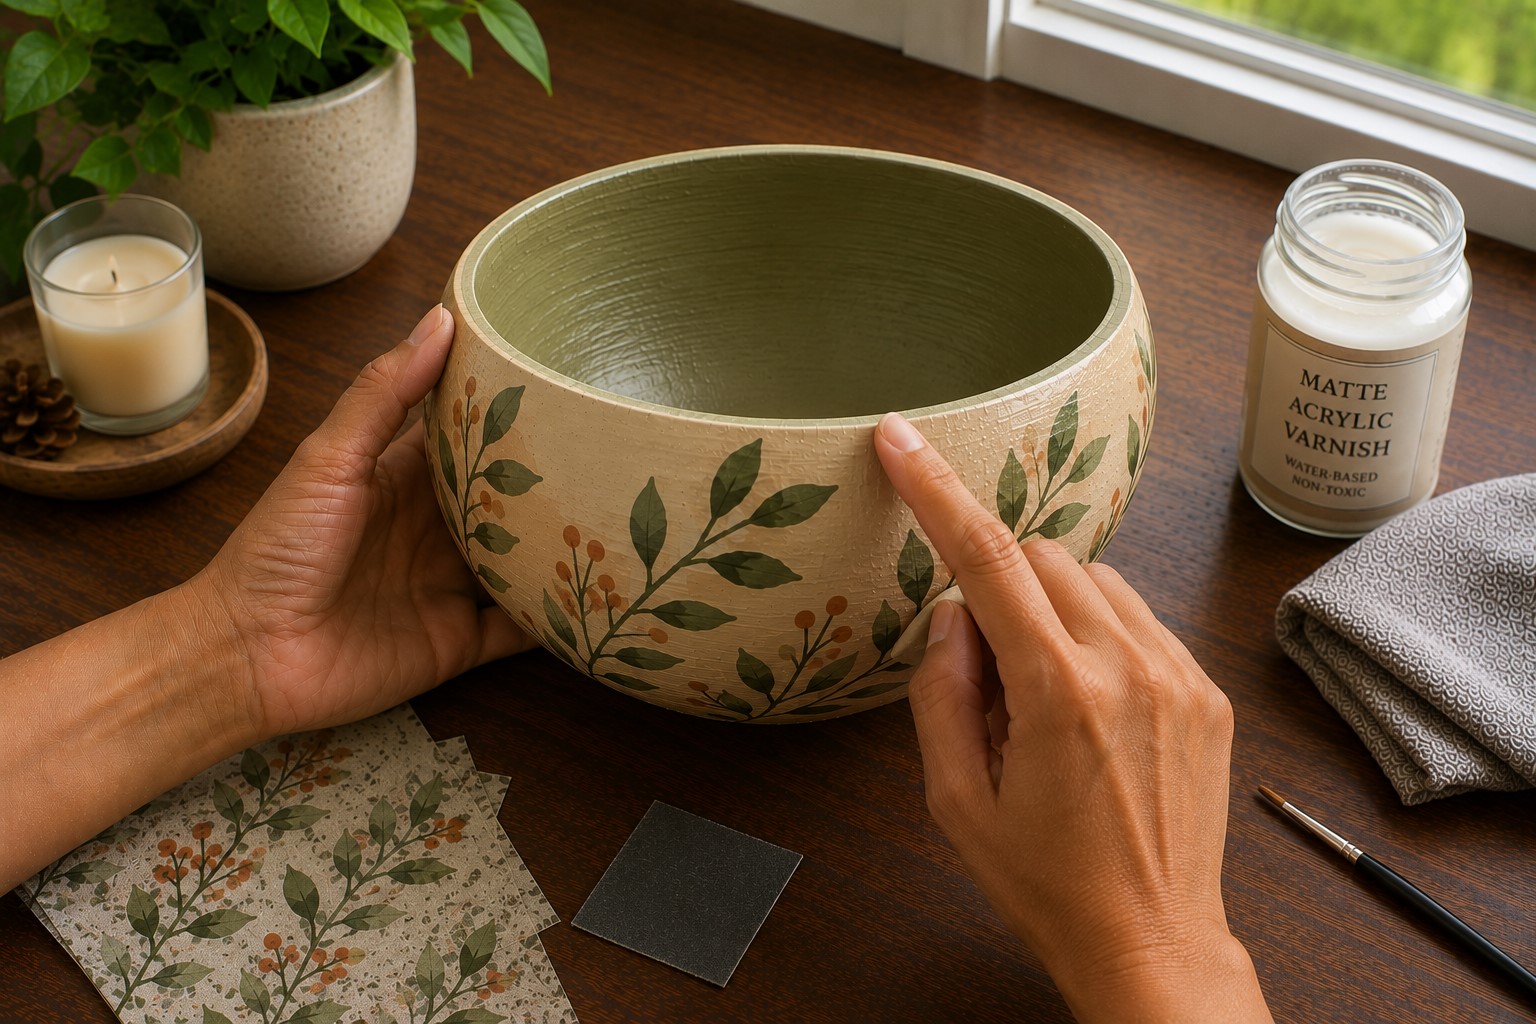
Before placing your bowl on display, spend a few minutes checking your work. This final inspection helps you catch small issues while they are still easy to fix.
Look closely at the rim first. It should feel firm and smooth all the way around. If you find a rough spot, sand it lightly and add a little more sealer.
Next, examine the inside and outside under good light. Touch up any small paint chips or missed areas with a fine brush.
Let the paint dry before sealing that spot again.
Hold the bowl gently in both hands. It should feel sturdy without bending. If one area feels weak, add a small paper patch, let it dry, and repaint it.
Set the bowl on a flat table. It should sit evenly without rocking. If needed, sand the bottom very lightly until it rests flat.
Take one last look and enjoy what you have created. Learning How to Make a Paper Mache Bowl becomes much more rewarding when you slow down and appreciate the finished piece.
Every careful step has helped turn simple paper into something attractive and useful.
Common Mistakes That Cause Paper Mache Bowls to Crack
- Cracks can happen to anyone, especially during a first project. The good news is that most of them have simple causes. Once you know what to avoid, your next bowl will have a much better chance of drying smoothly.
- One common mistake is using too much paste. Paper should feel damp, not soaked. Extra paste traps moisture inside the layers, so the outside dries first while the inside stays wet.
- Another mistake is making the layers too thick. Thick Paper Mache takes much longer to dry. As the moisture leaves, the bowl can shrink unevenly and develop cracks.
- Many beginners also rush the drying stage. The bowl may feel dry on the outside, yet the center can still hold moisture. Give the project enough time before removing it from the mold.
- Using only one or two layers creates another problem. Thin walls bend easily and may crack while you handle the bowl. Build enough layers to make the bowl sturdy without making it overly thick.
- Direct sunlight and strong heat often cause trouble as well. While faster drying sounds appealing, it usually creates stress in the paper. A room with good airflow gives much better results.
- Finally, do not ignore small wrinkles or air bubbles. Fix them while the paste stays wet. Those little imperfections can become weak points after the bowl dries.
Creative Ways to Use Your Paper Mache Bowl
After you learn How to Make a Paper Mache Bowl, you will probably want to make more than one. Each bowl can have its own style and purpose.
- Place one on your entry table to hold keys, loose change, or sunglasses. It keeps everyday items together while adding a handmade touch.
- Use another bowl as a centerpiece. Fill it with dried flowers, pinecones, decorative balls, or seasonal ornaments. You can change the display throughout the year.
- A Paper Mache bowl also works well on a desk. Store paper clips, sticky notes, binder clips, or other small office supplies inside.
- If you enjoy giving handmade gifts, fill the bowl with wrapped treats, candles, soaps, or small craft supplies. The bowl becomes part of the gift, making it even more memorable.
- You can also create matching bowls in different sizes. Arrange them together on a shelf or coffee table for a coordinated display. Using different colors and patterns makes the collection even more eye-catching.
Final Thoughts
Making a Paper Mache bowl does not require expensive supplies or years of crafting experience. Instead, it rewards careful work and a little patience.
Each strip of paper adds strength, and each stage helps shape the finished bowl into something you can enjoy for years.
If your first bowl is not perfect, do not feel discouraged. Every project teaches something new.
You may discover a better way to smooth the layers, improve the shape, or decorate the surface. Those small lessons make the next bowl even better.
I hope this guide gives you the confidence to create a bowl that dries smoothly and stays strong.
Once you finish your first project, you will see why Paper Mache Bowl remains a favorite craft for beginners and experienced makers alike.
Gather your supplies, enjoy the process, and take pride in creating something beautiful with your own hands.