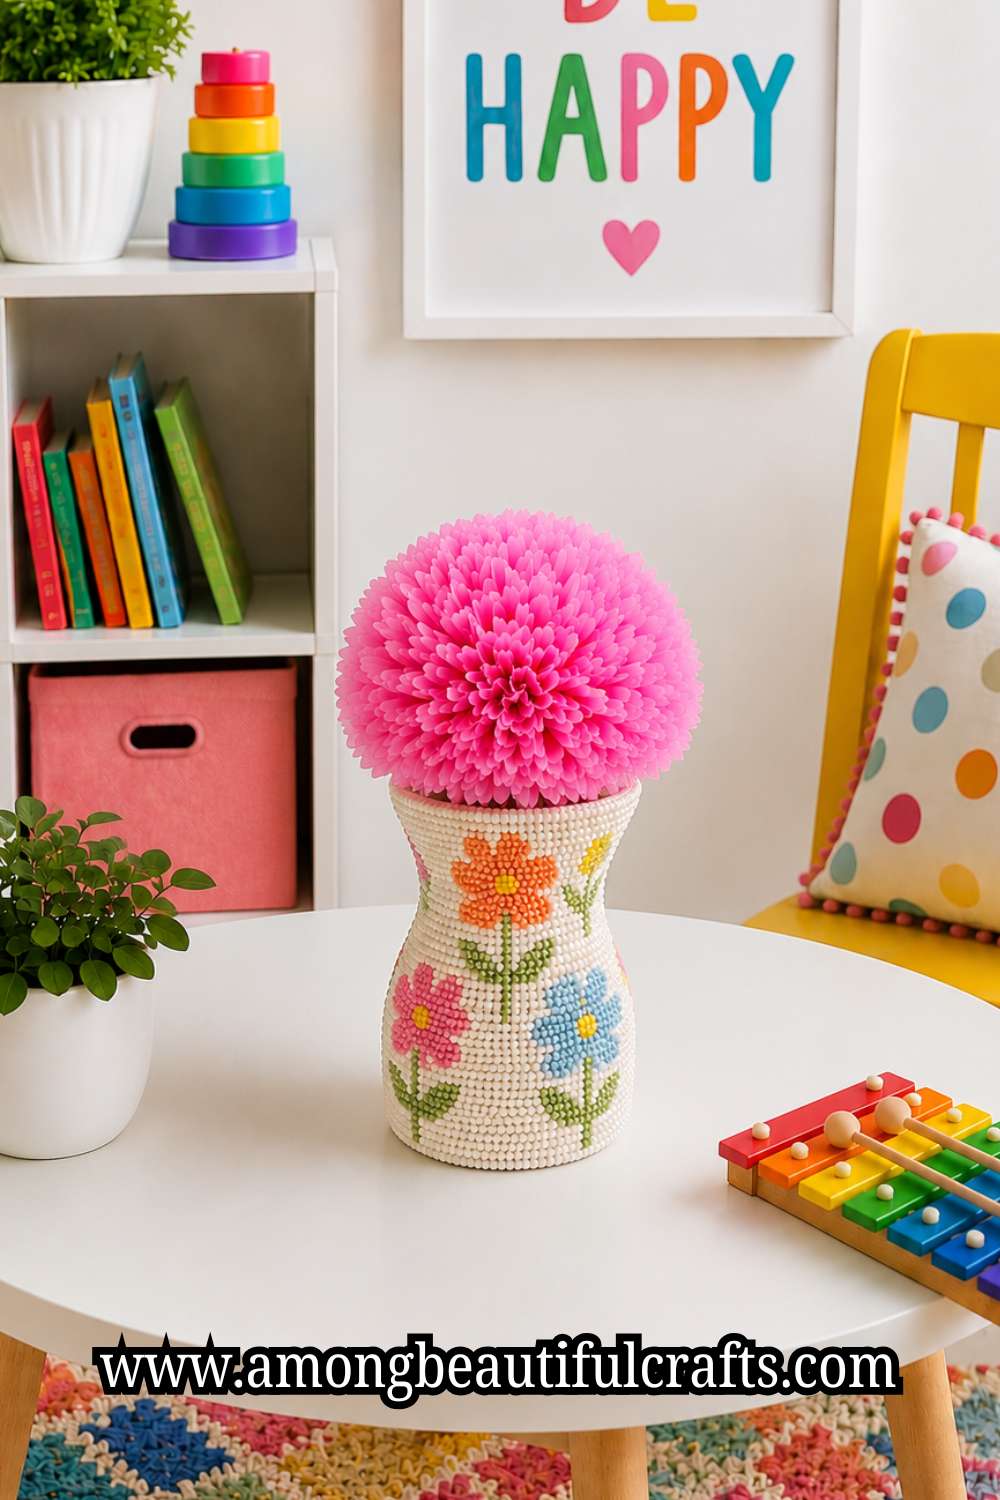
Some of the prettiest decorations are the ones people never expect. Imagine placing a bouquet of tissue paper flowers on a table, and someone walks over just to take a closer look.
They might even ask where you bought them because they cannot believe they started as a few simple sheets of tissue paper.
That little moment is one of the best parts of this craft. It shows that beautiful decorations do not always come with a high price tag.
If you love working with real flowers too, figuring out How to Make a Pressed Flower Frame That Looks Boutique-Worthy is another lovely way to display them.
Once you learn How to Make Tissue Paper Flowers, you will start seeing colorful decorations in places where you once saw only plain sheets of paper.
At first, tissue paper may not look like much. It feels thin, delicate, and almost too simple to become anything special.
Yet once you fold it the right way, shape the edges, and gently open each layer, everything changes. Little by little, a full flower begins to appear.
Before you know it, your table holds colorful blooms that can brighten a room, decorate a party, or make a handmade gift feel even more thoughtful.
That is exactly what this guide will help you create. I will take you through every step in a simple way, so you know not only what to do but also why each step matters.
Along the way, you will learn the small tricks that make flowers look full instead of flat and soft instead of messy.
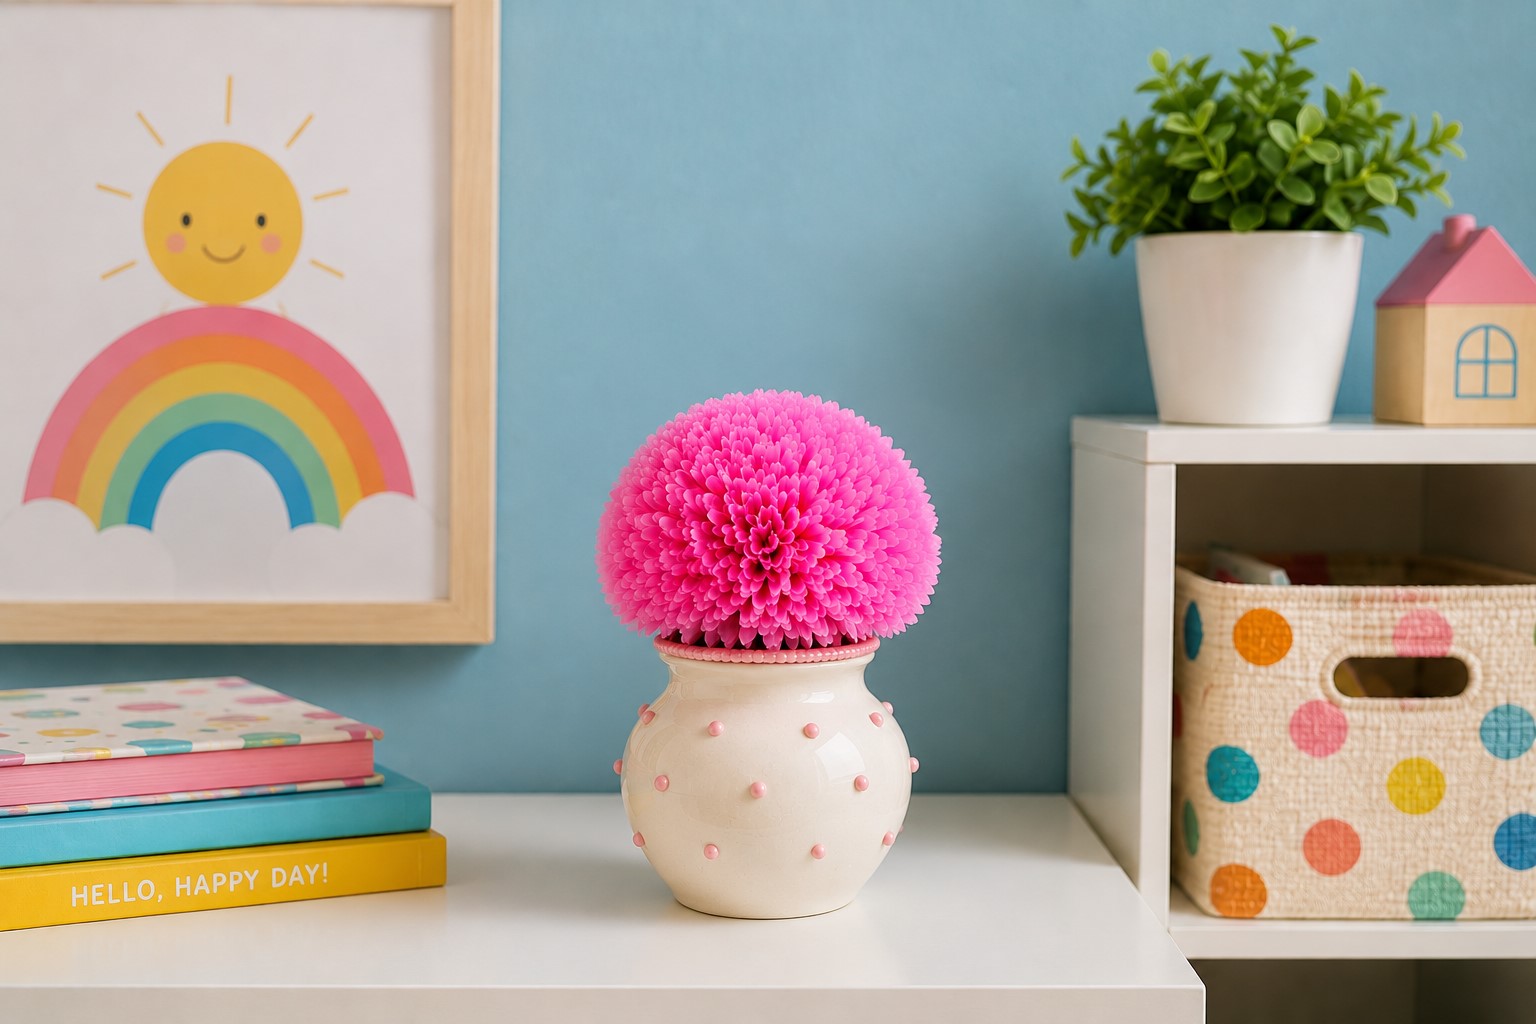
By the end, you will have tissue paper flowers that people admire before they ever realize what they are made from.
Even better, you will know how to make them again in different sizes, colors, and styles whenever inspiration strikes.
Supplies You Will Need
Gather everything before you begin. Doing this keeps the process smooth, and you will not have to stop halfway through.
You will need:
- 8 to 12 sheets of tissue paper – (Available on Amazon)
- Sharp scissors – (Available on Amazon)
- Ruler
- Floral wire, twist tie, or pipe cleaner – (Available on Amazon)
- Pencil
- Ribbon or string for hanging the flowers (optional) – (Available on Amazon)
You can use one color or mix several colors together. Mixing shades often gives the flower more depth and makes it look even more realistic.
This same simple supply list works well for 19 Easy Clay and Pipe Cleaner Crafts Kids Will Want to Make too.
How to Make Full and Fluffy Tissue Paper Flowers That Impress
Step 1: Choose the Right Tissue Paper
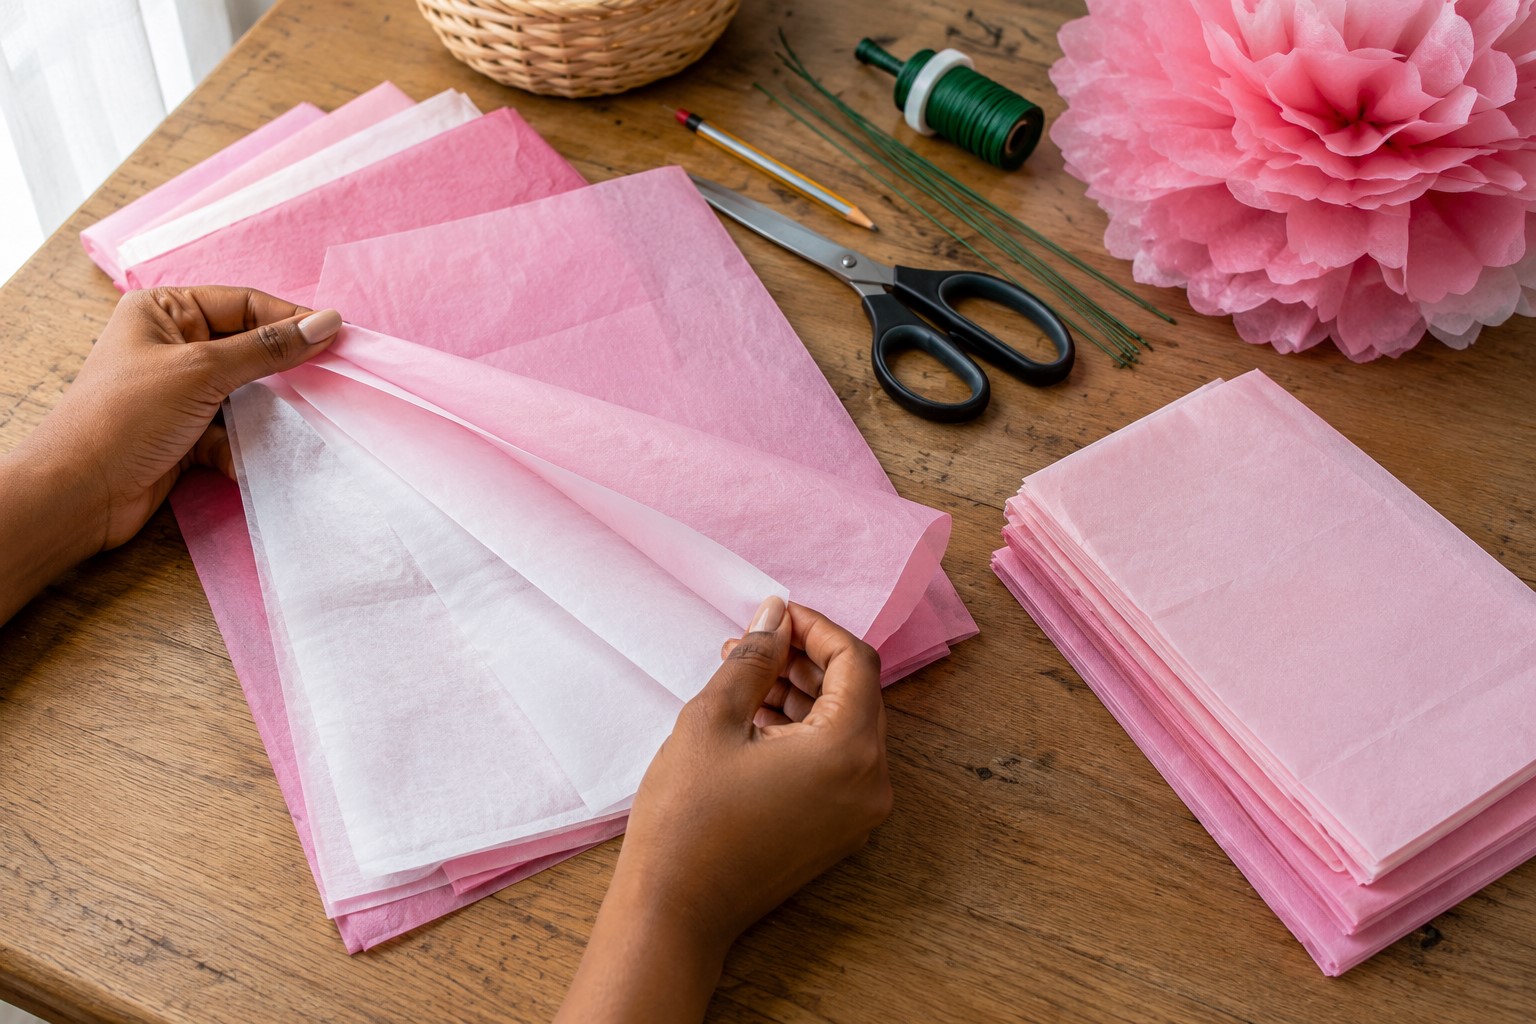
The kind of tissue paper you choose has a bigger impact than many people realize. Soft tissue paper opens more easily and creates petals that look light and natural.
If the paper feels too thin, it may tear while you separate the layers. If it feels too thick, the flower can lose its soft and fluffy look.
Spending a few extra minutes picking good tissue paper gives you a much better result from the beginning.
Next, think about the color you want your flower to have. Bright colors work well for birthdays and fun celebrations, while pastel shades suit baby showers and weddings.
If you love playing with bold color mixes, 21 Creative Rainbow Crafts That Brighten Any Day has more fun color ideas to try.
You can also stack different colors together to create a more interesting flower. For example, white between pink sheets gives the petals a softer look.
Yellow mixed with orange creates a warm flower that stands out beautifully.
Before moving to the next step, smooth each sheet as much as possible. Small wrinkles will not ruin your flower, but deep creases can show after you fluff the petals.
Also, make sure every sheet is the same size. Even edges make folding much easier later, and they help the flower bloom into a neat, balanced shape.
Step 2: Decide the Size of Your Flower
Take a moment to picture where your finished flower will go. A large flower looks beautiful on a party backdrop or an empty wall.
A medium flower works well in a centerpiece or wreath. Smaller flowers make lovely gift toppers, greeting card decorations, and bouquet fillers.
Knowing the purpose of your flower helps you choose the right size before you start cutting.
Thinking ahead about size and display also matters in this guide on How to Make a Stunning Layered Paper Shadow Box From Scratch, where the finished frame shapes the whole plan.
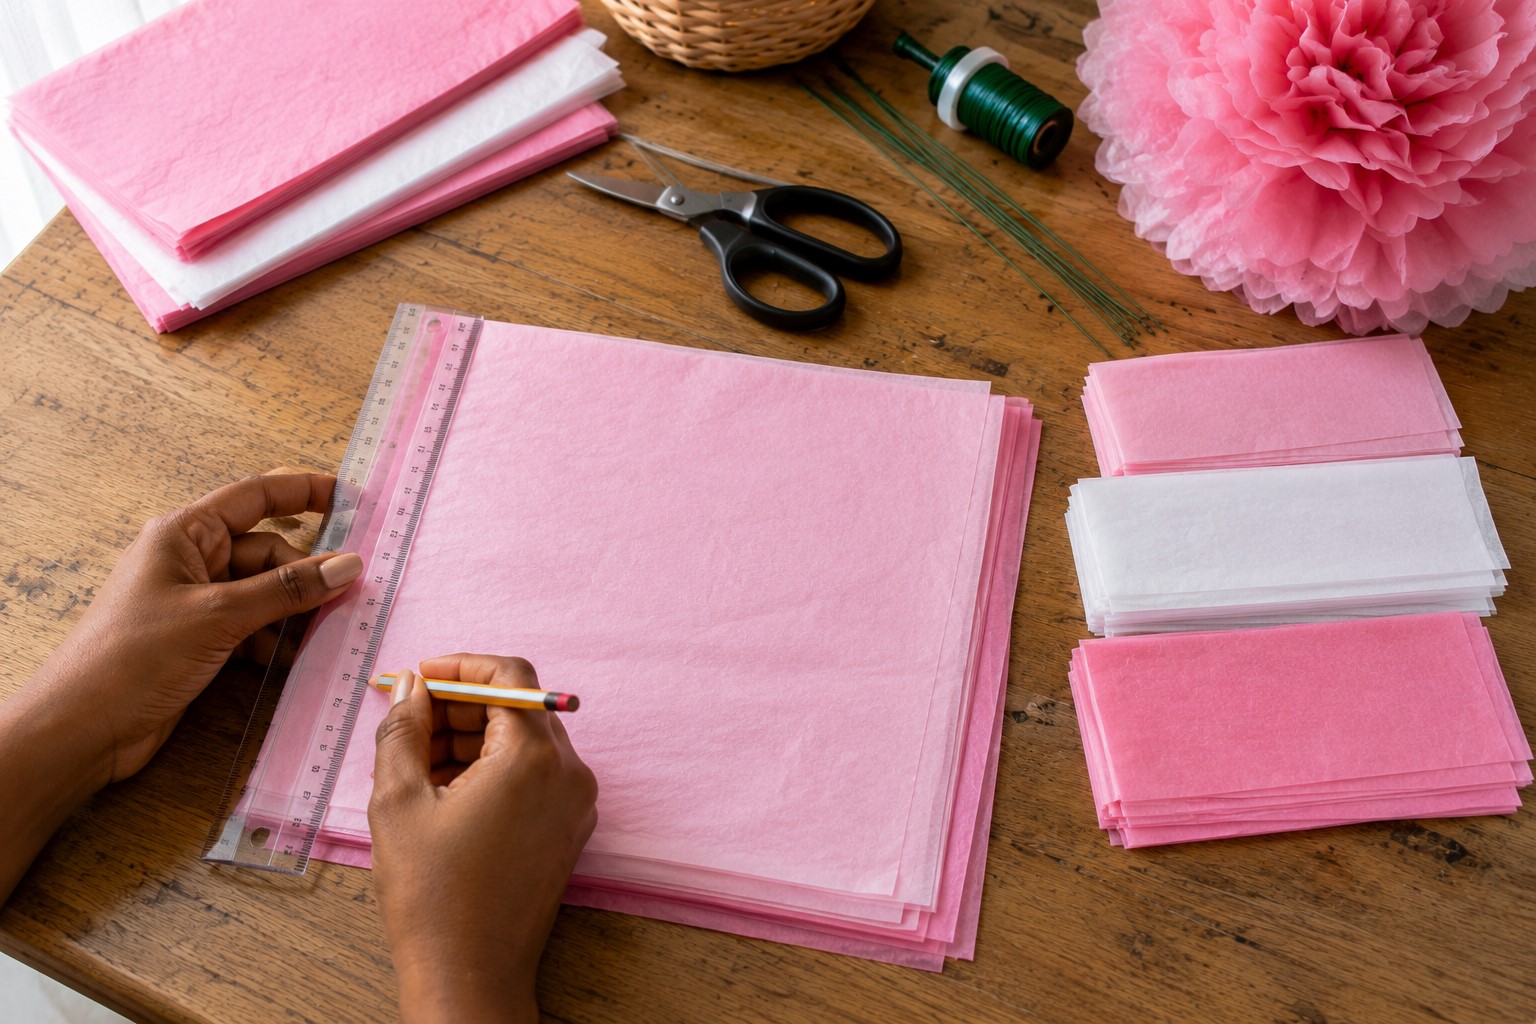
If your tissue paper comes in large sheets, you can leave it as it is for oversized blooms. For medium or small flowers, trim every sheet before stacking them.
Use a ruler if you want several flowers to match. A little measuring now saves you from trying to fix uneven flowers later.
Making different sizes also creates a more natural display. Flowers rarely grow in identical sizes, and your decorations do not have to either.
Try making one large flower, two medium ones, and a few smaller blooms. Together, they fill the space better and give your display more depth and character.
Step 3: Stack the Tissue Paper Correctly
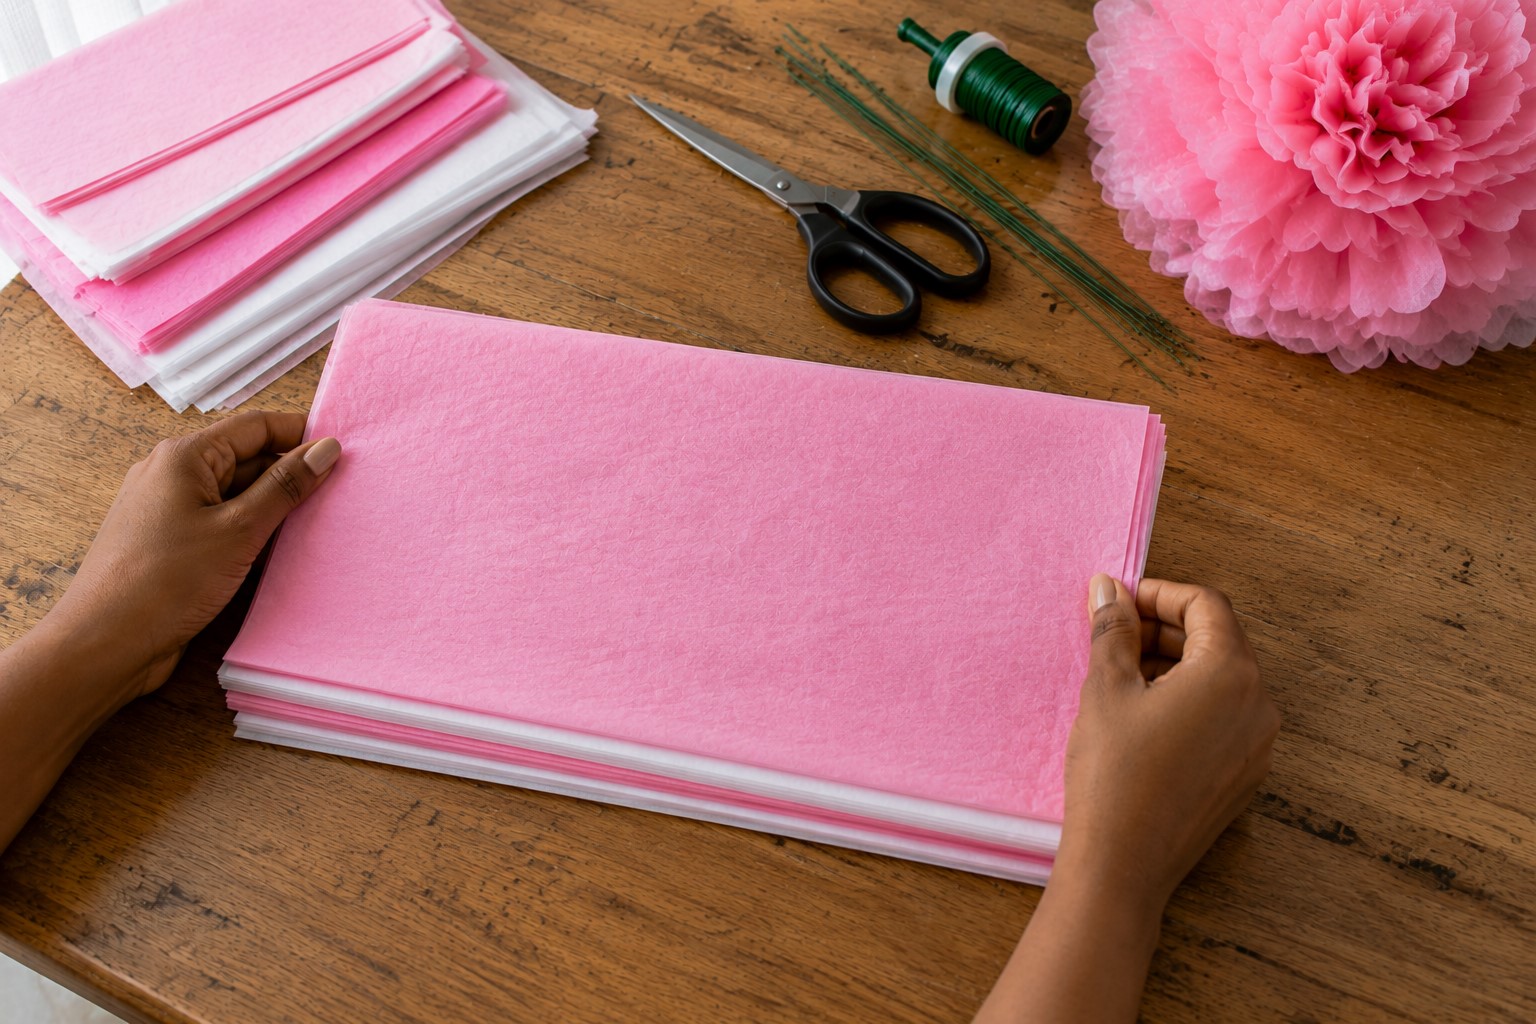
Now it is time to build the base of your flower. Place every sheet neatly on top of the next one and line up the edges as closely as you can.
A tidy stack may seem like a small detail, yet it helps every petal open evenly. If the sheets keep sliding, tap the edges gently against the table until they line up.
A neat, even base matters just as much in figuring out How to Make a Paper Mache Bowl That Dries Without Cracking, where a messy first layer causes problems later.
The number of sheets you use also changes the final look. Eight sheets usually create a nice full flower. If you want an even fluffier bloom, use ten to twelve sheets instead.
More layers give the flower extra volume and make it look fuller after you separate every petal. Just remember that very thick stacks take a little more patience to fluff.
This is also the perfect time to mix colors if you want something different. Alternate two colors for a striped effect or place one contrasting color in the center of the stack for a subtle surprise.
Once everything looks neat and even, press the stack gently with your hands. You are now ready to start folding, and your flower already has a strong foundation.
Step 4: Fold the Tissue Paper Like an Accordion
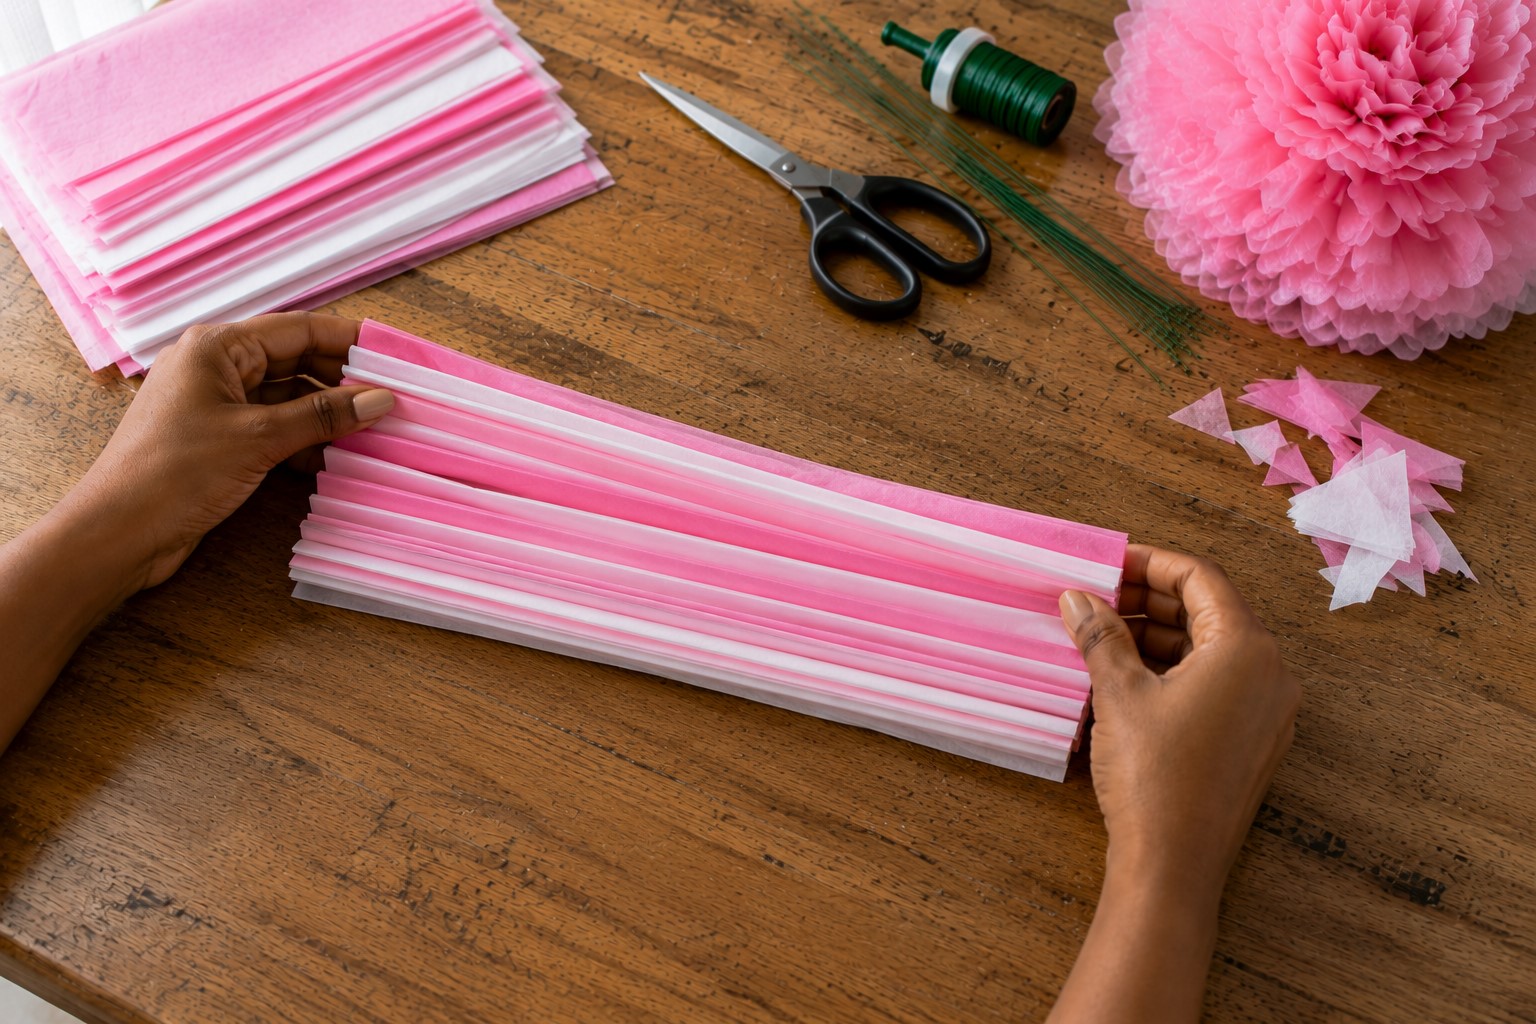
Now comes the step that gives your flower its shape. Pick up the stack and begin folding it back and forth like an accordion or a paper fan.
Try to keep each fold close to the same width. Folds that measure about one inch work well for most flowers, though you can make them slightly narrower for smaller blooms.
As you continue folding, press each crease firmly with your fingers before making the next one. Sharp folds help the flower open evenly later.
The same careful, even folding matters in learning How to Create Impressive Paper Quilling Designs as a Beginner, where uneven shapes stand out right away.
If one fold looks much wider than the rest, unfold it and fix it before moving on. It only takes a few extra seconds, and your flower will look much neater in the end.
Keep folding until you reach the last edge of the paper. When you finish, the stack should look like a small paper fan. Check that both ends look even.
If one side sticks out much farther, trim it slightly with your scissors. A neat accordion fold gives every petal a better chance to spread out beautifully.
Step 5: Secure the Center Tightly
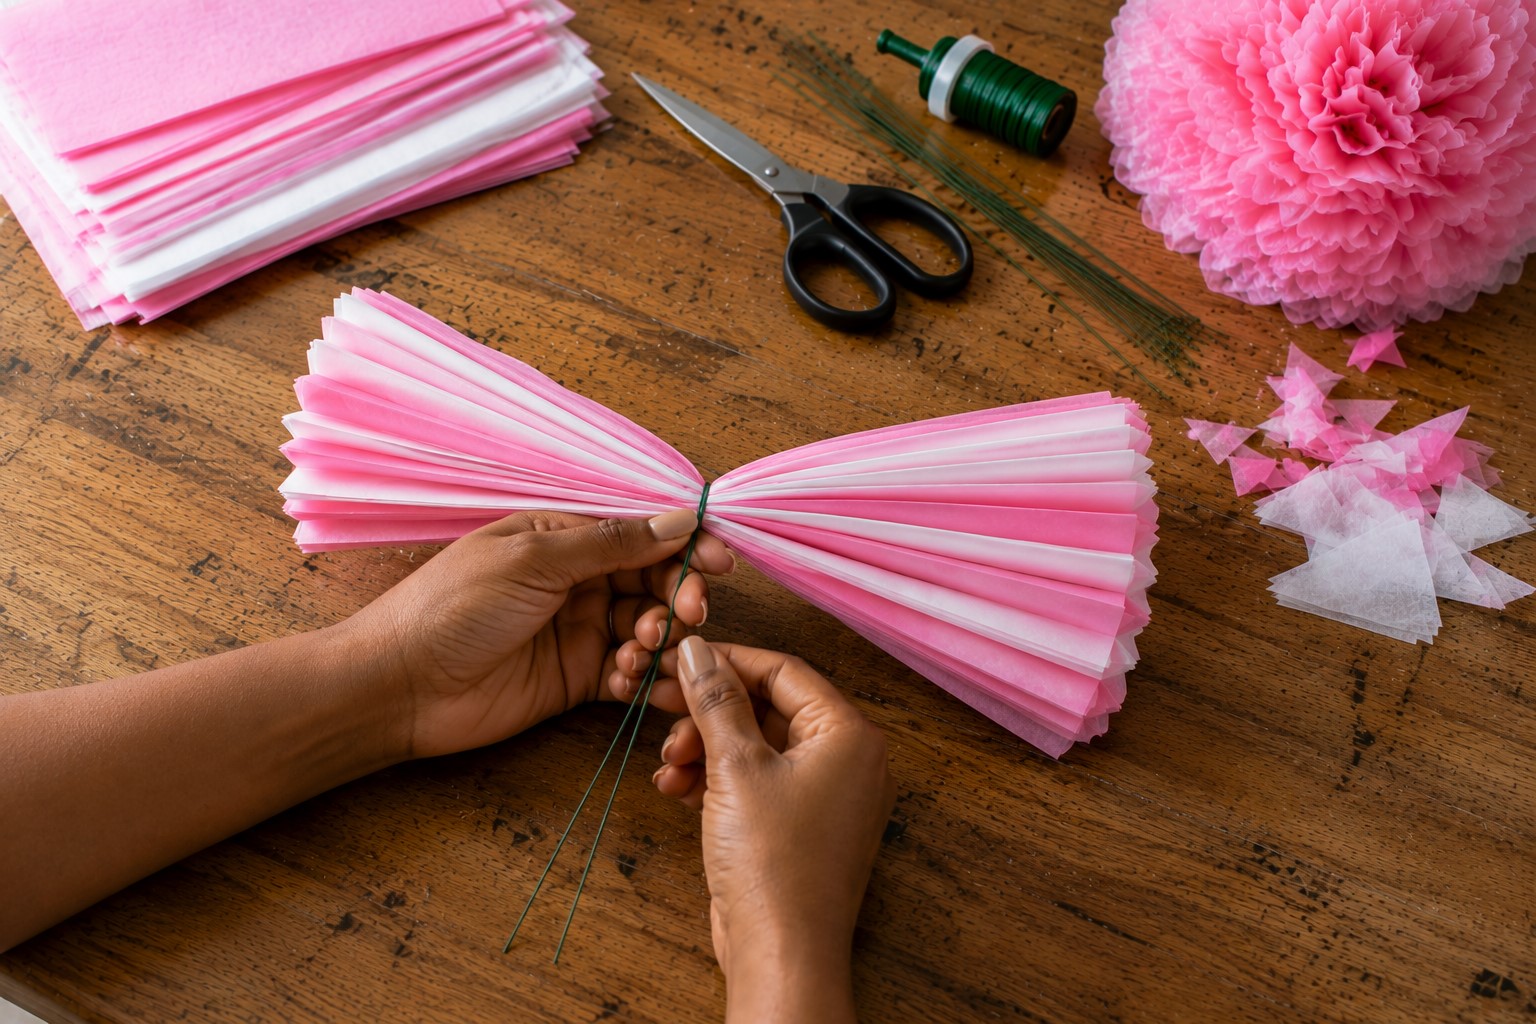
Once your accordion fold is ready, find the center of the stack. Fold it gently in half to locate the middle, then unfold it again.
Wrap a piece of floral wire, a pipe cleaner, or a twist tie around that spot. Twist it tightly enough to hold the paper together, but do not squeeze so hard that the paper tears.
The center holds the entire flower together, so take your time here. If the wire feels loose, the flower may shift while you fluff the petals.
This same careful, centered precision is what makes How to Make a Beautiful Origami Crane You’ll Be Proud to Display hold its shape so well.
That can make one side look fuller than the other. A secure center keeps both halves balanced and makes shaping much easier later.
If you plan to hang the flower, leave one end of the wire a little longer. You can also tie a ribbon or fishing line around the center before twisting the wire completely.
Doing this now saves you from trying to attach it after the flower has already opened.
Step 6: Shape the Petal Edges
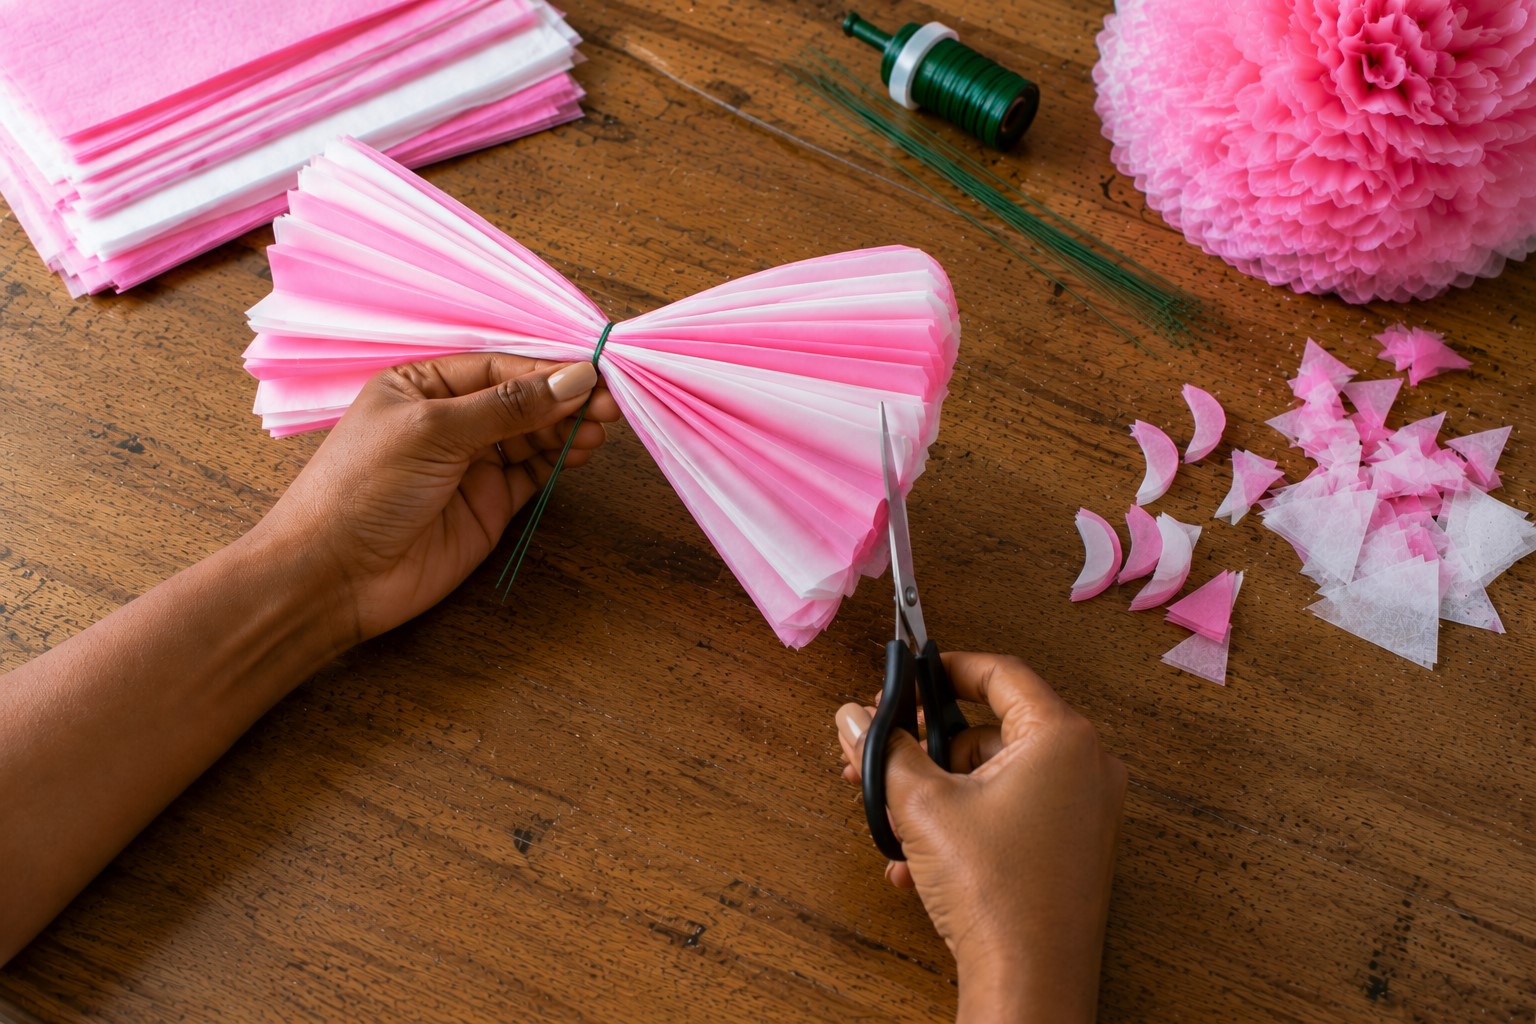
Before opening the flower, shape both ends of the folded stack. This simple step changes the entire look of the finished flower.
Rounded edges create petals that look soft like peonies. Pointed edges give the flower a more dramatic appearance. You can even cut gentle waves if you want something a little different.
Cutting clean, careful shapes matters just as much for this guide on How to Make a Personalized Quilled Paper Portrait as a Gift, where every small shape adds up to the finished picture.
Use sharp scissors and cut through all the folded layers at once. Try to make both ends match as closely as possible. Even cuts help the petals look balanced after they open.
Do not worry about making them perfect. Small differences often make handmade flowers look more natural.
After cutting, brush away any tiny paper pieces left behind. Hold the folded stack in your hands and look at both ends.
You should already see the petal shape starting to appear. Now your flower is ready for the most satisfying part, where it slowly comes to life one layer at a time.
Step 7: Fan Out Both Sides
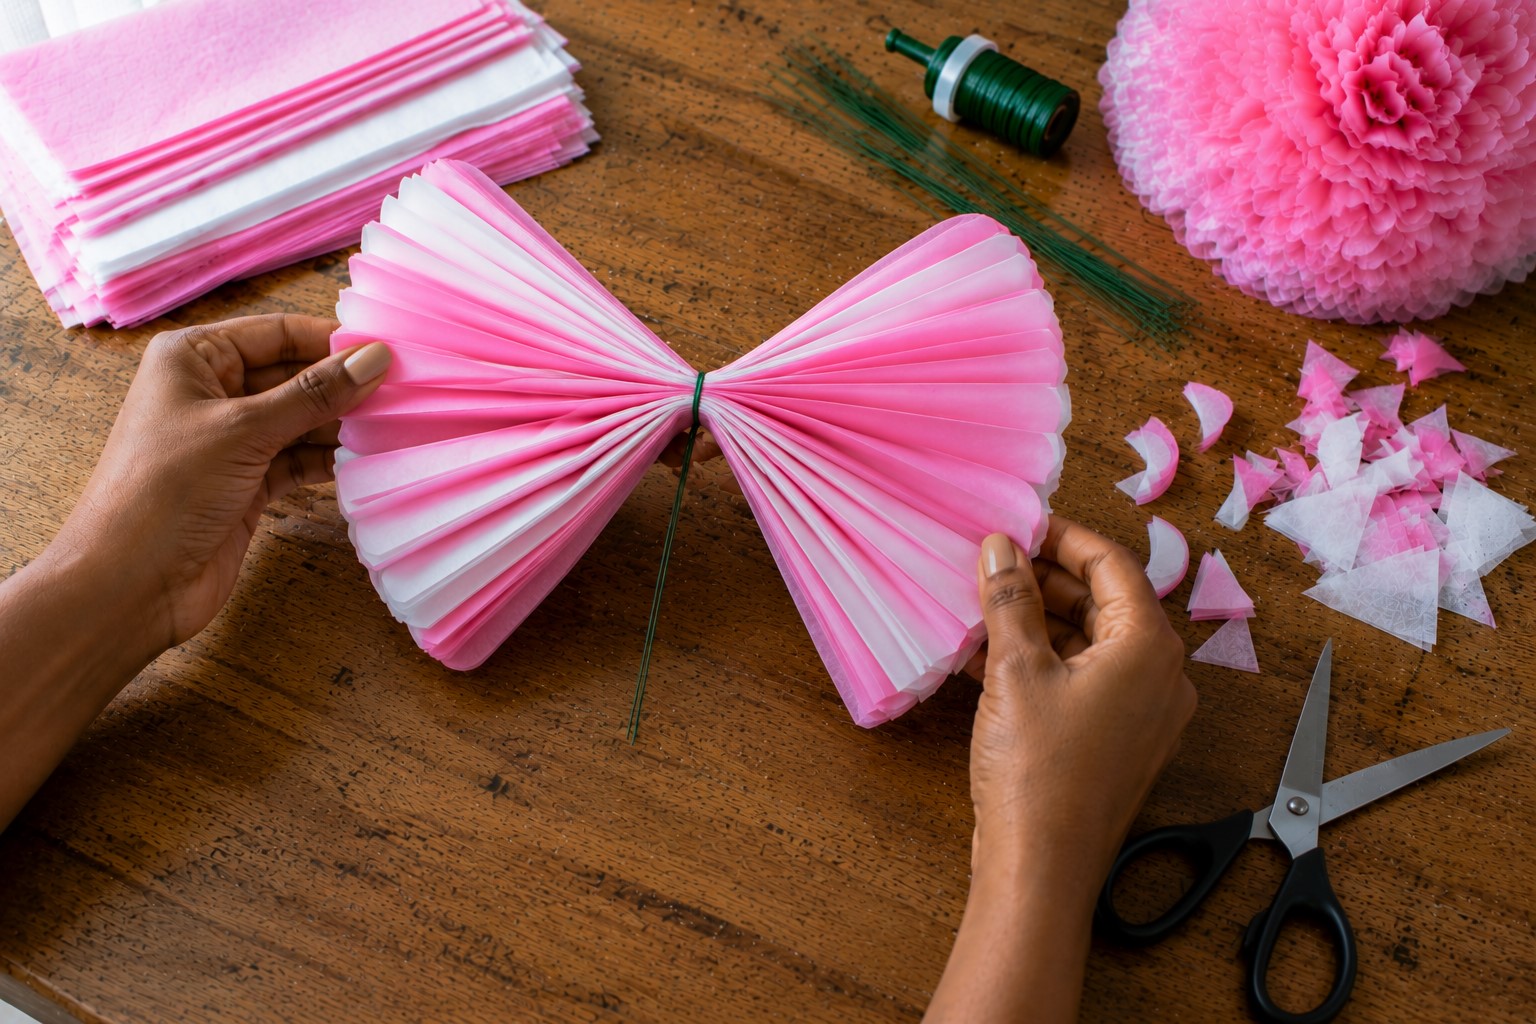
Hold the flower by the center wire and gently spread the folded paper so it opens into a wide fan on both sides. Do not pull too quickly because the tissue paper can tear if you force it.
As the folds begin to spread, you will notice the flower slowly taking shape. This is a good time to check that both sides look even before you move on.
Look at the flower from the top and from the side. If one half looks wider than the other, adjust the folds with your fingers until both sides match.
Taking a minute to do this now makes the finished flower look much more balanced. Small adjustments are easier before you begin separating the layers.
A quick, easy technique like this is also what makes How to Decorate Paper Crafts with Washi Tape in Just 10 Minutes such a fun project to try in a short amount of time.
Keep handling the paper gently throughout this step. The tissue paper is still folded tightly together, so there is no need to rush.
Once both sides form a neat fan, you are ready to reveal the petals hidden inside.
Step 8: Separate the Layers Carefully
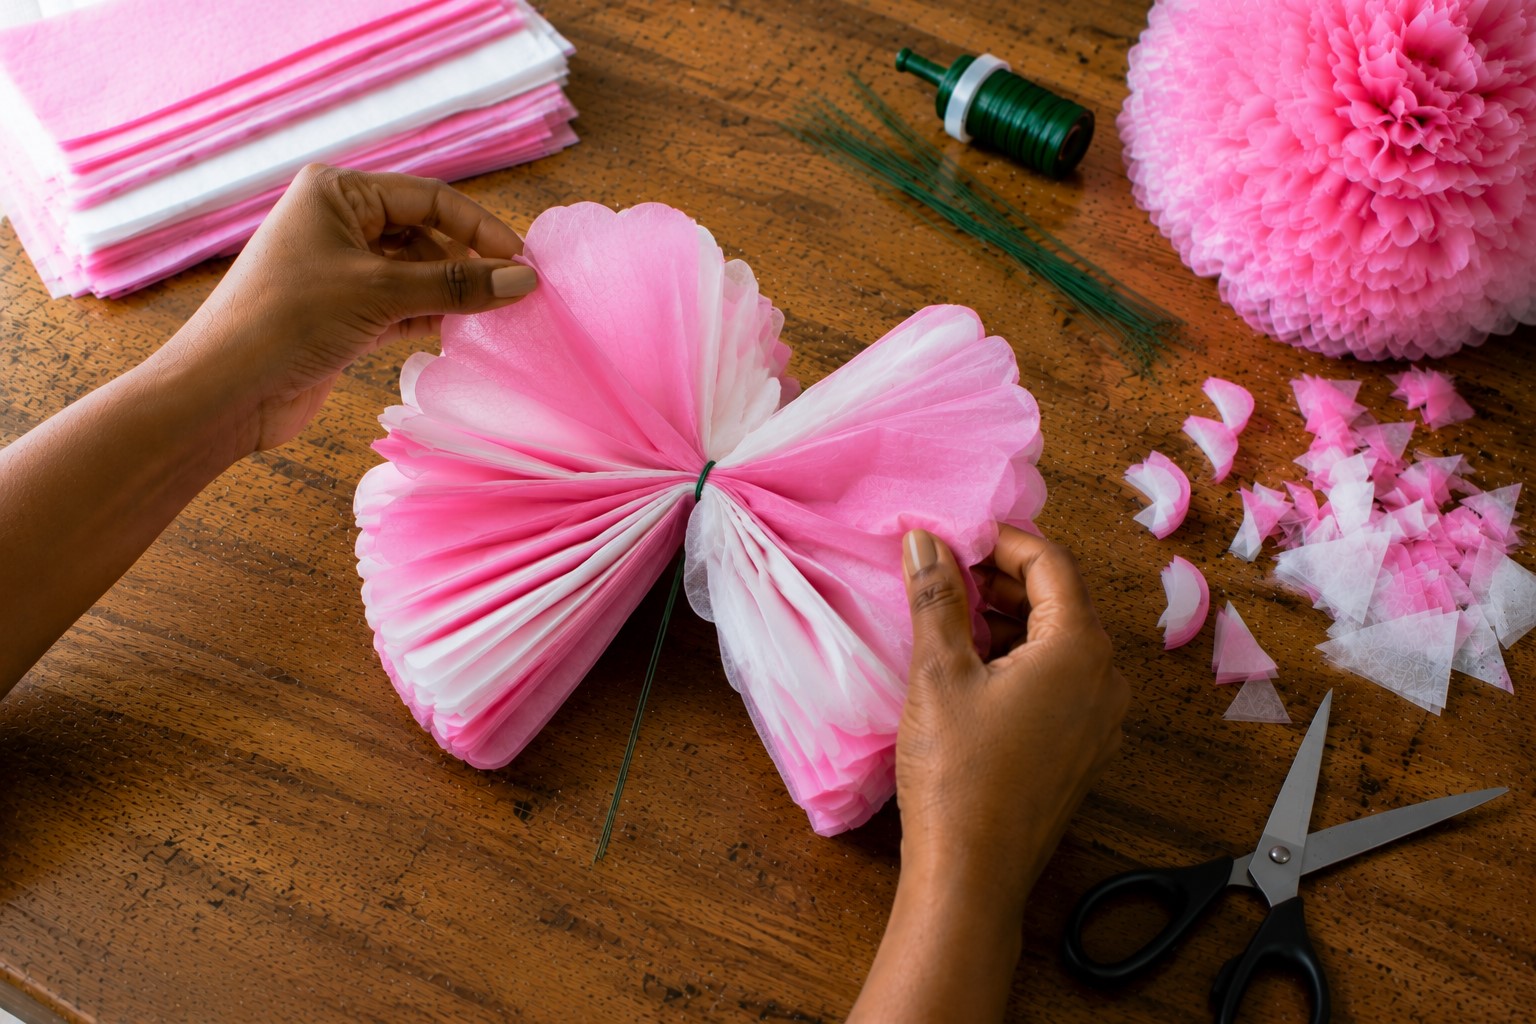
This is the step where the flower truly begins to bloom. Start with the top sheet on one side and gently lift it toward the center.
Use your fingertips instead of pulling with your whole hand. Slow movements help prevent small tears, especially near the middle where the paper is tied together.
Continue lifting one layer at a time. After you finish one side, turn the flower over and repeat the same process on the other side.
Try not to separate several sheets together. Individual layers create a much fuller flower because each petal has room to spread naturally.
This same gentle, kid-friendly patience is what makes learning How to Make Colorful Bubble Art With Kids Without the Mess such a fun activity to slow down and enjoy together.
If a small tear happens, do not worry too much. Tiny tears usually disappear once the flower opens completely. The important thing is to keep working patiently.
Every layer you lift adds more volume, and the flower becomes prettier with each one.
Step 9: Keep Fluffing Until the Flower Looks Full
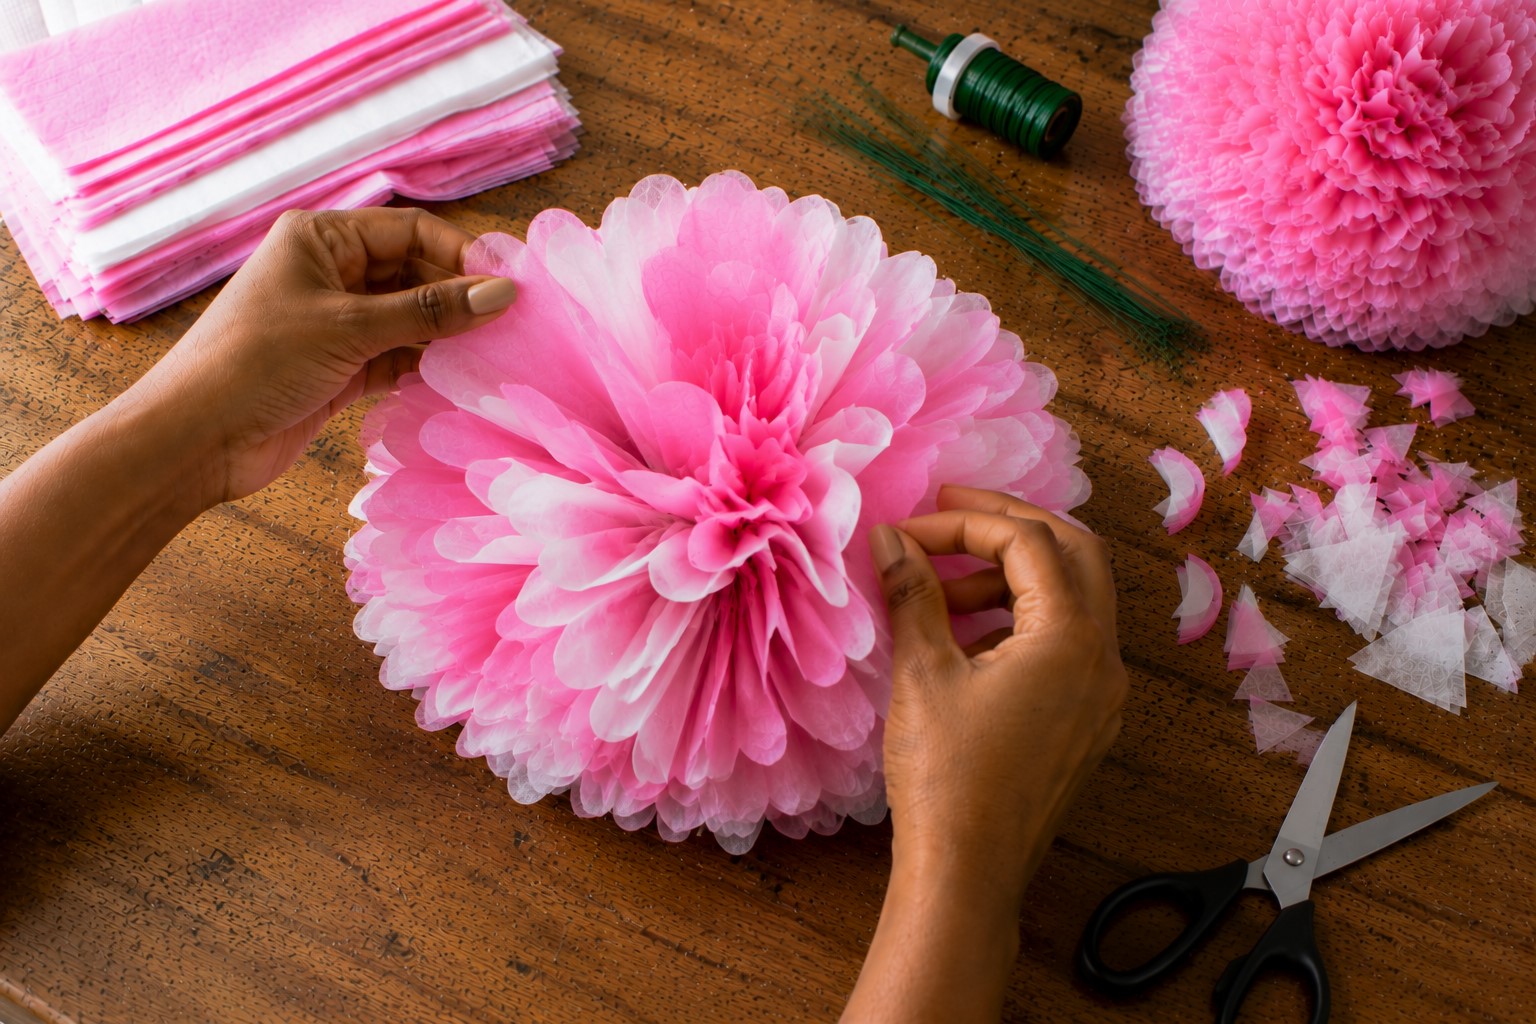
Once every layer stands apart, spend a few minutes fluffing the petals. Gently curl, lift, and spread them until the flower looks round from every angle.
You do not have to follow a perfect pattern. In fact, slightly uneven petals often make the flower look more realistic.
Turn the flower in your hands as you work. Looking at it from different angles helps you spot empty spaces that still need attention.
If one side looks flatter, lift a few petals toward the center until the shape looks even again. These little adjustments make a surprising difference.
If you want a quick, colorful project to try next, How to Paint a Watercolor Bookmark in Under 30 Minutes is a nice change of pace.
Resist the urge to stop too early. Many beginners think the flower is finished after separating the layers, yet fluffing gives it its final shape.
Keep adjusting until the bloom looks soft, full, and ready to display. A few extra minutes here often create the biggest improvement in the finished flower.
Step 10: Shape and Adjust the Finished Flower
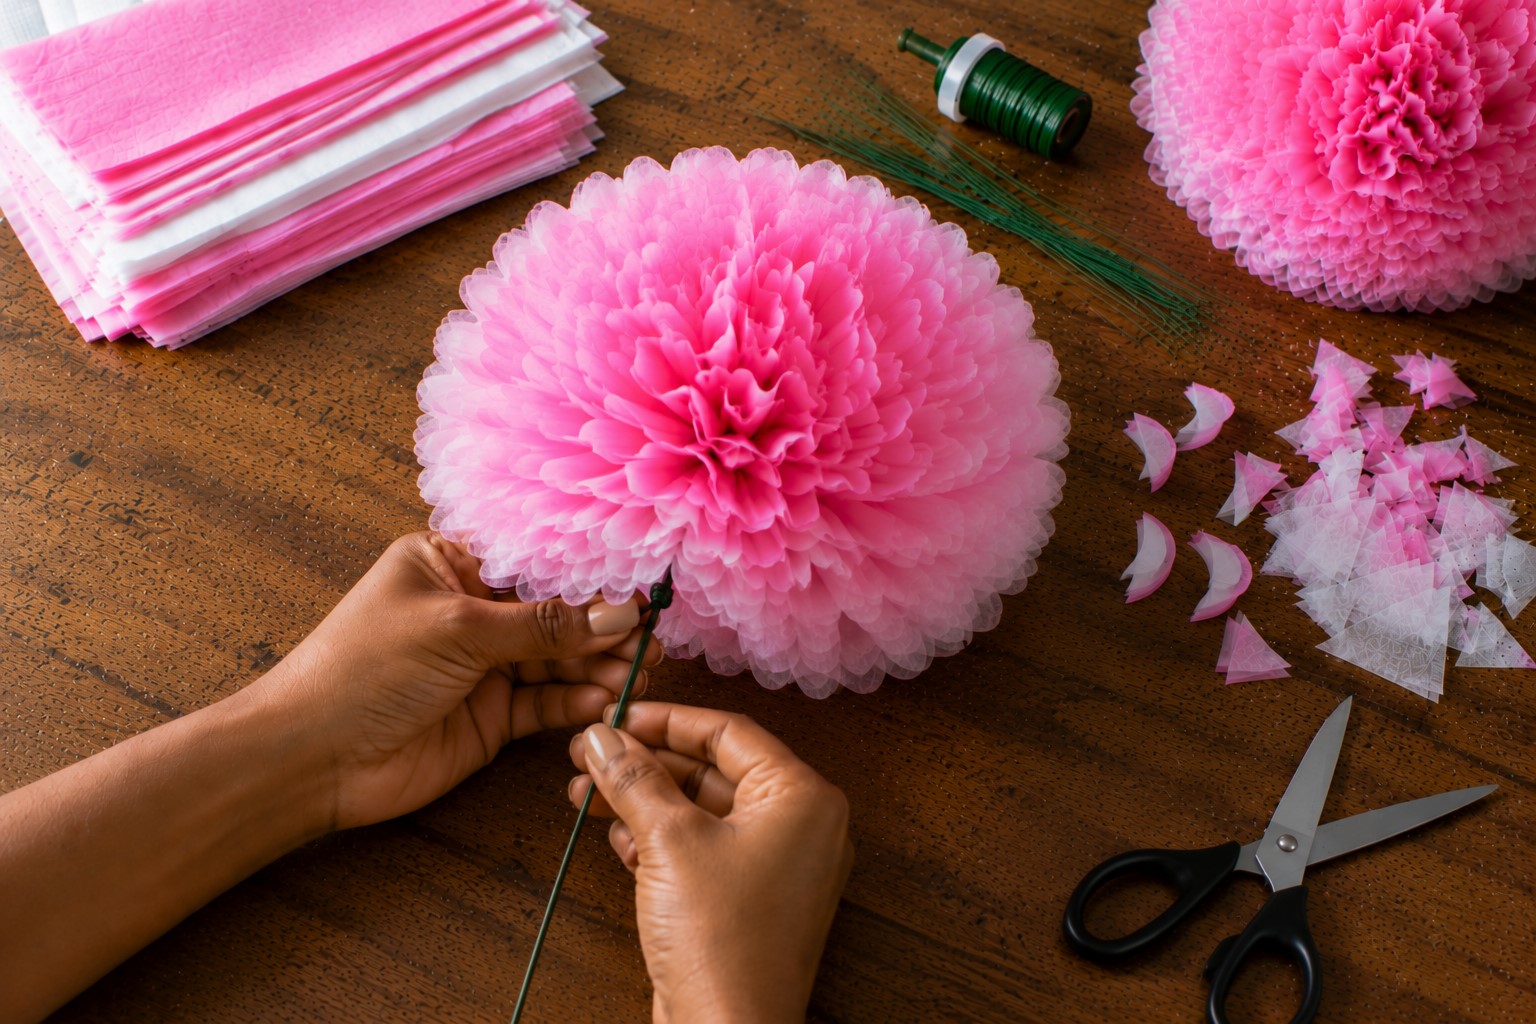
Your flower should already look beautiful, but this final step helps it look even more polished. Hold it at eye level and slowly turn it around.
Look for petals that seem folded inward or areas that look thinner than the rest. A few gentle adjustments can make the entire flower appear fuller without adding more tissue paper.
Use your fingertips to curl some petals outward while tucking others slightly toward the center. Do not worry about making every petal identical.
Real flowers have different shapes, and those little differences make your handmade flower look more natural. If the center looks too tight, gently spread the inner petals to give the flower a softer appearance.
This same small, careful finishing touch is what makes How to Make Adorable Clay Magnets Worth Displaying look polished too.
Set the flower on a table or hold it against the place where you plan to display it. Sometimes you notice small details from a distance that you miss while holding it.
Once you feel happy with the shape, your tissue paper flower is ready to brighten any space.
Common Mistakes That Make Tissue Paper Flowers Look Flat
Even simple crafts can become frustrating when a few small mistakes slip in. The good news is that most of these problems have easy fixes.
Once you know what to look for, you can avoid them from the very beginning.
- Using too few sheets of tissue paper: Thin flowers often happen because there are not enough layers. Use at least eight sheets if you want a flower that looks full and fluffy.
- Folding unevenly: Accordion folds that vary in size can make one side of the flower look larger than the other. Try to keep each fold as even as possible.
- Tying the center too loosely: The center holds the entire flower together. If it shifts while you fluff the petals, the flower can lose its balanced shape.
- Pulling several layers at once: Lift one layer at a time. This reduces tearing and helps every petal spread naturally.
- Stopping too soon: Many people separate the layers and call it finished. Spend another minute fluffing and shaping the petals. Those final touches often make the biggest difference.
Creative Ways to Use Your Tissue Paper Flowers
- One of the best things about this craft is its versatility. Once you make one flower, you will probably think of many more places to use it. Large flowers create beautiful party backdrops, while medium ones brighten tables, wreaths, and centerpieces. Smaller flowers look lovely on gift boxes, greeting cards, and handmade bouquets.
- These flowers also work well for home décor. Arrange a few inside a decorative basket or vase to add color to a shelf or coffee table. You can even hang them from the ceiling or place them on a bedroom wall to create a cheerful focal point. Since they weigh very little, they are easy to display almost anywhere.
- Combining handmade flowers with natural materials like twigs and leaves is also the fun part of How to Make a Beautiful Nature Collage Using Natural Materials.
- You can also match the colors to the season or celebration. Bright shades suit birthdays and summer parties. Soft pastels fit baby showers and weddings beautifully. Rich reds, oranges, and golds bring warmth to autumn decorations, while white and silver create an elegant winter display.
Frequently Asked Questions
How many sheets of tissue paper should I use?
Eight to twelve sheets usually create the fullest flowers. Smaller flowers may need fewer sheets, while extra-large flowers often look better with more layers.
Can I use wrapping tissue paper?
Yes, as long as it is soft enough to separate without tearing too easily. Many gift tissue papers work perfectly for this project.
Why does my flower look flat?
This usually happens because there are too few layers, the folds are uneven, or the petals have not been fluffed enough. Spend a little more time shaping each layer.
Can children make tissue paper flowers?
Yes. Younger children may need help with scissors and tying the center, but the folding and fluffing make a fun family activity.
How do I store tissue paper flowers?
Keep them in a dry place where they will not get crushed. A large storage box works well if you want to save them for another celebration.
Final Thoughts
By now, you have learned How to Make Tissue Paper Flowers from start to finish. More importantly, you know why each step matters.
A little extra care while folding, tying, and fluffing can completely change the finished flower. Those small details turn simple tissue paper into decorations that catch people’s attention.
If you love flowers and fabric together, the guide on How to Create Vibrant Flower Pounding Prints on Fabric is a fun and different way to capture real petals and leaves.
Do not feel like every flower has to look exactly the same. Handmade crafts have their own charm, and small differences make each flower unique.
Try new color combinations, experiment with different petal shapes, and make flowers in several sizes. Every project teaches you something new, and each one helps you build more confidence.
Most of all, enjoy the process. Creating something beautiful with your own hands always feels rewarding. Before long, you will have colorful flowers ready for parties, gifts, seasonal decorations, and everyday displays around your home.
Even better, you will have a craft you can return to anytime you want to make something beautiful without spending much.

