Unique shoes do not have to come from a specialty store. In fact, some of the most eye-catching pairs I have seen started as plain white shoes, faded canvas sneakers, or old footwear that looked ready for retirement.
A little creativity can completely change how a pair looks. That is one reason I love teaching people How to Paint Shoes at Home.
Instead of settling for designs everyone else owns, you can create something that feels personal and unique.
I have noticed that many beginners hesitate to start because they worry about ruining their shoes. Maybe you feel the same way.
You might wonder if the paint will crack, if the colors will look messy, or if the finished result will look homemade. Those concerns make sense.
I had plenty of questions when I painted my first pair. Yet I quickly learned that professional-looking results come from following the right process, not from having special artistic talent.
Small details such as cleaning the shoes properly, choosing suitable paint, and applying thin layers often make a bigger difference than the design itself.
That is exactly what this guide will help you do. I will walk you through every stage as if we are working on the project together.
First, we will gather the right supplies. Next, we will prepare the shoes correctly so the paint lasts. Then, I will show you how to paint, seal, and protect your design for a clean finish.
Along the way, I will share practical tips I wish someone had told me earlier.
By the end, you will know how to transform an ordinary pair of shoes into custom footwear that looks polished, durable, and professionally finished.

Gather Your Supplies Before You Begin
Before we start painting, let’s make sure you have everything you need. Being prepared makes the project smoother and much more enjoyable.
For most beginner projects, I recommend gathering:
- Canvas, leather, or faux leather shoes
- Acrylic paint designed for shoes or fabric
- Paintbrushes in several sizes
- Painter’s tape or masking tape
- Pencil
- Soft cloths
- Mild soap
- Water
- Rubbing alcohol for leather shoes
- Paint palette
- Paper towels
- Protective sealer
You do not need expensive tools to achieve good results. In fact, choosing the correct materials matters much more than buying the most expensive supplies available.
Once everything is within reach, you can focus on the creative process instead of searching for missing items halfway through the project.
Choose the Right Shoes for Painting
Not all shoes behave the same way when paint enters the picture. Choosing the right pair from the beginning can make the project much easier.
Canvas shoes are usually the best option for beginners. The material accepts paint well, and the surface feels easier to work with.
Many first-time painters start with plain white canvas sneakers because they provide a clean surface for almost any design.
Leather shoes can also look amazing when painted. Still, they require more preparation because paint does not naturally grip smooth leather as easily as canvas.
Faux leather falls somewhere in between. Some types work beautifully, while others may not hold paint as well over time.
Take a close look at your shoes before you begin. Check for deep cracks, loose stitching, or severe damage.
Paint can improve appearance, but it cannot fix structural problems. Starting with shoes that are still in decent condition gives you the best chance of success.
How to Paint Shoes at Home and Get a Professional Look
Step 1: Clean the Shoes Thoroughly

Every professional-looking paint job begins with proper preparation. I know this step does not feel exciting, yet it is one of the most important parts of the entire process.
Shoes collect dirt, dust, oils, and residue during everyday use. Even if they appear clean at first glance, the surface may contain enough buildup to interfere with paint adhesion.
If paint struggles to stick properly, it may peel, crack, or wear away much faster than expected.
Start by removing the shoelaces. This gives you easier access to the entire shoe. Next, brush away loose dirt and debris.
After that, mix a small amount of mild soap with warm water and gently clean the surface with a soft cloth.
Pay extra attention to the toe area, sides, and seams. These spots often collect more dirt than people realize.
If you are painting leather shoes, wipe them with rubbing alcohol after cleaning. This helps remove oils and prepares the surface for paint.
Once the shoes are clean, allow them to dry completely. I never rush this stage. A little patience here creates a much stronger foundation for the steps that follow.
Step 2: Protect the Areas You Do Not Want to Paint

Now that your shoes are clean and completely dry, it is time to protect the sections that should remain paint-free. Many beginners treat this step as an afterthought.
Then they spend extra time fixing mistakes later. I always tell people that a few minutes of preparation can save a lot of frustration.
Take your painter’s tape or masking tape and carefully cover areas such as the soles, eyelets, logos, and any trim you do not want painted.
Press the tape down firmly, especially around the edges. This helps prevent paint from slipping underneath and creating messy lines.
As you work, take a moment to inspect the shoe from different angles. Sometimes small sections remain exposed without you noticing.
Catching those spots now is much easier than correcting them later.
One thing I learned early on is that clean edges instantly make a project look more professional.
Even a simple design appears polished when the painted areas stay exactly where they belong. So do not rush through the taping process. Think of it as setting the stage for everything that comes next.
Step 3: Plan Your Design Before Picking Up a Brush

This is usually the point where excitement starts to build. The shoes are clean, protected, and ready for color. Even so, I recommend slowing down for a few more minutes before opening the paint.
A clear plan makes the entire project easier. Start by deciding what kind of look you want. Some people love bold patterns and bright colors.
Others prefer simple designs that look clean and modern. Neither approach is wrong. The goal is to create something you will enjoy wearing.
If you are new to shoe painting, keep the design simple. Many beginners assume complicated artwork will look more impressive.
In reality, simple designs often look cleaner and more professional.
Consider ideas such as:
- Color blocking
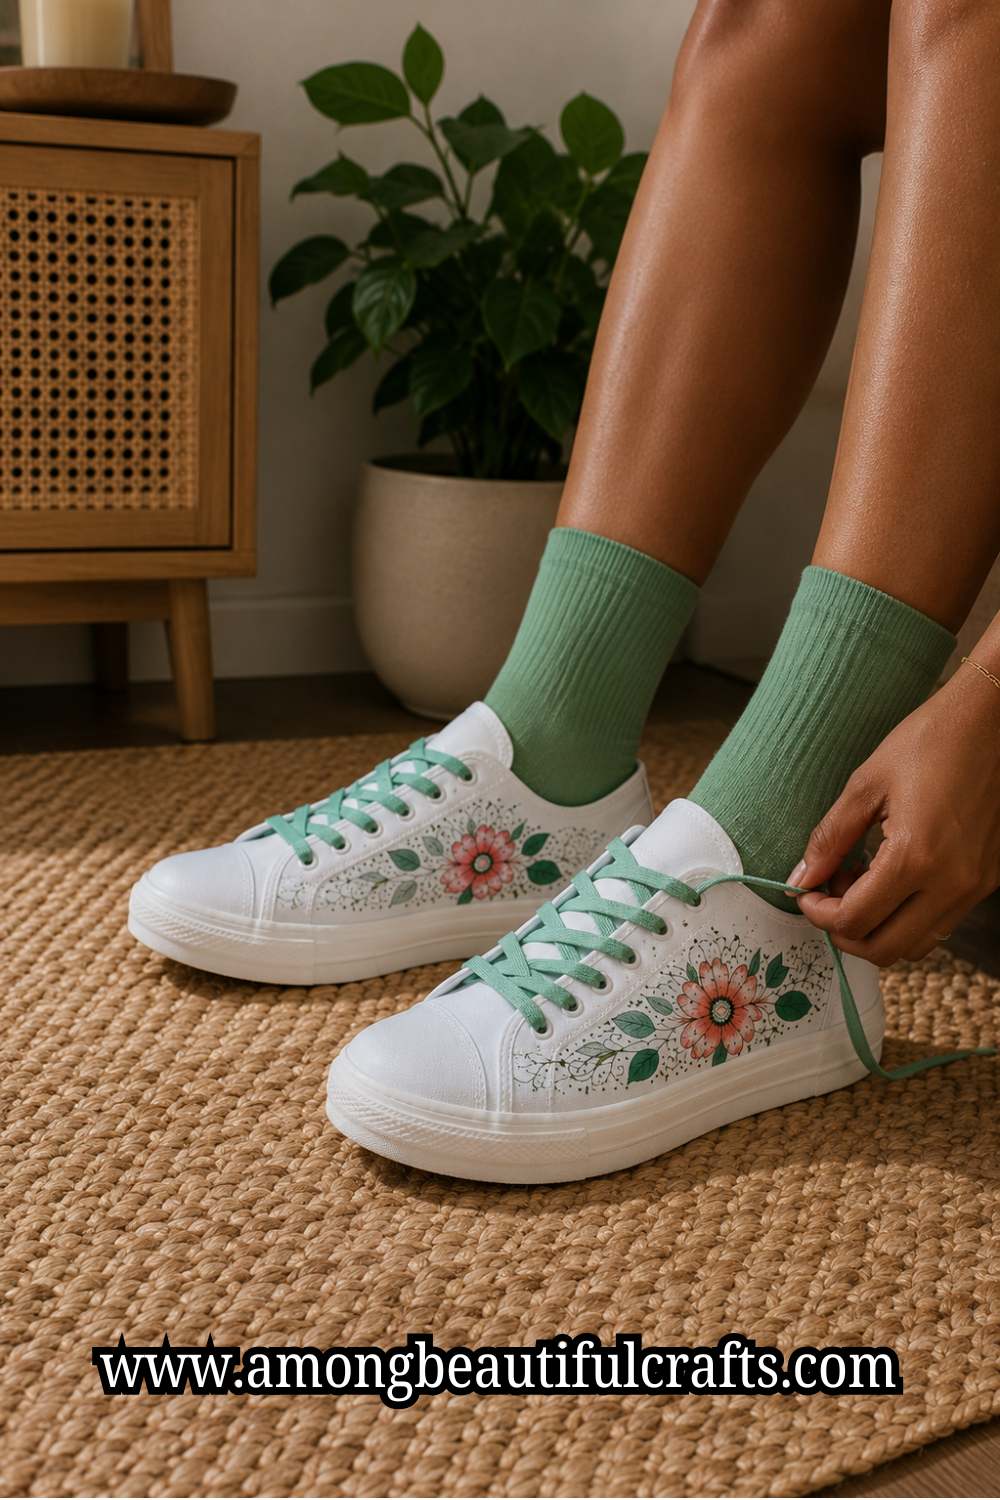
- Floral accents
- Geometric shapes
- Abstract patterns
- Minimalist line art
- Nature-inspired designs
Once you settle on a design, sketch it on paper first. This allows you to experiment without worrying about mistakes. After you feel confident, lightly draw guidelines on the shoe with a pencil.
Do not worry about creating a perfect sketch. These lines simply help you place design elements correctly. Think of them as a roadmap that keeps you moving in the right direction.
Step 4: Prepare Your Paint Properly

Now we can finally talk about paint.
Before applying any color to the shoes, spend a few minutes preparing your materials. This simple habit leads to smoother application and better results.
Shake each paint bottle thoroughly. Paint pigments can settle over time, especially if the bottles have been sitting unused for a while. Mixing everything well helps create consistent color.
Next, squeeze a small amount of paint onto a palette. Avoid pouring out too much at once. Acrylic paint dries fairly quickly, and wasting paint serves no purpose.
Keep a cup of clean water nearby for rinsing brushes. I also like keeping a paper towel within reach because it helps remove excess moisture from brush bristles.
Before painting the actual shoes, test your colors on a scrap piece of paper. The shade inside the bottle sometimes looks different once it dries. Testing first allows you to make adjustments before committing to the design.
This small step takes only a minute or two, yet it can prevent disappointment later.
Step 5: Apply the First Coat Using Thin Layers

The first layer of paint often surprises beginners.
Many people expect solid, vibrant coverage right away. Then they panic when the first coat looks streaky or uneven. If that happens to you, do not worry. It is completely normal.
Dip your brush lightly into the paint and apply a thin, even coat across the area you want to cover. Focus on smooth strokes rather than heavy coverage.
The biggest mistake I see at this stage is applying too much paint at once. Thick layers may seem faster, but they often create problems.
They can crack, dry unevenly, and leave visible brush marks.
Instead, allow the first coat to remain thin. Think of it as building the foundation rather than creating the finished look.
As you paint, move steadily across the surface. Try not to keep brushing over the same spot repeatedly.
Once the paint starts settling, excessive brushing can create texture that is difficult to fix later.
When the first coat is complete, step back and take a look. It may not look impressive yet, and that is perfectly fine.
Professional-looking painted shoes develop gradually through several layers, not all at once.
Step 6: Let the First Coat Dry Completely

Patience becomes your best friend during this stage.
After applying the first layer, resist the urge to immediately add another coat. Fresh paint needs time to dry properly before additional layers go on top.
Drying times vary depending on the paint brand, temperature, humidity, and shoe material. Some coats may dry within thirty minutes, while others need longer.
Touch the painted surface lightly before continuing. If it feels tacky or slightly sticky, give it more time.
I know waiting can feel frustrating when you are excited to see the finished result. Still, rushing this stage often creates smudges, uneven coverage, and unwanted texture.
While the paint dries, use the time to clean brushes, review your design, or prepare the colors needed for the next layer.
The extra patience will pay off once the project starts coming together.
Step 7: Build Up the Color With Additional Coats

Once the first layer dries completely, you can begin building depth and richness in the color. This is the stage where the shoes start looking much closer to your vision.
Apply another thin coat using the same careful technique you used before. You may notice that the paint covers much better this time.
The streaks from the first layer will begin to disappear, and the color will look more even.
Keep working in thin layers instead of trying to speed up the process with thick coats. I know it can be tempting to load the brush with extra paint.
After all, everyone wants faster results. Still, thin coats almost always produce a cleaner finish.
Depending on the color and material, you may need anywhere from two to five coats. Light colors often require more layers than darker shades.
White, yellow, and pastel colors usually need extra attention to achieve solid coverage.
As you continue, check the shoes under good lighting. Sometimes a section looks fully covered until you move it closer to a window or brighter light source.
Catching those uneven areas now makes the final result much more polished.
By the time you finish the last color coat, the shoes should look smooth, vibrant, and much more professional than they did after the first layer.
Step 8: Add Details and Decorative Elements

Now comes my favorite part of the process.
With the base colors complete, you can focus on the details that make the shoes unique. This stage transforms a painted shoe into a custom design.
Switch to smaller brushes for better control. Fine brushes help you create cleaner lines, sharper edges, and more precise details.
Work slowly and avoid feeling rushed. Decorative elements often require more patience than the larger painted sections. A steady pace usually produces the best results.
Depending on your design, you might add:
- Flowers
- Leaves
- Abstract shapes
- Geometric patterns
- Outlines
- Stars
- Hearts
- Small illustrations
- Personal symbols
As you work, step back every few minutes and view the shoes from a distance. This simple habit helps you judge balance and placement more accurately.
I learned this lesson after overcrowding one of my early projects. Every individual detail looked nice, yet the overall design felt busy.
Since then, I remind myself that empty space can be just as important as painted space.
A well-balanced design often looks more professional than one packed with too many elements.
Step 9: Fix Small Mistakes Before They Become Big Problems

Even experienced artists make mistakes. The difference is that they know how to handle them calmly.
If paint lands outside the intended area, try to correct it while it is still wet. A cotton swab or damp cloth can often remove fresh paint quickly and cleanly.
Do not panic if you notice an error. Most painting mistakes can be corrected with patience.
Sometimes a line may look uneven. In other cases, a section may need stronger color coverage. You might even decide that part of the design needs adjustment.
That is perfectly normal.
Allow the paint to dry before attempting larger corrections. Then use the surrounding color to carefully reshape the area.
I often remind beginners that custom-painted shoes are handmade. Small imperfections rarely stand out once the entire design is finished.
Focus on creating a clean overall look rather than chasing absolute perfection.
The goal is to create something beautiful, not something flawless.
Step 10: Remove the Tape Carefully

After all the painting is complete and the surface has dried, it is finally time to remove the tape.
This stage always feels satisfying because the finished design starts revealing itself.
Peel the tape away slowly rather than pulling it off quickly. Moving too fast can sometimes lift paint along the edges.
Work your way around the shoe carefully. As each section becomes visible, check the paint lines and inspect the overall finish.
You may notice a few tiny areas that need touch-ups. That is completely normal. Use a small brush to make any necessary corrections.
Most of the time, this is the moment when people realize how professional their project actually looks. Clean edges create a huge visual impact.
Even simple designs appear more polished when the borders look neat and intentional.
Take a few minutes to admire your progress before moving on to the final protective steps.
Step 11: Seal the Design for Long-Term Protection

After spending hours creating your design, you will want to protect it properly.
This is where a quality sealer becomes important.
Many beginners underestimate this step because the shoes already look finished. Yet a protective coating helps preserve all the work you just completed.
A good sealer can help protect against:
- Scuffs
- Dirt
- Light moisture
- Everyday wear
- Color fading
Choose a sealer that works with both your paint and shoe material. Always read the product instructions before applying it.
Just like paint, sealers work best in thin layers. Apply a light coat and allow it to dry before adding another if needed.
One of the most important lessons I learned while teaching How to Paint Shoes at Home is that durability starts with protection.
Beautiful artwork means very little if it begins peeling after only a few wears.
A few extra minutes spent sealing the shoes can add months or even years to the life of the design.
Step 12: Allow the Shoes to Cure Properly

At this point, your shoes probably look finished. Even so, there is one final step that many people overlook. The shoes need time to cure.
Dry paint and fully cured paint are not always the same thing. While the surface may feel dry to the touch, the paint underneath may still be hardening.
Check the instructions provided by the paint and sealer manufacturers. Some products require twenty-four hours, while others may need several days before regular use.
I know this waiting period can test your patience. After all, you are probably excited to wear your newly customized shoes.
Still, curing gives the paint time to reach maximum durability. Skipping this step can increase the risk of cracking, peeling, or premature wear.
Whenever possible, place the shoes in a clean, dry area and allow them to rest undisturbed. The waiting may feel inconvenient now, but it can make a noticeable difference in how long your design lasts.
Common Mistakes That Can Ruin a Shoe Painting Project
Most beginners make at least one mistake during their first shoe painting project. That is completely normal. In fact, mistakes often teach valuable lessons.
The good news is that many of the most common problems are easy to avoid once you know what to watch for.
One mistake I see frequently is skipping the cleaning stage. People get excited about painting and want to jump straight into the fun part.
Unfortunately, paint does not bond well to dirt, oils, or dust. Even a beautiful design can start peeling if the surface was not prepared properly.
Another common issue is applying paint too heavily. Thick coats may seem like a shortcut, yet they often create uneven textures and visible brush marks.
In some cases, thick paint can even crack after the shoes begin bending during normal wear.
Rushing drying times causes problems as well. When fresh paint gets covered before it has fully dried, colors can mix unintentionally and surfaces may become rough.
Patience often produces much better results than speed.
I also notice that some beginners choose complicated designs for their first project.
While ambitious ideas can be exciting, simple designs usually provide a better learning experience. Once you gain confidence, you can always tackle more advanced artwork later.
Tips That Help Painted Shoes Look More Professional
Professional-looking results rarely happen by accident. Small habits and careful decisions often make the biggest difference.
One of the easiest ways to improve your results is by keeping your color palette simple. Too many colors competing for attention can make a design feel cluttered.
A smaller selection of colors often creates a cleaner and more polished appearance.
Good lighting helps more than many people realize. Whenever possible, paint near a window or in a well-lit workspace.
Proper lighting allows you to spot uneven coverage, missed areas, and small mistakes before they become bigger issues.
Quality brushes also make a noticeable difference. You do not need expensive professional tools, yet brushes that hold their shape well are much easier to control.
Cleaner brush strokes often lead to cleaner-looking designs.
Another habit I strongly recommend is stepping back from your work regularly. Looking at the shoes from a distance provides a different perspective.
Sometimes a design looks perfect up close but feels unbalanced when viewed from farther away.
Most importantly, do not rush. Every stage of How to Paint Shoes at Home benefits from patience. The people who achieve the best results are usually the ones who take their time.
Creative Shoe Painting Ideas for Beginners
If you are feeling unsure about what to paint, do not worry. Inspiration often comes once you start exploring different possibilities.
One beginner-friendly option is color blocking. This technique uses large sections of color to create a bold and modern look.
It does not require advanced painting skills, yet it can look incredibly stylish.
Floral designs remain popular for a reason. Simple flowers, leaves, and vines can add personality without becoming overwhelming. Even basic floral patterns often look impressive on shoes.
Geometric designs are another excellent choice. Triangles, stripes, circles, and repeating shapes create a clean appearance while remaining relatively easy to paint.
Nature-inspired themes also work beautifully. Mountains, sunsets, ocean waves, clouds, and trees can transform plain shoes into wearable artwork. These designs often look especially striking on canvas sneakers.
If you prefer a more subtle approach, minimalist artwork may be the perfect solution. Small illustrations, simple line drawings, or tiny accents can create visual interest without covering the entire shoe.
When learning How to Paint Shoes at Home, remember that you do not need a complicated design to create something memorable. Sometimes the simplest ideas leave the strongest impression.
How to Care for Painted Shoes
After investing so much time and effort into your custom shoes, it makes sense to take care of them properly.
The first rule is to avoid excessive moisture whenever possible. While sealed shoes can handle everyday use, soaking them in water may shorten the life of the paint.
When the shoes become dirty, clean them gently. A soft cloth usually works much better than aggressive scrubbing. Harsh cleaning can wear away details over time.
Proper storage matters too. Keep your painted shoes in a cool, dry location when you are not wearing them.
Avoid leaving them in extremely hot areas for long periods because excessive heat can affect both paint and sealers.
If the shoes receive frequent use, inspect them occasionally for signs of wear. Small touch-ups are much easier to handle than major repairs.
Good care habits can keep painted shoes looking fresh for a surprisingly long time.
Final Thoughts
Learning How to Paint Shoes at Home is one of the most rewarding ways to personalize your footwear. What begins as a simple pair of shoes can become something completely unique with the right preparation and techniques.
The process does not require professional training, expensive equipment, or years of artistic experience. Instead, it requires patience, attention to detail, and a willingness to learn.
As you work through each step, remember that preparation matters just as much as painting itself.
Clean surfaces, thin layers, proper drying times, and protective sealing all contribute to a professional-looking finish. When you take your time and avoid shortcuts, the results often exceed expectations.
Most importantly, allow yourself to enjoy the creative process. Every project teaches something new, and every pair of shoes becomes a chance to express your personality.
Whether you choose bold artwork, subtle patterns, or colorful designs, your finished shoes will tell a story that no store-bought pair can match.
So gather your supplies, trust the process, and start creating. You may be surprised by what you can achieve once you discover How to Paint Shoes at Home.