I still remember the first flowers I pressed. I didn’t have a plan. I simply thought they looked too pretty to throw away after they started drying in a vase. So, I tucked them inside a heavy book and forgot about them for weeks.
When I found them again, I couldn’t stop wondering what I could make with them. That little experiment eventually led me to learn How to Make a Pressed Flower Frame, and I honestly wish I had tried it sooner.
It turned flowers that would have ended up in the trash into something I still smile at every time I walk past it.
If you’re anything like me, you’ve probably seen beautiful pressed flower frames online and assumed they needed special skills or expensive materials.
I used to think the same thing. Then I discovered that the secret wasn’t artistic talent. The secret was taking my time and paying attention to small details. The flowers needed proper pressing.
The layout needed breathing room. Even the frame choice changed the finished look. Once I understood those little things, my projects started looking cleaner, brighter, and much more elegant.
So, in this guide, I’m going to show you everything I wish someone had explained before I made my first frame.

We’ll start with choosing flowers, then prepare them correctly, and finally arrange them into a design that looks balanced instead of messy.
Along the way, I’ll share little tricks that made the biggest difference for me. By the time we’re done, you’ll have a handmade frame that looks like something you found in a lovely boutique, but you’ll know you created it yourself.
Materials You’ll Need
I always recommend gathering every supply before you begin. It saves time, keeps your flowers safe, and helps you enjoy the project without unnecessary interruptions.
Since pressed flowers can tear easily, you also want a clean workspace where you can move slowly and carefully.
Here’s everything you’ll need:
- Pressed flowers and leaves
- Floating glass frame or picture frame
- Acid-free craft glue or clear-drying craft adhesive
- Tweezers
- Small scissors
- Soft paintbrush
- Microfiber cloth
- White sheet of paper
- Pencil
- Cotton gloves (optional)
If you plan to press your own flowers, you’ll also need a heavy book or a flower press and plain absorbent paper. Once everything sits within reach, you’re ready to begin.
How to Make a Pressed Flower Frame That Looks Boutique-Worthy
Step 1: Choose Flowers That Press Beautifully

A boutique-worthy frame starts with the flowers you collect. I learned this after making my first frame with flowers that looked lovely outside but dried poorly.
Since then, I always spend a little more time choosing the right blooms. Trust me, this small effort pays off when you begin arranging everything.
Pick Flowers That Dry Well
Fresh flowers always give the best results. I usually pick mine after the morning dew disappears because the petals stay firm without extra moisture.
Thin flowers like daisies, pansies, violas, cosmos, baby’s breath, and small wildflowers press beautifully. Ferns and delicate greenery also work well because they add softness without taking attention away from the flowers.
Thick blooms like roses and peonies need extra preparation because they hold more moisture and dry much more slowly.
Create Variety From the Beginning
Don’t collect flowers alone. Bring home different leaves, grasses, and small stems too. They help fill empty spaces and make the finished frame feel balanced instead of crowded.
I also recommend gathering flowers in different sizes and colors rather than using only one variety. Finally, collect more flowers than you think you’ll need.
Some may break during pressing, while others may not suit your final design. Extra choices always make the arranging stage much easier.
Step 2: Press Your Flowers Correctly

Beautiful flowers deserve a little patience. I know it’s exciting to start the frame right away, yet pressing your flowers properly makes all the difference.
When flowers dry evenly, they stay flatter, keep more of their color, and become much easier to arrange inside the frame.
Prepare and Press the Flowers
Start by trimming thick stems and removing any damaged petals. Then place each flower between two sheets of plain absorbent paper.
Leave a little space between each one so they don’t overlap. Next, put the paper inside a heavy book or flower press.
If you’re using a book, stack a few more heavy books on top. After that, leave everything in a dry place where it won’t be disturbed.
Give Them Enough Time to Dry
Most flowers need two to four weeks to dry completely. Even though waiting feels slow, don’t rush this step. Before removing all your flowers, check one first.
It should feel crisp, flat, and completely dry. If it still feels soft, return it to the press for several more days.
Once every flower has dried, store them between clean sheets of paper until you’re ready to build your frame.
Step 3: Choose the Right Frame

Your frame does much more than hold the flowers together. It also shapes the overall style of your project. I used to think any old frame would work.
Then I tried the same flower arrangement in two different frames. One looked ordinary, while the other looked like something from a boutique.
That’s when I realized the frame deserves just as much attention as the flowers.
Pick a Frame That Matches Your Style
Floating glass frames create a light, modern look because you can see through both sides. They work beautifully with delicate flowers and simple arrangements.
On the other hand, a traditional picture frame gives you a solid background that makes colorful flowers stand out.
White, cream, or soft beige backings usually create the cleanest finish. Whichever frame you choose, make sure it has enough space so the flowers don’t feel cramped.
Check and Clean Everything First
Before arranging your flowers, inspect the frame carefully. Wipe both sides of the glass with a microfiber cloth to remove fingerprints, dust, and tiny lint pieces.
Even small marks become noticeable once the frame is sealed. While you’re cleaning, check that the glass fits securely and the frame closes properly.
Spending a few extra minutes here helps your finished piece look neat and professionally made.
Step 4: Prepare Your Workspace
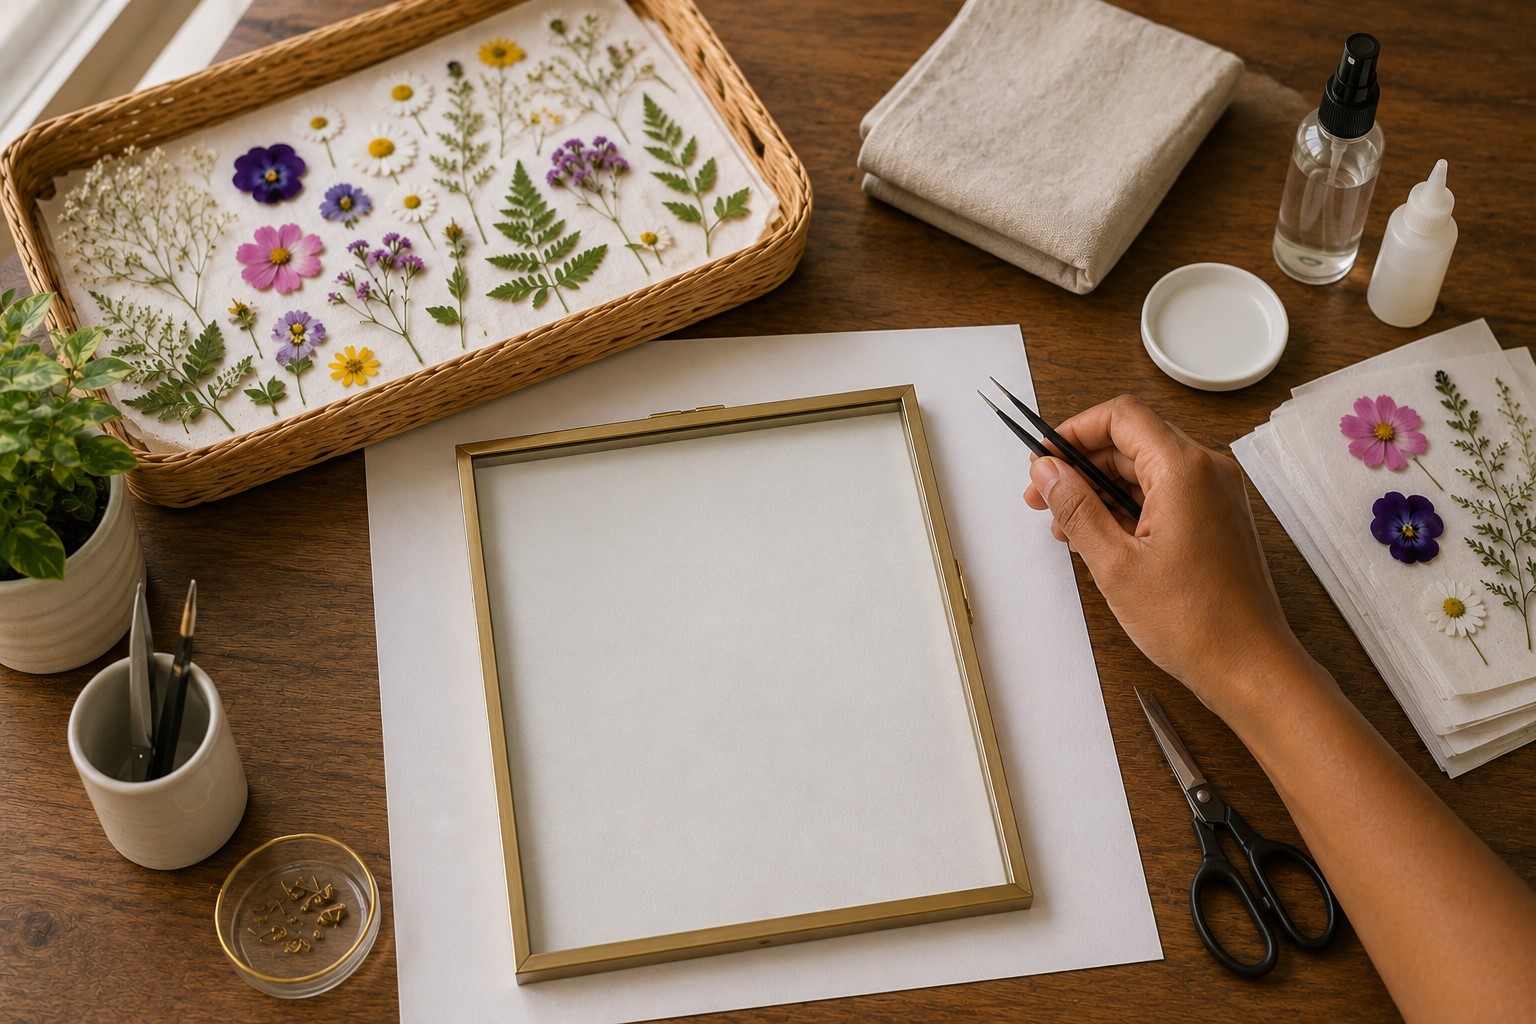
Now that your flowers and frame are ready, it’s time to set up your workspace. This step may seem simple, yet it prevents many common mistakes.
I always prepare my table before opening my envelope of pressed flowers. That way, I can focus on creating instead of searching for tools.
Keep Everything Within Reach
Place your glue, tweezers, scissors, cloth, and flowers where you can reach them easily. I also like placing a sheet of white paper on my table.
It helps me see tiny petals clearly and catches any pieces that fall. Good lighting also makes a huge difference because it helps you notice small details before you glue anything down.
Handle the Flowers Gently
Pressed flowers become fragile after drying, so pick them up with tweezers whenever possible. Avoid stacking them on top of each other because delicate petals can crack under pressure.
I also keep my hands clean and dry throughout the project. Even a little moisture or natural skin oil can leave marks on light-colored petals.
Taking care of your flowers now helps them stay beautiful inside the finished frame.
Step 5: Plan Your Layout Before Gluing

This is my favorite part because I get to play with different ideas before making anything permanent. I never glue flowers as soon as I take them out. Instead, I move them around until everything feels balanced.
Taking a little extra time here often turns a nice frame into one that looks professionally designed.
Create a Balanced Arrangement
Start with your largest flower because it naturally becomes the focal point. Next, place your medium flowers around it, then fill the remaining spaces with smaller blooms and greenery.
Leave a little empty space between each flower so every detail stands out. If the frame starts looking crowded, remove one or two flowers instead of squeezing everything together. Simple arrangements almost always look more elegant.
Step Back Before You Decide
Once you’re happy with the layout, don’t rush to glue it. Instead, step away for a few minutes and come back with fresh eyes. I do this every time because it helps me notice small changes that improve the design. You can also take a quick photo with your phone. That way, if a flower shifts while you’re working, you’ll know exactly where it belongs.
Step 6: Attach the Flowers Carefully
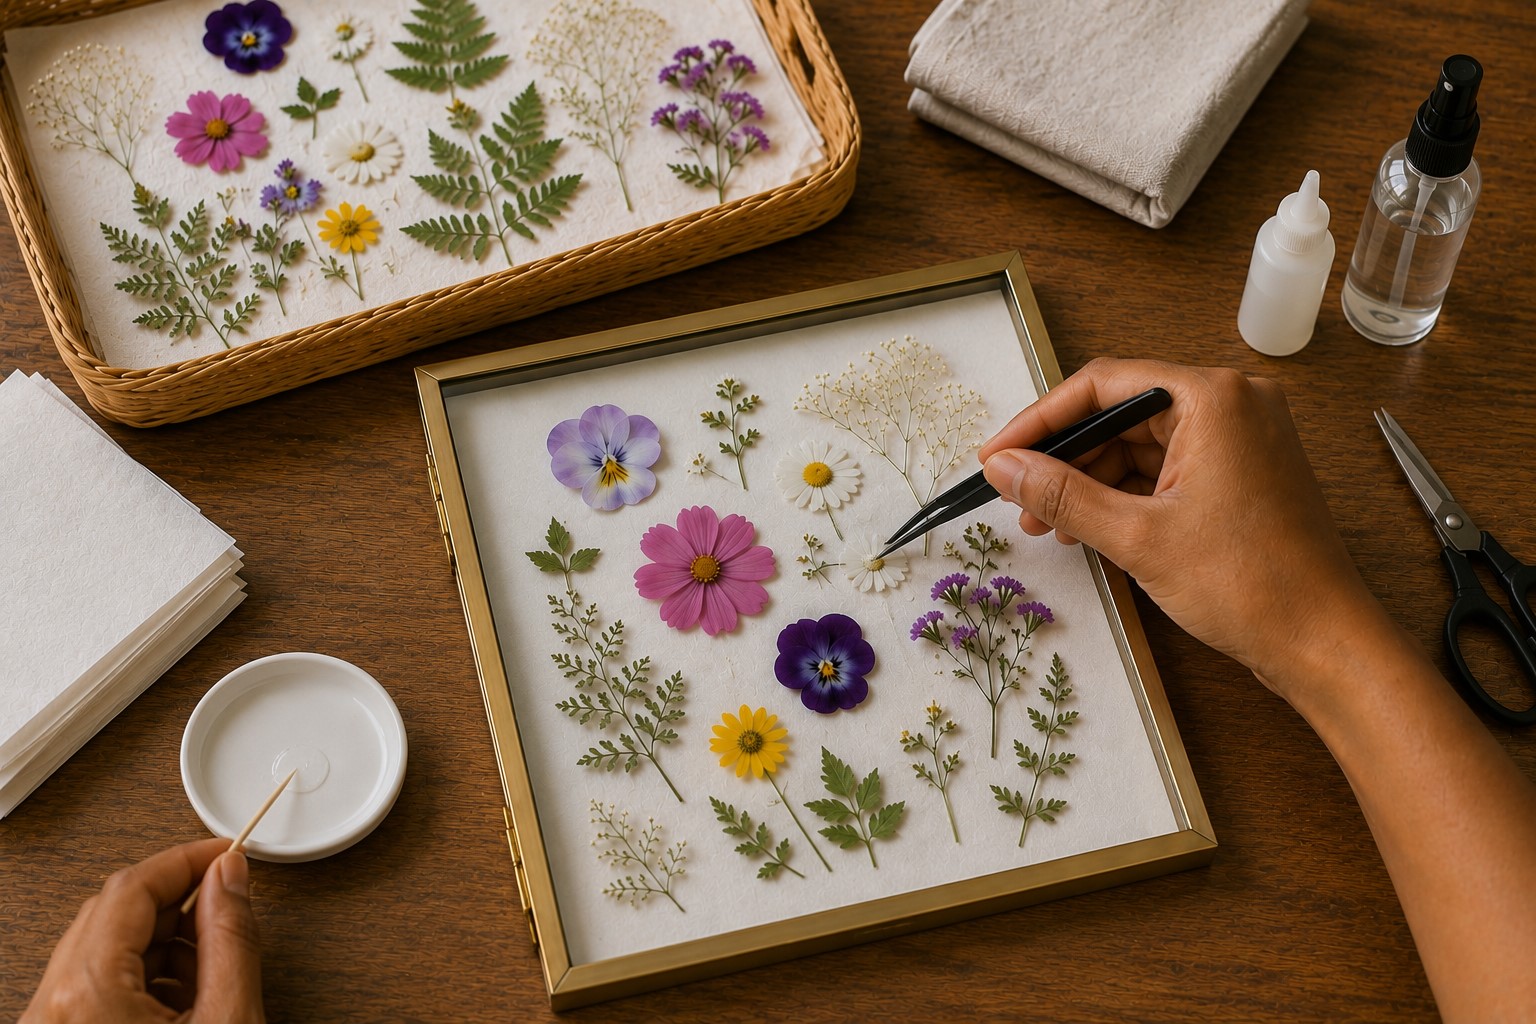
After you’ve planned your design, it’s time to secure everything in place. This part requires patience more than speed.
I always remind myself that flowers are delicate, so gentle movements produce the best results. Rushing usually leads to torn petals or glue marks that are difficult to hide.
Use Just Enough Glue
Apply a tiny amount of clear-drying, acid-free glue to the back of each flower or leaf. A toothpick works well because it gives you better control than the glue bottle itself.
Press the flower down gently with tweezers, then leave it alone for a few moments so the adhesive can set.
Too much glue can spread beyond the petals and become visible through the glass, so use the smallest amount possible.
Work Slowly Until Everything Is Secure
Begin with the largest flowers and finish with the smallest details. This order makes it easier to build a balanced arrangement without disturbing pieces you’ve already attached.
If a petal moves, adjust it gently before the glue dries. Once every flower is in place, let the design dry completely before touching the frame.
Waiting a little longer now helps keep your arrangement exactly where you want it.
Step 7: Assemble the Frame
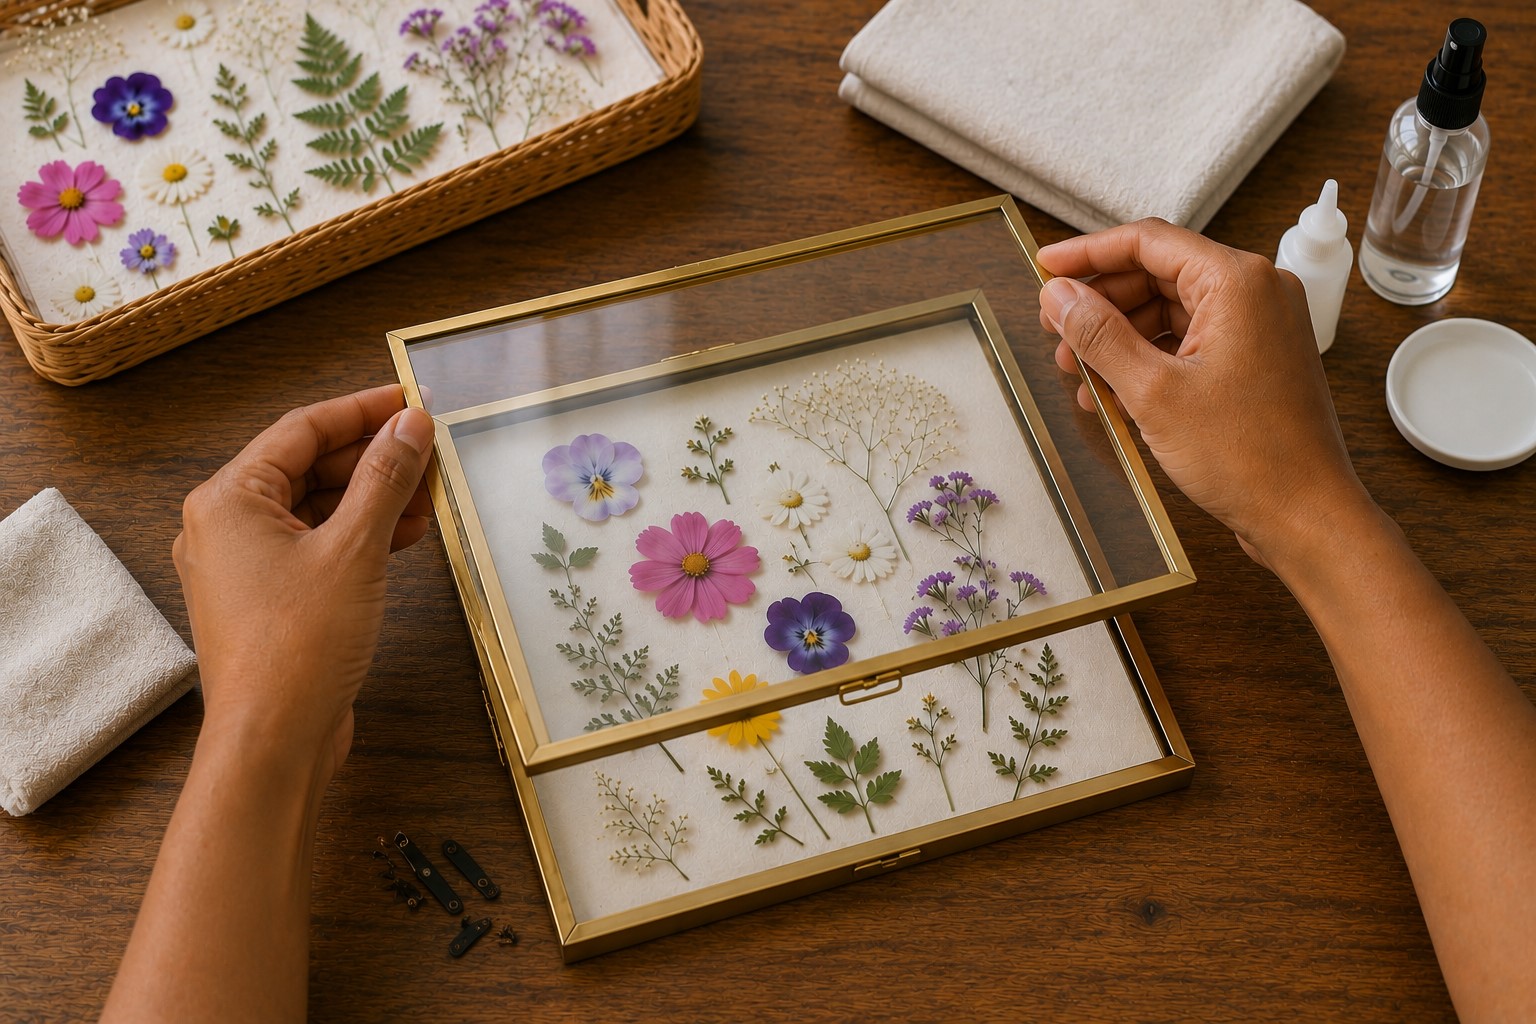
Now comes the exciting part. Your flowers have found their place, and it’s time to turn everything into a finished piece.
I always slow down during this step because one quick movement can shift the arrangement. A little patience helps everything stay exactly where you planned it.
Close the Frame With Care
If you’re using a floating glass frame, gently place the second piece of glass over your design. Lower it slowly instead of dropping it into place.
This helps prevent lightweight petals from moving. If you’re using a traditional frame, place the backing over your arrangement just as carefully.
Before sealing the frame, check every flower one last time. If something looks out of place, fix it now because it will be much harder later.
Finish With a Final Inspection
Once the frame is closed, wipe away fingerprints and dust with a clean microfiber cloth. Hold the frame under natural light and look at it from different angles.
I always do this because tiny smudges or crooked flowers become easier to spot. If everything looks neat and balanced, secure the back of the frame completely.
By now you’ve finished the hardest part of the project.
Step 8: Style and Display Your Pressed Flower Frame

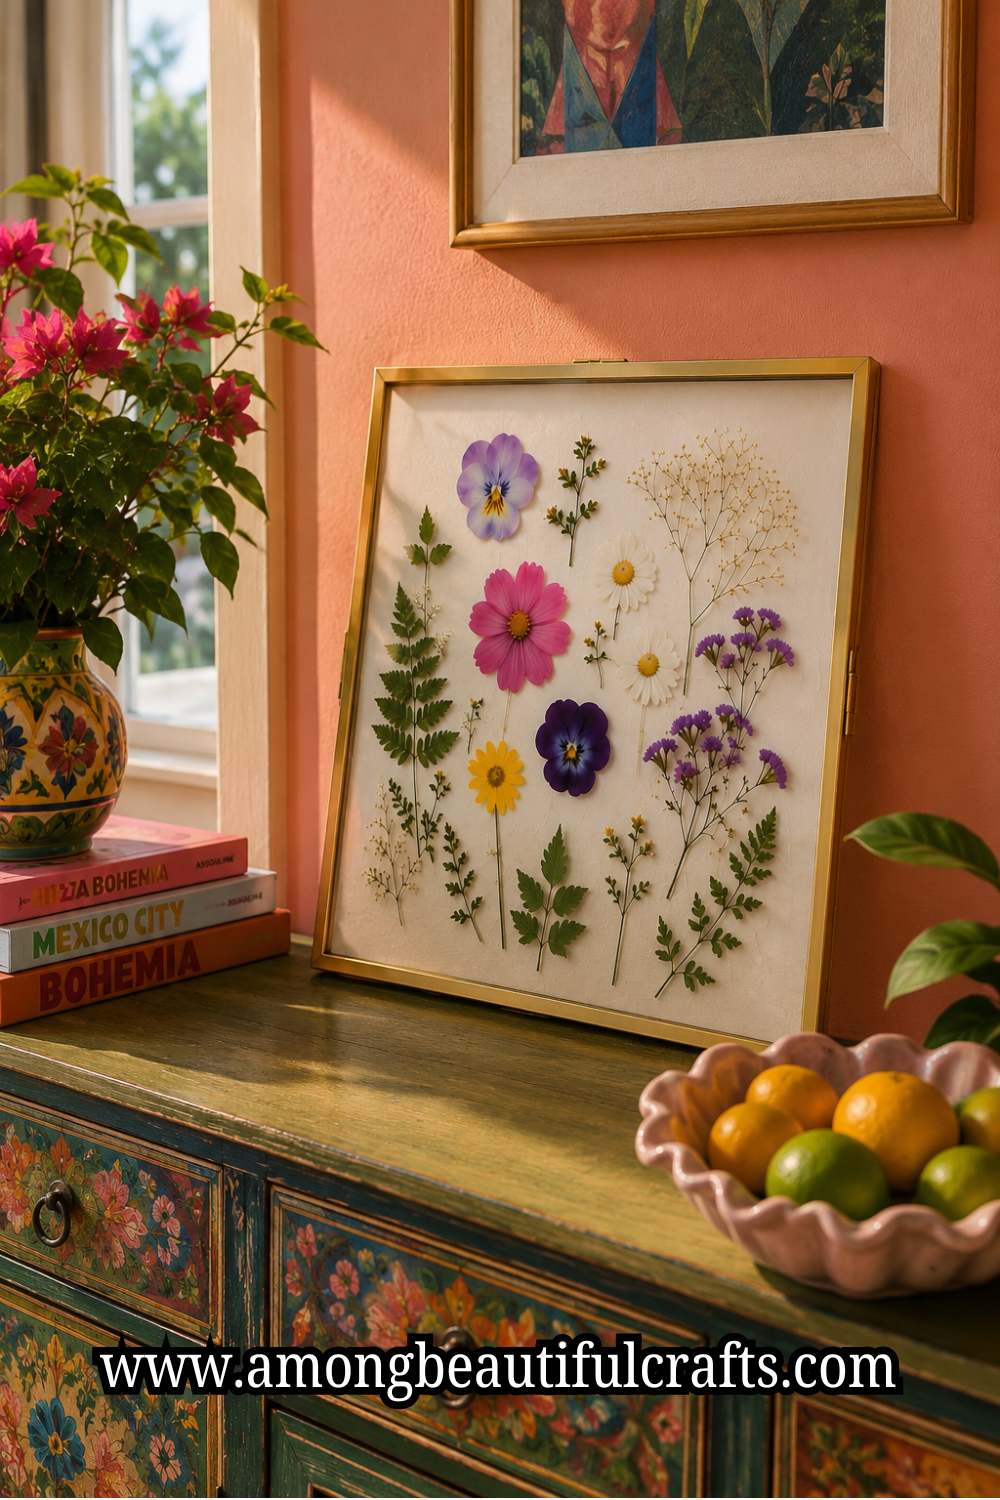
Your frame deserves a place where people can enjoy it every day. I love seeing mine on a shelf because it reminds me of the day I collected the flowers. No matter where you display yours, choosing the right location helps it stay beautiful much longer.
Choose the Best Spot
Display your frame in a cool, dry room away from direct sunlight. Bright sunlight can slowly fade the flower colors over time. A bookshelf, entryway table, bedroom dresser, or gallery wall all make wonderful places to show off your work.
If you’re decorating with several frames, try mixing different flower shapes and frame sizes to create an interesting display without making the wall feel busy.
Keep It Looking Beautiful
Dust the frame regularly with a soft microfiber cloth. Avoid spraying glass cleaner directly onto the frame because moisture can seep inside over time.
If you need to clean the glass, spray the cloth first and then wipe gently. Also, keep the frame away from humid areas like bathrooms because excess moisture can shorten the life of your pressed flowers.
With a little care, your handmade artwork can stay beautiful for many years.
Common Mistakes to Avoid
Even simple craft projects come with a learning curve. I made several of these mistakes when I started, so don’t feel discouraged if something doesn’t go as planned.
The good news is that each mistake has an easy fix. Once you know what to watch for, you’ll create a cleaner and more professional-looking frame.
Using Flowers That Aren’t Completely Dry
This is probably the biggest mistake beginners make. Flowers that still contain moisture can turn brown or develop mold after you seal the frame.
Even if a flower looks dry, check that it feels crisp before using it. If you’re unsure, leave it in the press for a few more days. It’s much better to wait than to start over later.
Overcrowding the Design
It’s easy to fall in love with every flower you press. I know I’ve wanted to use them all in one frame. Still, too many flowers can make the arrangement look messy.
Leave enough empty space for each bloom to stand out. Sometimes removing one flower makes the entire design look more elegant.
Using Too Much Glue
More glue doesn’t make the flowers stick better. Instead, it often spreads beyond the petals and becomes visible through the glass.
Use only tiny dots of glue and let them dry naturally. A neat application keeps the focus on the flowers instead of the adhesive.
Forgetting to Clean the Glass
One fingerprint can stand out once the frame hangs on the wall. Before sealing the frame, wipe both sides of the glass with a microfiber cloth.
This quick habit gives your finished project a polished appearance.
Frequently Asked Questions
Can I use flowers from a bouquet?
Yes. Fresh flowers from a bouquet work very well as long as you press them before they begin to wilt. Many of my favorite frames include flowers from birthdays, anniversaries, and other special occasions.
What if I don’t have a flower press?
A heavy book works just as well for most flowers. Place the blooms between sheets of absorbent paper, close the book, and add extra weight on top. The process takes a little time, but the results are beautiful.
Do pressed flowers always keep their color?
Some flowers stay vibrant for years, while others fade slightly over time. Keeping your frame away from direct sunlight helps preserve the colors much longer.
Can I make these frames as gifts?
Absolutely. Handmade pressed flower frames make thoughtful gifts for birthdays, weddings, Mother’s Day, housewarmings, and many other occasions. You can even use flowers that hold special memories for the person receiving the gift.
Can I reuse a pressed flower frame later?
If you’ve glued the flowers permanently, removing them may damage the petals. If you’d like to change the design in the future, consider using a floating frame that gently holds the flowers between two pieces of glass without much adhesive.
Final Thoughts
The first pressed flower frame I made still sits on a shelf in my home. Every time I see it, I remember how nervous I felt about getting everything perfect.
Looking back, I smile because perfection was never the goal. Taking my time, enjoying the process, and learning from a few small mistakes mattered much more.
That’s exactly what I hope you experience too. As you continue practicing How to Make a Pressed Flower Frame, you’ll notice your confidence growing with every project.
Soon, you’ll start creating designs that reflect your own style instead of copying someone else’s.
Don’t be afraid to experiment with different flowers, frame colors, and layouts. Some of my favorite frames came from trying something I hadn’t planned.
A simple wildflower, an interesting leaf, or a tiny sprig of grass can completely change the finished design.
As you make more frames, you’ll also discover which flowers press best in your area and which color combinations you enjoy most. Those little discoveries make every project feel personal and rewarding.
I hope this guide has shown you that creating a beautiful pressed flower frame doesn’t require expensive tools or years of experience.
It simply takes patience, thoughtful planning, and a willingness to enjoy each step. The next time you find a flower that’s too beautiful to throw away, you’ll know exactly what to do with it.
Gather your supplies, trust your creativity, and have fun bringing a small piece of nature into your home. Your finished frame won’t just decorate a wall.
It will tell a story that you created with your own hands.