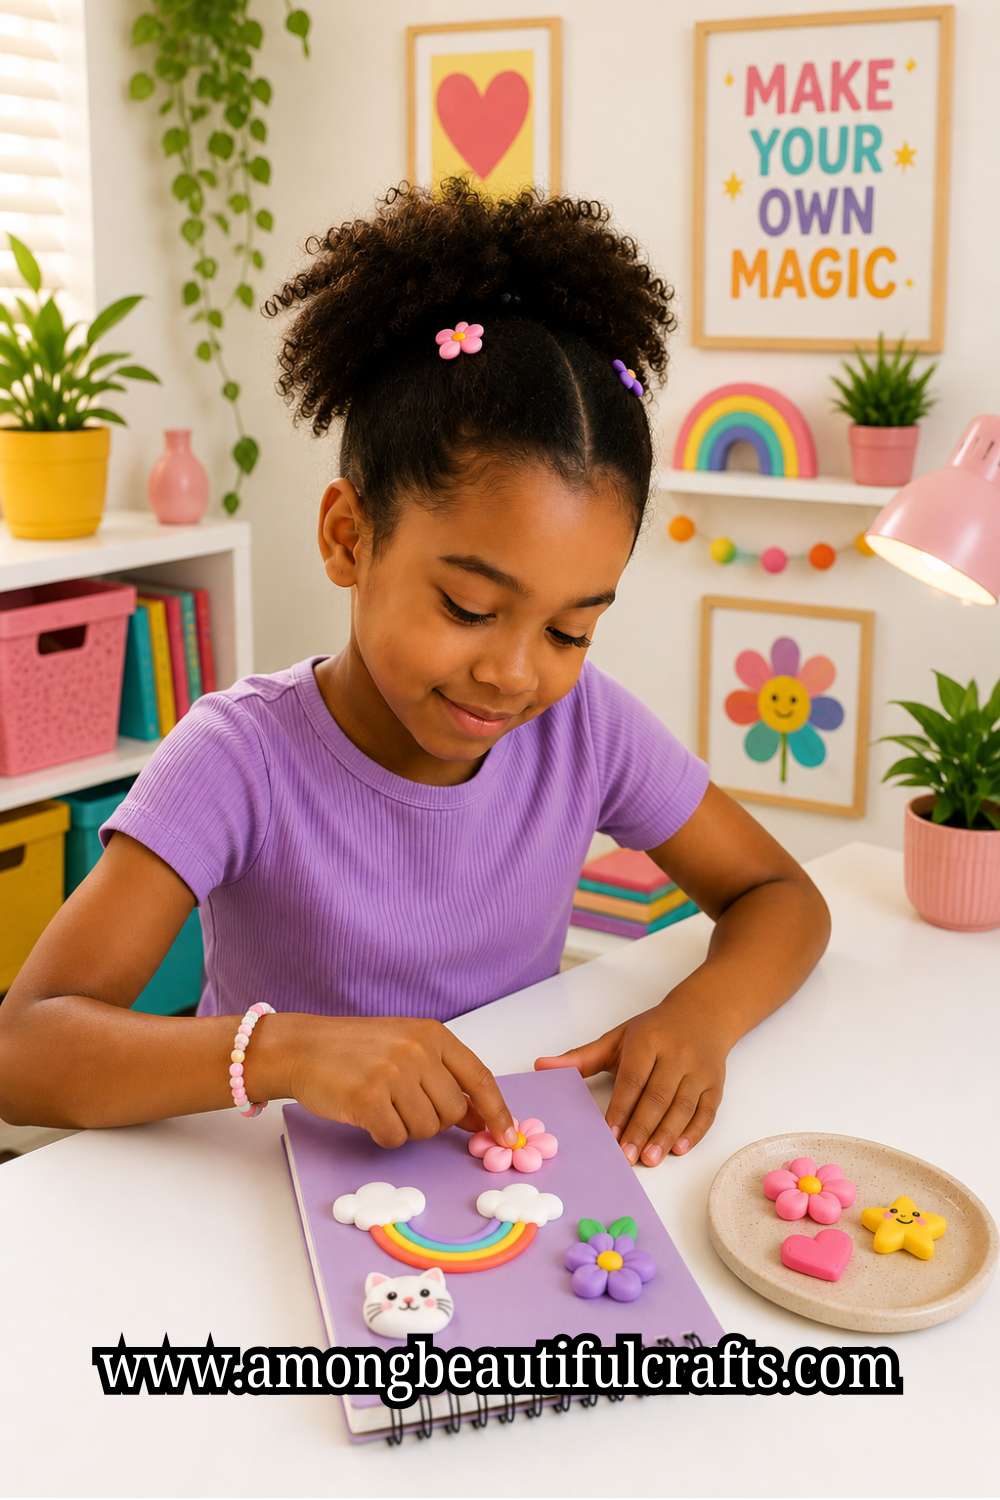
When children get new school supplies, they usually feel excited for a few days. Then they notice that many classmates carry the same notebooks, pencil holders, and bookmarks. I have seen that happen many times.
Instead of buying expensive personalized supplies, I like showing families how a little clay can completely change ordinary items.
That is why Air Dry Clay Crafts for Kids are such a fun choice. They give children the chance to create something nobody else owns while enjoying every minute of the process.
One afternoon, I helped a young crafter decorate a plain pencil cup with tiny clay daisies. At first, every flower looked different.
Some petals were thick while others were tiny. We laughed, made another flower, and kept going. Before long, the pencil cup looked bright, cheerful, and full of personality.
The child could not stop smiling because every little detail came from their own hands. That moment reminded me that children do not need perfect shapes to create something they truly love.
They simply need someone to encourage them and show each step in a simple way. That is exactly what this guide will do.

I will break every project into easy ideas that children can actually finish without feeling overwhelmed.
At the same time, parents will find plenty of tips to coach instead of taking over. You will learn which shapes work best, how to avoid common mistakes, and how to turn simple school supplies into colorful keepsakes.
So grab your clay, protect your table, and let us create school supplies that children will feel proud to carry every single day.
Gather These Supplies First
Having everything ready before you begin makes the projects much easier to complete.
- Air dry clay
- Rolling pin or smooth glass bottle
- Clay sculpting tools or toothpicks
- Acrylic paint or paint markers
- Small paintbrushes
- Craft glue
- Clear varnish or sealer
- Wax paper or silicone crafting mat
- Small bowl of water
- Damp cloth or baby wipes
- Alphabet stamps or letter cutters (optional)
- Keyrings, jump rings, or colorful cord for charms
Now place the supplies within easy reach and wash your hands before touching the clay. Clean hands keep the clay looking bright and prevent unwanted marks.
After that, you are ready to start creating personalized school supplies that children will feel proud to use every day.
19 Cute Air Dry Clay Crafts for Kids to Personalize School Supplies
1. Flower Pencil Topper

Start by rolling one small ball for the center of the flower. Next, roll six to eight smaller balls for the petals. Flatten each petal gently with your finger before arranging them around the center.
Press every piece together until the flower feels secure. Then roll a short clay cylinder and gently push the top of a pencil into it to create the opening.
Remove the pencil before the clay dries. Attach the flower to the cylinder, smooth the joins with a little water, and leave it to dry completely.
Once dry, paint the flower if you used white clay, then seal it with a thin coat of varnish.
This simple craft gives an ordinary pencil a bright new look. Children can make matching toppers for different school subjects or decorate each flower with tiny ladybugs, leaves, or glitter paint.
Parents can also encourage children to create their own flower colors instead of copying real ones.
2. Name Tag Backpack Charm

Roll the clay until it is about one-quarter inch thick. Then cut out a rectangle, heart, star, circle, or any favorite shape.
Use alphabet stamps or a toothpick to write the child’s name across the front. After that, decorate the edges with tiny flowers, stars, hearts, or dots.
Make a small hole near the top before the clay begins to dry. Let the charm dry completely, paint it if needed, seal it, and thread a colorful cord or keyring through the hole.
Children love spotting their backpacks quickly without checking every bag on the rack. This project also gives them something they proudly made themselves.
Try adding favorite colors or tiny clay decorations that match their hobbies.
3. Animal Bookmark

Roll the clay into a long, thin strip that fits comfortably inside a book. Next, shape one end into a favorite animal such as a cat, panda, fox, bunny, or bear.
Use a toothpick to draw simple facial details before the clay dries. Then smooth the edges with your finger and allow the bookmark to dry completely.
Paint the animal with bright colors before sealing the finished piece.
A handmade bookmark makes reading time even more exciting. Children can create different animals for different books or design matching bookmarks for friends and classmates.
4. Rainbow Pencil Holder

Start with an empty cardboard tube or a small recycled container. Roll several long clay ropes in rainbow colors. Then wrap the ropes around the outside until the entire container is covered.
Blend the edges gently with your fingers to create a smooth finish. Next, add tiny clouds, stars, or smiling suns around the rainbow. Leave the project to dry before sealing it.
This colorful pencil holder keeps desks neat while adding plenty of personality. Children can even create matching desk decorations using the same rainbow theme.
5. Initial Notebook Charm

Roll the clay flat and use a letter cutter or knife to cut out the child’s first initial. Smooth every edge carefully so the letter feels neat.
Then decorate it with tiny hearts, flowers, stars, or swirls. Make a small hole at the top before drying.
After the clay hardens, paint the letter, seal it, and attach it to the notebook spiral with ribbon or string.
This little charm makes notebooks easy to identify at school. It also gives children another chance to show their creativity without covering the notebook itself.
6. Smiley Face Eraser Holder

Roll a small ball of clay until it feels smooth. Then gently flatten it into a thick circle. Press a small eraser halfway into the clay to create the perfect fit.
Remove the eraser before the clay dries. Next, use a toothpick to draw two eyes and a smiling mouth. You can also add tiny clay ears, bows, or funny hair for extra character.
Let the holder dry completely before painting and sealing it. Finally, slide the eraser back into its custom holder.
This project makes small erasers easier to hold and harder to lose inside a backpack. Children can create several funny faces with different expressions to make homework time more enjoyable.
7. Apple Bag Zipper Pull

Roll a medium-sized ball of clay and shape it into a small apple. Next, flatten it slightly and smooth the sides with your fingers.
Roll a tiny brown stem and press it onto the top. Then make one or two green leaves and attach them beside the stem.
Use a toothpick to create a small hole through the top before the clay dries.
Allow the apple to dry completely, paint any extra details if needed, seal it, and attach it to a zipper with a keyring or colorful cord.
This tiny apple gives school bags a fun classroom theme. Children can also make matching apples in different colors to decorate lunch bags or pencil cases.
8. Star Paper Clip Holder

Roll the clay until it is about one-quarter inch thick. Cut out a large star shape using a cookie cutter or craft knife.
Next, flatten the back slightly so the star sits firmly on a desk. Press several paper clips gently into the back to create shallow grooves, then remove them before drying.
Leave the clay to harden, paint it with bright colors, and seal it. Once finished, slide the paper clips into the grooves whenever they are needed.
This clever desk accessory keeps paper clips together instead of letting them scatter across the table. Children can also shape the holder like a heart, cloud, or lightning bolt.
9. Cute Notebook Corner Protector

Roll the clay into a thin sheet. Then cut out a square that measures about two inches on each side. Fold it gently over the corner of an old notebook to create the correct shape.
Carefully remove it before the clay starts drying. Decorate the front with an animal face, flower, rainbow, or favorite cartoon style. Leave it to dry completely before painting and sealing it.
A handmade corner protector helps children recognize their notebooks quickly. It also adds a fun surprise every time they open the cover.
10. Mini Crayon Box Decoration

Roll the clay into a thin rectangle that fits the front of a crayon box. Smooth the edges until they look neat.
Next, decorate the rectangle with tiny flowers, stars, smiley faces, or the child’s name. Press every decoration firmly into place before drying.
Once the clay hardens, paint it if needed, seal it, and glue it onto the crayon box.
This easy project transforms a plain crayon box into something completely unique.
Children enjoy carrying art supplies that reflect their own imagination, and they often take better care of items they decorate themselves.
11. Butterfly Pencil Case Decoration

Roll the clay until it is about one-quarter inch thick. Draw a simple butterfly shape with a toothpick or use a small cutter.
Cut it out carefully and smooth every edge with your finger. Next, roll tiny clay ropes to create patterns on the wings. You can also add small dots or swirls for extra detail.
Leave the butterfly to dry completely before painting and sealing it. Finally, glue it onto a hard pencil case with strong craft glue.
A colorful butterfly makes a plain pencil case stand out right away. Children can also create matching butterflies for notebooks or desk organizers to complete the look.
12. Cartoon Name Plate for a Pencil Box

Roll the clay into a thin rectangle or oval that fits the top of the pencil box. Then write the child’s name with alphabet stamps or a toothpick.
Next, decorate the plate with a favorite cartoon-style face, stars, sports balls, flowers, or tiny hearts. Press every piece firmly into place before drying.
Once the clay hardens, paint the design with bright colors, seal it, and glue it onto the pencil box.
This project helps children identify their pencil boxes in seconds. It also lets them create something that reflects their favorite interests instead of using plain labels.
13. Ladybug Binder Clip Cover

Roll one small clay ball for the ladybug’s body. Then flatten it slightly into an oval shape. Add a smaller black circle for the head and tiny black dots across the back.
Use a toothpick to draw the line between the wings. After that, press the finished ladybug gently onto the flat side of a large binder clip.
Remove it before drying if needed, then glue it back once the clay hardens. Finish with a coat of sealer.
This cheerful decoration turns an ordinary binder clip into a fun desk accessory. Children can also make bees, turtles, frogs, or butterflies to build a whole collection.
14. Heart-Shaped Desk Organizer Tray

Roll the clay into a thick sheet. Next, cut out a large heart shape. Roll one long clay rope and attach it around the edge to create the tray walls.
Smooth the inside and outside with a little water until the joins disappear. Leave the tray to dry completely before painting and sealing it.
This small tray gives children one place to keep erasers, sharpeners, paper clips, and other tiny school supplies. It also helps desks stay tidy during homework time.
15. Owl Sticky Note Holder

Roll the clay into a thick oval for the owl’s body. Next, shape two pointed ears by gently pinching the top corners.
Add two large circles for the eyes, a tiny triangle for the beak, and small wings on both sides.
Before the clay dries, press a shallow groove into the front that will hold a stack of sticky notes. Smooth every edge, allow the owl to dry completely, then paint and seal it.
This adorable holder keeps sticky notes close by during homework or study sessions.
Children can even create matching owls in different colors for family members or teachers.
16. Cloud Cable Organizer

Photo Credit
Roll the clay into a thick oval and gently shape the edges into soft cloud curves. Next, flatten the back so it rests evenly on a desk.
Use a pencil or sculpting tool to press two or three shallow grooves across the front. These grooves should be wide enough to hold charging cables or earphone wires.
Smooth the surface with your finger before leaving the clay to dry completely. Once it hardens, paint the cloud in soft colors, seal it, and place the cables into the grooves.
This project helps children keep charging cables from sliding off the desk or becoming tangled.
You can also decorate the cloud with smiling eyes, rosy cheeks, or tiny raindrops for extra charm.
17. Ice Cream Bag Tag

Roll one clay ball into a cone shape for the ice cream cone. Then roll another ball and flatten it slightly to make the scoop.
Press the scoop onto the cone and smooth the join with your finger. Add tiny sprinkles, a cherry, or a smiling face while the clay is still soft.
Next, make a small hole at the top for a keyring or ribbon. Allow the tag to dry completely before painting, sealing, and attaching it to a backpack or lunch bag.
This sweet little tag makes school bags easy to recognize from a distance. Children can also create different flavors by changing the colors and decorations on each scoop.
18. Personalized Ruler Decoration

Roll the clay into several tiny shapes instead of one large piece. Make small stars, flowers, hearts, planets, or letters that fit along the top edge of a plastic ruler.
Press each decoration gently into place before removing it to dry. Once the clay hardens, paint and seal every piece.
Finally, glue them onto the ruler while leaving the measurement markings completely visible.
A personalized ruler feels much more exciting to use during class. Children should avoid covering the numbers so the ruler stays useful for schoolwork.
19. School Mascot Desk Buddy

Roll a large ball of clay for the body and a smaller one for the head. Press the two pieces together and smooth the join with your finger.
Next, add tiny arms, legs, ears, and a cheerful face. If the school has a mascot, shape the character to match it.
If not, let your child invent a brand-new classroom friend. Leave the figure to dry completely before painting and sealing it.
This little desk buddy adds a personal touch to a homework space without getting in the way. It also gives children a fun reminder of the creativity they used to make it.
Parents can encourage children to name their mascot and even create new outfits or accessories throughout the school year.
Tips for Making Air Dry Clay Projects Last Longer
Children often want to use their new creations right away. Even so, giving each project enough time to dry makes a big difference.
A little extra patience now can keep the crafts looking great for months.
Let the Clay Dry Completely
Thicker projects need more drying time than thinner ones. Place each craft on a flat surface where air can reach all sides.
Then turn it over after several hours if needed. Avoid moving the pieces too often because soft clay can lose its shape.
Use Small Amounts of Water
A little water helps smooth cracks and join pieces together. Still, too much water can make the clay sticky and weak.
Dip your finger into water instead of pouring it onto the clay. That simple habit makes shaping much easier.
Press Pieces Together Firmly
Small decorations can fall off if they are only resting on the surface. Instead, press every flower, star, heart, or letter gently into the main piece.
Then smooth the joins with your finger or a clay tool. This extra step helps everything stay attached after drying.
Paint Only After the Clay Hardens
It can feel tempting to paint right away. Still, waiting until the clay feels completely dry gives better results.
The paint spreads more evenly, and the colors look brighter. Children can also add extra details without damaging the surface.
Seal Every Finished Project
A clear sealer protects the paint from scratches and everyday handling. It also gives the crafts a cleaner finish.
Apply a thin coat with a small brush, then allow it to dry before using the project at school.
Store Leftover Clay Correctly
Wrap unused clay tightly in plastic wrap before placing it inside an airtight container or resealable bag.
This simple habit keeps the clay soft for future projects. Before using it again, knead it gently until it becomes smooth and easy to shape.
Common Mistakes to Avoid
Even experienced crafters make mistakes from time to time. The good news is that most problems have simple solutions.
Do not make the clay too thick because it takes much longer to dry. At the same time, avoid making very thin pieces because they can crack more easily.
Try not to rush through the drying process. A fan or direct sunlight may seem helpful, yet slow drying often produces stronger results.
Keep decorations small and balanced. Very large decorations may pull away from the main project as the clay dries.
Always check that holes for keyrings or ribbons are large enough before the clay hardens. A tiny hole can close while drying.
Finally, remember that every project does not need to look exactly like the picture in your mind. Some of the most memorable crafts come from happy little changes along the way.
Final Thoughts
I have always believed that the best crafts are the ones children enjoy making from start to finish. Perfect shapes and flawless paint jobs are nice, yet they are not the real goal.
The real success comes when children feel proud of something they created with their own hands. As parents, we can guide them, answer questions, and cheer them on while still letting their creativity shine.
Those small moments around the craft table often become memories that last much longer than the finished project itself.
I also hope these Air Dry Clay Crafts for Kids inspire children to see ordinary school supplies in a whole new way.
A simple pencil, notebook, or ruler can become something colorful and personal with just a little imagination.
Even better, these projects help children build confidence because they can see their progress with every new creation.
One finished craft usually leads to another, and soon they begin inventing ideas of their own.
So gather your clay, invite your child to the table, and enjoy creating together. Celebrate every flower, every funny face, and every tiny masterpiece along the way.
Most of all, remember that the laughter, conversations, and teamwork matter just as much as the finished crafts.
Those are the moments children will carry with them long after the school year ends.