A blank wall has a subtle way of asking for attention. Mine certainly did. I tried hanging prints, shelves, and even a mirror, but the space still felt cold.
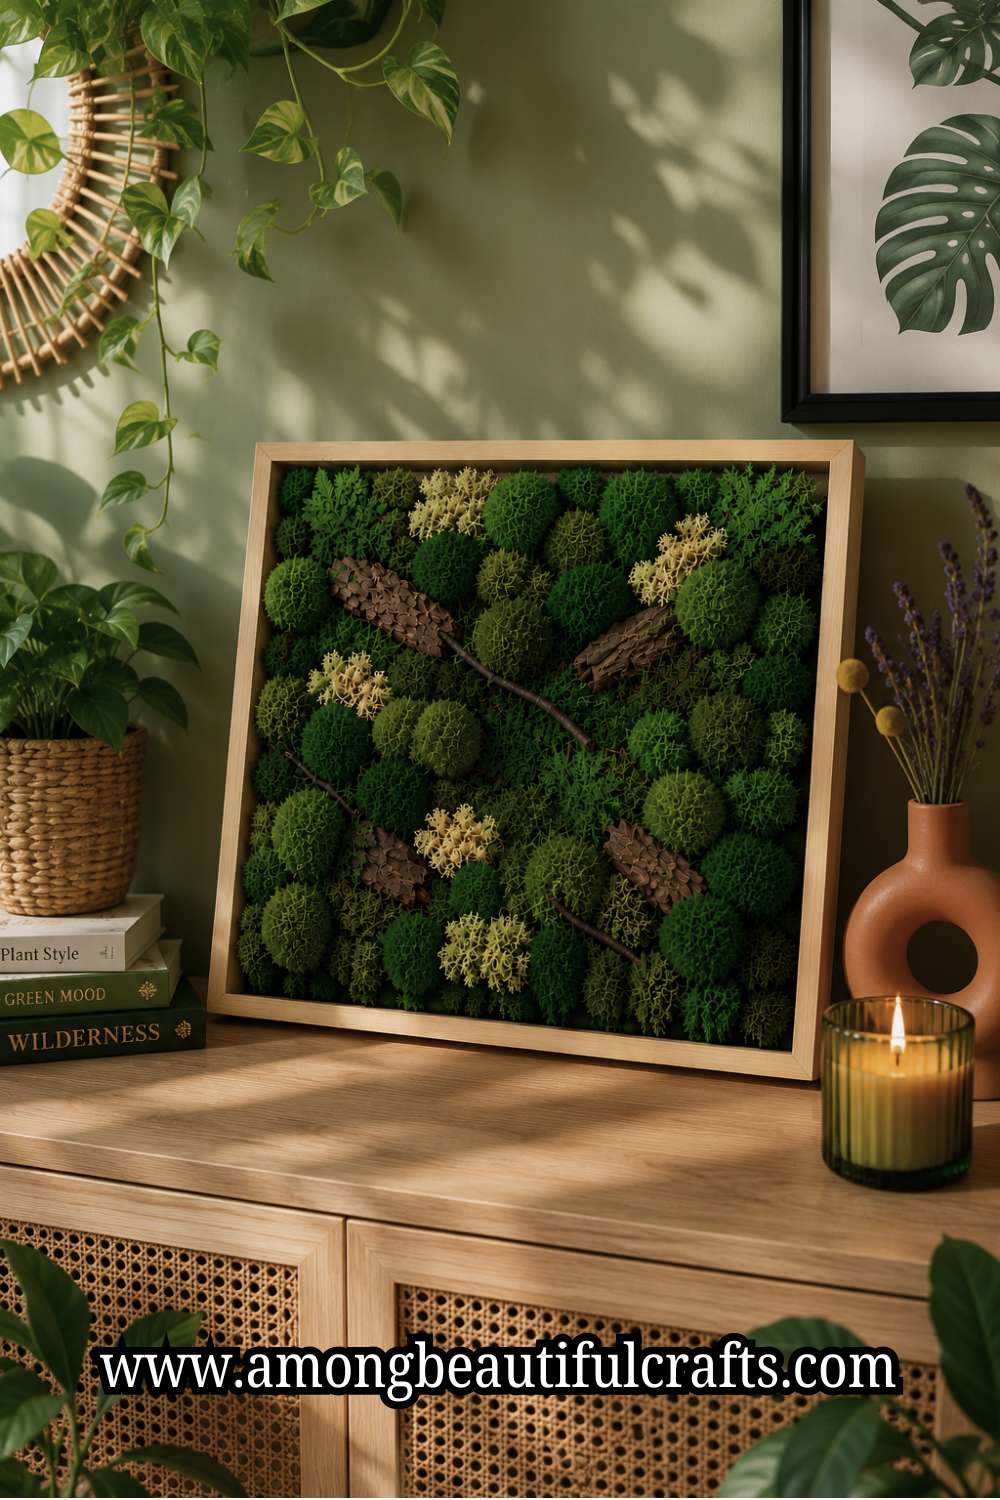
I wanted something that looked alive without adding another plant to remember every week. Then I came across a gorgeous moss wall art frame.
It looked like a tiny forest had found its way indoors. The best part surprised me most. It stayed soft, rich, and green without a watering can anywhere nearby.
That discovery made me want to learn How to Make Moss Wall Art, and I soon found out it was much easier than I expected
My first project taught me something I still think about today. Beautiful moss wall art doesn’t happen because someone has amazing artistic talent.
It happens because they know what to do first, what to do next, and what mistakes to avoid. I learned that lesson after spending far too long moving little pieces of moss around, wondering why my design looked flat.
Then I changed my approach, added more texture, and finally stepped back with a smile. The frame suddenly looked full, natural, and expensive.
From that day on, every project became easier because I understood the process instead of simply copying a picture.
So if you’ve been admiring moss wall art but assumed it was too difficult, let me show you another side of it. Imagine we’re sitting at the same craft table, with all the supplies spread out between us.
I’ll explain every step before we move to the next one, and I’ll tell you the little tricks I wish someone had shared with me sooner.
You’ll learn how to choose the right moss, build depth that looks natural, cover empty spaces neatly, and finish your artwork so it stays beautiful for years without watering.
By the time we’re done, you’ll have more than a pretty decoration. You’ll have the confidence to create another one whenever inspiration strikes.
Gather Your Supplies
Having everything ready before you begin makes the project much more enjoyable. You can focus on creating instead of searching for missing tools.
I always place my supplies on the table before plugging in the glue gun. That simple habit saves time and keeps the process stress-free.
Materials
- Wooden frame or shadow box
- Foam board, MDF, or plywood backing
- Preserved sheet moss
- Preserved mood moss
- Preserved reindeer moss
- Hot glue gun
- Glue sticks
- Sharp scissors
- Craft knife
- Pencil
- Ruler or measuring tape
- Tweezers
- Soft paintbrush or handheld duster
- Small container for moss scraps
How to Make Moss Wall Art That Stays Green Without Watering
Step 1: Choose the Right Frame
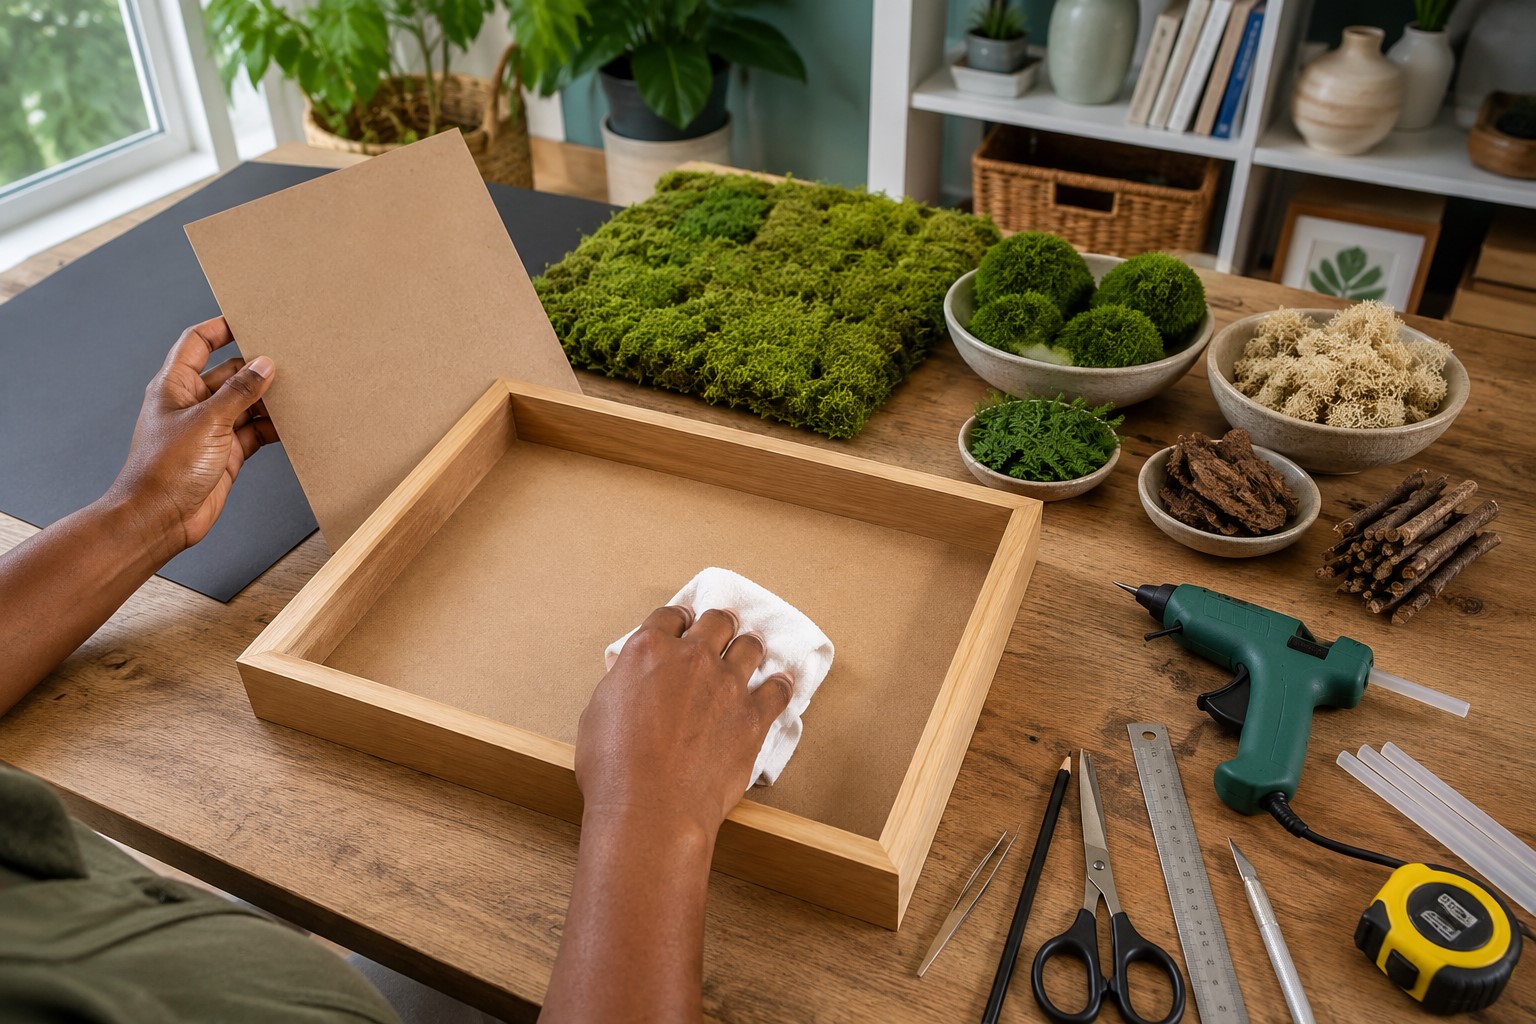
Start by deciding where you want to display your moss wall art. A small frame looks beautiful on a shelf or narrow wall.
A larger frame works well above a sofa, fireplace, or entryway table.
Next, think about the frame’s depth. A shadow box gives you more room to layer different moss types. This creates a fuller and more natural design.
A regular frame also works if you keep the moss layers thinner.
Now choose a color that fits your décor. Natural wood creates a warm and earthy feel. Black frames look modern, while white frames brighten the artwork.
Pick one that complements the room instead of taking attention away from the moss.
Before moving on, remove the backing and make sure it fits securely inside the frame. Wipe away any dust with a dry cloth, then place the frame nearby. You are now ready for the next step.
Step 2: Plan Your Design
Before you pick up the glue gun, spend a little time planning your layout. This is one of the biggest secrets behind beautiful moss wall art.
A simple plan helps you create a balanced design instead of making changes later.
When I first learned How to Make Moss Wall Art, I rushed straight into gluing the moss. I thought I could adjust everything as I worked.
I quickly discovered that moving glued moss never looks as neat as getting the layout right from the beginning.
Since then, I always spend extra time arranging everything first.
Create a Layout That Looks Natural
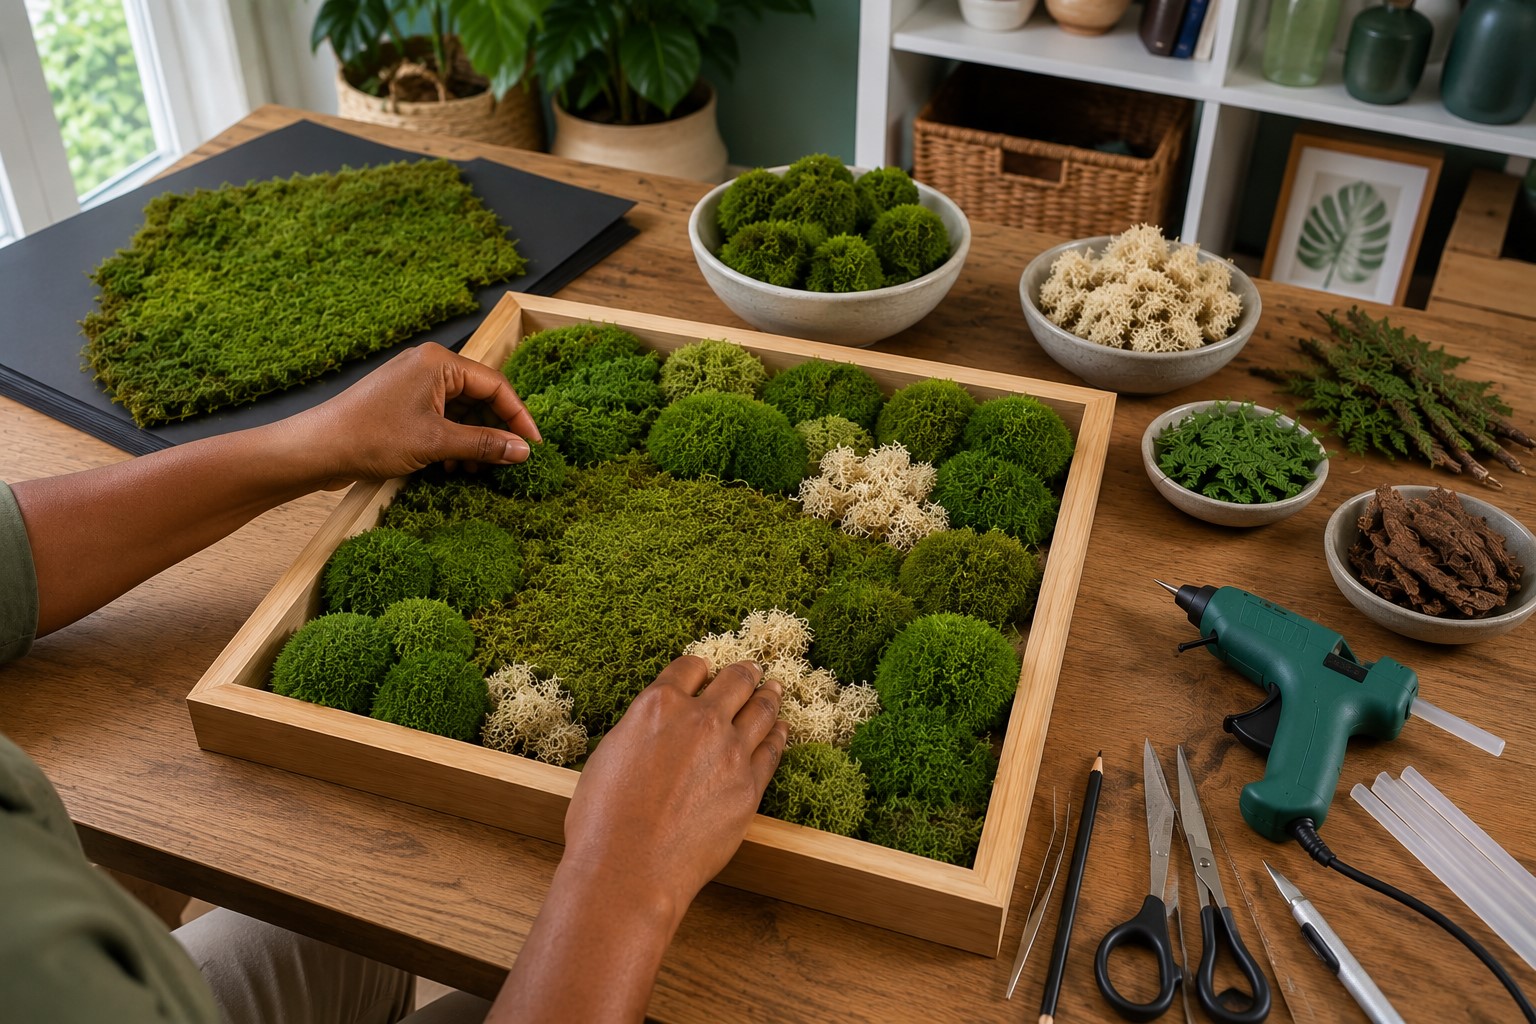
Place the backing board inside the frame without using glue. Then spread all your moss types across the surface. Keep each type in its own pile so you can reach them easily.
Start with the sheet moss because it covers the largest area. Lay the pieces on the backing board until most of the surface feels covered.
Leave small open spaces because the other moss types will fill them later.
Next, place the mood moss around the frame. Spread the clumps across different areas instead of grouping them together.
This creates gentle height changes that make the artwork look more like nature.
Now add a few pieces of reindeer moss. Tuck them into open spaces and around the mood moss. Keep moving the pieces until the design feels balanced from every angle.
Stand back every few minutes and study your work. Looking from a distance helps you notice empty spots much faster.
If one side feels heavier than the other, move a few pieces until everything looks even.
If you plan to use preserved ferns, bark, twigs, or small branches, test their placement now. Small accents should support the moss instead of covering it.
Before moving to the next step, take a photo of your layout with your phone. I never skip this trick.
If a piece shifts while gluing, I simply check the photo and place it back where it belongs.
Step 3: Prepare the Backing Board
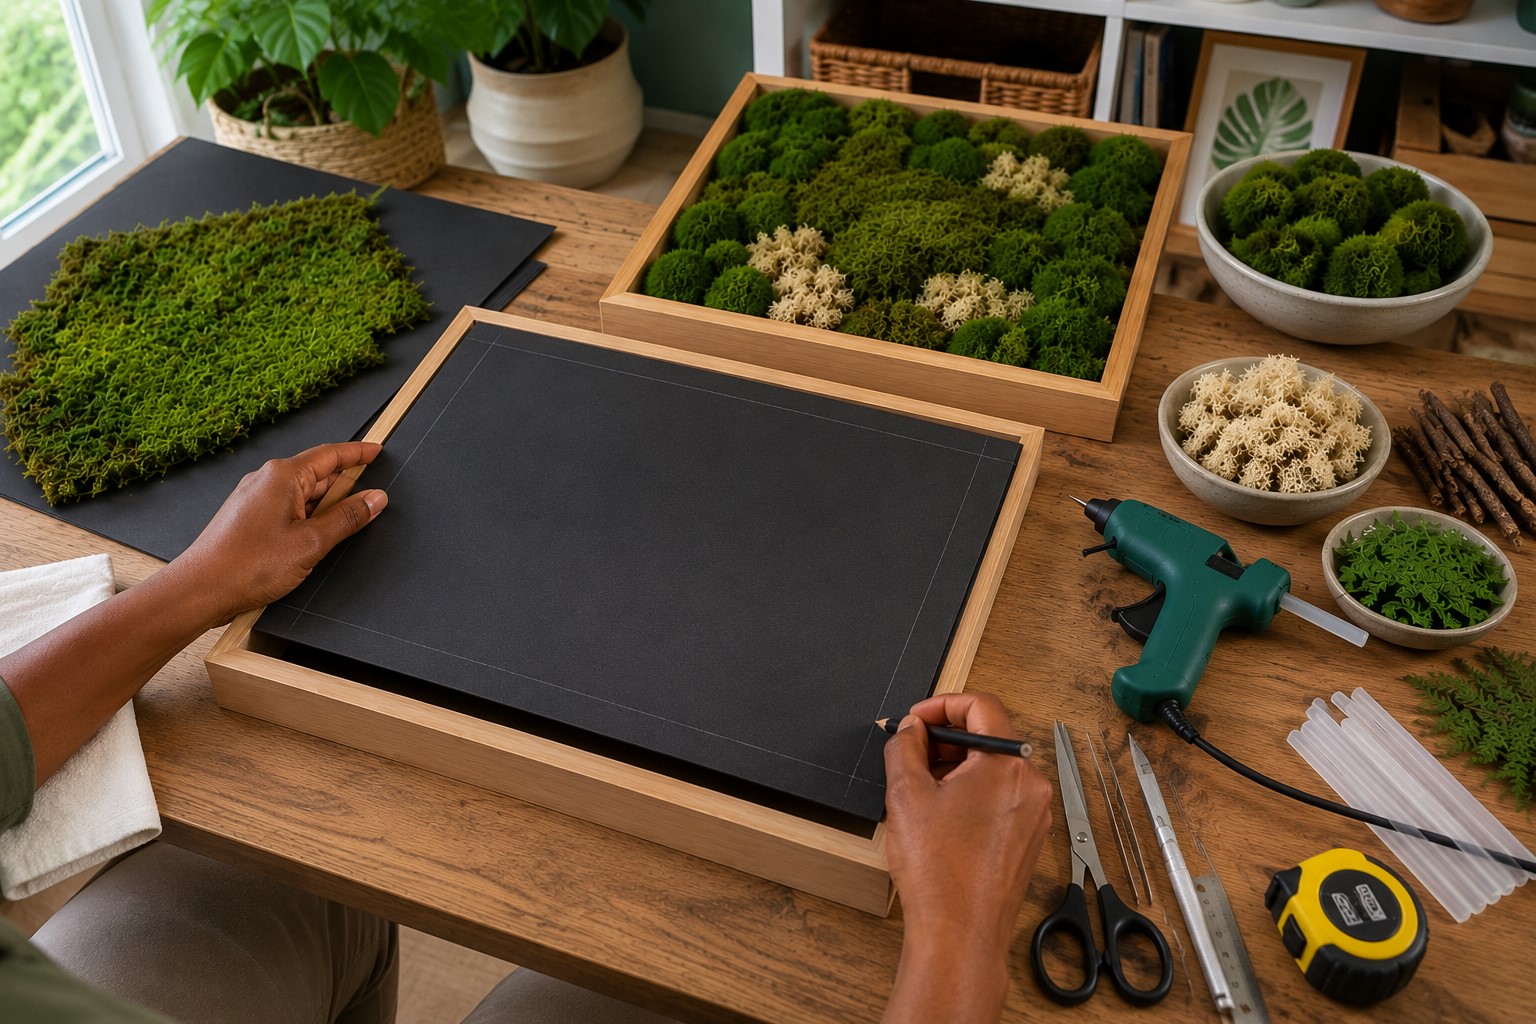
Place the backing board inside the frame to make sure it fits perfectly. If it feels too large, trim the edges with a craft knife until it slides into place without force.
Next, wipe the surface with a clean, dry cloth. Removing dust helps the glue stick much better.
If one side of the board feels smoother than the other, use the smoother side. A flat surface gives the moss better support and creates a cleaner finish.
Now use a pencil to lightly mark the area that the frame will cover. These guide lines remind you to keep thick moss away from the edges.
Leaving a little space makes it much easier to place the backing inside the frame later.
If your backing board has a bright white surface, paint it dark green, brown, or black. Let the paint dry completely before continuing.
This simple step hides tiny gaps and helps the finished artwork look fuller.
Finally, place the board inside the frame one last time. Double-check the fit before moving forward. Once everything looks right, remove the board and place it on your work table.
Step 4: Create the Base Layer
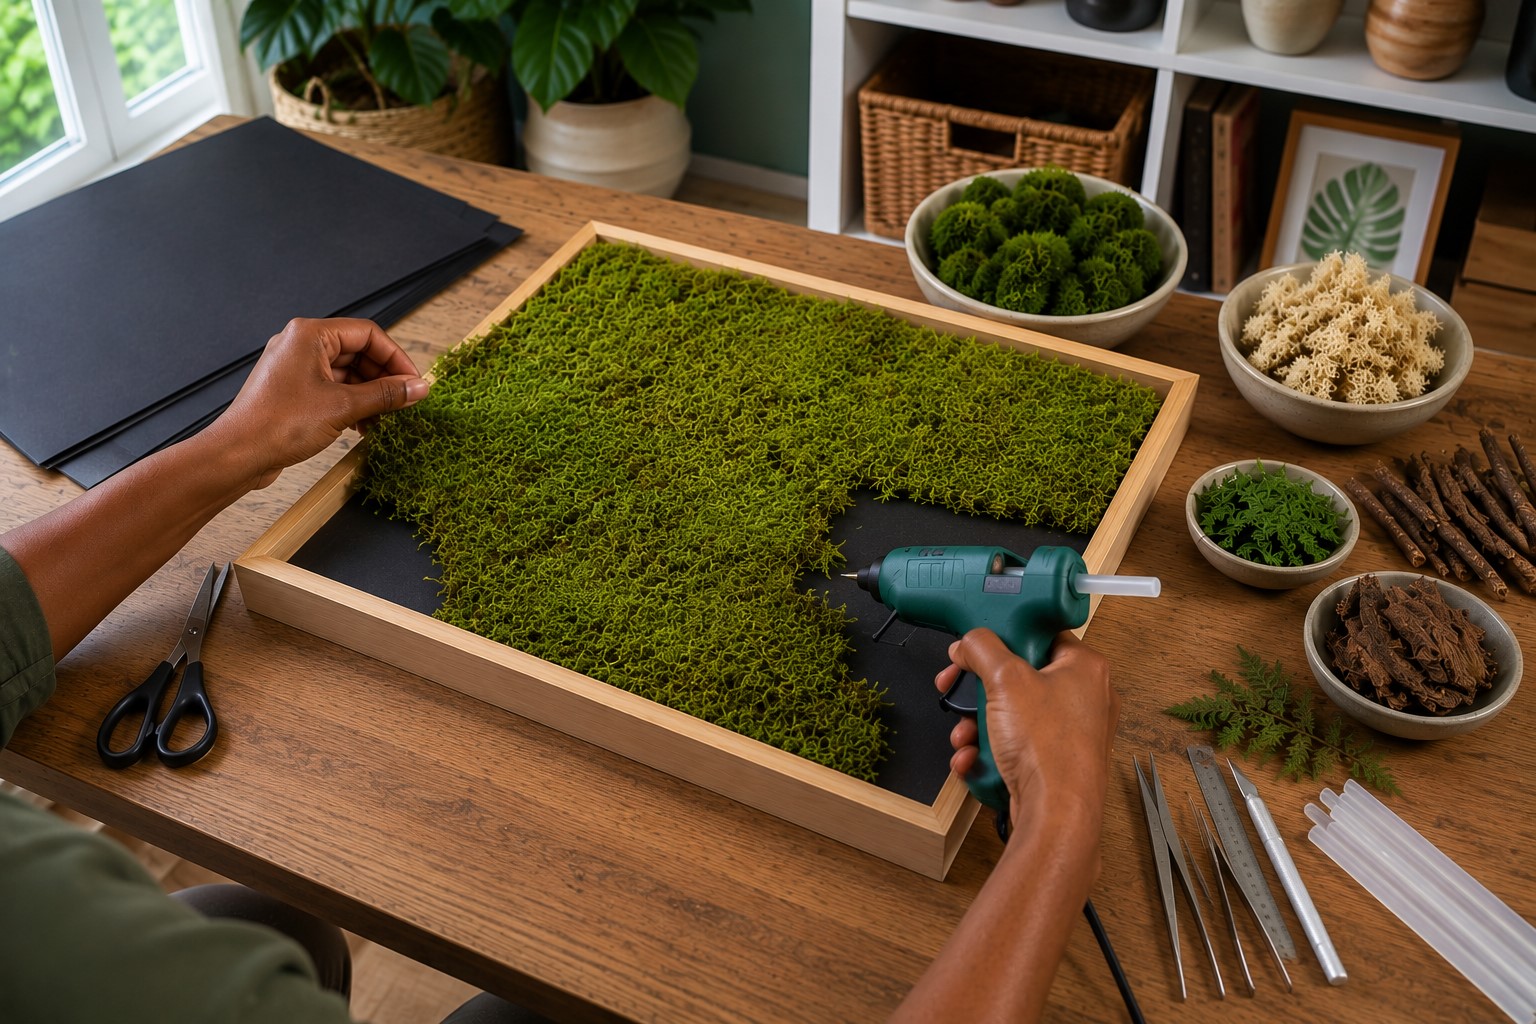
Plug in your hot glue gun and let it heat completely. Working with fully heated glue gives you a stronger bond and saves time.
Pick up your largest piece of preserved sheet moss and place it on the backing board without glue. Move it around until you like the position.
Then lift one edge, apply a small amount of hot glue, and press the moss down for several seconds.
Continue adding one piece at a time across the board. Let the edges overlap slightly because this creates a natural look without obvious seams.
If a piece hangs over the edge, trim it with sharp scissors before gluing it down. Small adjustments now will make the finished artwork look much neater.
Do not cover every inch of the backing board. Leave small spaces where you plan to add mood moss and reindeer moss. Those open areas will help create depth and make the design look more realistic.
Every few minutes, lift the board carefully and look at it from different angles. Check that the moss lies flat and stays firmly attached.
If a corner starts lifting, add another small drop of glue underneath before moving on.
When you finish this step, your artwork should have a smooth and natural foundation. The next layers will build on this base and bring the entire design to life.
Step 5: Build the Main Moss Design
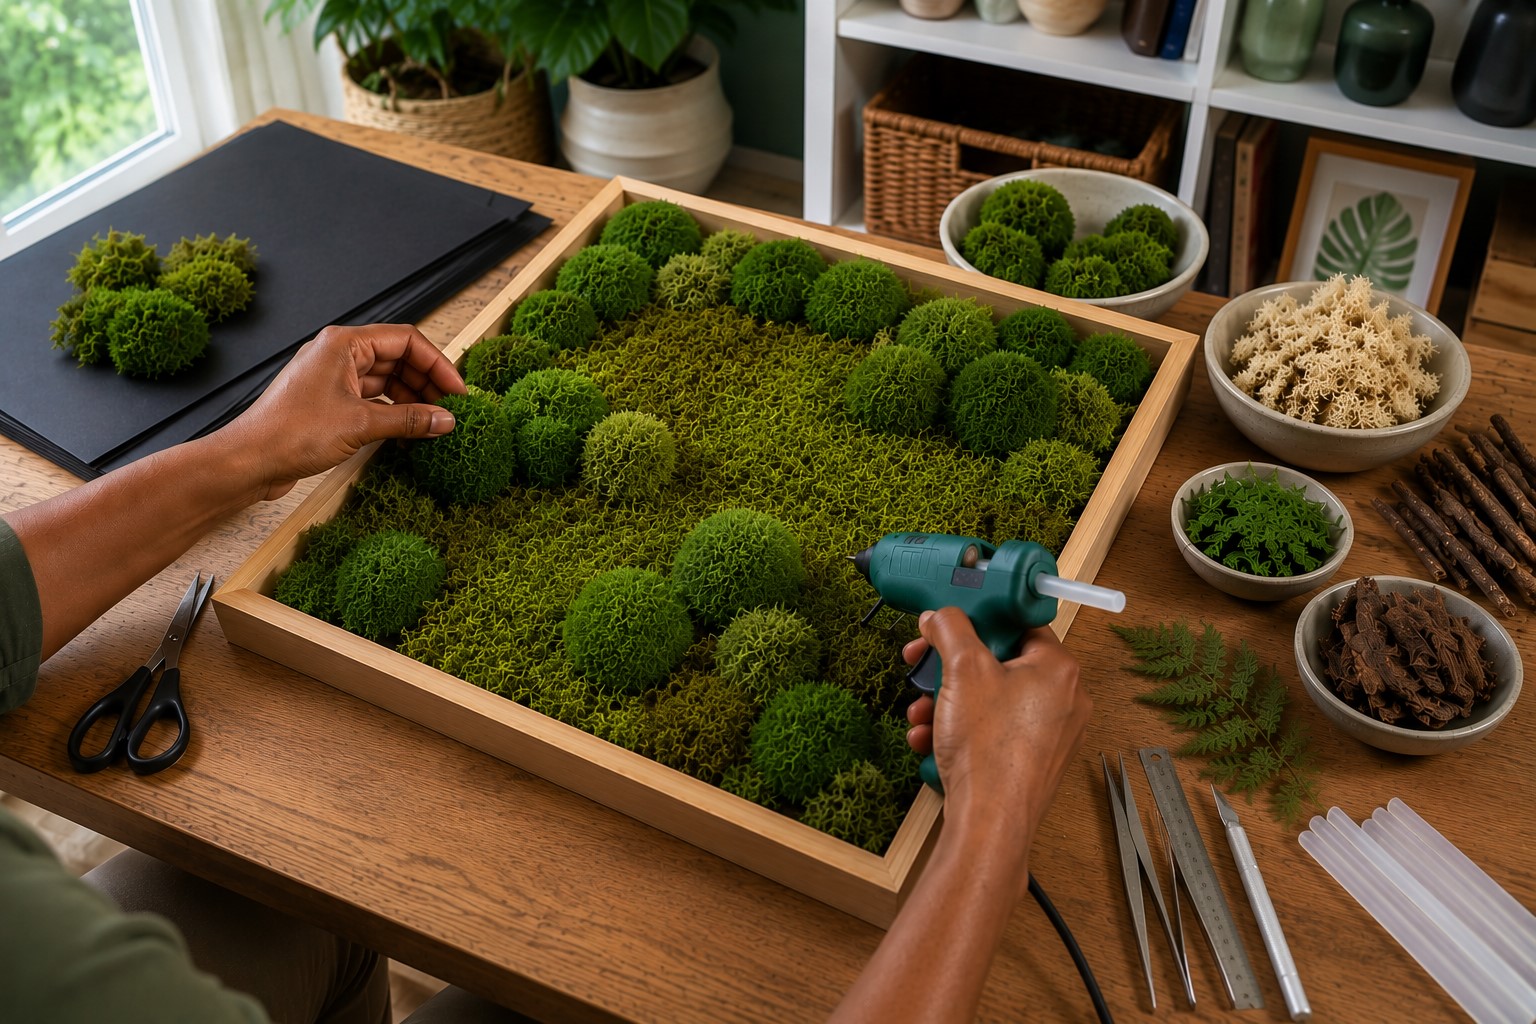
Your moss wall art should already look interesting at this stage. Now it is time to give it more character.
This step adds the rounded shapes that make preserved moss look soft, full, and natural.
I always remind myself not to hurry here. It feels tempting to fill every empty space right away. Then I remember that the best designs grow little by little.
Taking your time helps you create a piece that looks like it came straight from nature.
Layer Different Moss Types
Start with the preserved mood moss. Place several clumps on top of the sheet moss without using glue first. Spread them across the design instead of keeping them in one area. This creates a balanced look that feels more natural.
Once you like the arrangement, glue one clump at a time. Apply the glue to the bottom of the moss instead of the backing board. Then press it gently into place for a few seconds.
Mix large and small pieces as you work. Larger clumps create bold texture, while smaller ones soften the spaces between them.
Try not to make every section the same height. Small changes make the artwork much more interesting.
Turn the frame every few minutes and study it from different directions. You may notice flat areas that need another piece of moss. You may also find places that already look full enough.
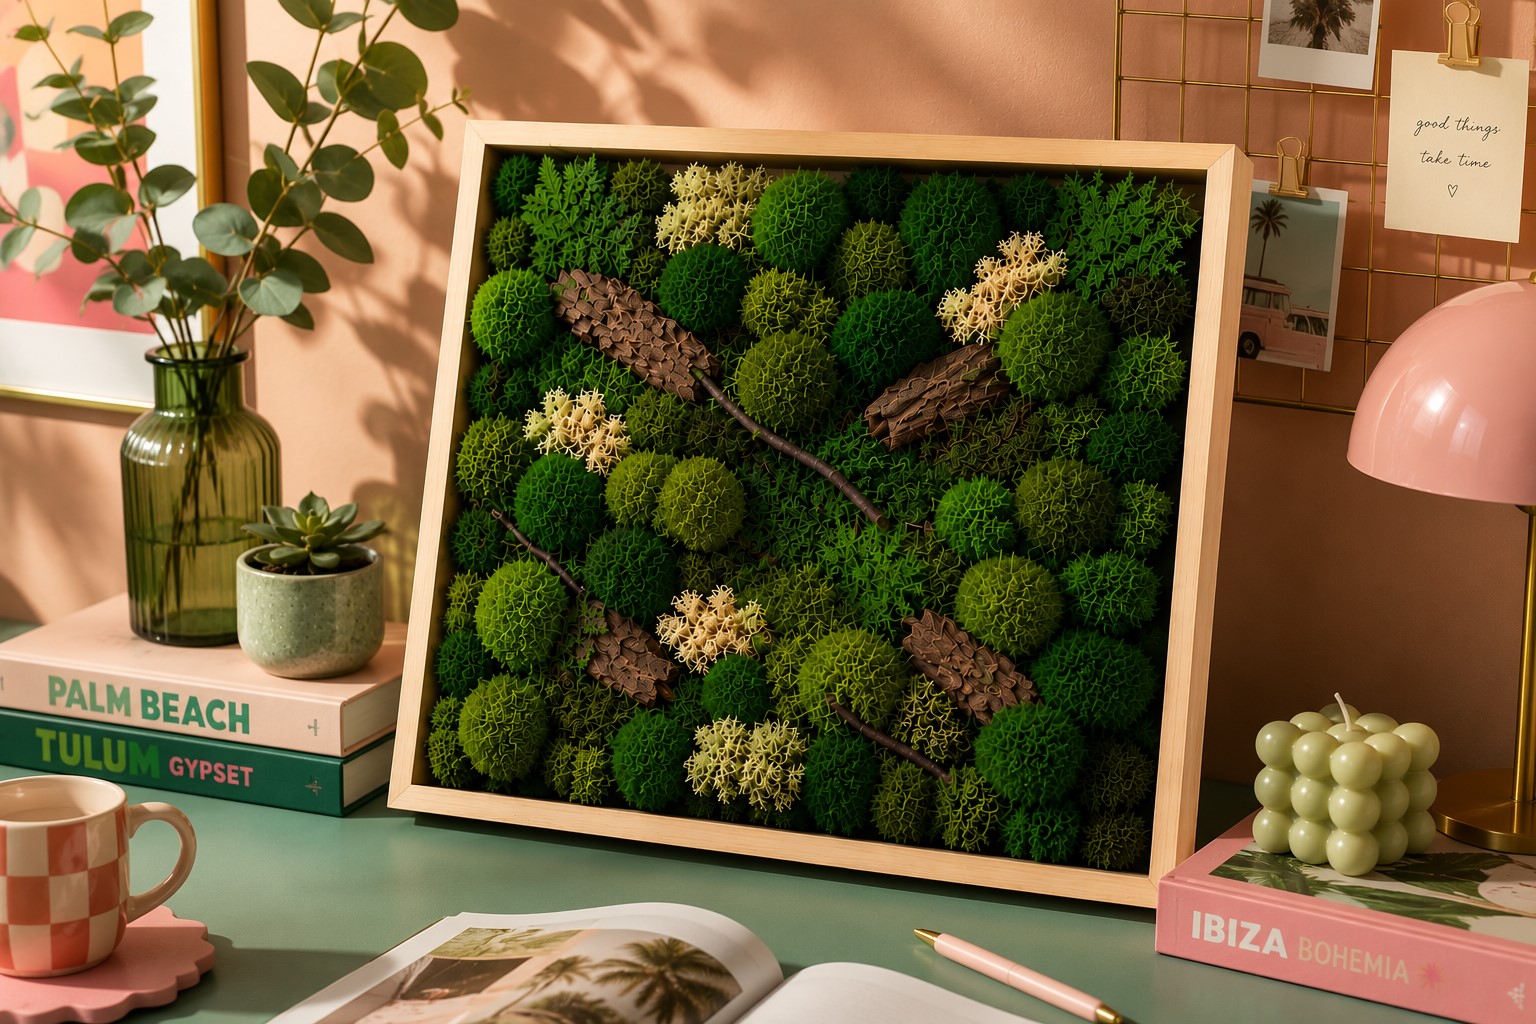
Keep building the layers until the artwork has a soft, rolling appearance. It should remind you of a peaceful forest floor instead of a flat green surface.
Step 6: Add More Texture and Depth
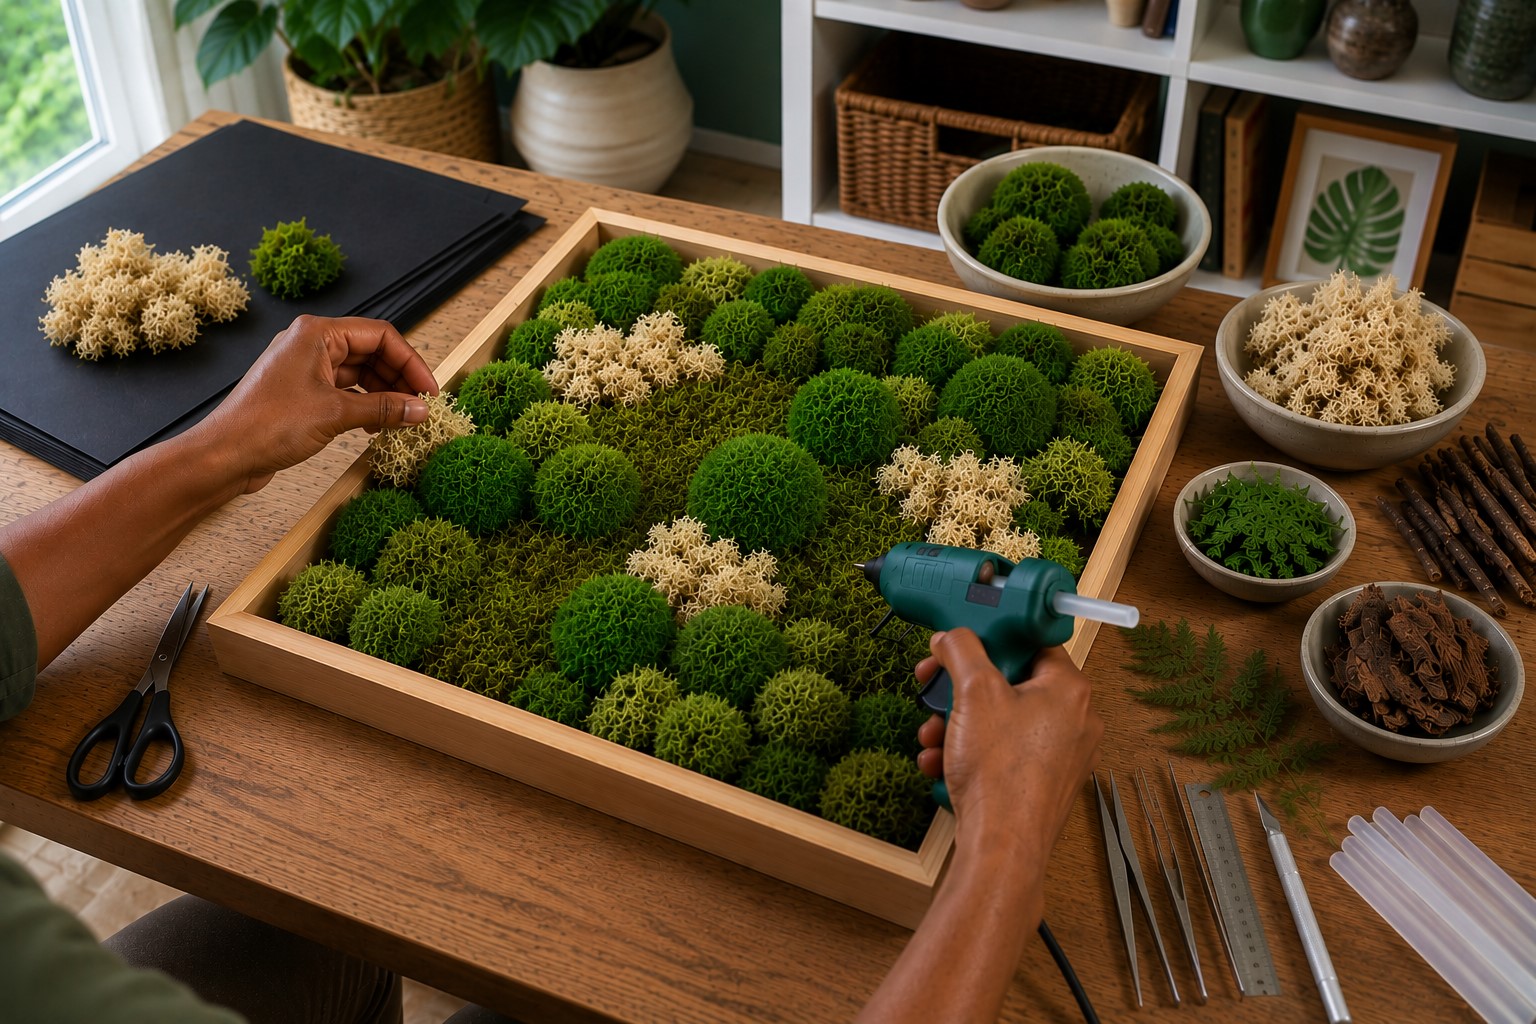
Pick up your preserved reindeer moss and gently pull it into smaller sections. Smaller pieces blend better with the rest of the design than large clumps.
Begin placing the reindeer moss between the mood moss and sheet moss. Let it fill the spaces naturally instead of covering the larger moss pieces.
As you work, leave a few areas where the sheet moss still shows through. This creates contrast and keeps the design from looking crowded.
Next, look for places that need a little more height. Add another small clump of mood moss if necessary. Then soften the edges with pieces of reindeer moss.
Step back often and look at the frame from several feet away. This gives you a better view of the overall balance. If one side looks heavier, move a few loose pieces before the glue cools.
Keep making small adjustments until your eyes move comfortably across the entire artwork. No single area should pull all the attention.
Step 7: Fill Every Gap Naturally
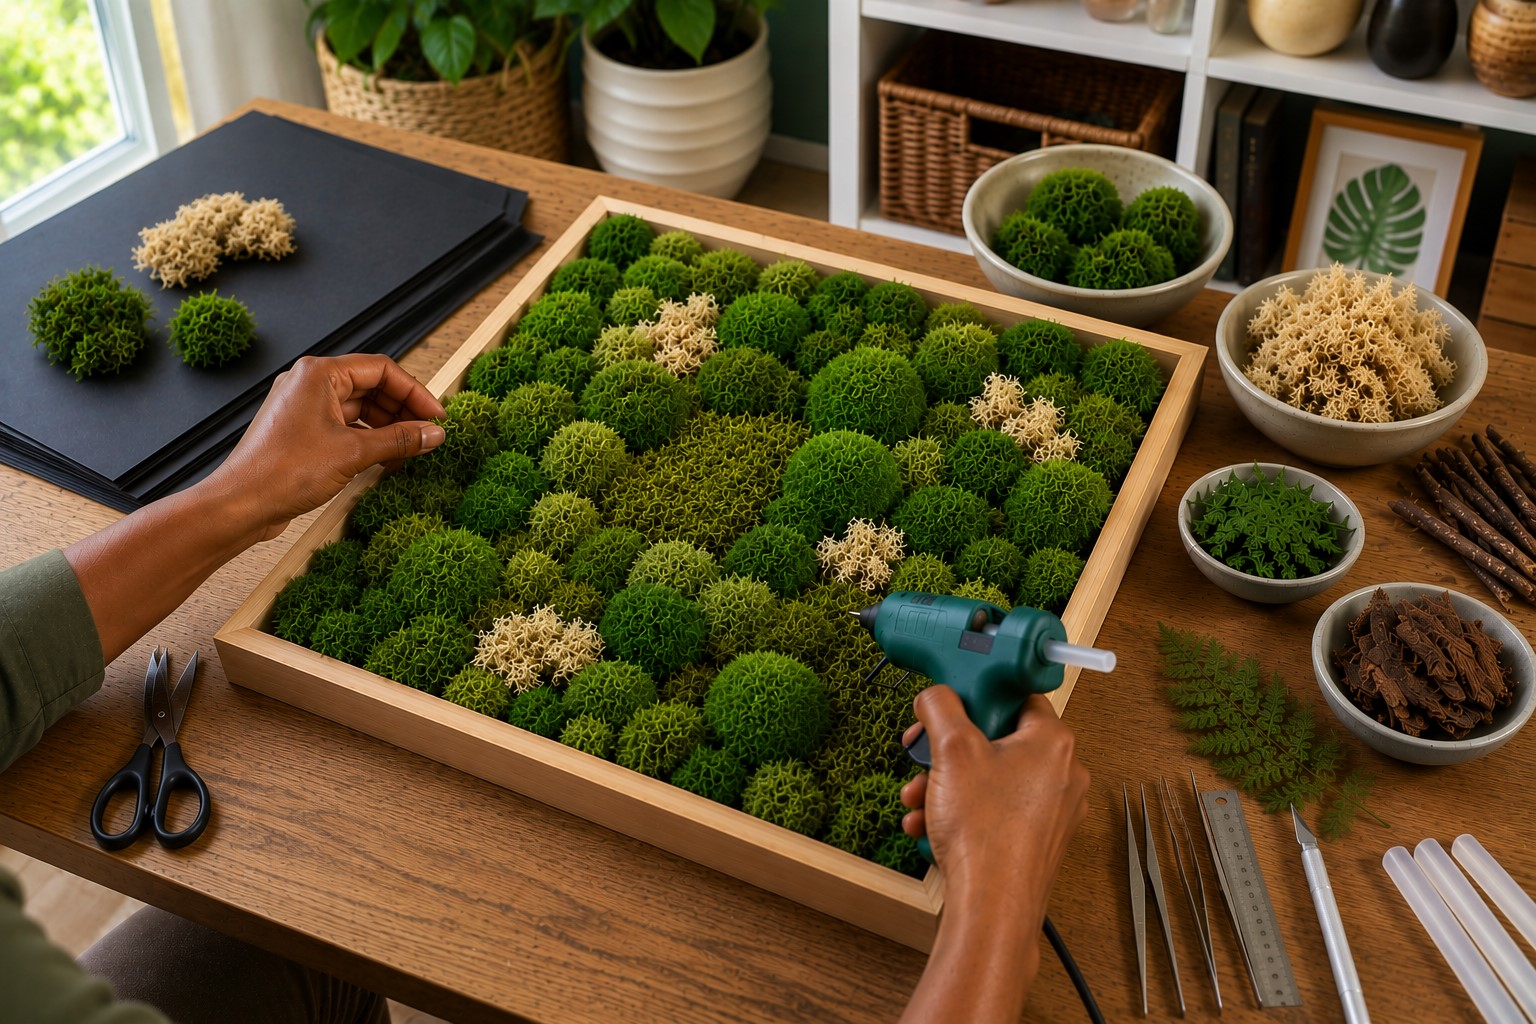
Little gaps can distract from an otherwise beautiful design. Filling them carefully helps your moss wall art look complete without making it feel overcrowded.
This step takes patience, but I never regret spending extra time here. I usually notice tiny spaces that I completely missed earlier. Once those gaps disappear, the whole design feels polished.
Blend Everything Together
Look closely at the spaces between the different moss types. Fill the larger gaps first because they stand out the most.
Use small pieces of reindeer moss to soften sharp edges. Tuck them gently into place with tweezers if your fingers cannot reach comfortably.
Next, check the corners of the frame. These areas often need extra attention because they can look empty after the larger pieces go in. Add just enough moss to blend them with the rest of the design.
If one area feels too full, remove a small piece before adding more somewhere else. Balance matters much more than using every piece of moss.
Run your fingers lightly across the surface after each adjustment. The moss should feel secure without large loose sections.
Finally, hold the frame upright for a moment. This simple test helps you spot pieces that may fall after hanging the artwork. Glue down anything that shifts before moving to the next step.
Step 8: Add Decorative Details
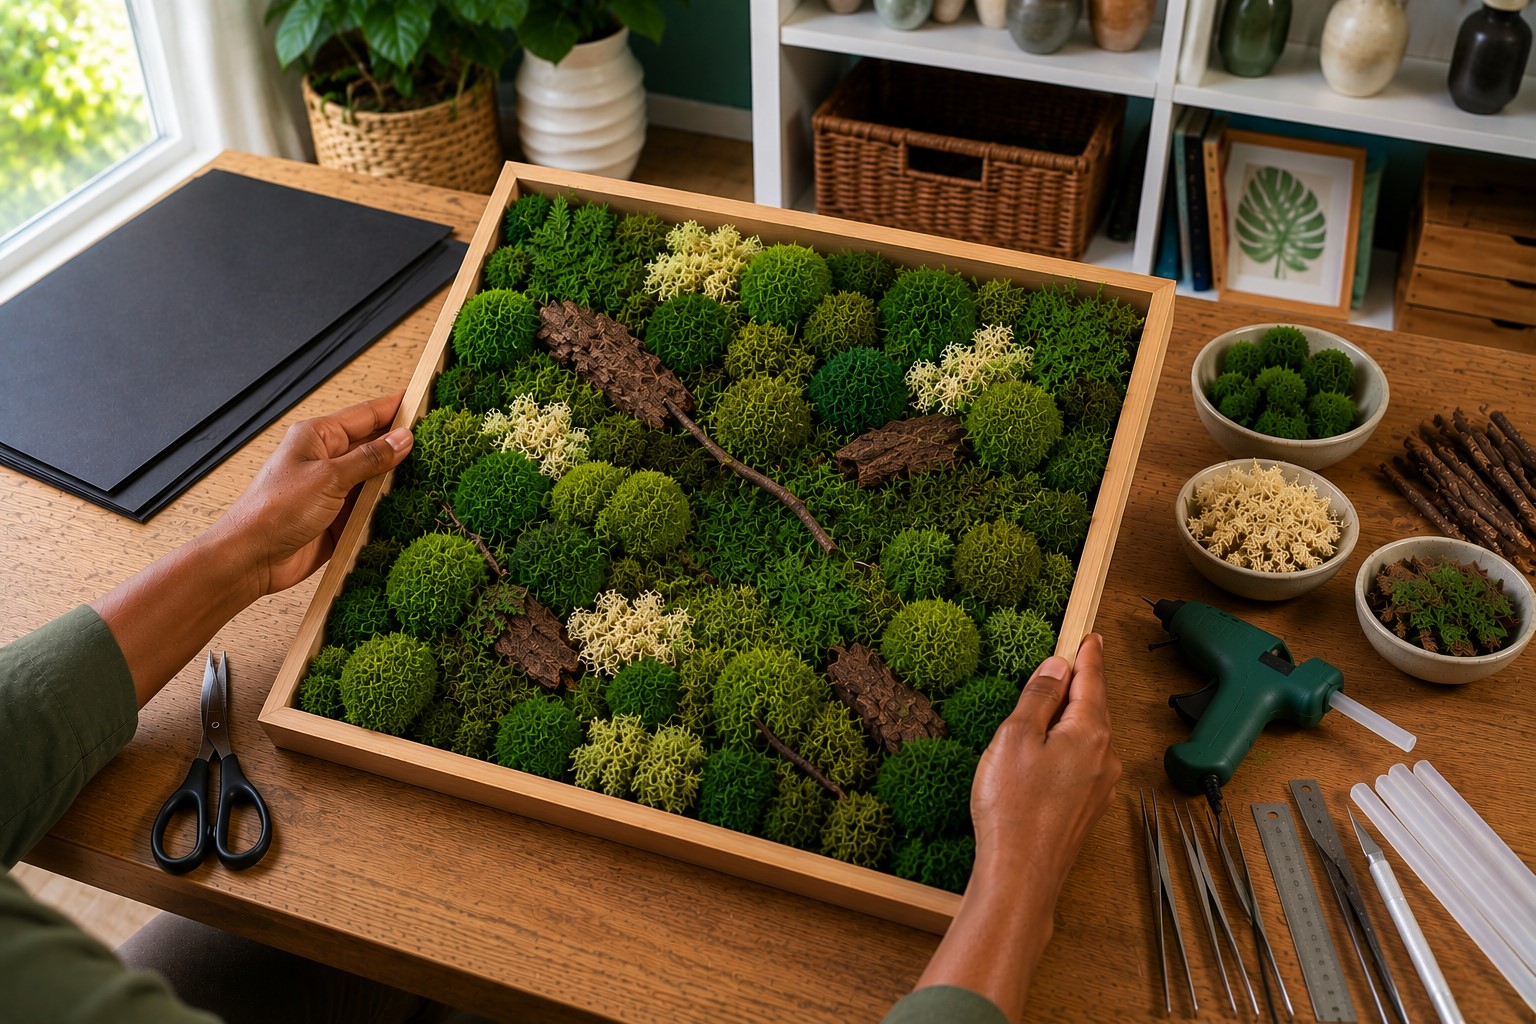
Your moss wall art already looks beautiful, but a few thoughtful details can make it feel even more special. The goal is not to cover the moss. Instead, you want to highlight its natural beauty.
I like keeping decorative elements simple. Choose natural accents that match the moss. Small preserved ferns, thin twigs, bark pieces, dried seed pods, or tiny branches all work well.
Place each item on the artwork before using glue. Move it around until it feels like part of the design instead of an object sitting on top.
Glue one decorative piece at a time. Press it gently into the moss so it blends naturally with the surrounding texture.
Avoid placing decorations in every corner. Leaving open areas allows the moss to remain the main attraction.
Once you finish, step back and admire your work from a distance. If your eyes notice the moss before the decorations, you have found the right balance.
Your artwork should now feel rich, natural, and ready for the final finishing steps.
Step 9: Secure Every Piece
Start at one corner of the backing board and work your way across the design. Gently press each section with your fingertips.
If a piece moves or lifts, add a small drop of hot glue underneath and hold it in place for a few seconds.
Next, look closely for visible glue strings. These thin strands often stretch across the moss without you noticing. Carefully pull them away with your fingers or tweezers.
Now check the edges of the design. Trim any moss that hangs too far over the backing board. Clean edges help the artwork fit neatly inside the frame and give it a professional finish.
After that, lightly shake the backing board over your work table. If any loose moss falls away, glue it back before continuing.
It is much easier to fix those pieces now than after hanging the artwork.
Finish this step by brushing away tiny moss crumbs with a soft paintbrush. A clean surface allows all the beautiful textures to stand out.
Step 10: Inspect the Finished Artwork
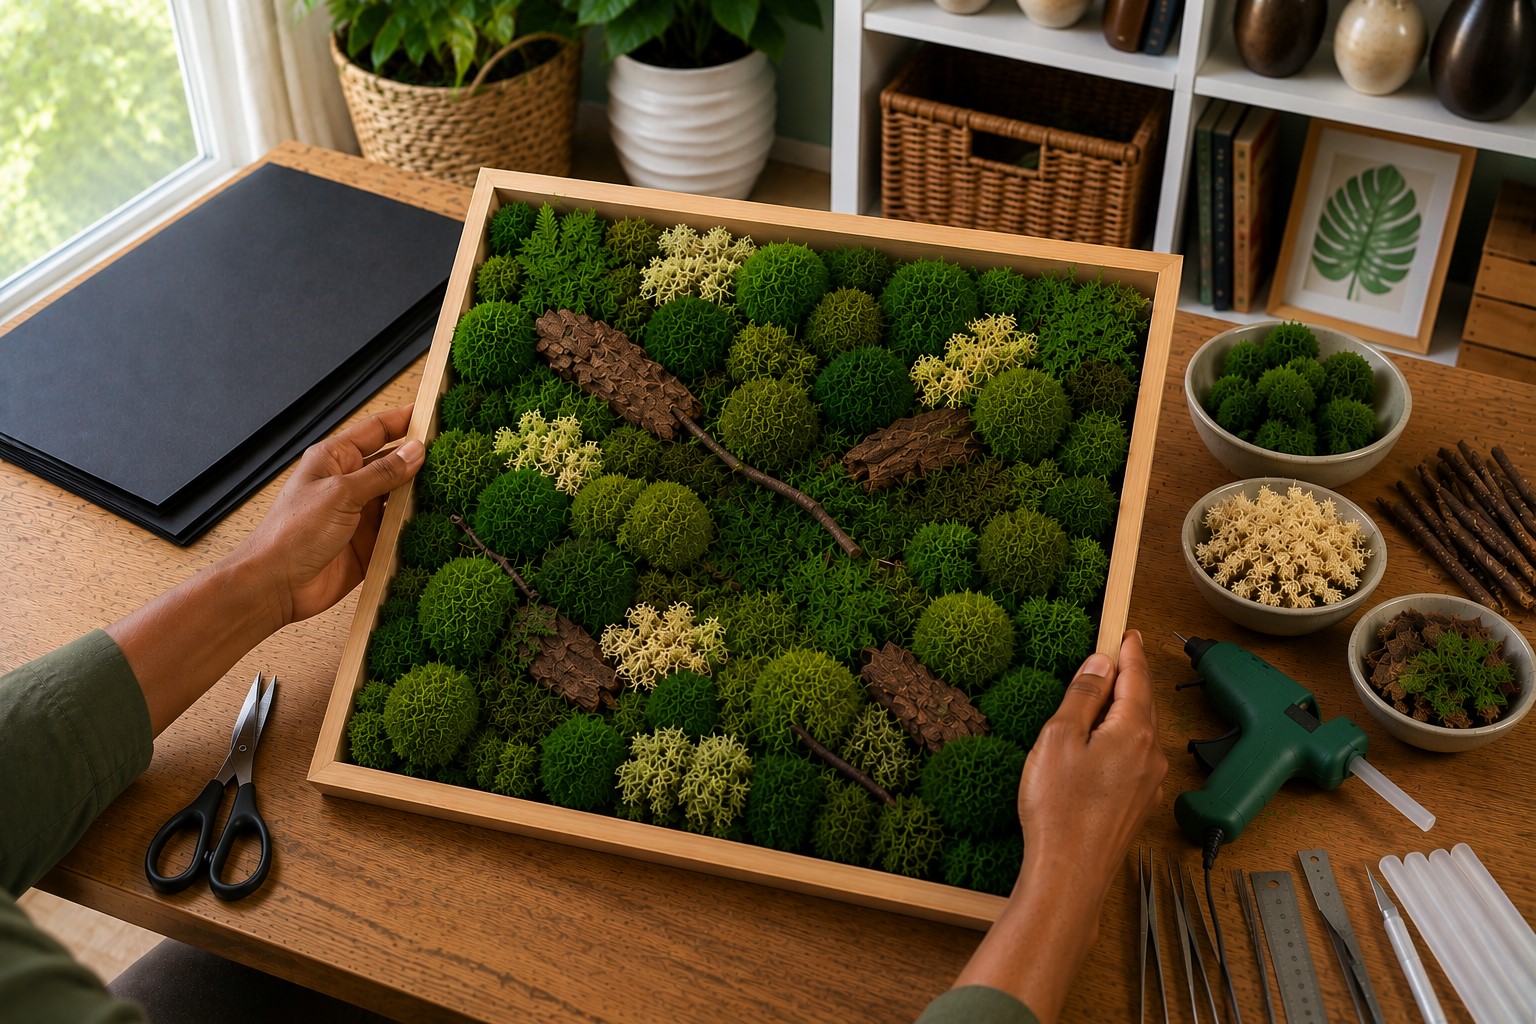
Place the frame where natural light reaches it. Then stand several feet away and study the overall design.
Look for empty spots, uneven sections, or decorations that draw too much attention. If something feels out of place, make small adjustments until everything looks balanced.
Next, check the frame itself. Wipe away fingerprints, glue marks, or dust with a soft cloth.
If you find a loose piece of moss, glue it down before hanging the artwork. Waiting until later often makes small repairs more difficult.
Finally, compare the finished piece with the photo you took during the planning stage. It is always fun to see how your original idea has grown into a beautiful piece of handmade décor.
Step 11: Display and Care for Your Moss Wall Art
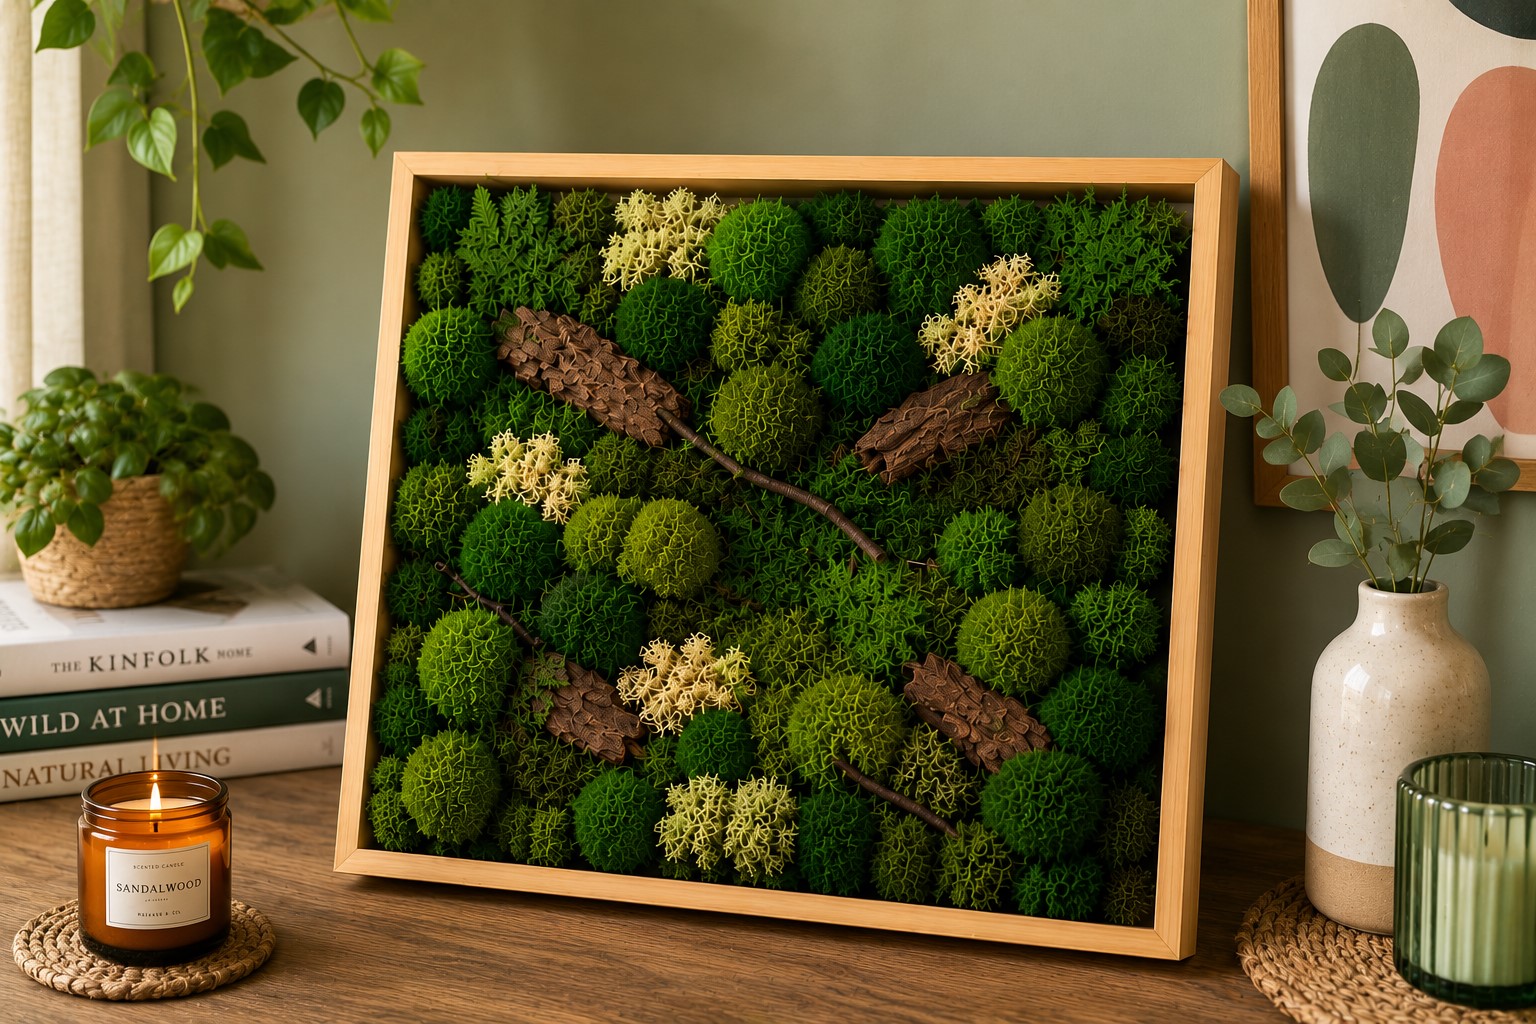
Many people worry that preserved moss needs watering just like a living plant. It does not. In fact, adding water can damage the moss and shorten its lifespan.
That simple fact makes this project perfect for busy homes.
Keep It Looking Beautiful for Years
Hang your artwork in a spot away from direct sunlight. Strong sunlight can slowly fade the rich green color over time.
Keep it away from fireplaces, heating vents, and other strong heat sources. Too much heat can dry the moss and make it feel brittle.
Avoid placing it in very damp areas where moisture collects regularly. Preserved moss lasts much longer in a dry indoor environment.
Every few weeks, remove dust with a soft paintbrush, a feather duster, or gentle bursts of compressed air. Handle the artwork carefully so you do not pull the moss away from the backing.
Most importantly, never water the moss. It already contains the treatment that keeps it soft and colorful. Simply leave it alone and enjoy its natural beauty.
With just a little care, your moss wall art can stay fresh-looking for many years and continue bringing warmth and texture to your home.
Common Mistakes to Avoid
Even simple craft projects can go wrong when you miss a few important details. The good news is that most mistakes are easy to avoid once you know what to watch for.
Take a few minutes to read through these tips before you begin. They can save you time, reduce frustration, and help you create a finished piece that looks clean and professional.
Using the Wrong Type of Moss
One of the biggest mistakes beginners make is buying live moss instead of preserved moss. Live moss needs moisture, sunlight, and the right growing conditions to survive.
It can also lose its fresh appearance indoors. Always choose preserved moss for this project. It already has a special treatment that keeps it soft and green without regular care.
Adding Too Much Glue
It is easy to think more glue means a stronger hold. In reality, too much glue can squeeze through the moss and create shiny spots that stand out.
Use small amounts of glue and add more only when needed. The moss should stay secure without showing the adhesive.
Filling Every Empty Space
Many people try to cover every inch of the backing board. That often makes the artwork feel crowded and heavy.
Leave a few small openings between different moss types. Those little spaces help create depth and make the design look more natural.
Ignoring the Overall Balance
Sometimes you become so focused on one corner that you forget to look at the whole design.
Step back often while you work. Looking from a distance helps you spot uneven sections before they become a problem.
Hanging the Artwork in Direct Sunlight
Preserved moss keeps its beautiful color for a long time, but direct sunlight can slowly fade it.
Choose a place with bright indoor light instead. Your artwork will stay vibrant much longer.
Final Thoughts
Making moss wall art may look difficult at first, but it becomes much easier once you break the project into simple steps.
By planning your design, choosing the right materials, and working patiently, you can create artwork that looks beautiful for years.
I hope this guide has shown you that you do not need expensive tools or professional experience to achieve great results.
I also hope you enjoyed learning How to Make Moss Wall Art as much as I enjoyed sharing the process with you.
One of my favorite parts of crafting is watching simple materials turn into something that completely changes a room.
Every project teaches you something new, so do not worry about making everything perfect the first time.
Now it is your turn to gather your supplies and start creating. Work at your own pace, trust your creativity, and enjoy every step along the way.
Before long, you will have a beautiful handmade moss wall art piece that brings lasting color, texture, and natural charm into your home without ever needing a drop of water.