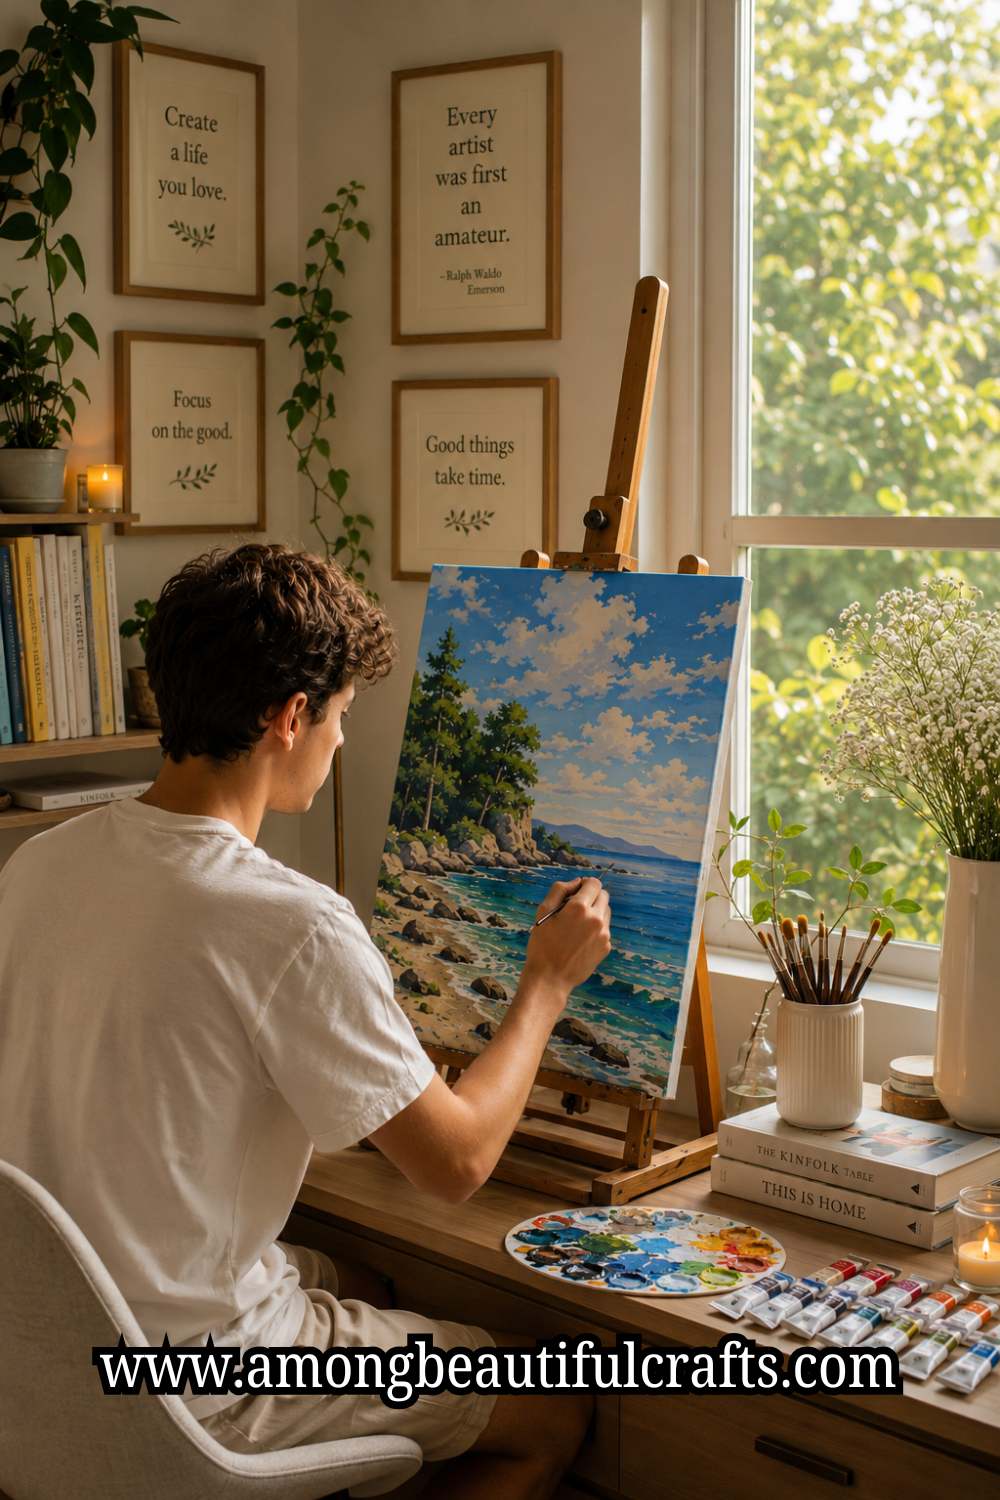
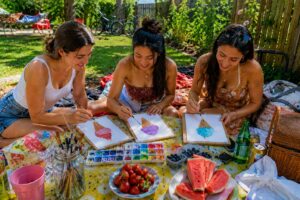
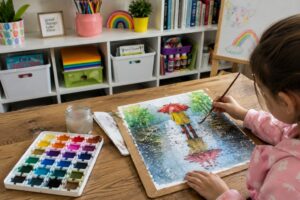
September has a way of arriving before you feel ready for it. One week it is the middle of summer and the next week the mornings are cooler and the back-to-school displays are already up at every store. If you have been meaning to try painting but keep pushing it to “later,” this is your sign to start now. Summer painting ideas for beginners are everywhere this season, and the warm months genuinely are the best time to pick up a brush for the first time.
If you enjoy seasonal creative projects beyond painting, 15 Summer Craft Ideas for Kids to Beat Boredom Without Screens offers plenty of simple ideas to keep creativity flowing all season long.
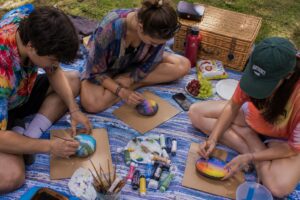
Painting as a beginner is not about producing gallery-worthy work. It is about giving yourself permission to make something imperfect and enjoy the process anyway. Watercolor bleeds in unexpected directions. Acrylic dries faster than you expect. Oil paint takes patience you did not know you had. Each of those surprises teaches you something that no tutorial video can fully prepare you for. Moreover, that hands-on discovery is exactly what makes painting so addictive once you start.
Summer makes the perfect backdrop for this kind of creative exploration. The light is golden and long. The subjects are everywhere; flowers, fruit, water, skies, and lazy afternoons that practically beg to be captured on paper. So clear some table space, lay down some newspaper, and work your way through as many of these ideas as you can before the season slips away.

What Paint Should a Beginner Start With?
Before going into the ideas, a quick word on paint types. Each medium behaves differently and suits different projects.
- Acrylic paint is the most beginner-friendly overall. It dries quickly, cleans up with water, and works on almost any surface. Additionally, mistakes can be painted over once dry, which removes a lot of the pressure from early attempts.
- Watercolor paint is beautiful and unpredictable. It rewards loose, relaxed technique and punishes overworking. Beginners who enjoy letting go of control tend to love it immediately.
- Gouache sits between acrylic and watercolor. It is opaque like acrylic but water-based and velvety like watercolor. Furthermore, it is forgiving enough for beginners who want rich, flat color without the permanence of acrylic.
- Tempera paint is inexpensive and widely available. It works well on paper and is ideal for anyone who wants to practice without spending much money on supplies.
19 Summer Painting Ideas for Beginners to Try Before September
1. Sunset Over Water
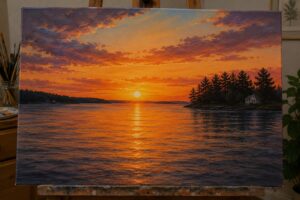
Mix red, orange, pink, and purple in horizontal bands across your paper or canvas. While the paint is still wet, drag a dry brush lightly across the color bands to blend the edges. Add a dark silhouette of trees, a pier, or a simple horizon line at the bottom. Sunsets are forgiving subjects because every version looks intentional. No two sunsets are ever exactly alike, which means yours cannot be wrong.
2. Single Sunflower Study

Paint a large circle in dark brown at the center of your canvas. Surround it with bold yellow petals painted one at a time from the outside inward. Add a second ring of shorter petals between the first ring and the center. Paint a simple green stem downward from the flower. This is one of those summer painting ideas for beginners that produces a result far more impressive than the skill level required to make it.
Sunflower artwork pairs naturally with How to Make Paper Sunflowers That Look Beautiful All Summer Long, especially if you enjoy creating seasonal flower-themed décor.
3. Watercolor Lemons
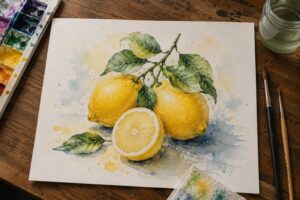
Paint a loose yellow oval for the lemon body. Add a small bump at each pointed end. Drop a little green into the wet yellow at one end for a natural tonal variation. Paint a small green stem and a tiny leaf beside it. Add a thin white highlight streak across the yellow surface while it is still damp. Group three lemons together on the page for a composition that feels complete and cheerful.
4. Abstract Color Block Painting
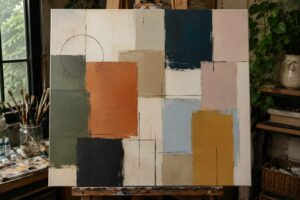
Divide your canvas into irregular geometric sections using masking tape. Paint each section a different solid color. Remove the tape while the paint is still slightly wet for the cleanest lines. The geometric shapes do not need to follow any logic or pattern. Abstract color block paintings are genuinely impossible to get wrong, which makes them a perfect first project for someone who feels intimidated by representational painting.
Creative beginner projects like this share the same approachable spirit as 25 Easy Art Projects for Kids That Look Amazing on Pinterest, where simple techniques produce eye-catching results.
5. Simple Succulent Pot
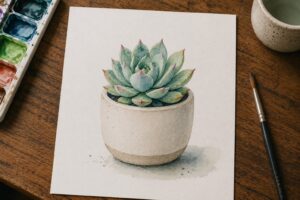
Paint a simple terracotta-colored pot shape in the lower center of your paper. Add a rounded green mound above the pot rim. Paint individual succulent leaves in teardrop shapes radiating outward from the center of the mound. Use two or three shades of green to vary the leaves. Add a thin line of lighter green along the top edge of each leaf for a highlight. This small subject is easy to control and looks lovely framed on a windowsill shelf.
6. Watercolor Galaxy

Wet your paper entirely with clean water first. Drop dark blue, purple, and black watercolor onto the wet surface and watch the colors bloom outward. While still wet, add tiny white dots using the tip of a brush handle dipped in white gouache or acrylic. Drag a fine brush loaded with white paint in a gentle arc across the dark background for a milky way effect. The wet paper does most of the creative work for you.
Galaxy-inspired artwork often appeals to crafters who enjoy imaginative projects like 23 Finger Painting Ideas for Kids That Spark Big Creativity, where experimentation is encouraged.
7. Tropical Leaf Study
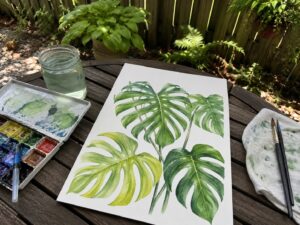
Paint a large elongated leaf shape in bright green. Add a bold white or yellow center vein down the length of the leaf. Paint smaller veins branching outward from the center on both sides. Add a second overlapping leaf in a slightly different green beside the first. Tropical leaves suit bold, confident brushstrokes. Do not fuss over the edges; loose, slightly imperfect leaf outlines look more natural than rigidly controlled ones.
Nature-inspired subjects like this often complement 19 Easy Nature Crafts for Kids That Turn Outdoor Finds Into Art, especially for creative people who enjoy bringing outdoor elements into their projects.
8. Ice Cream in a Cone
Paint a simple triangle cone shape in a warm tan color. Add two rounded scoops stacked above the cone rim; one pink and one white, or any flavor combination you prefer. Paint a small chocolate drip running down one side of the top scoop. Add tiny sprinkle dashes across both scoops using a thin brush. This painting subject is unambiguously fun and makes a great print to display in a kitchen or gift to a friend.
9. Ocean Waves
Start with a wide band of deep navy at the top of your canvas. Work downward through lighter blues toward a pale seafoam at the bottom. Paint a curved wave crest in white across the lower third of the canvas. Use short choppy horizontal brushstrokes in white and light blue to suggest breaking water below the crest. Add a few small white foam streaks in the dark water behind the wave. Ocean paintings photograph beautifully and look stunning in natural wooden frames.
Beach-inspired artwork can also spark ideas from 15 Beautiful Things You Can Make With Seashells, especially if you enjoy coastal-themed décor and crafts.
10. Simple Floral Bouquet
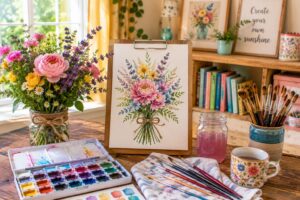
Paint a rough vase or jar shape at the bottom center of your paper. Add loosely painted circles and oval shapes in different sizes above the vase rim for flower heads. Use pinks, yellows, whites, and corals. Paint thin curved stems connecting the flowers to the vase. Tuck small leaf shapes between the stems. Finally, add tiny dot details at the center of each flower. Loose, imprecise bouquet paintings are one of the most searched summer painting ideas for beginners online for good reason; they are forgiving, fast, and genuinely pretty.
Floral artwork pairs beautifully with 21 Creative Ways to Use Dried Flowers in Your Home Décor, where flowers become long-lasting decorative pieces throughout the home.
11. Watermelon Slice
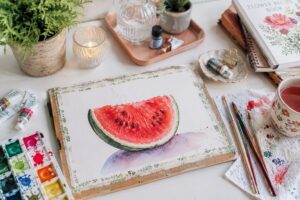
Paint a large triangle with a curved base in bright red or deep pink. Add a thin green rind along the curved bottom edge with a lighter green stripe inside it. Dot small black oval seeds across the red section while the paint is still wet. Add a thin white highlight along the top curved edge of the rind. Paint two or three of these slices overlapping each other for a composition that feels full and summery immediately.
12. Full Moon Night Sky
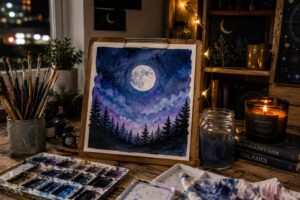
Paint the entire canvas in deep navy or black. Let it dry completely. Paint a large perfect circle in pale yellow or soft white near the upper center of the canvas. Use a round object as a template if needed. Add a soft outer glow by dry-brushing very pale yellow in a wider halo around the moon circle. Paint a simple dark silhouette of rooftops, trees, or a lone figure at the bottom. Negative space does most of the compositional work in this subject.
13. Pineapple Portrait
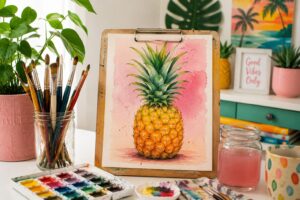
Paint an oval pineapple body in golden yellow. While wet, add a few diagonal crosshatch lines across the surface in a deeper amber. Paint a crown of spiky dark green leaves bursting from the top. Add a thin highlight of pale yellow or white along one side of the body. Pineapples have a strong recognizable shape that reads clearly even in a loose beginner style. They also make excellent greeting card designs once framed and photographed.
Fruit-themed creative projects fit nicely alongside 17 Summer Paper Craft Ideas Kids Can Make During the Holidays, another collection filled with colorful seasonal inspiration.
14. Rainy Day Puddle Reflection
Paint a grey-blue sky filling the top two-thirds of your paper. Reflect the same grey-blue tones in a puddle shape at the bottom. Add a blurred upside-down version of any simple shapes in the sky; a streetlamp, a tree outline, or a building silhouette; reflected in the puddle below. Blur the reflection edges with a wet brush. Rain paintings feel moody and atmospheric in a way that cheerful subjects sometimes cannot achieve.
15. Butterfly on a Flower
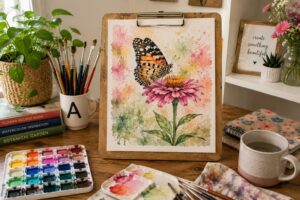
Paint a simple daisy or wildflower first and let it dry. Then paint a butterfly perched on the top petal. Start with the wing shapes; two large upper wings and two smaller lower wings. Fill each wing section with color and add simple dot and line markings along the wing edges. The flower gives the butterfly a natural resting place and makes the overall composition feel complete and balanced.
Flower-inspired artwork often connects beautifully with How to Make Beautiful Summer Pressed Flower Resin Jewelry, where blooms become wearable pieces of seasonal art.
16. Painted River Rocks Triptych
Find three flat smooth rocks of similar size. Paint each one with a different summer subject; a sun, a wave, and a flower. Keep each design simple and bold so it reads clearly on the small surface. Seal with clear varnish when dry. Arrange the three rocks together as a small triptych display on a shelf or windowsill. This counts as a painting project because the rock surface behaves similarly to a small canvas panel.
Creative projects that transform simple materials are one reason 29 Toilet Paper Roll Crafts for Kids That Are Surprisingly Cute continue to inspire crafters looking for budget-friendly ideas.
17. Loose Peony
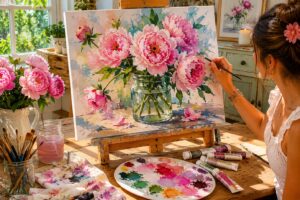
Paint a rough circle as a guide for the flower head. Build the peony from the outside inward by painting curved C-shaped petals in overlapping rings. Use varying shades of pink; deep rose on the outer petals and pale blush toward the center. Leave a small unpainted gap at the very center. Add a few green sepals peeking out from beneath the outer petals. Peonies look complex but are built from the same C-stroke repeated at different scales and angles.
18. Summer Market Fruit Bowl
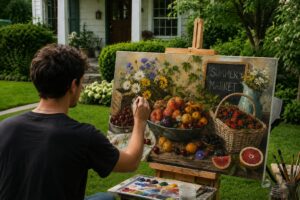
Paint a simple bowl or plate shape at the base of your composition. Fill it with overlapping round shapes; a red apple, a yellow pear, a cluster of purple grapes, two orange segments. Paint each fruit loosely and allow the colors to slightly overlap at the edges. Add a cast shadow beneath the bowl in a cool grey-blue. Still life fruit paintings have been a beginner staple for centuries because the subjects hold still, the shapes are familiar, and success comes quickly with practice.
Handmade table décor and display pieces often complement 15 Summer Resin Craft Ideas That Make Beautiful Home Décor, especially if you enjoy creating seasonal accents for your home.
19. Golden Hour Field

Paint the sky in warm amber and golden yellow from the top down. Blend into a strip of burnt orange near the horizon line. Paint a flat dark green or brown field across the lower third of the canvas. Add tall thin strokes of dark green and black above the field line to suggest distant trees or grass. Dot small bright spots of yellow and white in the field for wildflowers catching the last of the light. Golden hour field paintings are deeply satisfying to look at and even more satisfying to make.
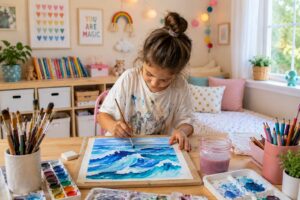
Tips for a Beginner’s First Painting Session
- Start small: A half-sheet of watercolor paper or a small 8 by 10 canvas is far less intimidating than a large blank surface. Smaller formats also dry faster, which means you see results sooner and stay motivated throughout.
- Do not rinse your brush in dirty water: Keep two water jars on your table; one for rinsing and one for mixing. Dirty mixing water muddies every color you use and makes your painting look dull before it is even finished.
- Let layers dry between applications: Wet paint on wet paint from the same brush creates muddy, unintended blends. Patience between layers is one of the simplest habits that separates a frustrating painting session from an enjoyable one.
- Paint the background before the subject: Painting around a detailed subject is much harder than painting the subject over a dry background. This single habit makes beginners feel immediately more capable.
- Use reference images freely: Looking at a photo while you paint is not cheating. Professional artists use reference constantly. A good reference image gives your eye something concrete to interpret rather than asking your imagination to generate every detail from scratch.
Creative practice projects are also encouraged in 21 Paper Plate Crafts for Kids That Are Cheap, Easy and Adorable, where simple materials help build artistic confidence.
Final Thoughts
Nineteen painting ideas is enough to fill the rest of summer several times over, but the goal was never to complete every single one. The goal is to find two or three subjects on this list that make you genuinely curious; the ones where you think “I wonder if I could actually do that”; and start there. Curiosity is a far more reliable motivator than discipline when it comes to learning something new. Follow it and the brush time will take care of itself.
What tends to happen with beginner painters is that the first session feels awkward, the second feels better, and somewhere around the fourth or fifth painting something clicks. The brush starts to feel familiar. Color mixing becomes more intuitive. The gap between what you see in your head and what appears on the paper begins to close. That shift does not happen by thinking about painting or watching tutorials; it happens by actually picking up a brush and making something imperfect on purpose.
For anyone who enjoys experimenting with different creative materials, 27 Animal Clay Crafts for Kids That Are Cute Beyond Words offers another fun way to keep building artistic skills beyond painting. Summer is exactly the right season to let that process begin.
