Every Father’s Day, store shelves fill up with the same things. Mugs. Ties. Gift cards in envelopes that took thirty seconds to pick out. Dads smile politely and say thank you, but deep down everyone knows the gift wasn’t exactly personal.
It becomes a routine. The same stores, the same sections, the same ideas recycled year after year. Nobody plans to give a forgettable gift.
It just happens when there’s no time, no inspiration, or no idea where to start. This year can be different. A Clay Fathers Day Gift Tutorial doesn’t require artistic talent or expensive tools.
It just requires a little time and the willingness to make something with your own hands. That small shift changes everything about how a gift feels, both to give and to receive.
If you’re looking for even more handmade inspiration, these Clay Father’s Day gift ideas offer plenty of thoughtful options.

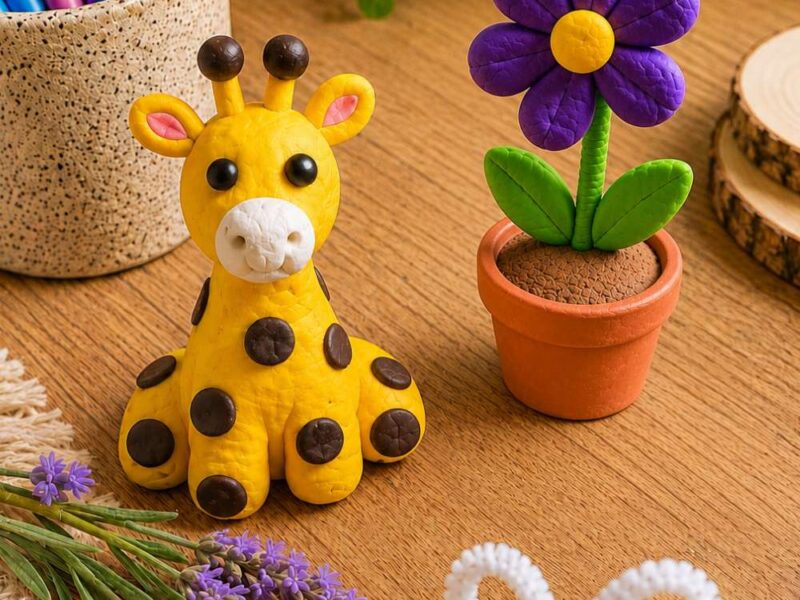
Clay gifts carry something store-bought items simply can’t have. Every deliberate mark, every smooth curve, every small imperfection tells a story about the person who made it.
That visible effort is exactly what makes a handmade gift feel special rather than obligatory. There’s a difference between handing someone a box and handing someone something you actually built.
One says you remembered. The other says you cared enough to sit down, roll up your sleeves, and create something from nothing.
So, whether you’re making this with young kids or flying solo on a quiet evening, the process itself is worth every minute. The laughter, the mess, and even the crooked edges are all part of what makes it meaningful.
This guide covers the entire process from start to finish. You’ll learn how to prepare your clay, shape and carve it, add personal details, and finish it properly so it lasts.
No pottery wheel needed. No kiln required. Just air-dry clay, basic tools, and a little patience. Each step is broken down simply so anyone can follow along without feeling overwhelmed.
Even if you’ve never touched clay before or you’ve made a few things in the past, this tutorial meets you where you are. By the end, you’ll have a finished gift that looks thoughtful because it genuinely is.
How to Make a Clay Father’s Day Gift That Looks Thoughtful
Step 1 : Prepare Your Clay Properly
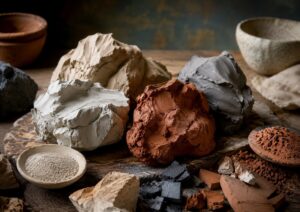
Most people skip this step entirely. That’s a mistake. Properly conditioned clay is easier to shape, less likely to crack, and produces a much smoother finished surface.
Start by tearing off the amount of clay you need for your project. Then, knead it firmly in your hands for two to three minutes. Think of it like kneading bread dough.
Work it back and forth, pressing and folding repeatedly. This process warms the clay up and makes it soft, pliable, and easy to work with.
Furthermore, check for air bubbles while kneading. Press the clay flat occasionally and look for small hollow spots beneath the surface.
Air bubbles cause cracks and weak spots as the clay dries. So, knead them out completely before shaping anything.
Keep unused clay wrapped tightly in a plastic bag or cling film while you work. Air-dry clay lives up to its name; it starts hardening the moment it’s exposed to open air.
So, you should only take out what you need for each stage of the project.
Step 2: Shape Your Piece
This is where the project actually begins taking form. The shaping stage sets the foundation for everything that comes after it. Place your kneaded clay onto the wax paper.
Use your rolling pin to flatten it into an even slab if you’re making something flat like a dish, tablet, or decorative tile. Roll from the center outward in smooth, consistent strokes.
Aim for an even thickness throughout; about half an inch works well for most beginner projects.
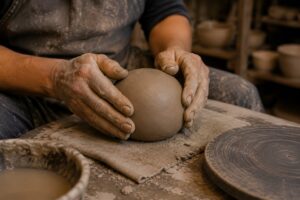
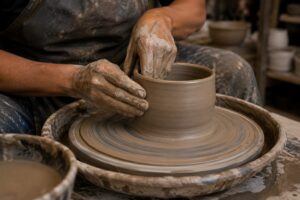
For rounder or three-dimensional shapes, use your hands to mold the clay directly. Roll it between your palms for smooth spheres. Press and pinch the edges to build walls for a small pot or vessel.
Work slowly and check the shape from multiple angles as you go. Many crafters who enjoy shaping clay by hand also enjoy making Shark Clay Crafts Kids Will Love Making Again and Again because many of the same molding and sculpting techniques apply.
Smooth the surface regularly with damp fingers during shaping. Don’t let the surface dry out while you’re still working on it. A light touch of water fills small cracks and keeps the clay workable for longer.
But, you should try to avoid using too much water at once. Oversaturating the surface weakens the clay and causes it to become sticky and difficult to handle.
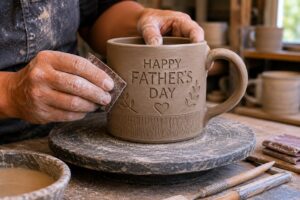
Step 3: Refine the Edges
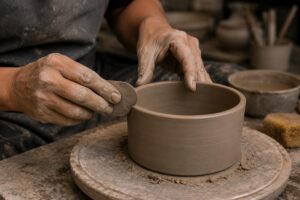
Edges are what separate a rushed-looking piece from one that looks genuinely well-made. Rough, uneven edges immediately signal that a project was hurried.
Clean edges signal care and intention. Run a damp finger slowly along every outer edge of your piece. Apply gentle, consistent pressure as you go.
This rounds sharp corners and smooths out uneven sections naturally. For straighter edges, use the flat side of your toothpick or a butter knife to press and straighten the clay while it’s still wet.
Additionally, check the bottom of your piece. Flat-bottomed items need a truly even base so they sit stable without rocking.
Press the piece gently onto the wax paper and check whether all edges make contact with the surface. Adjust any raised sections with light finger pressure before the clay sets.
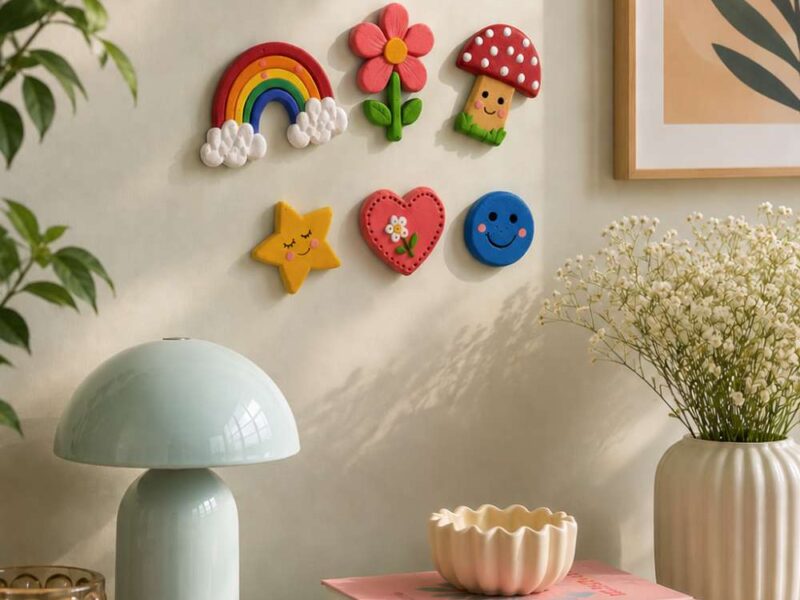
Step 4: Add Personal Details and Texture
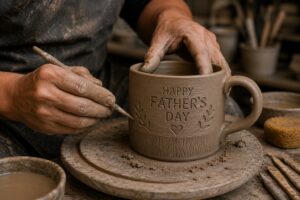
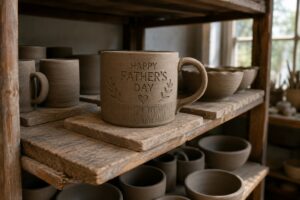
This is the step that transforms a plain clay piece into something genuinely meaningful. Personal details are what make the finished gift feel specific to your dad rather than generic.
Use your toothpick to carve letters, words, or short messages directly into the surface of the wet clay. Press firmly enough to leave a clear, visible line without cutting all the way through.
Short, honest phrases work best. A name. A year. A single word that means something between you. As a result, the carving becomes a permanent part of the piece rather than just decoration added on top afterward.
For texture, there are several simple techniques that look impressive without requiring skill. Press a piece of lace fabric lightly against the clay surface and peel it away slowly.
This leaves a delicate fabric pattern behind. Alternatively, press a coin, a leaf, or any object with an interesting surface against the clay. Each one transfers its texture cleanly onto the piece.
Natural textures like leaves can create effects similar to those used in 19 Easy Nature Crafts for Kids That Turn Outdoor Finds Into Art.
Dot patterns are another beginner-friendly option. Use the back end of your toothpick to press small, evenly spaced dots across the surface in rows or circular patterns.
Moreover, combining dot patterns with carved lettering creates a finished look that feels intentional and well-designed.
Step 5: Dry Your Piece Correctly
Drying is where most homemade clay projects go wrong. Rushing this stage or drying the piece incorrectly causes warping, cracking, and surface damage that can’t be undone.
Place your finished piece on a flat, dry surface away from direct sunlight, heating vents, and open windows. All three cause the clay to dry unevenly.
Uneven drying is the main reason flat pieces curl at the edges and round pieces develop lopsided cracks.
Thin pieces typically dry in about 24 hours. Thicker pieces need at least 48 hours before they’re ready to paint or handle. Don’t test dryness by pressing the surface.
Instead, pick the piece up and check the bottom. If the underside still feels cool or slightly soft, it needs more time. Patience during the drying stage is important in many crafts, including How to Press Flowers at Home Without Them Turning Brown, where rushing the process often leads to disappointing results.
Flip the piece over halfway through the drying period if it’s flat. This allows both sides to dry evenly and prevents the bottom from staying damp while the top hardens.
Also, placing a light flat object like a book on the corners during the first few hours of drying prevents the edges from curling upward as moisture leaves the clay.
Step 6: Sand the Surface Lightly
Once your piece is completely dry, run fine-grit sandpaper lightly across the surface. This step smooths out any remaining rough patches and creates a better surface for paint to grip.
Use gentle circular motions and don’t press too hard. Air-dry clay is solid but not as hard as kiln-fired ceramic. Too much pressure causes surface crumbling rather than smoothing.
Pay particular attention to the edges during sanding. These tend to be the roughest areas on any clay piece. A few seconds of careful sanding around each edge makes an enormous difference in how polished the finished gift looks.
Wipe away all clay dust with a slightly damp cloth after sanding. Let the piece sit for another 15 to 20 minutes before moving on to painting. In addition, don’t skip this step even if the surface already looks smooth.
Paint always reveals surface imperfections that aren’t visible on bare clay. Careful preparation also makes a big difference when learning How to Make Your First Resin Art Piece Without Making a Mess, where small imperfections become much more noticeable once the project is finished.
Step 7: Paint Your Piece

Painting is where your clay gift picks up personality and visual life. Approach this stage methodically rather than diving straight into colors and details.
Start with a primer coat of white acrylic paint across the entire surface. Even if you plan to paint the piece a dark color, the white primer helps every subsequent color appear more vivid and true.
Let the primer coat dry completely before adding any color; usually about 20 to 30 minutes for a thin coat.
Apply your base color next. Use smooth, even strokes and work in one direction. Two thin coats always look better than one thick one. Thick coats drip, bubble, and take far longer to dry.
So, apply a thin first coat, let it dry, and then apply a second coat for full, even coverage. Many beginners gain confidence with color by trying simple projects such as 23 Finger Painting Ideas for Kids That Spark Big Creativity, where experimentation is encouraged.
Add detail colors last using your thinnest brush. Painted lettering over carved grooves looks particularly striking. Fill the carved lines with a contrasting color; white over dark backgrounds, dark over light ones.
Use a steady hand and work slowly. There’s no rush at this stage. Patience here is what separates a good result from a great one.
Step 8: Seal the Finished Piece

Sealing is the final and most important protective step. An unsealed clay piece scratches easily, absorbs moisture, and loses color quickly with handling.
A properly sealed piece feels solid, looks polished, and lasts for years. Apply Mod Podge or a clear acrylic sealant using a wide brush.
Work in smooth, even strokes across the entire surface including the bottom and edges. Let the first coat dry completely before adding a second. Two coats provide significantly better protection than one.
For pieces that will be handled daily; like a keychain or a small dish used on a desk; apply three coats of sealant for maximum durability. Also, if the piece will sit outdoors, use a waterproof outdoor sealant specifically designed for porous surfaces.
Standard indoor sealants break down quickly when exposed to rain and direct sunlight. Let the final sealant coat cure for at least two hours before wrapping or gifting the piece.
Sealant that looks dry to the eye can still be slightly tacky underneath. Wrapping too soon causes the tissue paper or packaging to stick directly to the surface.
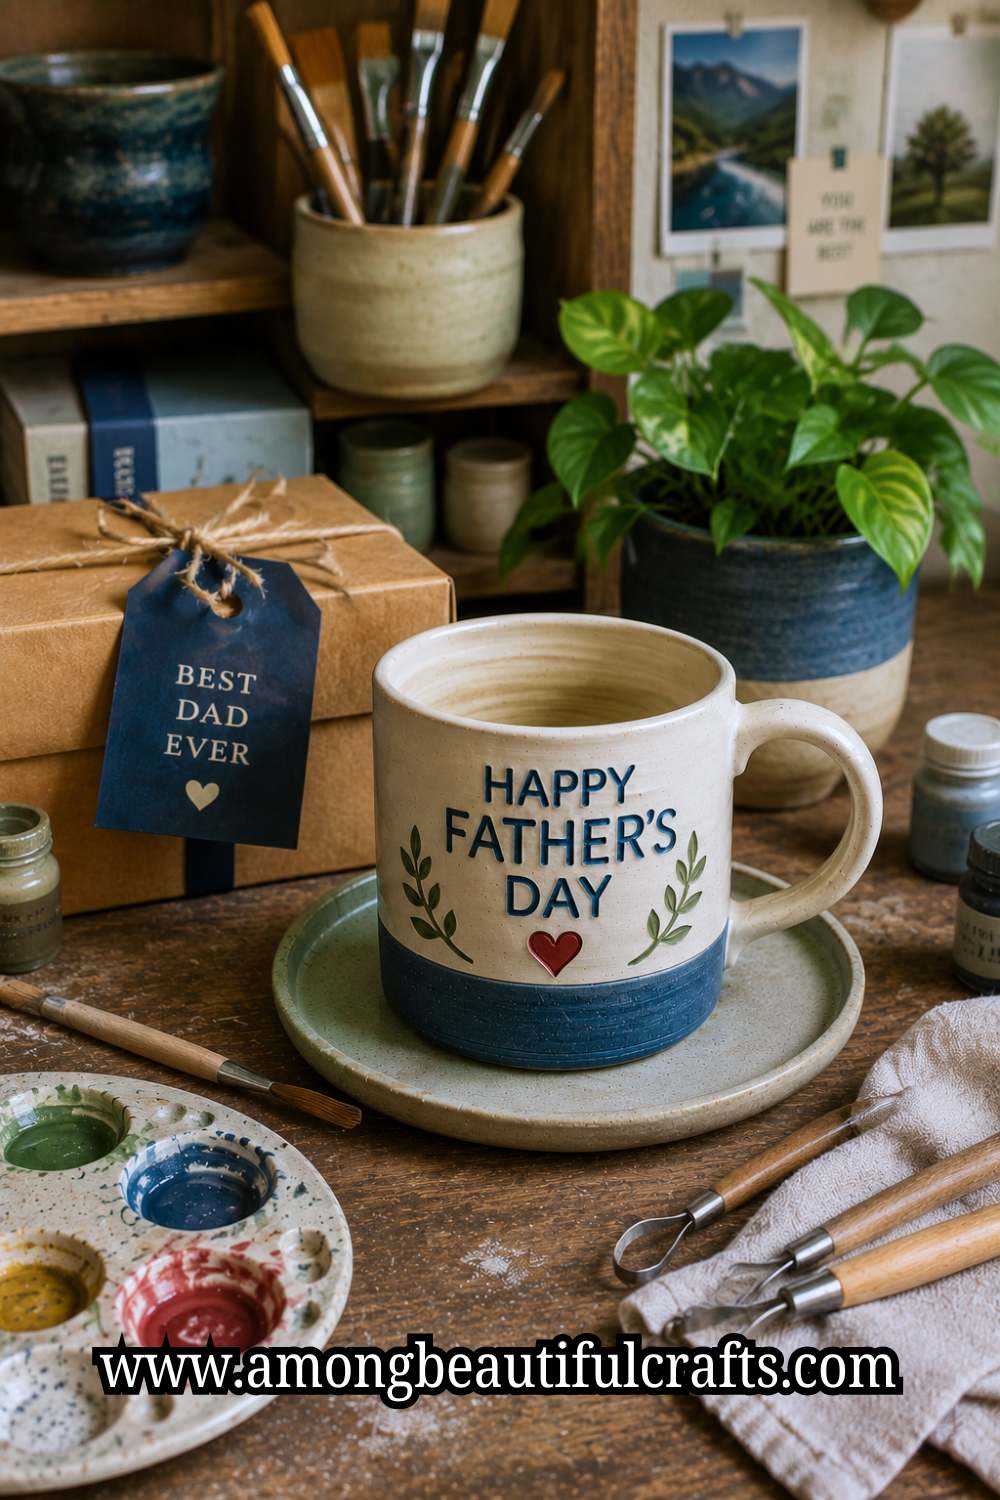
Packaging the Finished Gift

A beautifully made gift deserves packaging that matches the effort inside. Toss the plastic gift bags and generic wrapping paper for this one.
Line a small box with tissue paper in a color your dad would appreciate. Nestle the clay piece inside so it sits securely without shifting around. Tuck a short handwritten note beside it. Keep the note genuine and brief.
Three honest sentences land harder than a full paragraph of forced sentiment. Wrap the box in simple kraft paper and tie it with a ribbon or twine.
A small sprig of dried herbs or a few dried flowers tucked under the ribbon adds a thoughtful finishing touch without adding cost.
Ideas from 21 Creative Ways to Use Dried Flowers in Your Home Décor can help you make the presentation feel even more special. So, the whole package feels considered and personal from the outside before your dad even opens it.
A Few Things Worth Remembering
Before you start, keep these practical reminders close:
- Work in small sections. Trying to shape, carve, and texture all at once leads to rushed decisions and messy results.
- Keep water nearby always. Dry clay is unforgiving. A damp finger fixes most surface problems instantly if caught early.
- Let every stage fully complete before moving to the next. Shaping before kneading, painting before drying, sealing before painting; each shortcut creates a problem downstream.
- Embrace imperfections during shaping. Small irregularities in handmade pieces are features, not flaws. They prove a human being made this, not a machine. The same creative mindset is often encouraged in 25 Easy Art Projects for Kids That Look Amazing on Pinterest, where the focus is on enjoying the process rather than chasing perfection.
- Additionally, if something cracks badly during drying, don’t throw it away immediately. Mix a tiny amount of fresh clay with water to create a paste. Press it gently into the crack and smooth it flat. Let it dry again completely. Most cracks disappear entirely under a coat of paint.
Natural impressions and decorative details can also be inspired by 19 Stunning Pressed Flower Projects You Can Start Today, which showcase creative ways to add texture and visual interest to handmade creations.
Final Thoughts
It Doesn’t Have to Be Perfect to Be Good. The most important thing about this entire clay fathers day gift tutorial isn’t the technique. It isn’t the finish or the painted details or even the packaging.
It’s the decision to sit down and make something by hand for someone who matters to you. Dads are perceptive. They know the difference between something grabbed from a shelf and something made deliberately for them.
A clay piece with a slightly uneven edge and a carved name still sitting on a desk five years later tells you everything about what actually counts as a meaningful gift.
Simple handmade projects often become treasured keepsakes, which is one reason 21 Paper Plate Crafts for Kids That Are Cheap, Easy and Adorable continue to be popular with families looking to create meaningful memories together.
So clear off your kitchen table, pull out the clay, and give it a proper go this Father’s Day. The imperfect, handmade version of thoughtful will always beat the perfect, store-bought version of convenient. Every single time.