Some decorations just sit there, looking fine from across the room but holding nobody’s attention once they get close. A great resin tray does so much more. It makes guests stop mid-conversation to pick it up and ask where you got it. Fourth of July resin tray ideas are taking over holiday tables this summer, and honestly, it makes total sense. These trays are shiny, bold, and packed with patriotic charm. They hold your drinks, candles, and snacks while looking like actual art. It’s the rare decoration that’s both beautiful and genuinely useful at the same time.
If you’re new to working with resin, How to Make Your First Resin Art Piece Without Making a Mess is a great place to learn the basics before starting one of these patriotic projects.

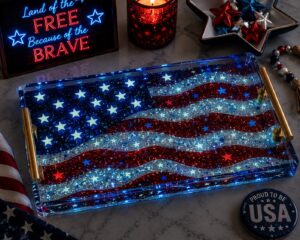
What makes resin trays so perfect for the Fourth of July is the color story. Red, white, and blue were practically made for this material. Those patriotic colors come alive inside resin in a way that feels almost electric. You can embed dried flowers, glitter, star confetti, or tiny flags and the result looks intentional and polished every single time. There’s no other holiday decoration that gives you this much visual impact for this little effort.
Resin also sounds scary but really isn’t. You mix two liquids together, pour them into a mold, and watch something beautiful happen. The process is straightforward, the learning curve is gentle, and the results are consistently impressive even on a first attempt. Anyone with a steady hand and a free afternoon can pull this off without any prior crafting experience.
So whether you are hosting a big backyard cookout or keeping things small with close family, this post has something for you. Every idea below is designed to impress your guests without overwhelming you. Some are simple enough to finish in one sitting. Others have a little more detail but are completely worth the extra time. Grab your resin kit and let’s make your July table the prettiest one on the block.
13 Fourth of July Resin Tray Ideas for Your Party
1. Classic Red, White, and Blue Swirl Tray

This is the most timeless of all fourth of July resin tray ideas. Pour your clear resin base into the mold first. Then drop small amounts of red, white, and blue alcohol ink across the surface. Use a toothpick to drag the colors into each other in long, sweeping strokes. The result looks like a watercolor painting frozen in time. Seal with a second clear resin layer for extra depth and gloss.
The same patriotic color palette shines in 23 Red White and Blue Painting Ideas for Your Home This Summer, where red, white, and blue become the focal point of seasonal decorating.
2. Star Confetti Suspension Tray

Fill your mold halfway with clear resin. Let it reach a gel-like consistency before moving on. Once it thickens, scatter red, white, and blue star confetti across the surface. Pour the second half of your resin on top to fully suspend the stars inside. After curing, the confetti appears to float in mid-air inside the tray. Guests will stare at it all evening.
3. Patriotic Geode Tray

Geode-style resin trays look incredibly complex but are actually approachable. Start by gluing chunky white and clear crystals along one edge of your mold. Pour a deep blue resin base first. Then add white resin in a thick line beside the crystals. Drag red and blue ink outward from the center in jagged, organic strokes. The layered effect mimics the look of a real geode slice beautifully.
4. Flag Stripe Tray

Divide your mold into three horizontal sections using tape or poured resin barriers. Pour red resin into the bottom section. Allow it to cure slightly before pouring white resin in the middle section. Finally, pour blue resin at the top. Once fully cured, remove the barriers and lightly sand any sharp edges. The result is a clean, graphic flag-striped tray that is bold and modern.
Graphic patriotic designs like this pair beautifully with 25 Patriotic Paper Craft Ideas For Festive Fourth of July Décor, especially when decorating an entire party space.
5. Glitter Galaxy Tray

Mix fine red, white, and blue glitter into separate cups of clear resin. Pour each color in loose, swooping arcs across your mold. Overlap them slightly so the colors blend at the edges. Use a heat gun to bring bubbles to the surface and pop them quickly. After curing, the glitter catches every light source in the room. This is one of those fourth of july resin tray ideas that photographs beautifully for social media.
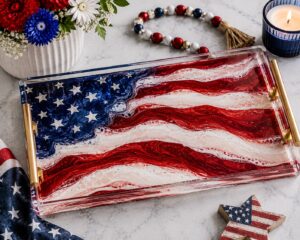
6. Dried Flower Patriotic Tray

Press small red and white dried flowers ahead of time. Blue dried flowers are harder to find, so blue ink works as a substitute color in the resin. Pour a thin clear resin base and let it partially gel. Arrange the dried flowers face-down across the resin surface. Pour a full second layer of clear resin on top to encase the flowers completely. After curing, flip the tray out and the flowers appear perfectly preserved underneath the glossy surface.
For a floral variation on this concept, see How to Make a Patriotic Resin Tray With Red, White and Blue Flowers, which focuses entirely on preserving patriotic blooms inside resin.
7. Metallic Stars and Stripes Tray

Mix red resin with gold mica powder for a rich, warm red tone. Pour it in diagonal stripes across your mold. Alternate with white resin mixed with silver mica powder. Allow both colors to partially set before pressing gold star stickers or metal star embeds into the surface. Pour a thin clear top coat to seal everything. The metallic shimmer makes this tray look expensive and elegant.
Metallic accents and layered textures often work beautifully alongside How to Make a Patriotic Macramé Wall Hanging for 4th of July, helping create a cohesive holiday display.
8. Layered Ombre Tray
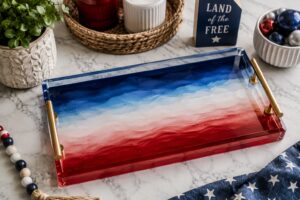
Start with deep navy blue resin at the base of your mold. While it is still wet, pour a lighter blue on top. Then add a thin layer of white resin above that. Finish with a very thin layer of pale pink or light red at the top edge. Tilt the mold gently back and forth to blend the transition between each color. The soft ombre effect feels sophisticated and festive at the same time.
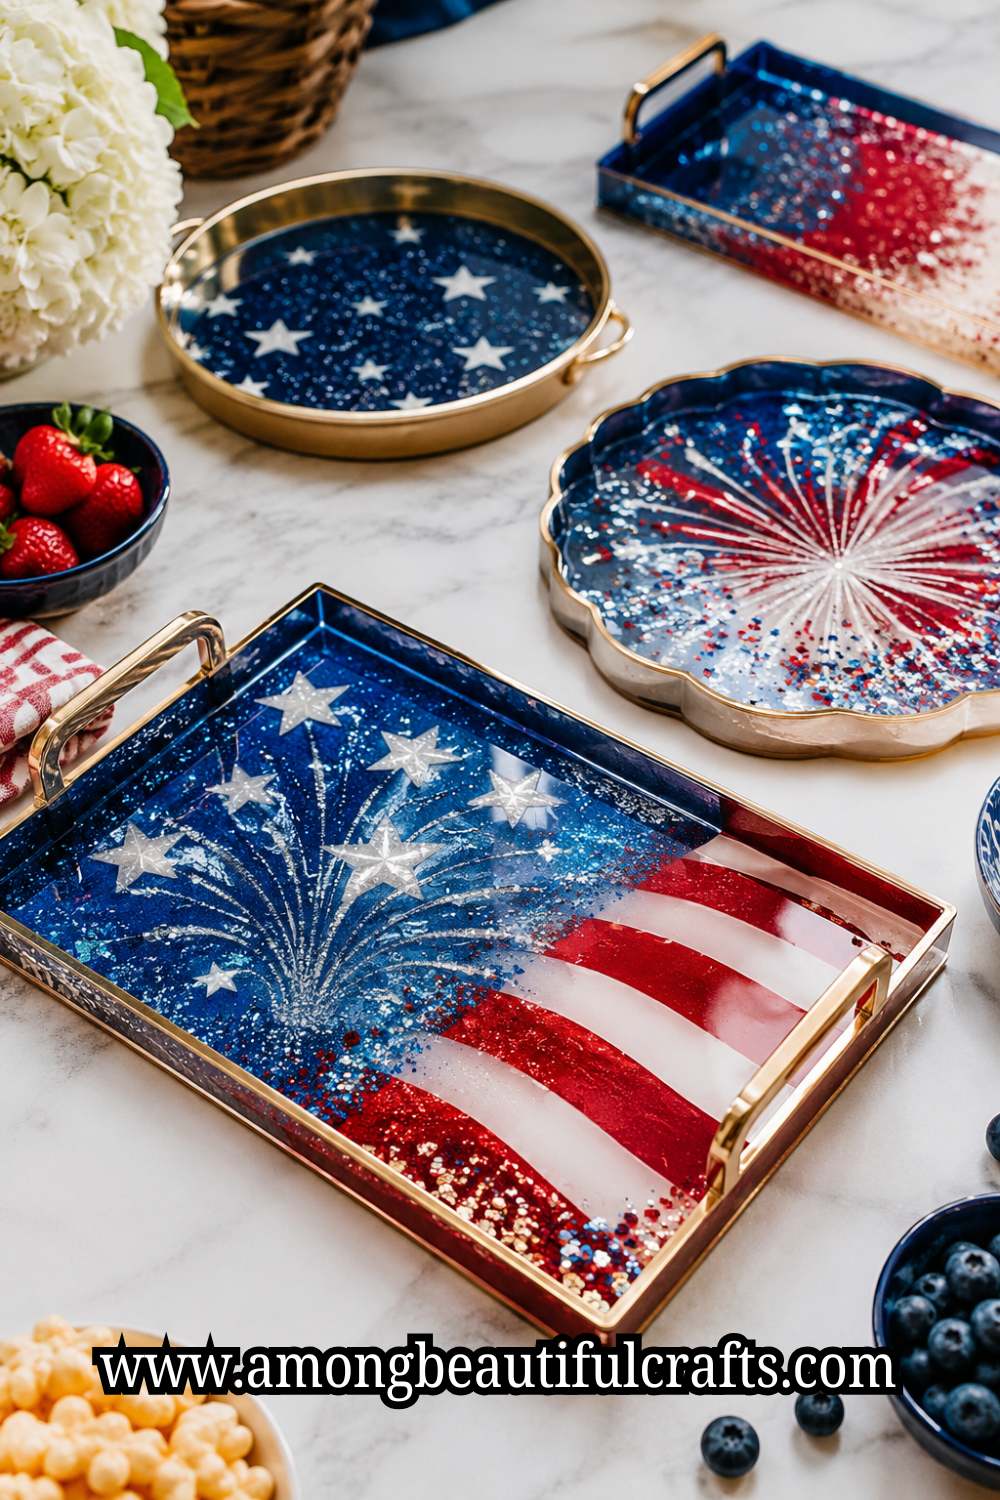
9. Fireworks Burst Tray

Pour a solid black or deep navy resin base and let it cure fully. Once hard, pour a thin clear resin layer on top. Immediately drop red, white, and gold alcohol inks in small clusters across the surface. Use a toothpick to drag each ink cluster outward in thin radiating lines. Each cluster becomes a fireworks burst frozen mid-explosion. This is genuinely one of the most dramatic fourth of July resin tray ideas you can make at home.
Fireworks-inspired designs pair perfectly with How to Paint a Fourth of July Canvas Without Artistic Experience, where bold patriotic colors create equally eye-catching results.
10. Beach Patriot Tray

Mix white resin with a tiny drop of blue for a soft seafoam color. Pour it as your base layer. While still wet, press small seashells and star-shaped sand dollars across the surface. Sprinkle red and blue glitter lightly around the shells. Pour a clear top coat to seal. Once cured, the tray looks like a patriotic beach scene under glass. It works especially well for coastal-themed Fourth of July parties.
Beach-themed projects naturally complement 15 Beautiful Things You Can Make With Seashells, especially if you already have a collection of shells from previous trips.
11. Confetti Letter Tray

Spell out “USA” or “July 4th” using letter stickers or resin alphabet molds. Place the letters in the center of your tray mold. Pour red resin around one side of the letters. Then pour white resin around the other side. Fill any remaining gaps with clear resin mixed with blue glitter. After curing, peel off any stickers to reveal clean letter shapes recessed into the tray. This adds a bold, personalized touch to your party setup.
12. Reverse Pour Flag Tray
This technique flips the usual process. Pour blue resin into the bottom left corner of your mold only. Let it cure fully. Next, pour red and white alternating stripes across the remaining mold space. Let those cure completely too. Finally, pour a thin unifying clear coat over the entire tray. The blue cured section becomes the “stars corner” of your flag, and the stripes fill the rest. Paint tiny white dots onto the blue section after curing for the full flag effect.
Patriotic flag-inspired décor often looks especially striking alongside How to DIY a Gorgeous Paper Rosette Wreath for July 4th, creating a coordinated holiday theme throughout your home.
13. Glow-in-the-Dark Patriot Tray
Save this one for the nighttime portion of your party. Mix glow-in-the-dark powder into your white resin before pouring. Use it as the base layer. Add red and blue alcohol ink swirls across the top while still wet. After full curing and charging under a light source, carry the tray outside after dark. The white resin sections will glow softly green in the dark, which creates a magical effect alongside your sparklers. This is easily the most show-stopping of all the fourth of July resin tray ideas on this list.
The dramatic visual impact of this tray makes it a perfect companion to 19 Patriotic Rock Painting Ideas That Are Easy Enough for Kids, another project that shines during evening celebrations.
Tips for Resin Beginners
- Measure accurately: Resin that is off-ratio will not cure properly. Always use equal parts resin and hardener by volume unless your brand specifies otherwise.
- Stir slowly: Fast stirring introduces too many bubbles. Instead, stir steadily for at least three minutes, scraping the sides and bottom of your cup. Thorough mixing ensures the resin cures correctly.
- Use a heat gun wisely: Hold it about six inches above the surface. Move it constantly and never hover in one spot. Too much heat warps or discolors the resin.
- Be patient with cure times: Most epoxy resins take 24 hours to demold and 72 hours to fully cure. Rushing this step causes soft, sticky, or cloudy results. Therefore, plan your project a few days before the party.
- Layer for depth: The most impressive resin trays use multiple poured layers. Each layer adds dimension and makes embeds appear to float at different depths inside the tray.
Creative holiday projects that reward patience and layering include 17 Fourth of July Clay Crafts That Double as Party Decorations, where attention to detail makes all the difference.
How to Use Your Tray at the Party

A finished resin tray is not just decoration; it is a working piece of party furniture. Here are a few ways to style yours:
Place pillar candles of different heights on the tray for a glowing centerpiece. Alternatively, use it as a drinks station organizer with glasses, a small pitcher, and cocktail napkins. Set it near your entry table with patriotic confetti and small flags scattered around it. Use it as a designated snack zone for bite-sized treats. Finally, photograph it before guests arrive for a beautiful party flat lay.
However you style it, your tray will immediately elevate the look of your whole setup.
Final Thoughts
Resin trays are one of those crafts that look incredibly professional without requiring professional skills. The materials do most of the work for you. Your job is simply to choose beautiful colors, add fun embeds, and pour with confidence. Each of these fourth of July resin tray ideas can be adapted to your taste, your party theme, and your skill level. Start with whichever idea excites you most. After that, you just might want to make two or three more. Resin is genuinely that addictive.
Many crafters who enjoy creating patriotic decorations eventually branch out into projects like How to Make a Patriotic Clay Wreath That Lasts Every Summer, which offers another creative way to display red, white, and blue throughout the season.
The other thing worth mentioning is how well these trays hold up after the holiday is over. Cured resin is durable, waterproof, and surprisingly resistant to everyday wear. That means your tray doesn’t have to disappear into a storage box on July 5th. Style it differently, swap out what sits on top of it, and it transitions beautifully into the rest of summer. A well-made resin tray has a way of earning a permanent spot in your home long after the fireworks are done.
Note that you should always work in a well-ventilated space. Additionally, cover your table with a silicone mat or plastic sheet because resin sticks to almost everything. And if you do make one this season, share it. Post it on Pinterest. Show it off on your stories. Because someone else is out there right now looking for exactly this kind of project and your finished tray might be the push they needed to finally try it themselves. Handmade things deserve to be seen, and a resin tray this beautiful is genuinely worth showing off. You put in the time and the effort. Let people see what that looks like.