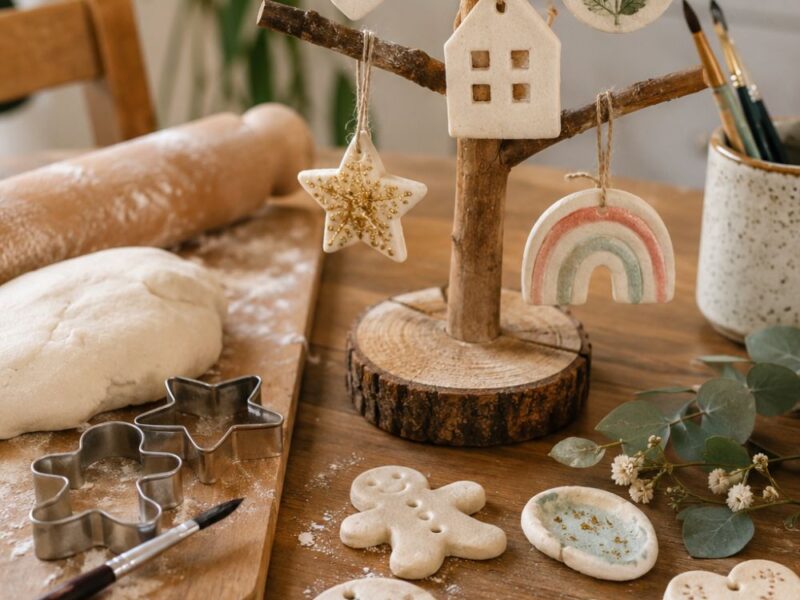
Once a child finishes a clay figure, there is always that little test. They give it a gentle shake to see if everything stays in place.
If the head stays on, they grin. If it rolls across the table, the whole room suddenly turns into a rescue mission.
That moment is exactly why figuring out How to Make Clay Figurines With Kids needs more than simply telling them to stick pieces together.
This same joy of shaping small, detailed creations by hand is also what makes figuring out How to Sculpt Adorable Miniature Clay Food That Looks So Real such a fun project for kids to try too.
I have found that kids understand clay much faster when they can see the reason behind each step. If an arm keeps falling off, I do not simply attach it again.
I show them how a roughened surface, a little slip, and gentle blending can give that arm a much stronger hold. Soon, they start checking their own joints before moving on.
That is the part I want this project to teach. The goal is not to turn children into serious sculptors or make every figure look polished.
Instead, we can let them make lopsided monsters, tiny people, silly animals, and anything else they imagine.
We just give those creations enough structure to stay in one piece from the first proud grin to the final dry figure.

Materials You Will Need
- Air-dry clay – (Available on Amazon)
- Small bowl of water
- Clay slip – (Available on Amazon)
- Toothpick or wooden skewer
- Clay sculpting tools – (Available on Amazon)
- Small rolling pin
- Small paintbrush – (Available on Amazon)
- Acrylic paints – (Available on Amazon)
- Fine paintbrushes
- Paper towels – (Available on Amazon)
- Wax paper or silicone mat – (Available on Amazon)
- Optional wire for larger figures
- Optional clear sealer – (Available on Amazon)
A similarly small, simple supply list is all you need for learning How to Make Gorgeous Air Dry Clay Earrings That Don’t Crack, if you want another quick clay project to try.
How to Make Clay Figurines With Kids That Won’t Fall Apart
1. Choose the Figurine and Plan Its Shape

Start by asking the child what they want to make. Give them plenty of freedom here because their idea should guide the project.
Maybe they want a tiny person with a giant hat. Another child may choose a cat, monster, fairy, or strange creature.
If your child loves animal-themed crafts, 23 Adorable Farm Animal Crafts That Bring the Barnyard to Life has plenty of simple animal ideas to inspire their next figurine.
Let the idea stay playful, but help them simplify complicated designs. A beginner does not need six arms and twelve tiny accessories.
For example, a child might want a dragon with enormous wings and four tails. You can turn that idea into a small dragon with two wings and one tail.
This keeps the project manageable without taking away the child’s creativity.
Next, talk about the basic shapes you will need. A person may need a body, head, arms, and legs. An animal may need a body, head, ears, and tail.
You can even sketch the idea quickly on paper. The drawing does not need to look perfect.
I often find that this little planning moment helps kids slow down. They start thinking about how each part will fit together.
Also, decide if the figurine needs to stand. If it does, the feet and body need enough support.
A sitting figure gives you more freedom because the body can rest on a wider base. That can work well for younger children.
2. Prepare and Condition the Clay
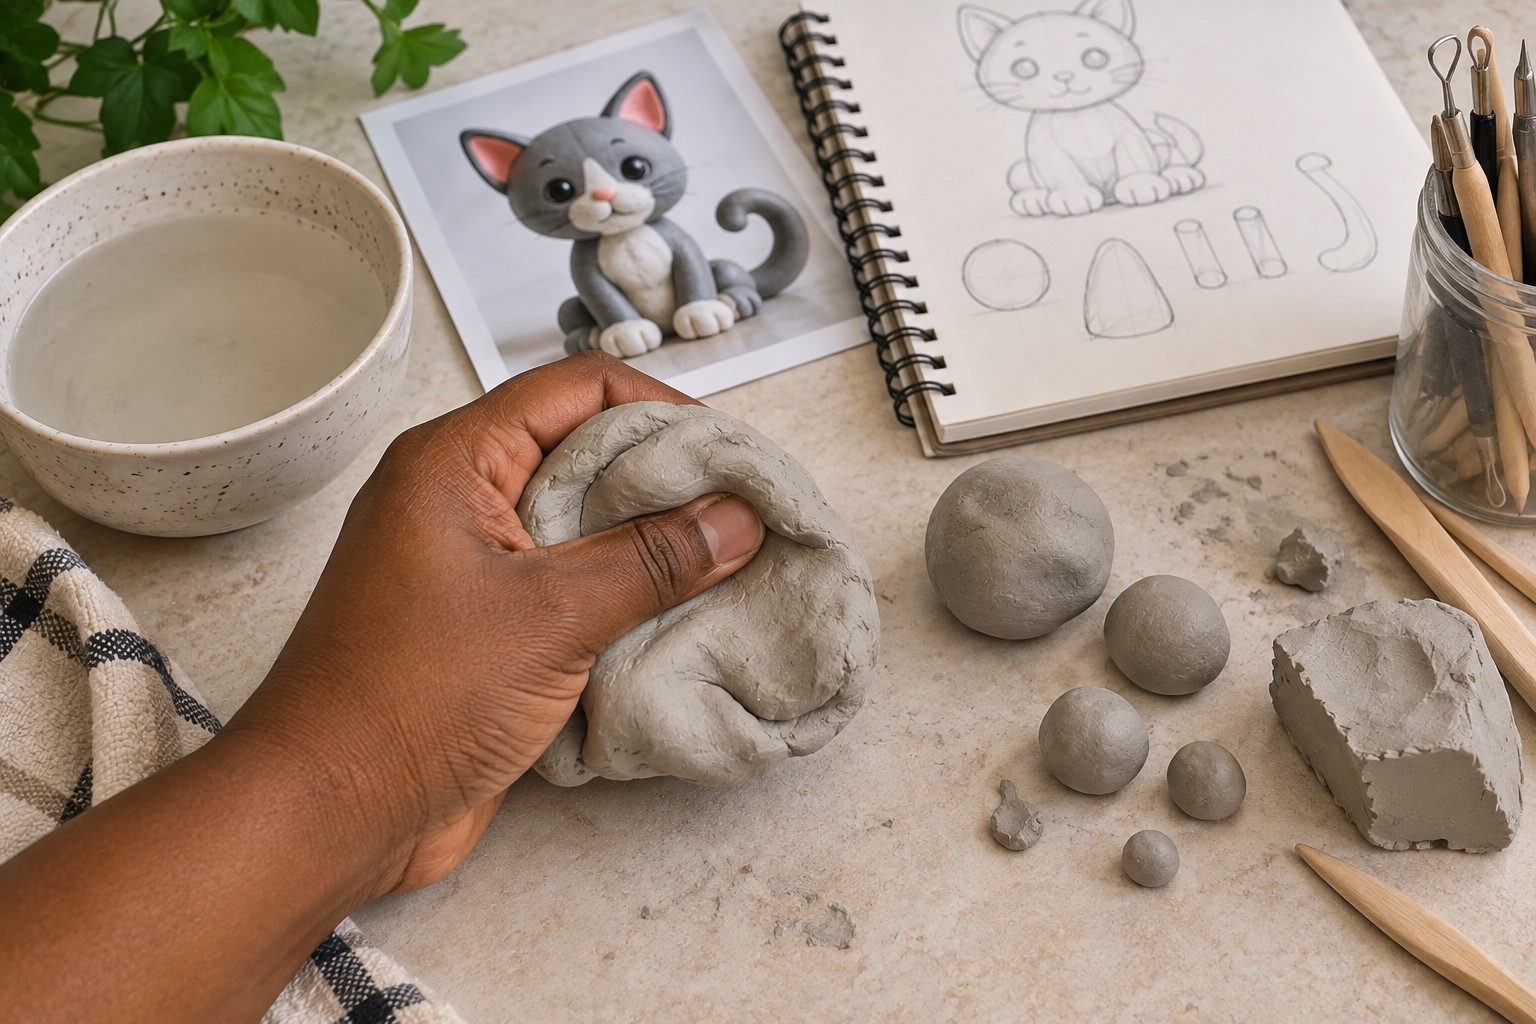
Take a manageable piece of clay and begin kneading it with your hands. This helps soften the clay and makes it easier to shape.
Show the child how to squeeze, fold, and roll the clay gently. Keep working until the clay feels smooth and flexible.
Do not add lots of water just because the clay feels slightly firm. Too much water can make the surface sticky and difficult to control.
Instead, dampen your fingertips lightly if the clay needs a little moisture.
Kids sometimes want to rush through this part because shaping the character feels more exciting. Still, this preparation matters.
The same resourceful, hands-on approach works well in 19 Easy Clay and Pipe Cleaner Crafts Kids Will Want to Make, where simple conditioning steps make a big difference too.
Well-conditioned clay responds better to rolling, pinching, joining, and blending. It also makes the sculpting process less frustrating.
Divide the clay into rough portions before you begin. Set aside pieces for the body, head, limbs, and details.
You do not need exact measurements. Just keep the pieces roughly proportional.
This also prevents the child from using almost all the clay on the head. That happens more often than you might expect.
3. Build a Stable Body and Base

Start with the largest section of the figurine. For most characters, that means the body. Roll the clay into a ball or oval. Then shape it according to the character you planned.
If the character needs to stand, pay close attention to the bottom. A narrow base can make the figure wobble.
Gently flatten the bottom against your work surface. You want a stable base without squashing the entire body.
Ask the child to place the body down and give it a tiny tap. If it tips over, fix the base now.
You can widen the bottom slightly or flatten it a little more. These small adjustments can save you trouble later.
Building a strong, stable foundation first is also key in learning How to Build a Beautiful Terrarium That Doesn’t Get Moldy, where every layer depends on the one below it.
Next, look at the body’s proportions. A tall, narrow body may need wider feet. A heavy body may need stronger legs.
Think about the figure like a tiny person standing on a table. Its weight needs somewhere solid to rest.
If the child wants a sitting character, make the bottom wider. The figure can then rest on its body and legs.
At this stage, do not worry about tiny details. Focus on creating a strong main shape first.
That approach makes learning How to Make Clay Figurines With Kids much easier because children can build from large shapes toward small ones.
4. Shape the Head, Arms, and Legs
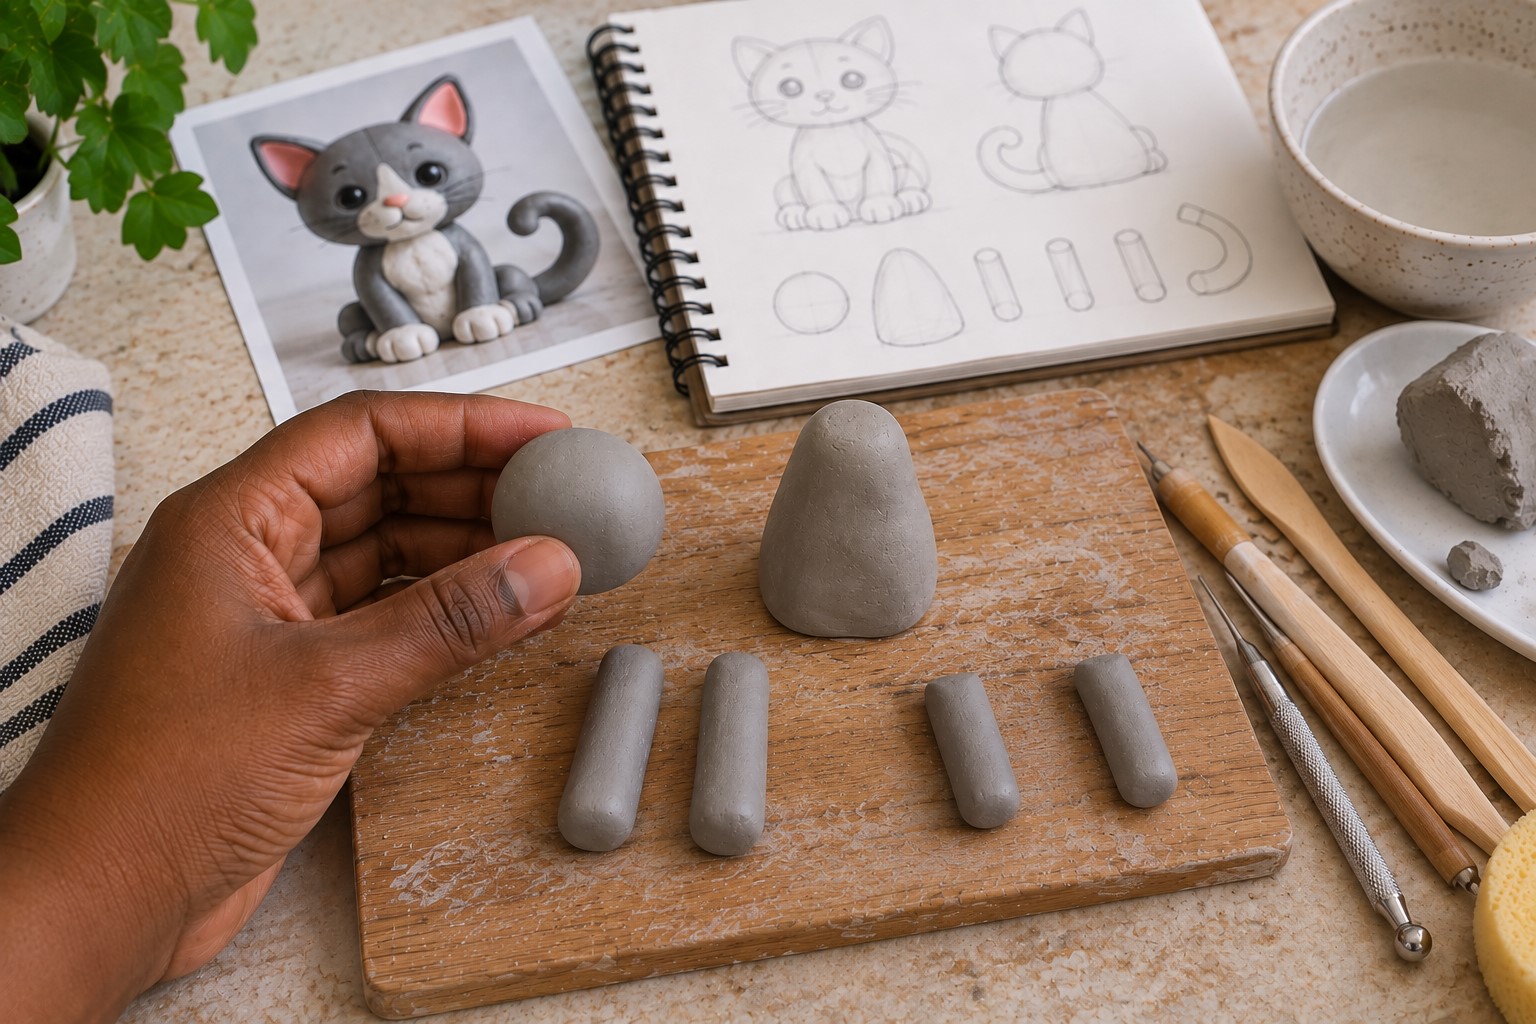
Now divide the remaining clay into pieces for the head and limbs.
Start with the head because its size can affect the rest of the figure. Kids often love making oversized heads because they have more room for faces.
That can look adorable, but a very heavy head can weaken the neck.
Make the head large enough for the child’s design, but keep it reasonable compared with the body.
Next, roll the arms and legs gently between your palms. Keep them thick enough to handle without snapping.
Very thin limbs may look delicate, but they can cause problems later.
For younger children, chunky arms and legs usually work better. They also make the character look playful.
If the figure needs two legs, compare them before attaching them. They should have similar lengths unless the character has an intentional uneven design.
Place both legs beside each other and make small adjustments. Do the same with the arms.
You can bend the limbs into simple poses before attaching them. A waving arm or bent leg can give the character more personality.
Still, avoid extreme poses during the first project. Simple positions make stronger beginner figures.
Keep the head, arms, and legs nearby while you work. That makes the next stage much easier.
5. Score the Clay Before Joining Pieces

This step can make a huge difference. Never rely only on pressing two smooth clay surfaces together.
Take a toothpick or clay tool and scratch small lines across the area you want to join.
Then scratch the matching area on the second piece. Score both surfaces so the joining material can grip properly.
The marks should stay shallow. You only need enough texture to roughen the surfaces.
This same patient, small-scale precision is also what makes the project on How to Do Diamond Painting: A Beginner’s Step-by-Step Tutorial such a satisfying craft for kids.
For example, score the top of the neck and the bottom of the head. Then score the shoulder and the matching end of the arm.
Do the same for legs, ears, tails, noses, or other attached pieces.
This is one of those simple techniques kids can understand quickly. They can actually see how the scratched surfaces differ from smooth ones.
I usually explain it as giving the pieces little places to grip each other. That description makes sense to children without turning the project into a technical lesson.
Let them try the scoring themselves when they can use the tool safely. You may need to guide their hands at first. After a few joins, many kids understand the motion.
6. Use Slip and Reinforce Every Important Joint
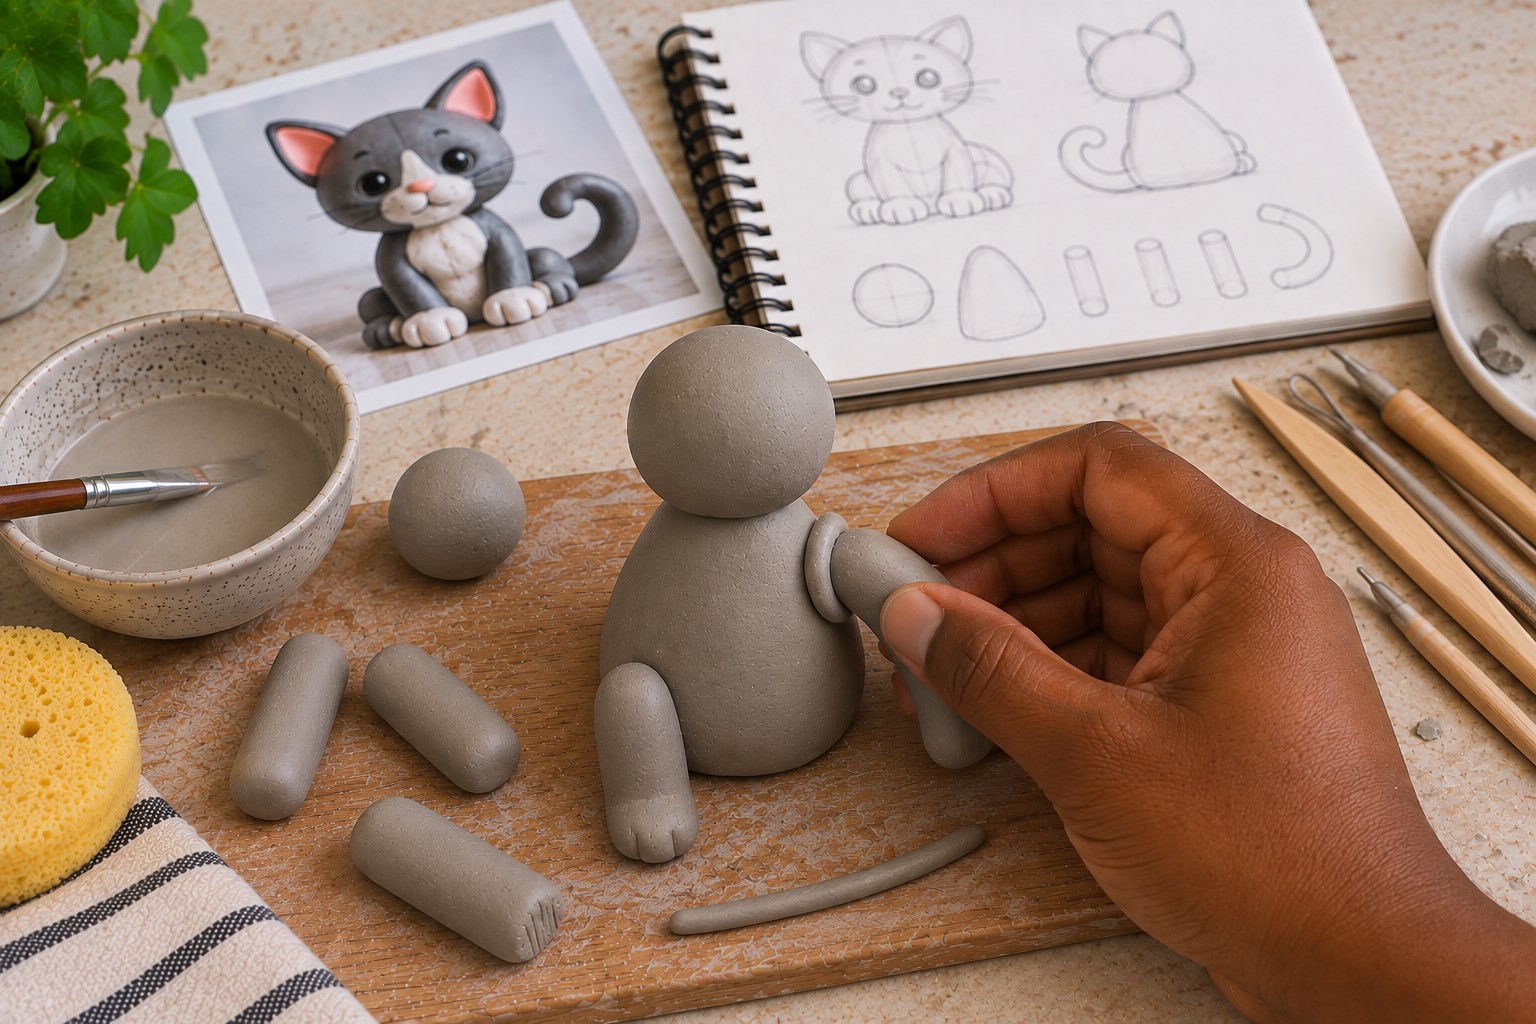
Once you score the surfaces, apply a small amount of clay slip. Brush it over both scratched areas. You do not need a thick coating.
Next, press the two pieces together gently. A slight twisting motion can help create a stronger connection.
Do not squeeze the pieces too hard. Thin arms and legs can lose their shape under too much pressure.
If some slip squeezes around the joint, wipe away the excess. Then use your finger or a clay tool to blend the edges.
This same careful, deliberate joining is what makes the project on How to Make a Beautiful Origami Crane You’ll Be Proud to Display hold together so well too.
Now comes another useful trick. Add a tiny strip of fresh clay around important joints.
Roll a small piece into a thin rope. Wrap it around the connection where the two pieces meet.
Blend that strip into the body and the attached piece. This creates extra support around the joint.
Use this method around the neck, shoulders, hips, and large tails. You can also use it around wings or other heavy decorations.
The extra clay should blend smoothly into the figure. You do not want a thick lump around every joint.
Think of it as adding a small support collar where the figure needs extra strength.
This technique works especially well when children make large heads or oversized accessories.
7. Attach the Head and Check the Balance
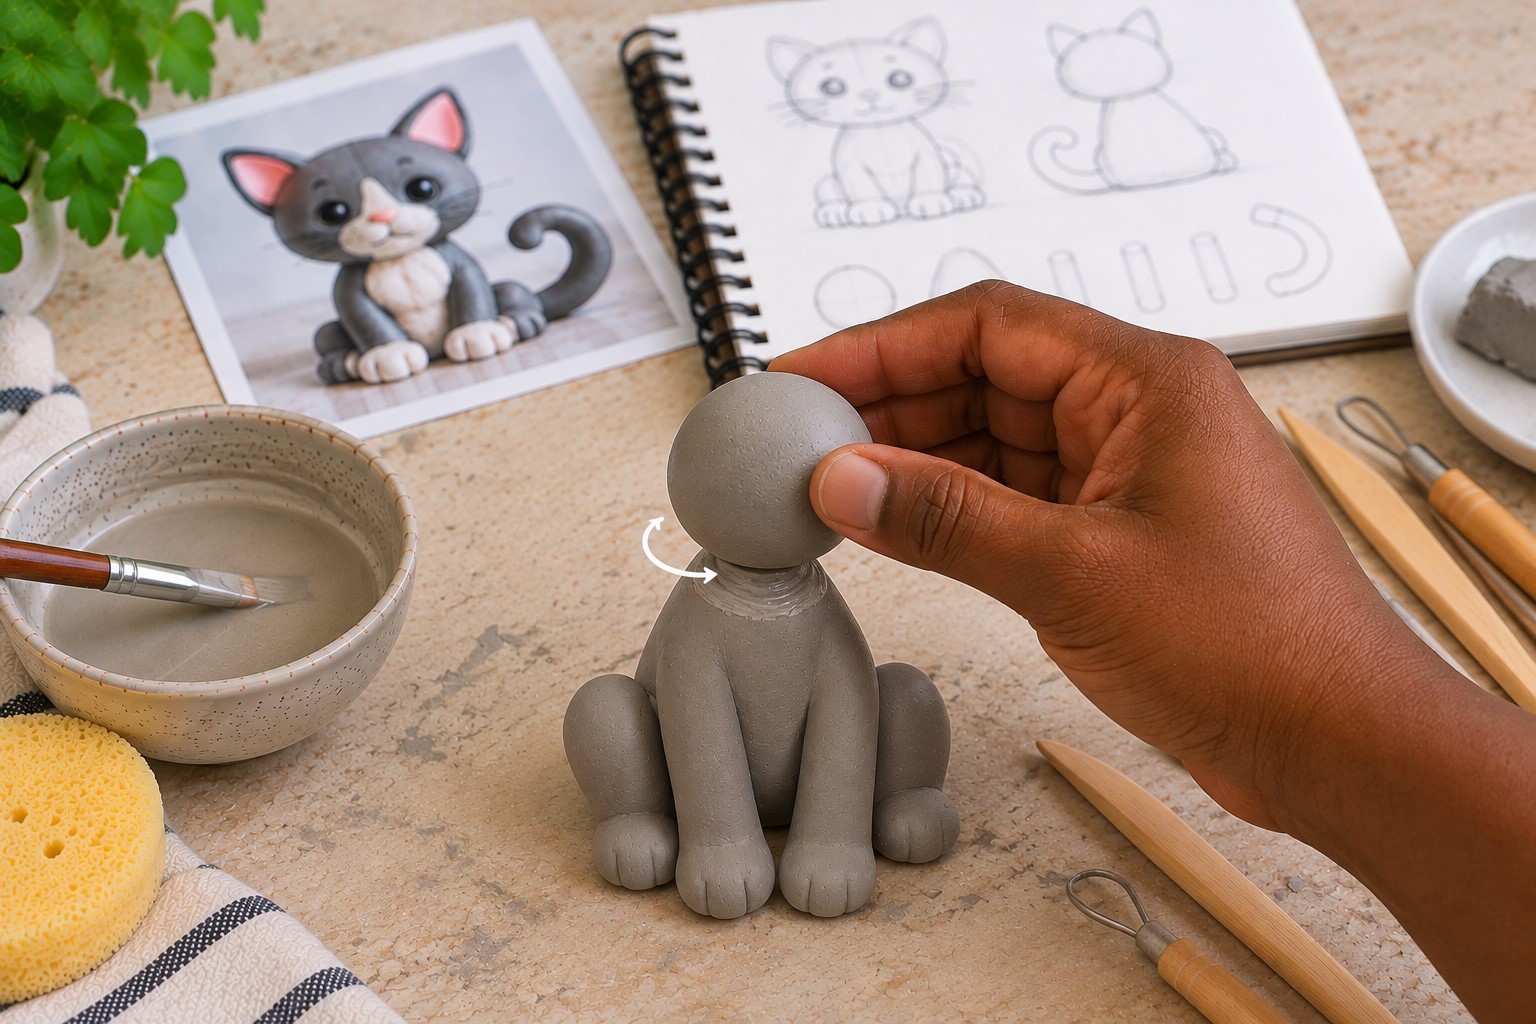
The head deserves special attention because it can become one of the heaviest parts.
Score the bottom of the head and the top of the neck. Apply slip to both areas before joining them.
Press the head onto the neck with a gentle twisting movement. Then check the figure from the front and side.
Is the head leaning forward? Does it make the body tip backward? Does the neck look too thin?
Fix those problems while the clay still feels soft. You can thicken the neck with a small amount of clay. You can also reduce the head slightly if it feels too heavy.
For larger figurines, an adult can add internal wire support. Use wire only when the project really needs it.
Keep young children away from sharp wire ends. Adults should cut, bend, and secure the wire before children continue.
Once the head sits properly, blend the neck into the lower part of the head.
Do not completely flatten the character’s neck if you want a clear shape. Just make the transition strong and smooth.
Now place the figurine on the table again. Give it a gentle tap. If it stays upright, you have a good starting point for the details.
8. Add the Face and Small Details

Now comes the part that usually gets kids excited. The character finally gets its personality. Add eyes, noses, ears, hair, horns, buttons, shoes, paws, or other details.
Start with the larger details before adding tiny ones. This makes the figure easier to handle.
For attached pieces, use the same scoring and slip technique. Small pieces still need a good connection.
For tiny eyes or dots, pressing them gently into the surface may work well. You can also create small marks directly in the clay.
Careful placement of tiny natural-looking pieces matters just as much in figuring out How to Make Charming Pebble Art from Ordinary Rocks.
Let the child decide which features matter most. One child may want a giant smile. Another may want sleepy eyes and enormous ears.
Those choices make each figure different. Try not to add every possible decoration. Too many tiny pieces can make the figure harder to handle.
They can also become weak spots during drying. If the child wants lots of details, add the most important ones first. Then check the figure before adding anything else.
This is also a good time to smooth fingerprints or unwanted marks.
Still, do not remove every little mark. Some fingerprints can make a handmade figure feel more special.
9. Inspect and Fix Weak Spots Before Drying

Before the figurine sits down to dry, inspect the entire piece. Start at the top and slowly work your way down.
Check the head, neck, ears, shoulders, arms, hands, hips, legs, feet, and tail.
Gently touch each part. You are not trying to bend the figure. You are simply checking for loose pieces or weak connections. If something wiggles, fix it now.
Add slip, score the joint again, or add a small clay support where needed. Next, check the base. Place the figurine on the table and look at it from different angles.
If your child enjoys pressing clay into shapes like this, learning How to Make Custom Clay Stamps You’ll Use Again and Again is a fun follow-up project.
Does it stand straight? Does one foot lift off the surface? Does the body lean? Fix those issues before drying.
I like letting kids handle this inspection themselves. It gives them a chance to notice problems instead of waiting for an adult to find them.
You can ask simple questions. “Which part feels loose?” “Does the figure stand by itself?” “Do you think this tail needs more support?”
These questions turn the final check into part of the creative process. Once everything looks secure, stop touching the figure. Too much handling can slowly change its shape.
10. Dry the Figurine Slowly and Paint It

Drying needs patience. Place the figurine on a flat surface away from direct sunlight and strong heat.
Do not place it beside a heater. Avoid putting it in a very hot window. Air-dry clay needs time to lose moisture evenly.
Follow the drying time on the clay package. Larger pieces often need more time than smaller ones.
Do not paint the figure just because the outside feels hard. The inside may still hold moisture. A cool or slightly soft feeling can tell you that the clay needs more time.
Kids may find this part frustrating because they want to see the finished character. Use the waiting time to choose paint colors instead.
Once the clay feels completely dry, brush away any loose dust. Then start painting with thin layers.
Building color in thin coats is the same trick that works so well in learning How to Paint Shoes at Home and Get a Professional Look.
Acrylic paint works well for many air-dry clay projects. Use small brushes around the face and other tiny details.
Let each layer dry before adding another. Start with the main colors, then add smaller details. A child can choose realistic colors or create something completely silly.
A blue cat with orange ears can be just as fun as a gray cat.
11. Seal, Protect, and Enjoy the Finished Figurine
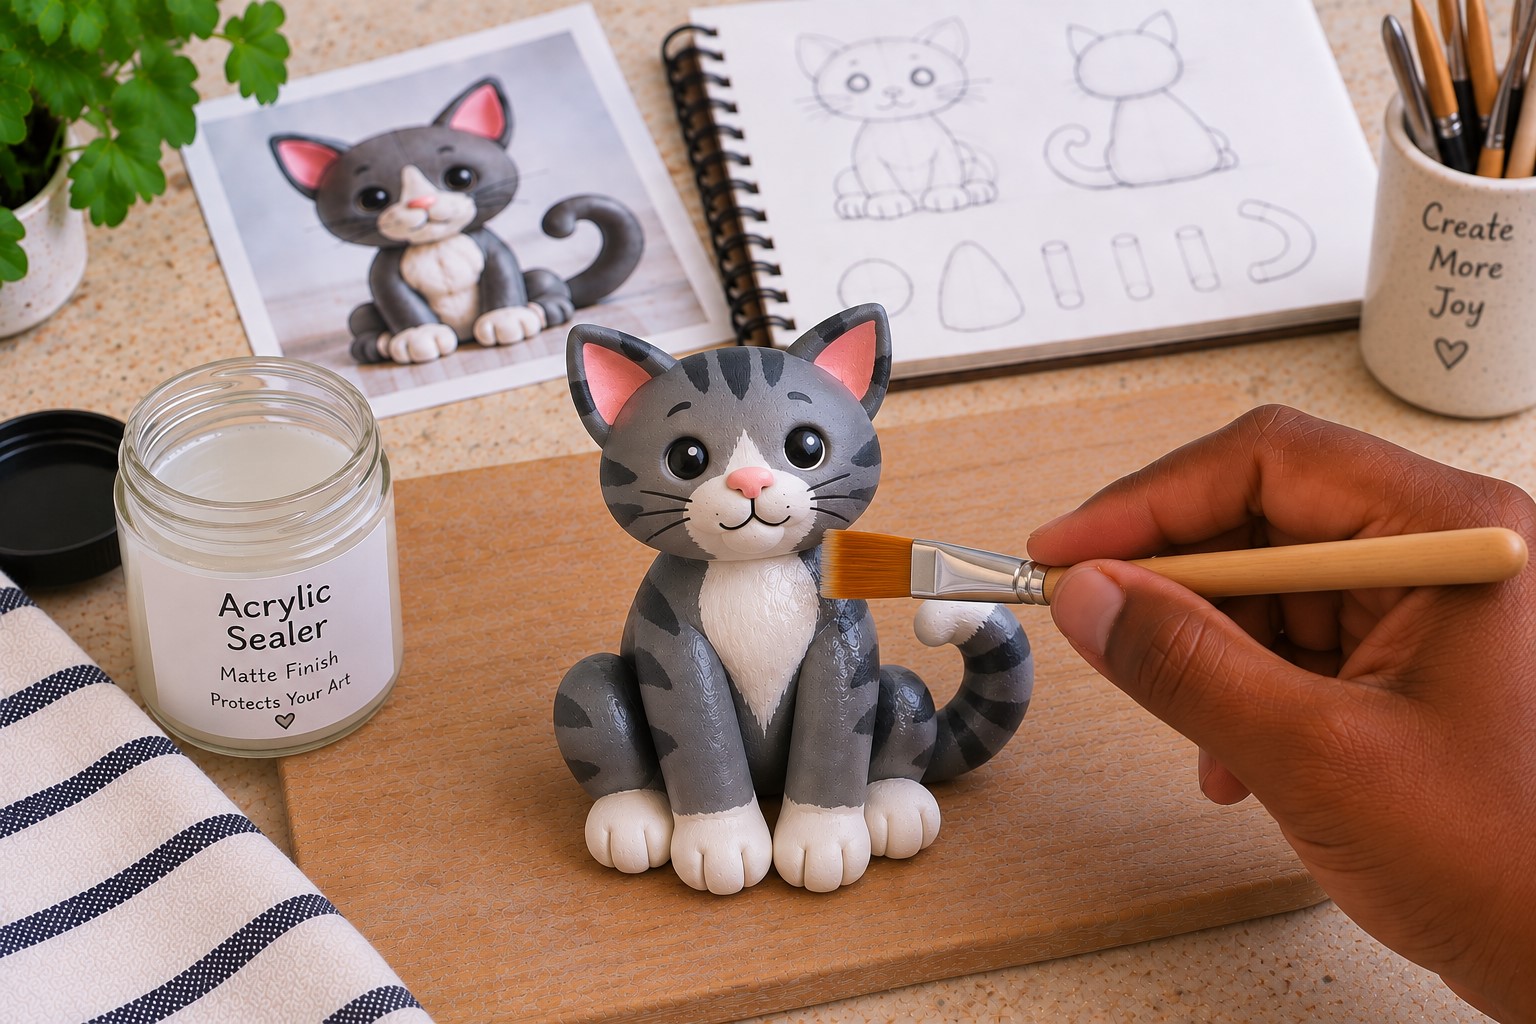
Once the paint dries, you can add a suitable clear sealer if your materials allow it. Always follow the product instructions.
An adult should handle spray sealers and use them in a well-ventilated area. Remember that sealing does not turn every air-dry clay figure into a waterproof object.
Keep the finished figurine away from soaking water and rough handling. Now comes the best part. Let the child pick a special place for the finished character.
A similar sense of pride comes from displaying the project; How to Make Adorable Clay Magnets Worth Displaying too, if your child wants to try another quick clay project.
Maybe it sits beside their favorite books. Perhaps it joins a whole family of clay creatures.
You can even give the character a name and make up a tiny story about it. This gives the finished project more meaning than simply placing it on a shelf.
It also gives children a reason to feel proud of the work they completed.
Simple Tricks That Make Clay Figurines Stronger
Learning How to Make Clay Figurines With Kids becomes easier when you remember a few basic rules.
- First, keep the proportions sensible. A giant head on a tiny neck can create unnecessary stress.
- Next, keep important limbs thick enough to survive normal handling. Thin pieces can look pretty, but they often need extra support.
- Also, strengthen every major joint. A little scoring, slip, and blending can save you from a broken arm later.
- Pay attention to large decorations too. Big wings, tails, hats, and ears can pull on the clay beneath them.
- Finally, give the finished figure enough drying time. Rushing the drying stage can undo all the careful work you did earlier. If your child enjoys colorful characters, 21 Creative Rainbow Crafts That Brighten Any Day has more fun color ideas for painting their finished figurines.
Common Problems You May See
The Head Keeps Falling Off
A heavy head can overpower a thin neck. Try making the neck thicker and strengthening the joint with scored surfaces and slip.
You can also add a small clay support around the base of the head.
The Arms Keep Breaking
The arms may be too thin. Make them slightly thicker and keep their position close to the body. Score the shoulder and arm before joining them. Then blend extra clay around the connection.
The Figure Keeps Falling Over
The base probably needs more support. Flatten the bottom slightly or widen the feet. You can also make the body shorter if it feels too tall and top-heavy.
Small Details Keep Falling Off
Tiny pieces need good attachment points too. Score both surfaces and use a small amount of slip. For extremely tiny details, carving them into the clay may work better.
Cracks Appear During Drying
Fast drying can contribute to cracks. Move the figurine away from direct heat and strong sunlight. Give thicker areas enough time to dry completely.
If your child wants a quicker project to enjoy while the figurine dries, the project on How to Paint a Watercolor Bookmark in Under 30 Minutes is a nice way to fill the waiting time.
Final Thoughts
The best clay figurines do not need perfect faces or perfectly shaped limbs. They need a little thought behind the way each piece connects.
Once children understand that idea, they can create much stronger characters without losing the fun.
If your family enjoys screen-free craft time, 21 Easy Minecraft Paper Crafts Kids Can Finish in One Sitting is another great activity to keep in your back pocket.
I still enjoy seeing the funny designs kids come up with during clay projects. Sometimes the strangest figure becomes the favorite.
A crooked smile, oversized ears, or uneven feet can give a character plenty of personality. Those little imperfections often make the finished piece feel truly theirs.
With these techniques, learning How to Make Clay Figurines With Kids becomes less about preventing every mistake.
If the grown-ups want a creative outlet of their own, 25 Aesthetic BTS Painting Ideas Every ARMY Should Try is a fun place to find inspiration too.
Instead, it becomes a chance to teach children how to build, test, fix, and try again.
They get to enjoy the mess, make something from their imagination, and finish with a clay character that can actually stay in one piece.