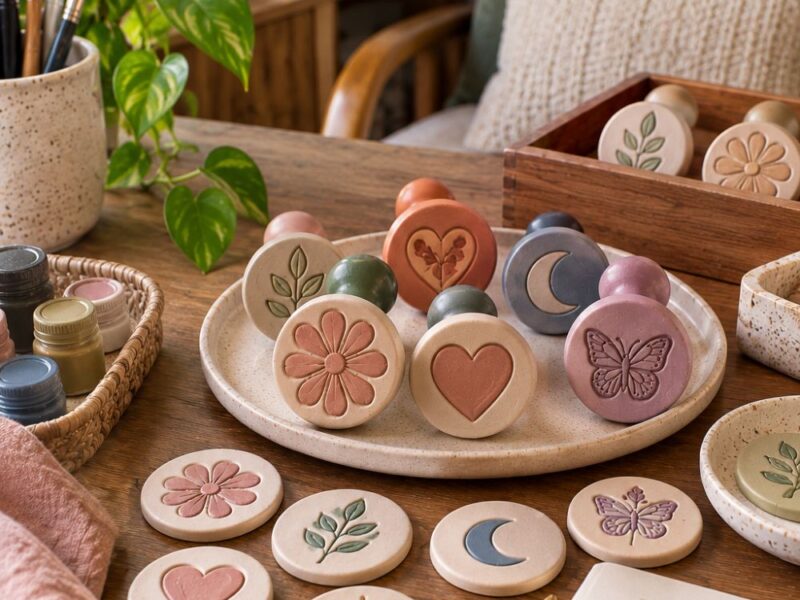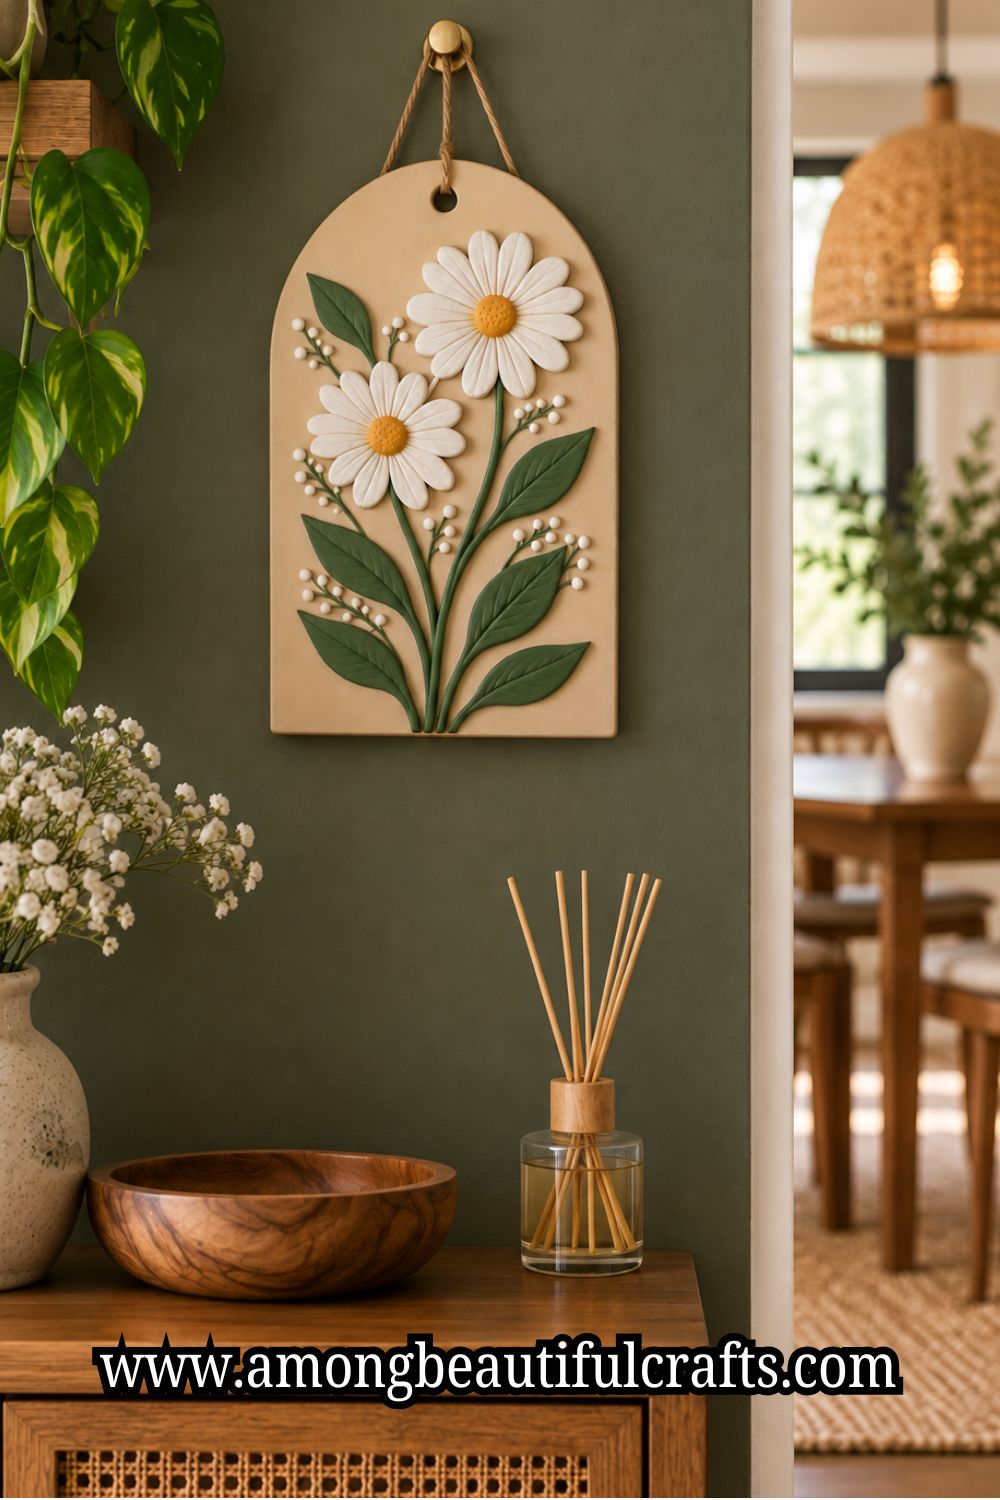
The first thing I would tell you about clay wall art is this: don’t start with the decoration. Start with the shape.
It is tempting to think about colors, patterns, and pretty details right away. Still, the shape gives everything else something solid to work with.
If the base feels balanced, your design already has a good starting point.
That sounds like a small detail, but it changes the whole project. When the base looks right, the rest becomes much easier.
You can add lines, textures, raised shapes, or even leave some areas completely plain.
I’ve found that simple details can often make a clay piece look more interesting than filling every inch.
The Guide to Making Clay Wall Art below will help you build the piece from that first simple shape.
I like projects like this because you can make them look complicated without doing anything complicated.
You don’t need a huge collection of tools or years of clay experience to begin.
I’ll take you through the process slowly, from preparing your clay to creating the design and getting it ready for the wall.
Along the way, I’ll point out the little things that can make your piece crack, bend, or lose its shape.
By the end, you should have a better idea of how to turn a simple lump of clay into wall art that feels like something you actually made yourself.
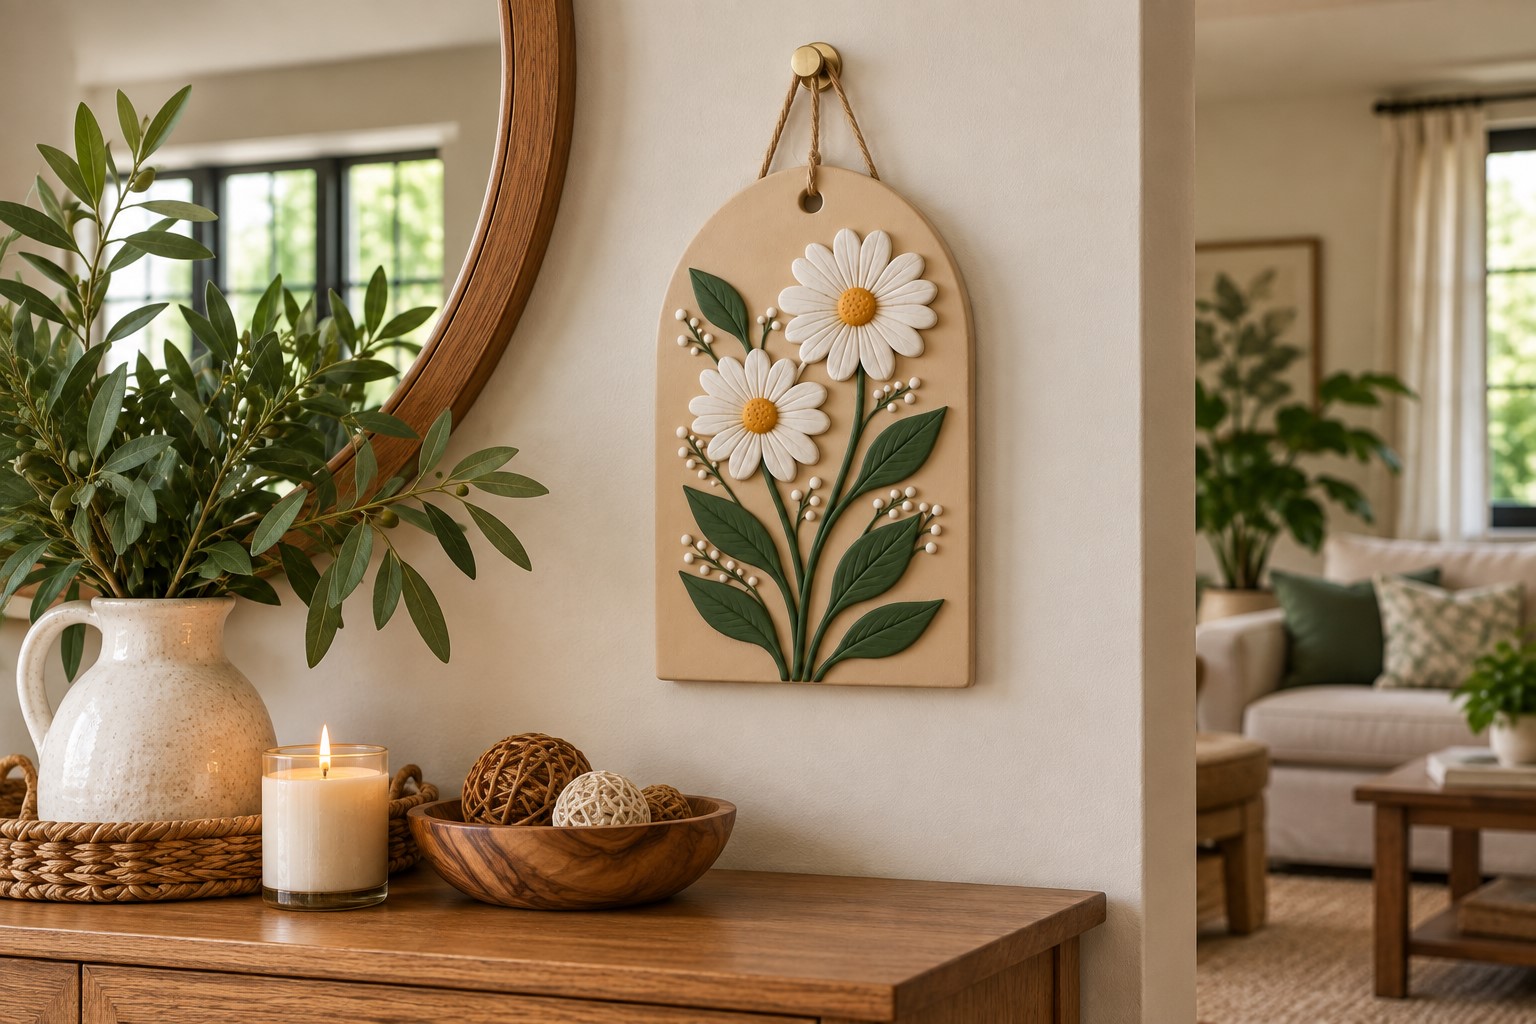
Supplies You’ll Need
Before you start, gather everything you need and keep it close by. This way, you can stay focused once you begin shaping the clay.
- Air-dry clay – (Available on Amazon)
- Pencil and paper
- Rolling pin – (Available on Amazon) or smooth glass bottle
- Small bowl of water
- Clay cutting tool – (Available on Amazon) or craft knife
- Baking paper or another smooth work surface
- Clay modeling tools – (Available on Amazon)
- Fine-grit sandpaper
- Acrylic paint – (Available on Amazon)
- Clean, soft cloth
- Small and medium paintbrushes – (Available on Amazon)
- Clear clay or craft sealer
- Suitable wall hanging hardware – (Available on Amazon)
You can also collect a few household items for making texture. A fork, lace, leaves, bottle caps, and textured fabric can all create interesting impressions.
Beginner-Friendly Guide to Making Beautiful Clay Wall Art
Step 1: Choose and Plan Your Design
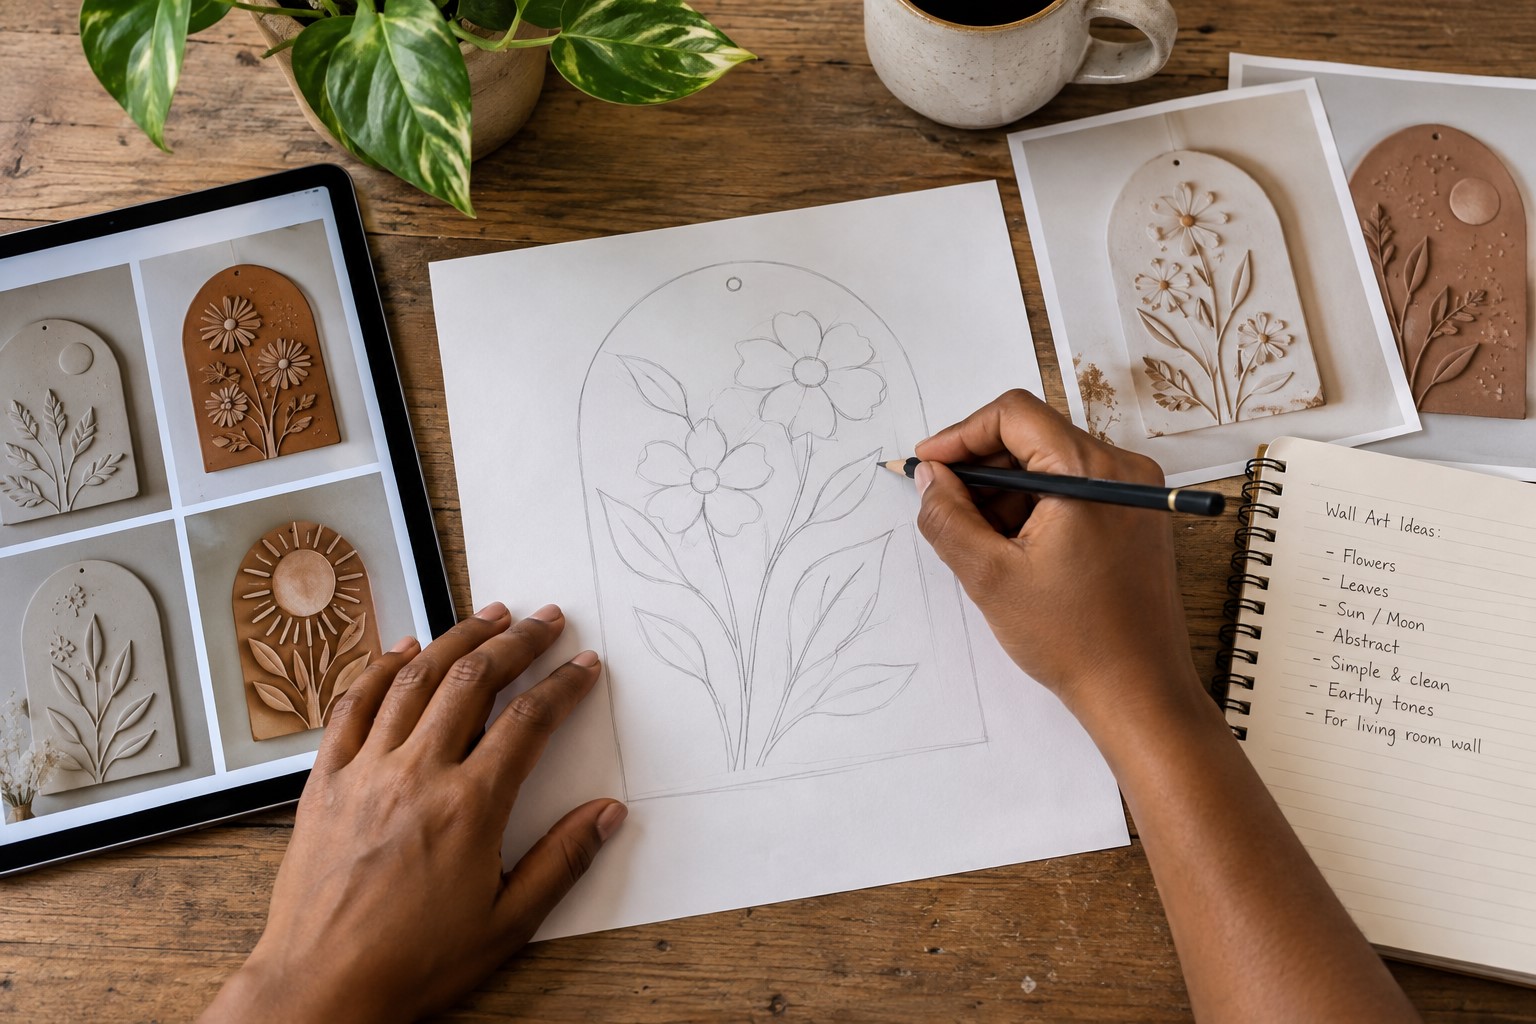
Before touching the clay, decide what you want your wall art to look like.
You don’t need a perfect drawing. A quick sketch can help you work out the shape and placement of your details.
Start with the overall shape of your piece. You could make a circle, oval, arch, rectangle, or an uneven organic shape.
Next, choose the main design. You might create flowers, leaves, a sun, a moon, abstract lines, or simple geometric shapes.
I recommend keeping your first design fairly simple. You want enough detail to make the piece interesting without making the project difficult to manage.
Think about the wall where you plan to display it too. A small artwork may suit a narrow wall, while a larger piece can fill an empty section above furniture.
Once you have an idea, draw the basic shape on paper. Mark the position of your largest design elements first. Then add the smaller details around them.
This simple plan can save you from trying to figure everything out while the clay is already on your table.
Step 2: Prepare Your Clay and Workspace
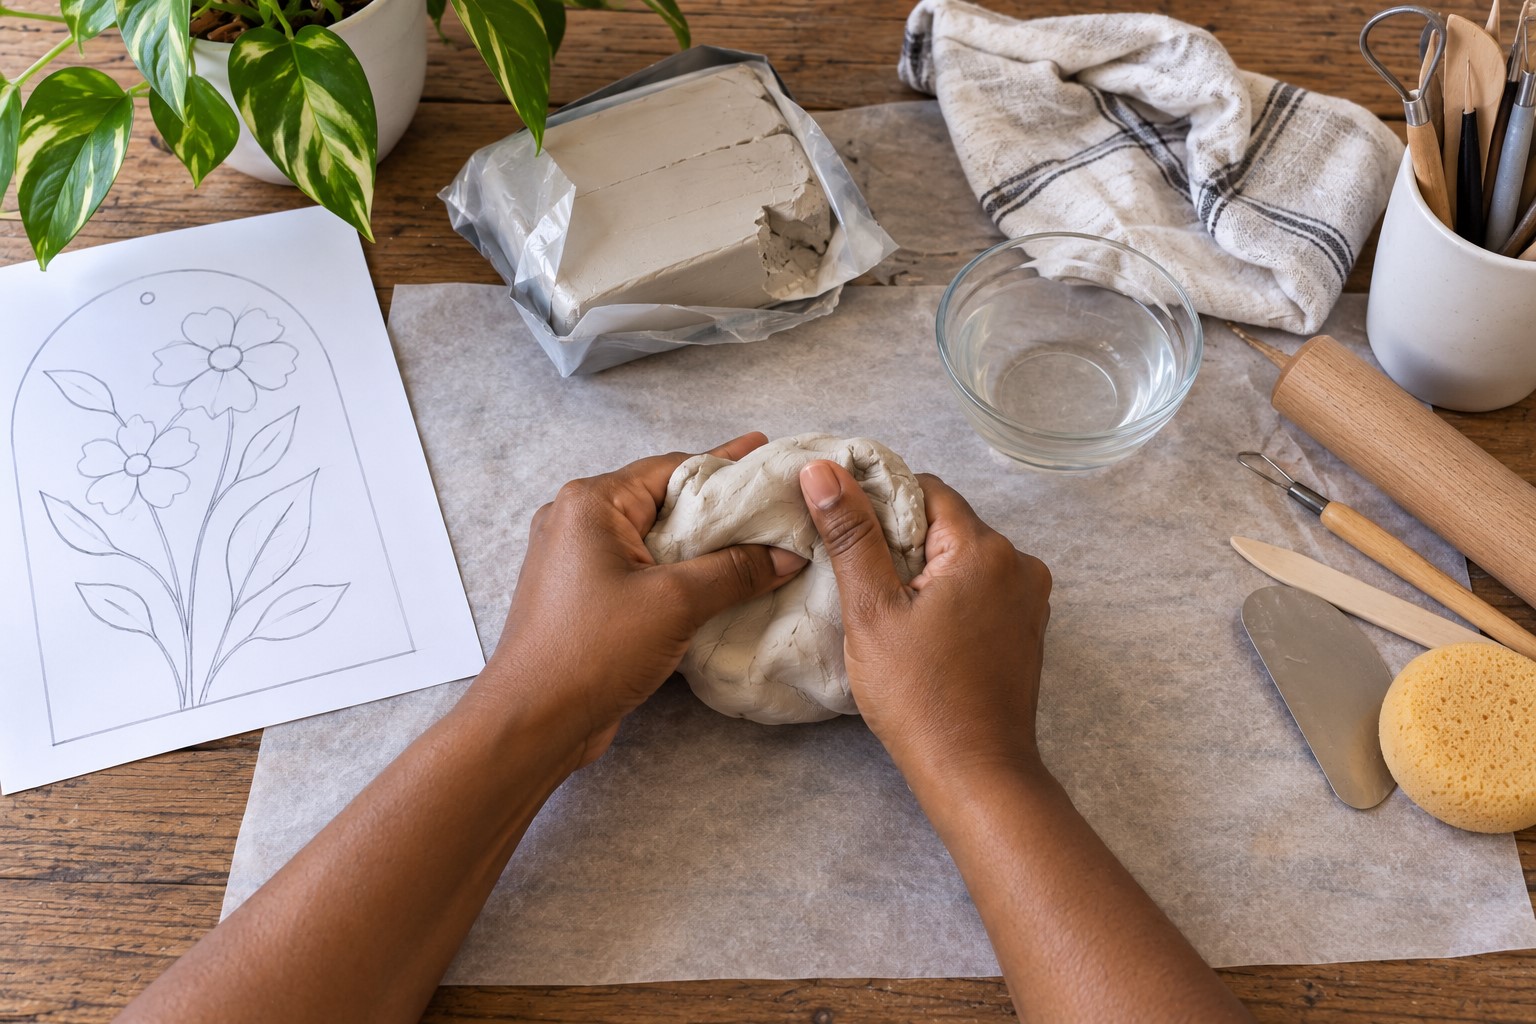
Give yourself a clean, comfortable area before you begin.
Clay can easily pick up crumbs, dust, and bits of dried material from your table. Those little pieces can leave marks on your finished artwork.
Cover your work surface with baking paper or another smooth material. Then place your clay, tools, sketch, and texture items within reach.
Open your clay and check its condition.
If it feels stiff, knead it gently with your hands. Work it until it becomes softer and easier to shape. Look for cracks as you knead.
Smooth small cracks with your fingers instead of ignoring them. A crack that looks tiny now may become more noticeable as the clay dries.
Don’t add lots of water to make the clay softer.
Follow the instructions that came with your particular clay. Too much water can make some types of clay sticky and difficult to handle.
Once the clay feels workable, roll it loosely into a ball. Now you are ready to create your base.
Step 3: Roll and Cut the Clay Base
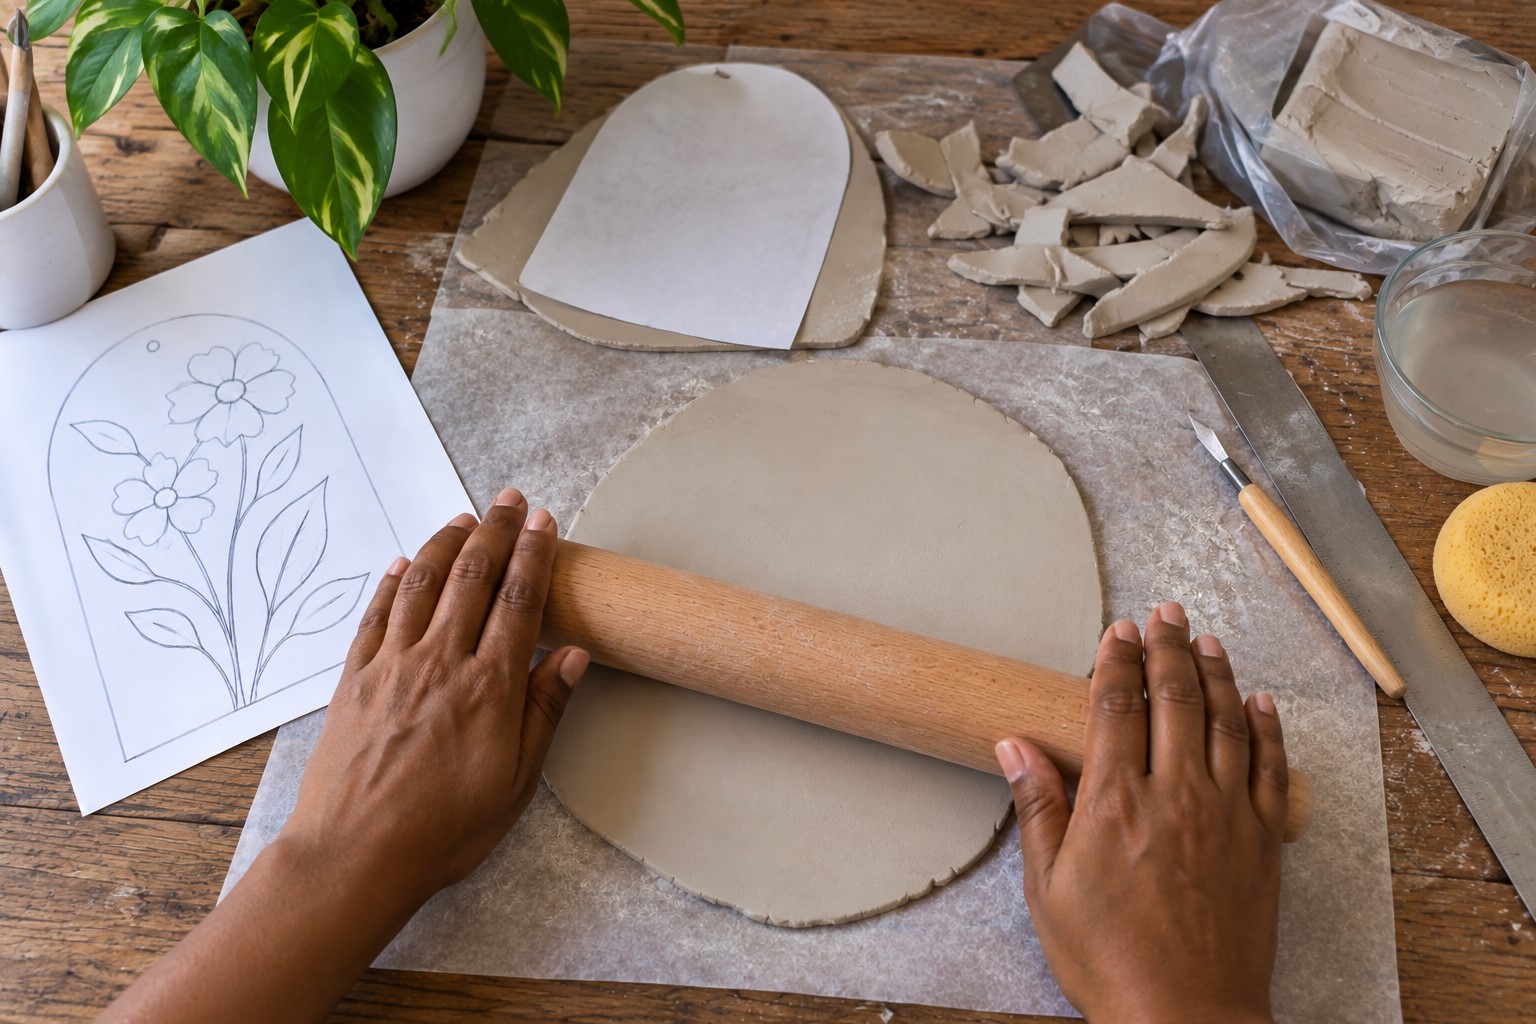
Place the clay on your prepared work surface. Use your rolling pin to flatten it gradually. Start from the center and roll toward the edges.
Turn the clay occasionally as you work. This helps you avoid creating one thick side and one thin side.
Keep checking the thickness from different angles.
You want a sturdy base that can support your raised details. At the same time, you don’t want to make the piece unnecessarily heavy.
Once the clay reaches a suitable thickness, place your paper template on top if you made one. Use a pencil to lightly mark the outline if needed.
Then carefully cut around the shape with your clay tool. Work slowly around curves and corners.
Instead of forcing the cutting tool through the clay in one movement, make smaller controlled cuts.
Remove the extra clay around your shape. Keep those scraps nearby. You can use them to create petals, leaves, dots, borders, or other small details.
Once the main shape is cut, look at it from different angles. If one side looks noticeably uneven, correct it now. This is much easier before you start decorating the surface.
Step 4: Smooth and Refine the Base
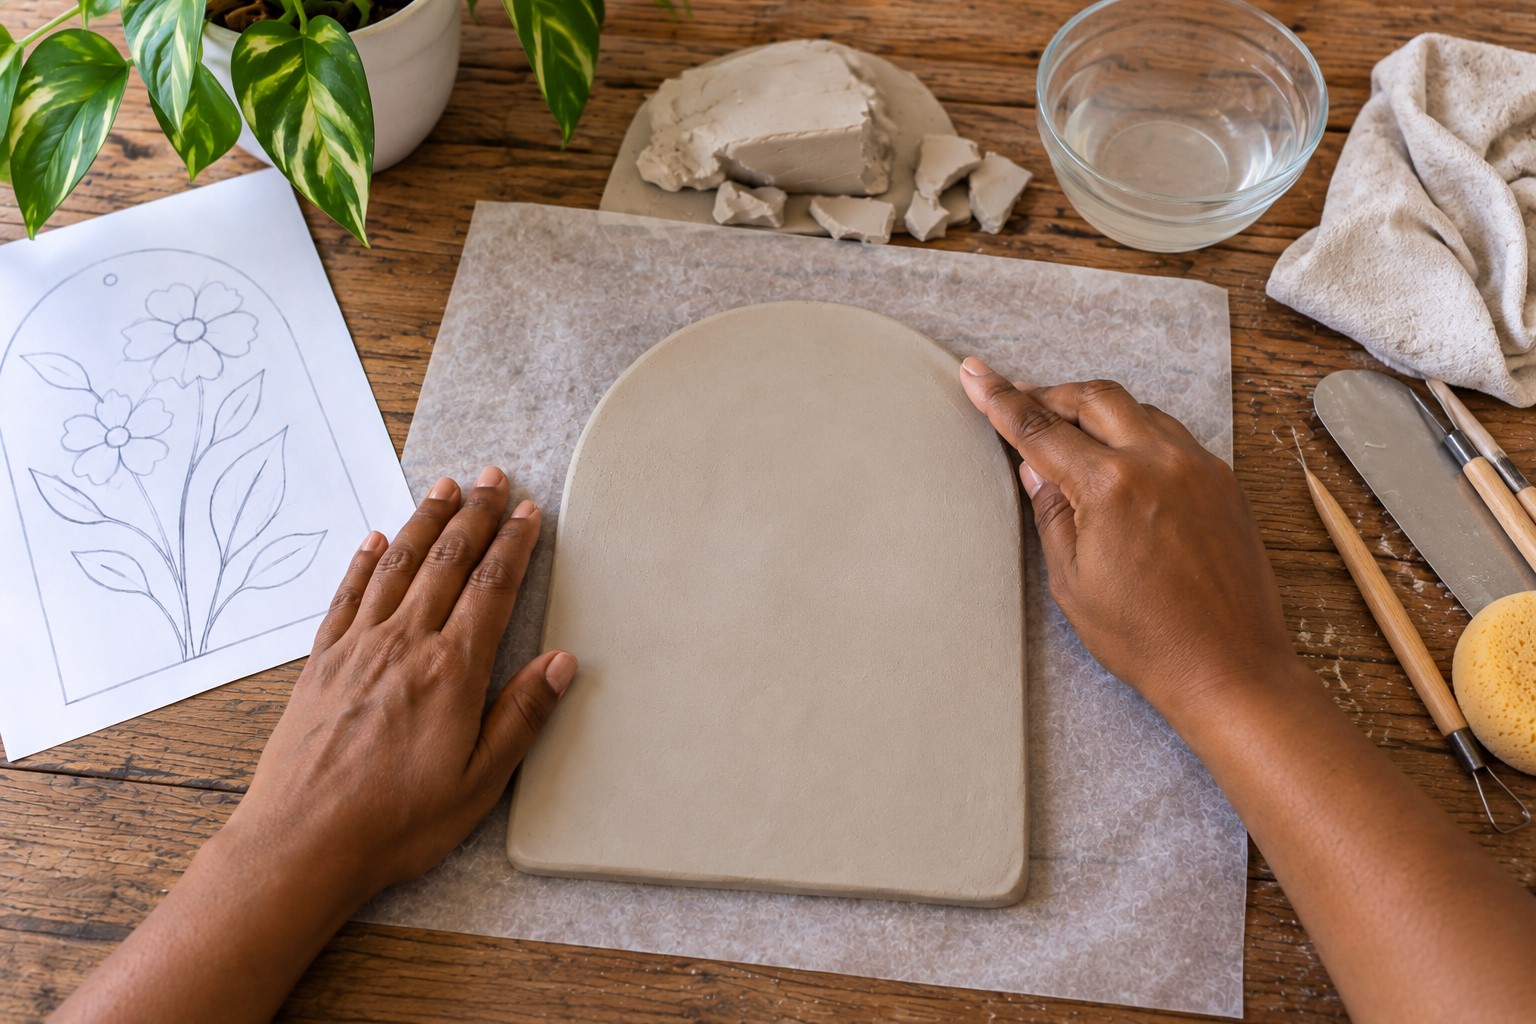
Now take a closer look at your clay base. You may notice fingerprints, dents, cracks, or rough edges. Smooth those areas gently with your fingertip.
If your clay instructions allow it, you can use a tiny amount of water on your fingertip to help smooth stubborn areas.
Use very little. You don’t want to make the surface wet. Pay special attention to the edges.
Run your finger gently around the outside of the piece and soften any sharp bumps.
The edge does not have to look perfectly manufactured. A slightly organic edge can actually suit handmade wall art.
Still, remove anything that looks accidental or distracting. Turn the piece around as you work.
Sometimes an edge looks smooth from one direction but uneven from another.
Once you are happy with the base, place your sketch beside it. Now you can start building the actual artwork.
Step 5: Create the Main Raised Shapes
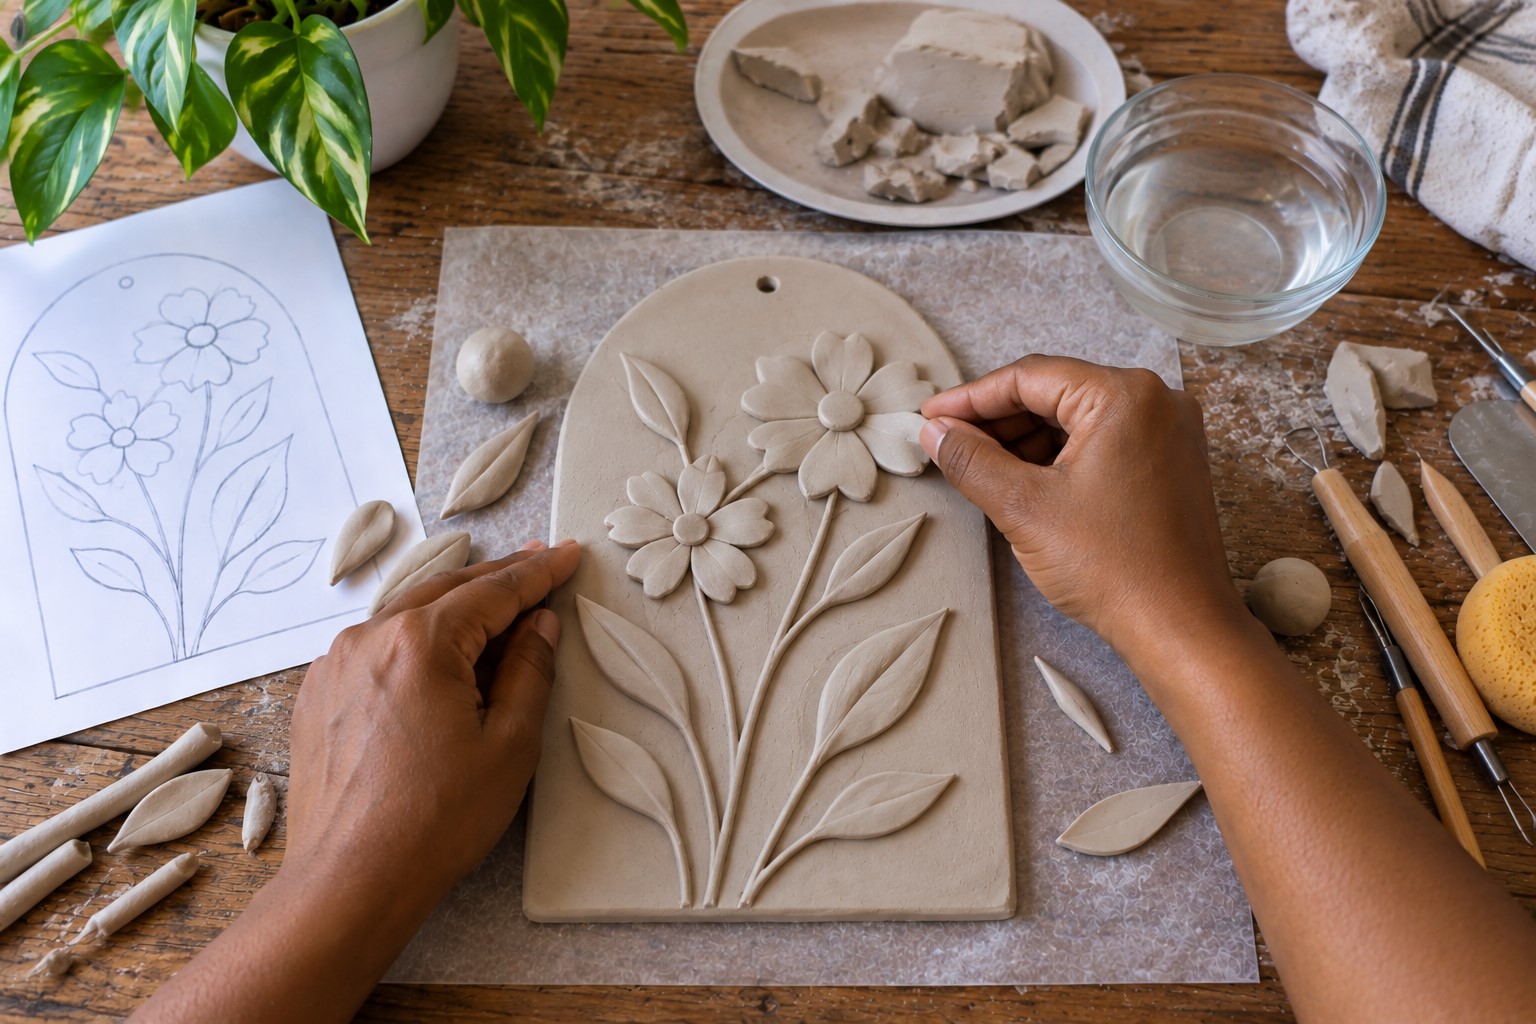
Start with the largest elements in your design. This is where your leftover clay becomes useful. Take a small piece and roll it between your fingers.
For a flower, flatten the piece and shape it into a petal. For a leaf, make a small oval shape and pinch one end into a point.
For an abstract design, roll thin clay strips and bend them into curves. If you are making a sun, create a raised circle for the center.
Then prepare the rays separately. Don’t make every detail the same size.
A little variation can make the artwork look more natural. Place your shapes on the base before attaching them.
Move them around until the arrangement feels balanced. Look at the whole piece instead of focusing on one section.
If one corner feels crowded, remove a detail. If another area looks empty, you can add something later.
Build from the largest shapes toward the smaller ones. That simple order makes it easier to control the design.
Step 6: Attach and Blend the Clay Details
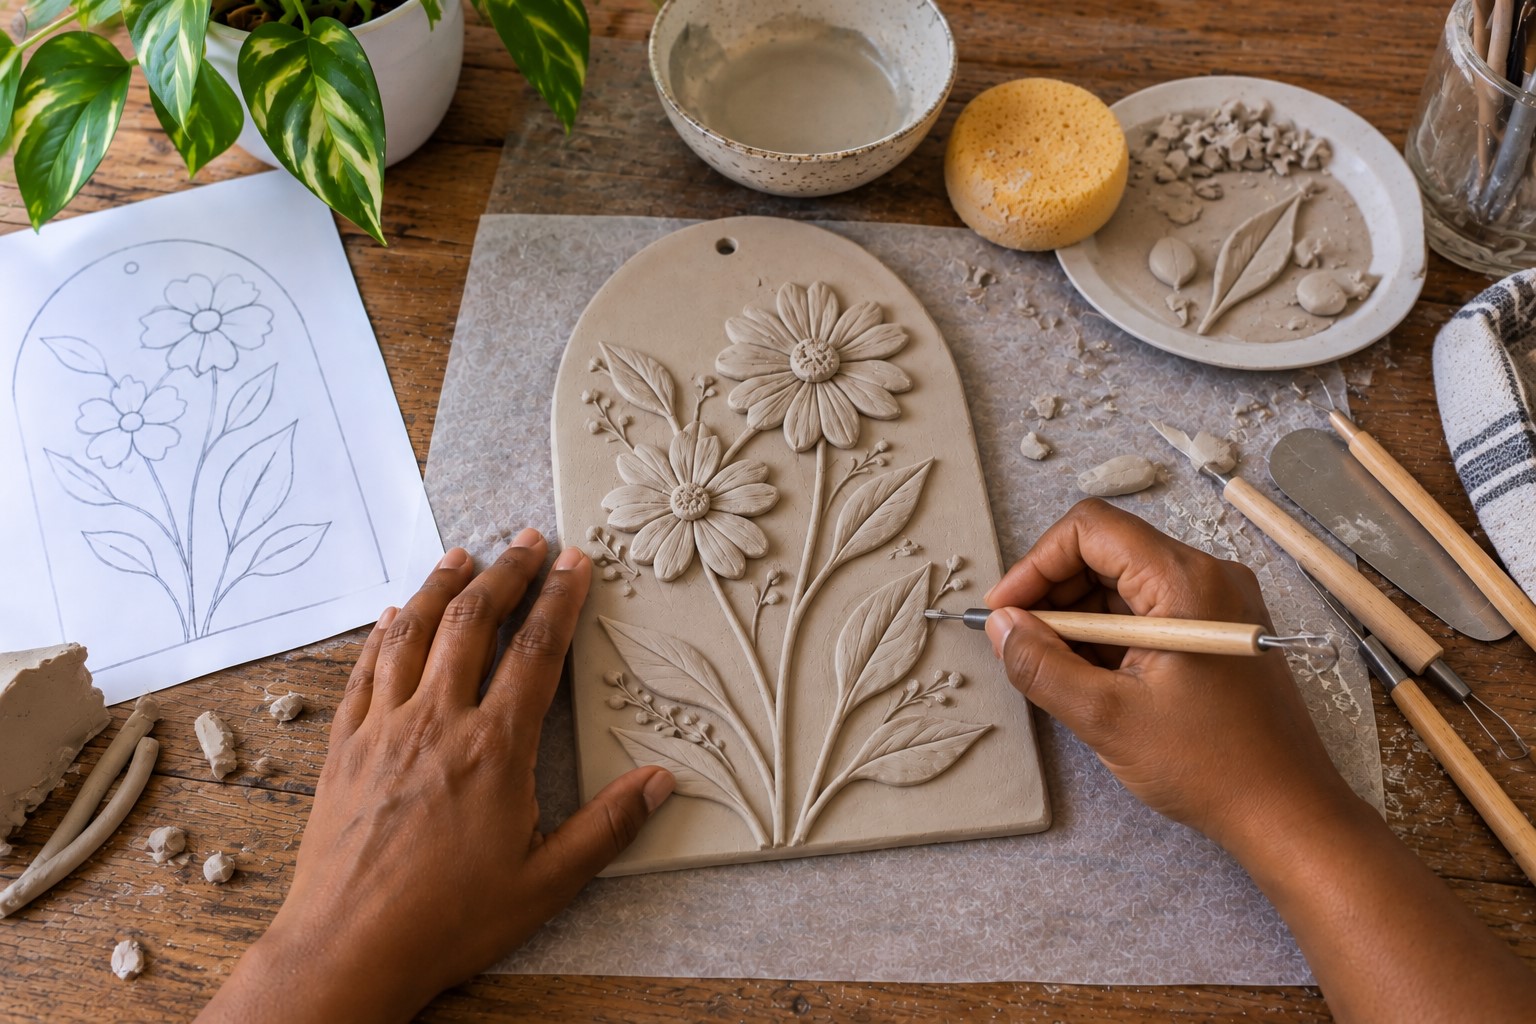
Once you are happy with the arrangement, start attaching the raised pieces. Press each piece gently onto the main clay base.
You want the pieces to connect firmly without flattening them. Use your fingertip or a clay tool to blend the edges slightly.
This helps the added clay become part of the base instead of simply sitting on top. Work slowly around flowers, leaves, curves, and other raised shapes.
If an edge looks too sharp, soften it. If a piece shifts while you work, reposition it before continuing.
You can also add a little texture to the raised pieces before attaching them. For example, use a clay tool to create veins on leaves.
Small lines can make a simple shape much more interesting. Just avoid pressing too deeply.
You still want the raised form to remain easy to see. Keep checking the thickness of your details too.
Very thick pieces can add unnecessary weight to the finished wall art. Thinner details usually create a cleaner result.
Step 7: Add Texture and Fine Details
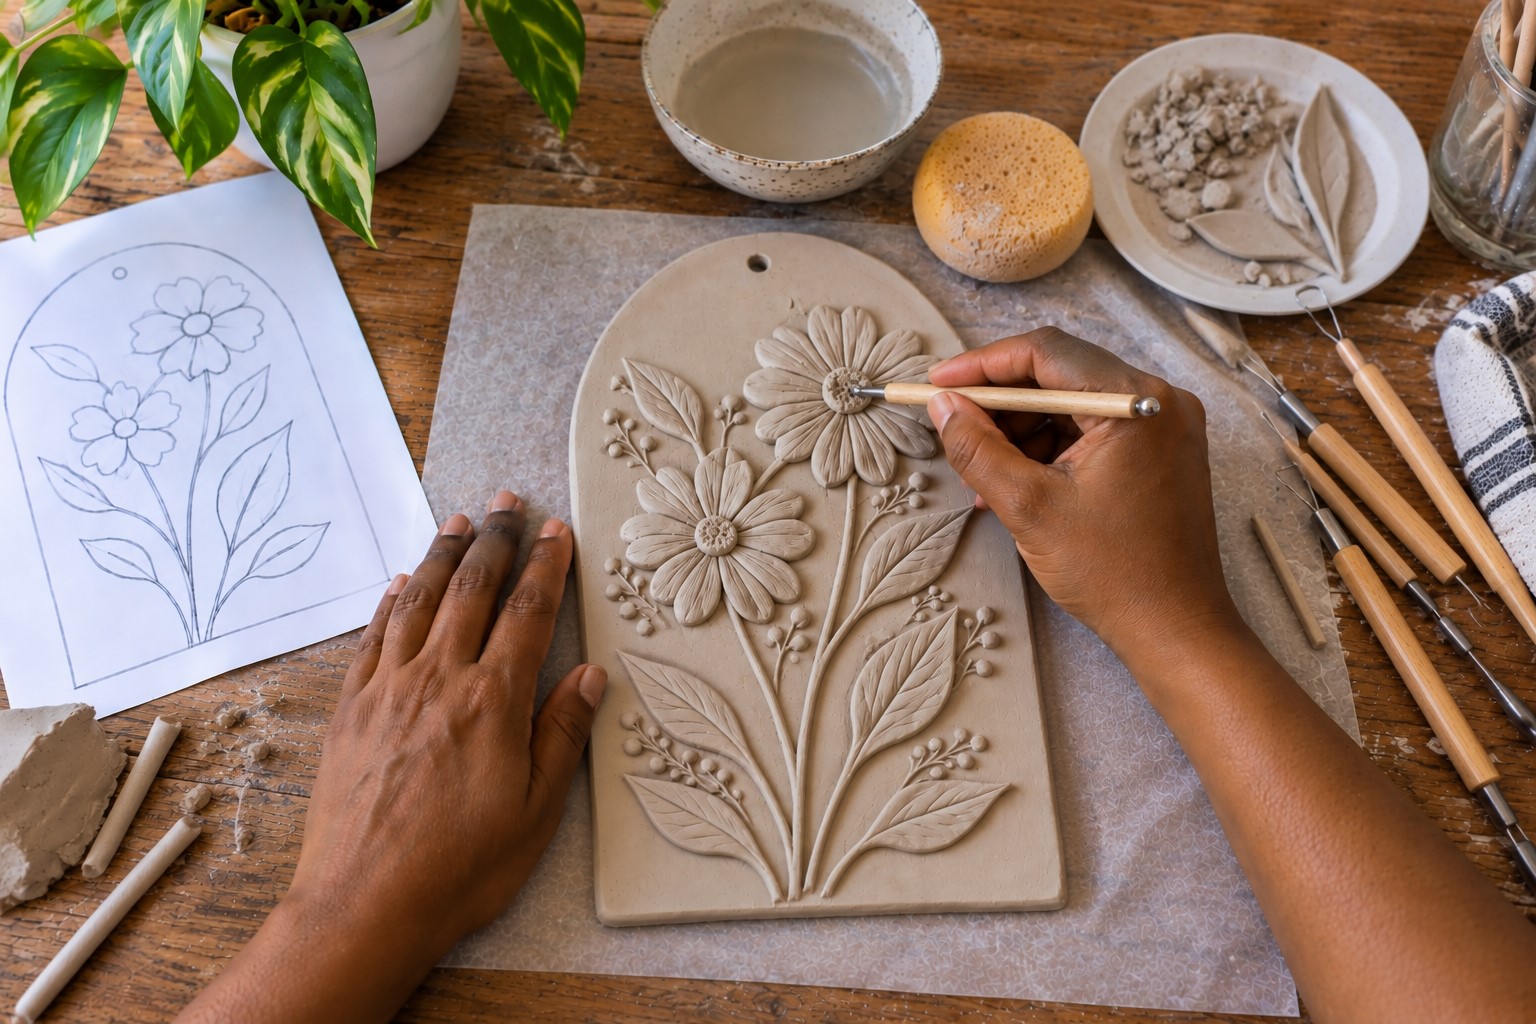
Once your main shapes are in place, add texture where it makes sense. You don’t need to texture the entire piece.
In fact, leaving some areas smooth can make the textured parts stand out more. Take a fork and press it gently into one section.
You can create repeated lines this way. A bottle cap can create circles, while lace can leave a delicate pattern.
You can also press a leaf into the clay for a natural impression. Always test an object on leftover clay first. This lets you see how deep the texture will be.
When you find a pattern you like, press the object straight into the clay. Then lift it carefully. Avoid dragging it across the surface.
Dragging can stretch the clay and distort your pattern. For smaller details, use the pointed end of a clay tool.
You can create dots, short lines, tiny borders, or patterns around your main shapes.
Try not to add details simply because you can. Every mark should have a reason to be there.
If the design already looks balanced, you may not need anything else.
Step 8: Check and Prepare the Piece for Drying
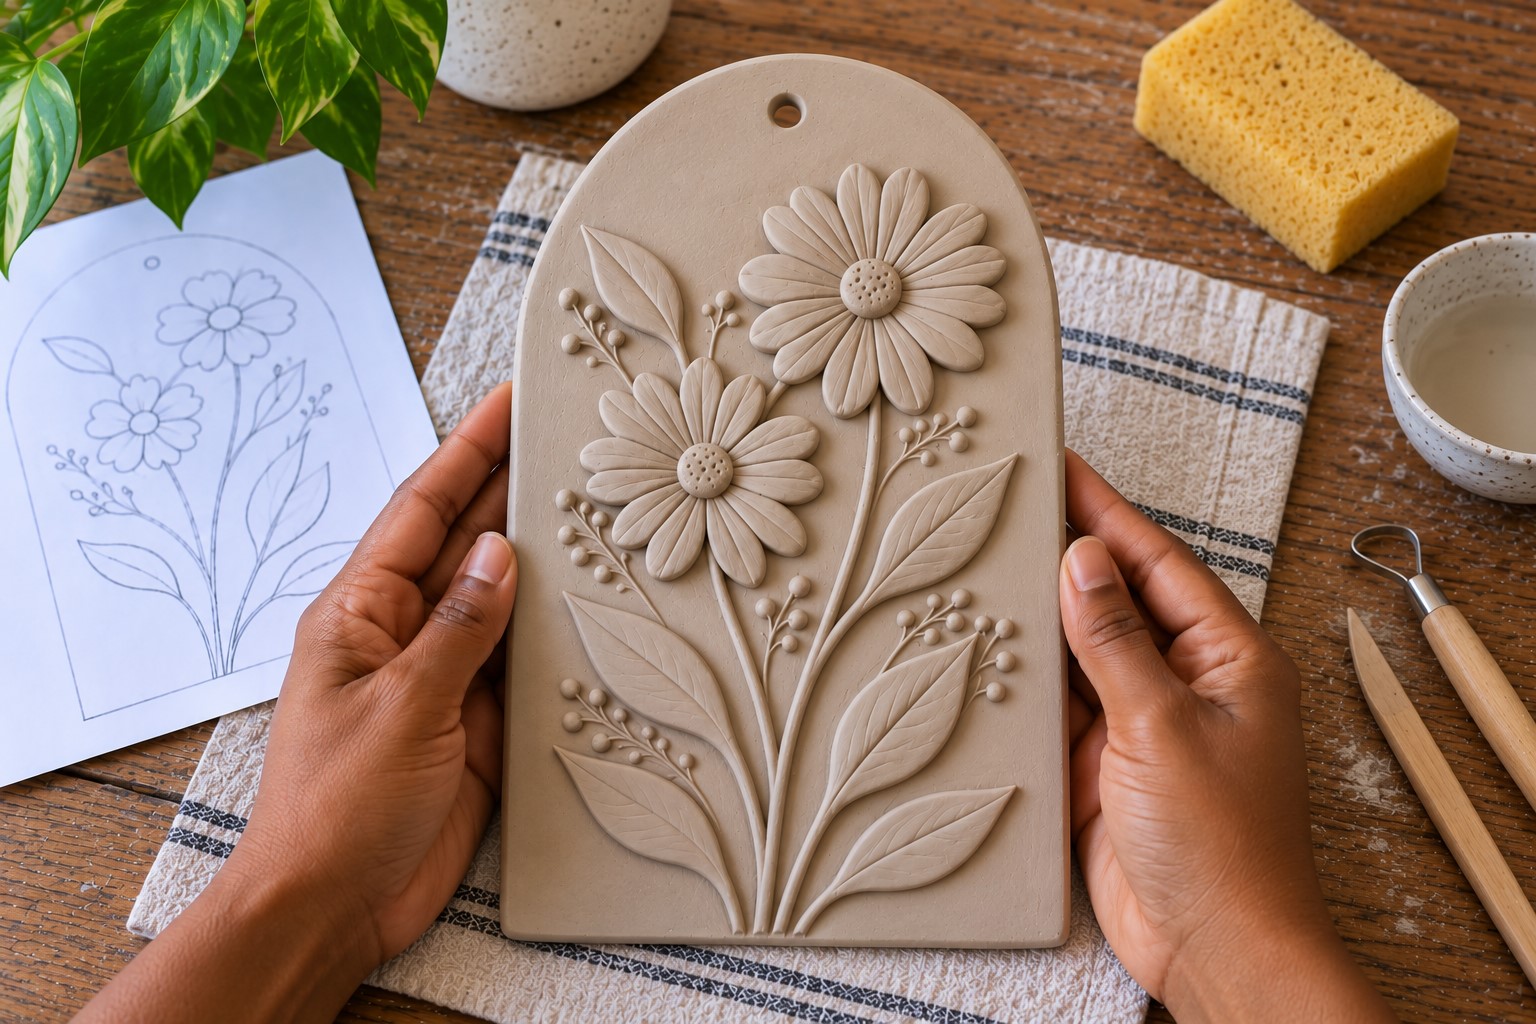
Before you leave the clay to dry, give your artwork one final inspection. Look at it from the front. Then turn it slightly and check the edges.
Step back from the table if you can. Seeing the artwork from a little distance can reveal things you miss when you work close to it.
Check if one side feels heavier than the other. Look for details that seem too crowded.
Also check for loose pieces. Anything that moves when you gently touch it needs attention.
Smooth the connection between that piece and the base. Now check the back of your wall art.
It does not need to look perfect, but it should sit reasonably flat. An uneven back can make hanging difficult later.
If you plan to use a hanging hole, make it now while the clay remains workable. Place it near the top, but not too close to the edge.
A weak edge can break during handling. Finally, clean away loose bits of clay from the surface. Your artwork is now ready for drying.
Step 9: Dry and Sand the Clay
Place the finished piece somewhere clean and safe. Follow the drying instructions provided with your clay.
Some air-dry clays need several hours, while thicker pieces can take much longer.
Don’t assume the surface is completely dry just because it feels firm. The inside may still hold moisture.
Avoid moving the artwork unnecessarily while it dries. Also, don’t place it beside strong heat unless your clay instructions specifically allow that method.
Fast drying can cause some pieces to crack or warp. Give the clay enough time to dry naturally.
Once it has completely dried, inspect the surface again. You may notice small rough areas around the edges.
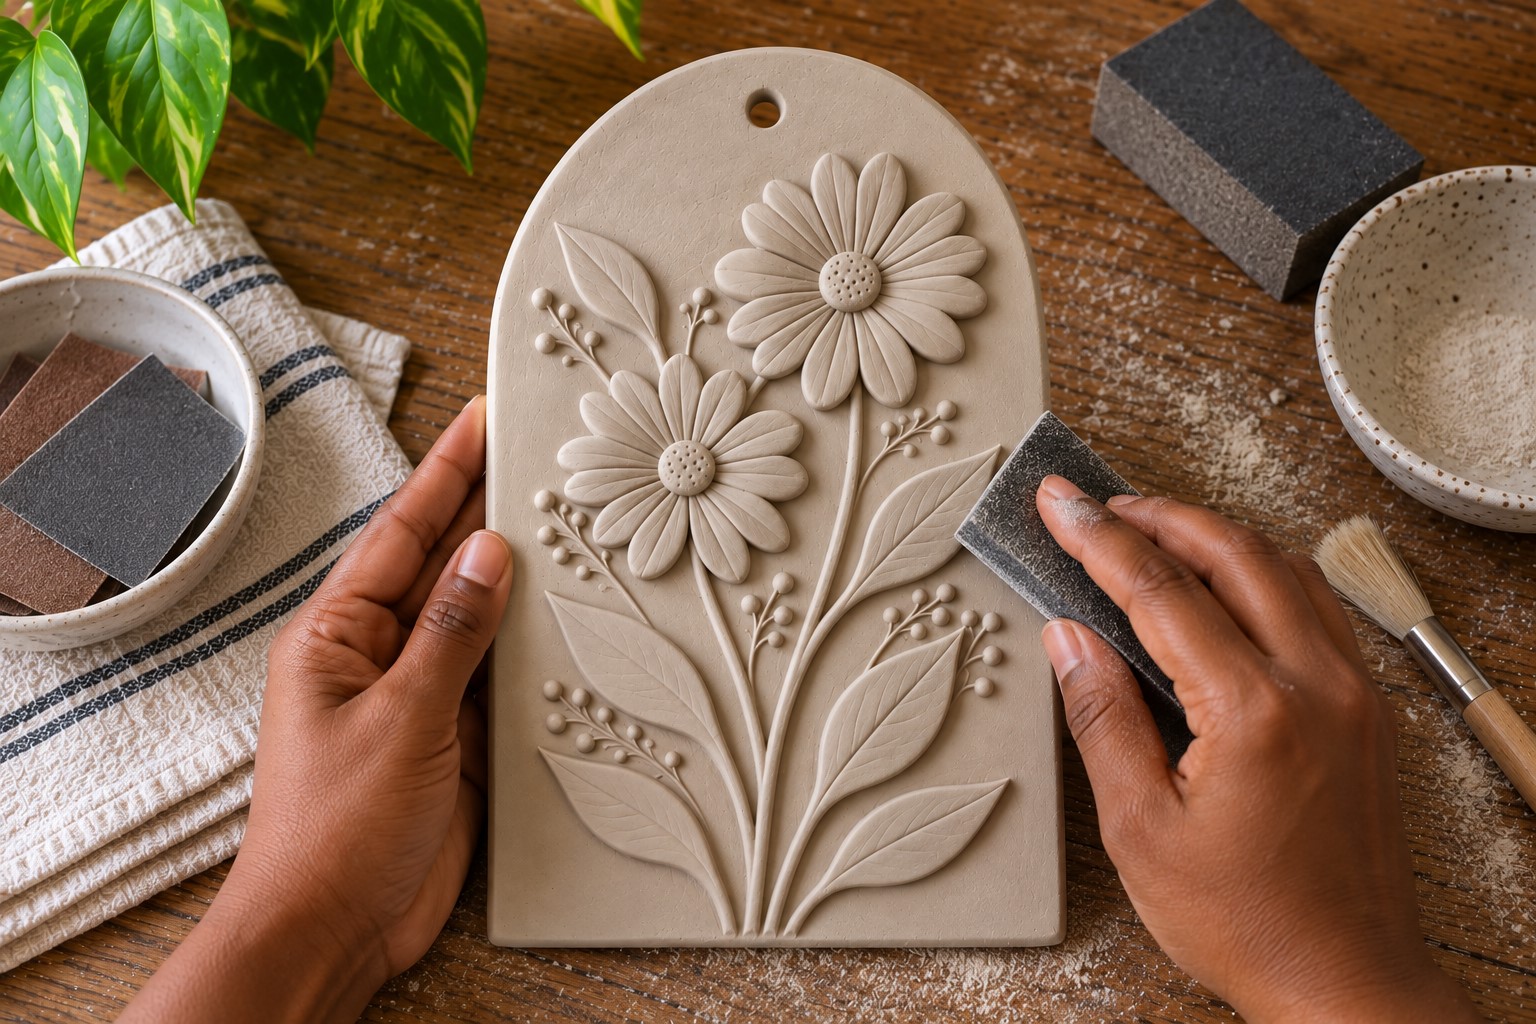
Use fine-grit sandpaper to smooth those spots. Work gently. You only need to remove roughness, not reshape the artwork.
Be especially careful around raised details. You don’t want to sand away the texture or shapes you created.
After sanding, wipe the entire piece with a clean, dry cloth. Remove all the clay dust before you start painting.
Step 10: Paint the Wall Art
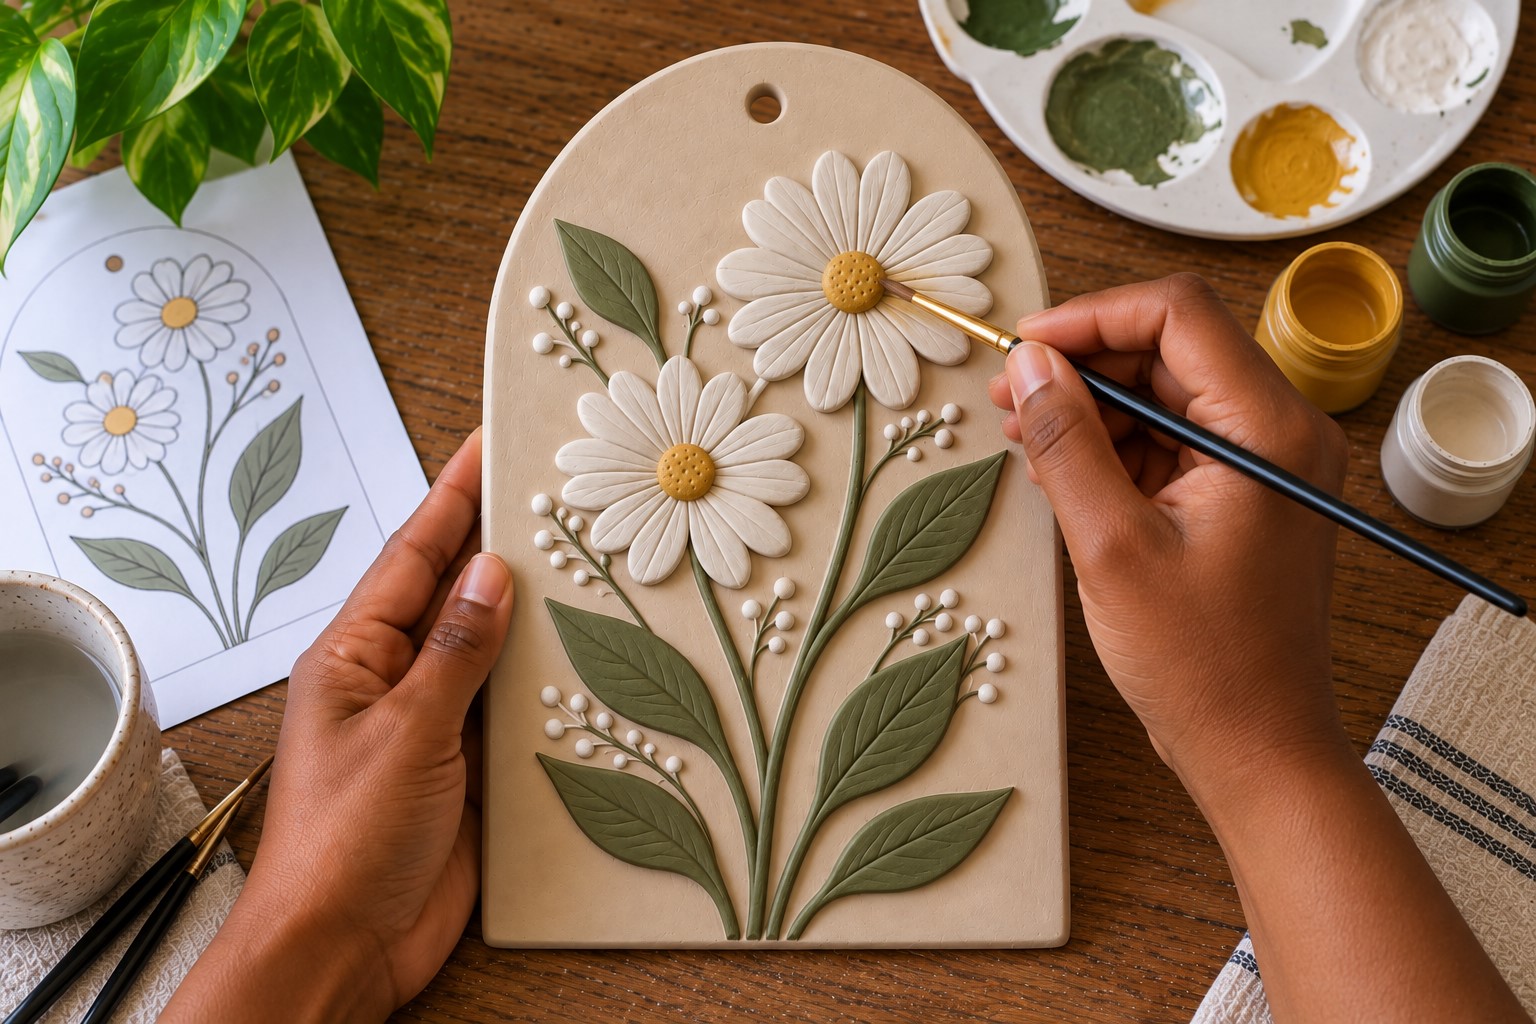
Now you can finally add your colors. Before painting, decide which areas should receive color. You could paint the entire piece one shade.
That can work beautifully when your design relies heavily on texture and raised shapes.
You could also use two or three colors. Start with the largest areas first. Use a medium brush and apply a thin layer of paint.
Don’t try to cover everything perfectly in one coat. Let the first coat dry before deciding if another one is needed.
Use a smaller brush around raised shapes. Take your time around the edges.
If you want the texture to stand out, try using a slightly darker color over the raised areas.
You can also try dry brushing. For this technique, put a small amount of paint on your brush.
Wipe most of it off before lightly brushing across the raised texture. The paint will catch on the higher areas.
This can make your patterns much easier to see. For a softer look, leave some natural clay showing through.
That little bit of variation can give the artwork more character.
Step 11: Seal and Prepare It for Hanging
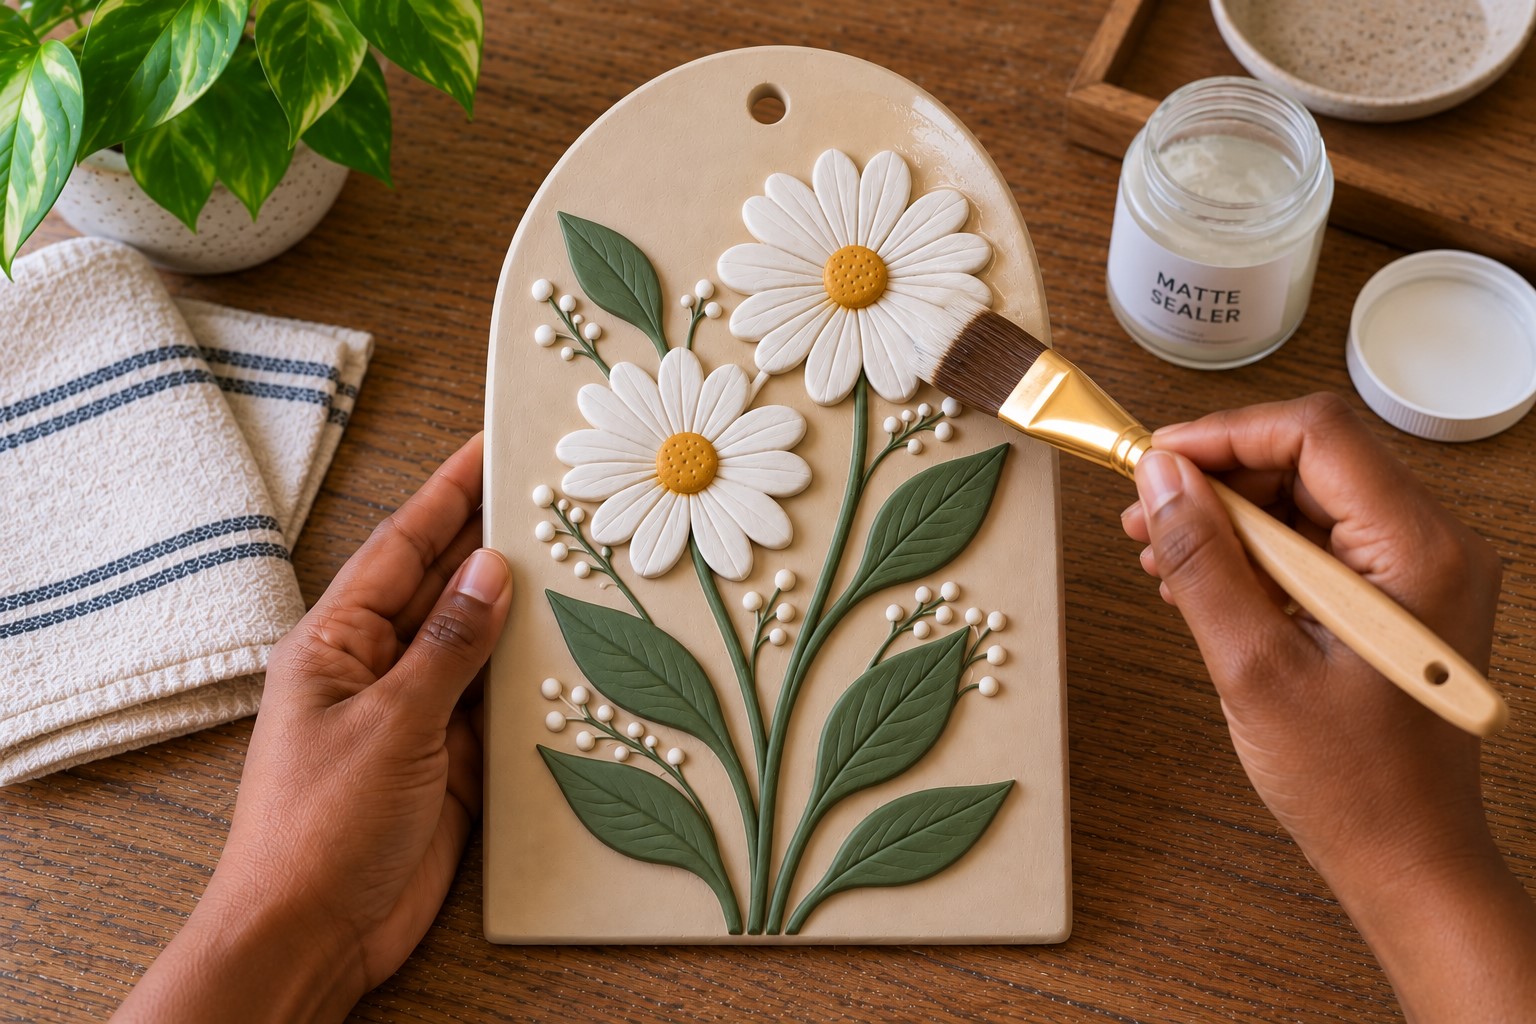
Once the paint has completely dried, inspect the artwork again. Look for areas that need another coat. Also check the edges for stray paint.
Fix those small problems before applying any sealer. If your clay and paint products allow it, apply a suitable clear sealer.
Read the product instructions first. Some sealers create a matte finish, while others create a glossy surface.
Choose whichever finish suits your design. Apply a thin, even coat. Don’t pour a heavy layer over the artwork.
Too much product can cover some of the texture you worked hard to create. Let the first coat dry properly.
Then add another coat if the product instructions recommend it. Once everything is completely dry, prepare your hanging hardware.
Choose hardware that can safely support the weight of your finished piece.
A lightweight artwork has different needs from a large, heavy one. Don’t rely on weak adhesive for a piece that could fall and break.
Step 12: Hang and Finish Your Clay Wall Art
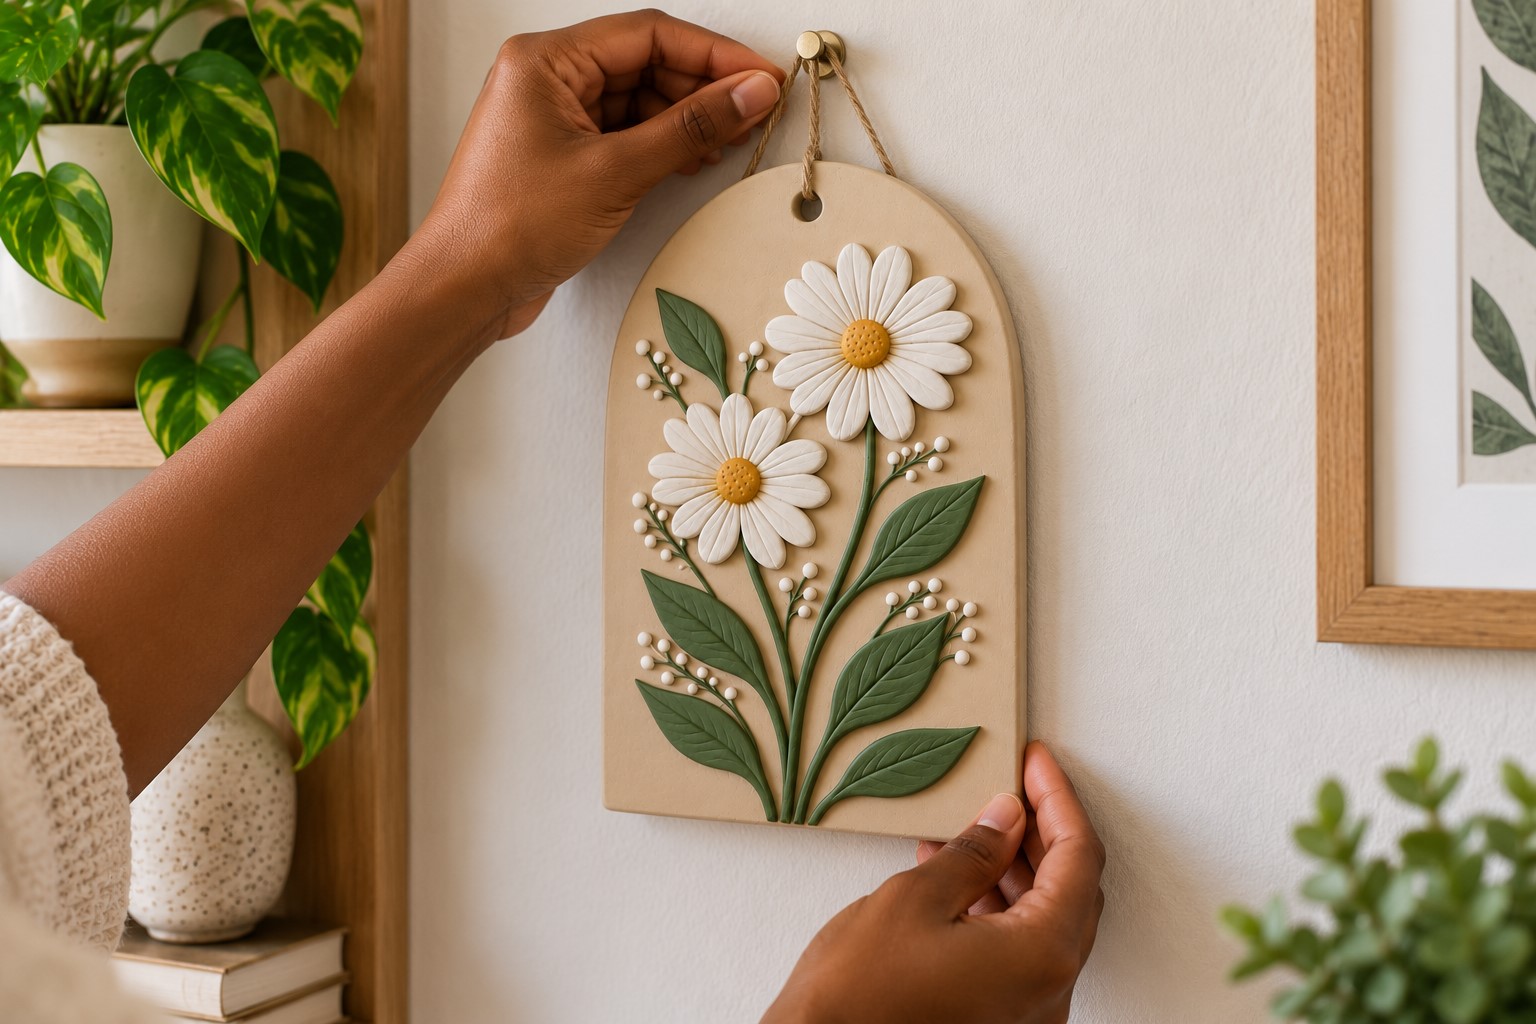
Before putting the hardware into the wall, decide exactly where you want the artwork to sit. Hold the piece against the wall and step back.
Look at it from across the room. You may discover that it looks better slightly higher or lower than you first imagined.
Check that the artwork feels balanced with the furniture and other objects around it.
Once you find the right position, install the appropriate wall hardware. Hang the artwork carefully. Then step back again.
This final check is worth doing because the piece may look different once it is actually on the wall.
If you made several smaller clay pieces, try arranging them with small spaces between them.
You can create a simple gallery-style arrangement without making every piece identical.
The Guide to Making Clay Wall Art does not end with making the clay piece itself. The final placement can change how the artwork feels in the room.
So, take your time with this last part. You worked through every stage by hand, and the finished piece deserves a spot where you can actually enjoy seeing it.
Tips for Making Clay Wall Art Look More Polished
A few small choices can make a handmade piece look much more intentional.
i. Create contrast: Mix smooth and textured areas instead of covering the entire surface with patterns.
ii. Vary your shapes: Make some leaves, petals, lines, or circles slightly different from each other.
iii. Keep the colors controlled: Two or three shades can often create more harmony than many unrelated colors.
iv. Leave breathing room: Empty sections give your main design somewhere to stand out.
v. Watch the edges: Smooth, carefully finished edges can make a simple clay piece look much more complete.
vi. Step back often: Looking at your artwork from a distance can help you notice an unbalanced design before it is too late.
Easy Clay Wall Art Ideas to Try
Once you understand the basic process, you can change the design to suit your style.
Textured Sun Wall Art
Create a round base and add a raised circle in the center. Then make simple rays around it.
Give a few rays different textures while leaving others smooth. You can paint the whole piece one warm shade or use a darker color for the raised areas.
Botanical Clay Wall Art
Make an organic-shaped base and add raised leaves, stems, and simple flowers. Keep the leaves slightly different in size.
Add shallow lines to each leaf for extra detail. You can leave the clay natural or paint the raised elements in soft green shades.
Abstract Clay Line Art
Create a simple base and cover it with raised curved lines. Let some lines overlap while others remain separate.
Add a few small circles or dots if the design needs more interest. A single paint color can give this idea a clean, modern appearance.
Floral Clay Wall Art
Start with a simple oval or circular base. Make small petals from leftover clay. Arrange them into flowers across the surface.
Then add thin stems and a few leaves. Keep the background plain so the flowers remain the main focus.
Moon-Inspired Clay Wall Art
Create a round base with a raised crescent moon. Add small dots or shallow marks around it.
You can also make a few tiny raised stars. Paint the background a deeper shade and use a lighter color for the raised details.
Final Thoughts
Making clay wall art becomes much easier when you stop looking at the finished piece as one huge project.
Instead, work through the design one stage at a time. Start with the base, build the raised details, add texture, and then let the clay dry properly.
The Guide to Making Clay Wall Art is really about understanding those small stages and giving each one enough attention.
If I were sitting beside you while you made your first piece, I would tell you not to panic over tiny imperfections.
Your edges may not be perfectly even, and your raised shapes may not match exactly. That is part of working with your hands.
What matters more is taking your time, checking the design as you go, and fixing the problems you can fix before the clay dries.
Once you become comfortable with the process, you can make the project much more personal.
Change the shape, try different textures, experiment with colors, or create several smaller pieces for one wall.
You don’t have to copy somebody else’s artwork to make something worth displaying.
Start with a simple idea, follow the steps, and let your own style develop as you work.