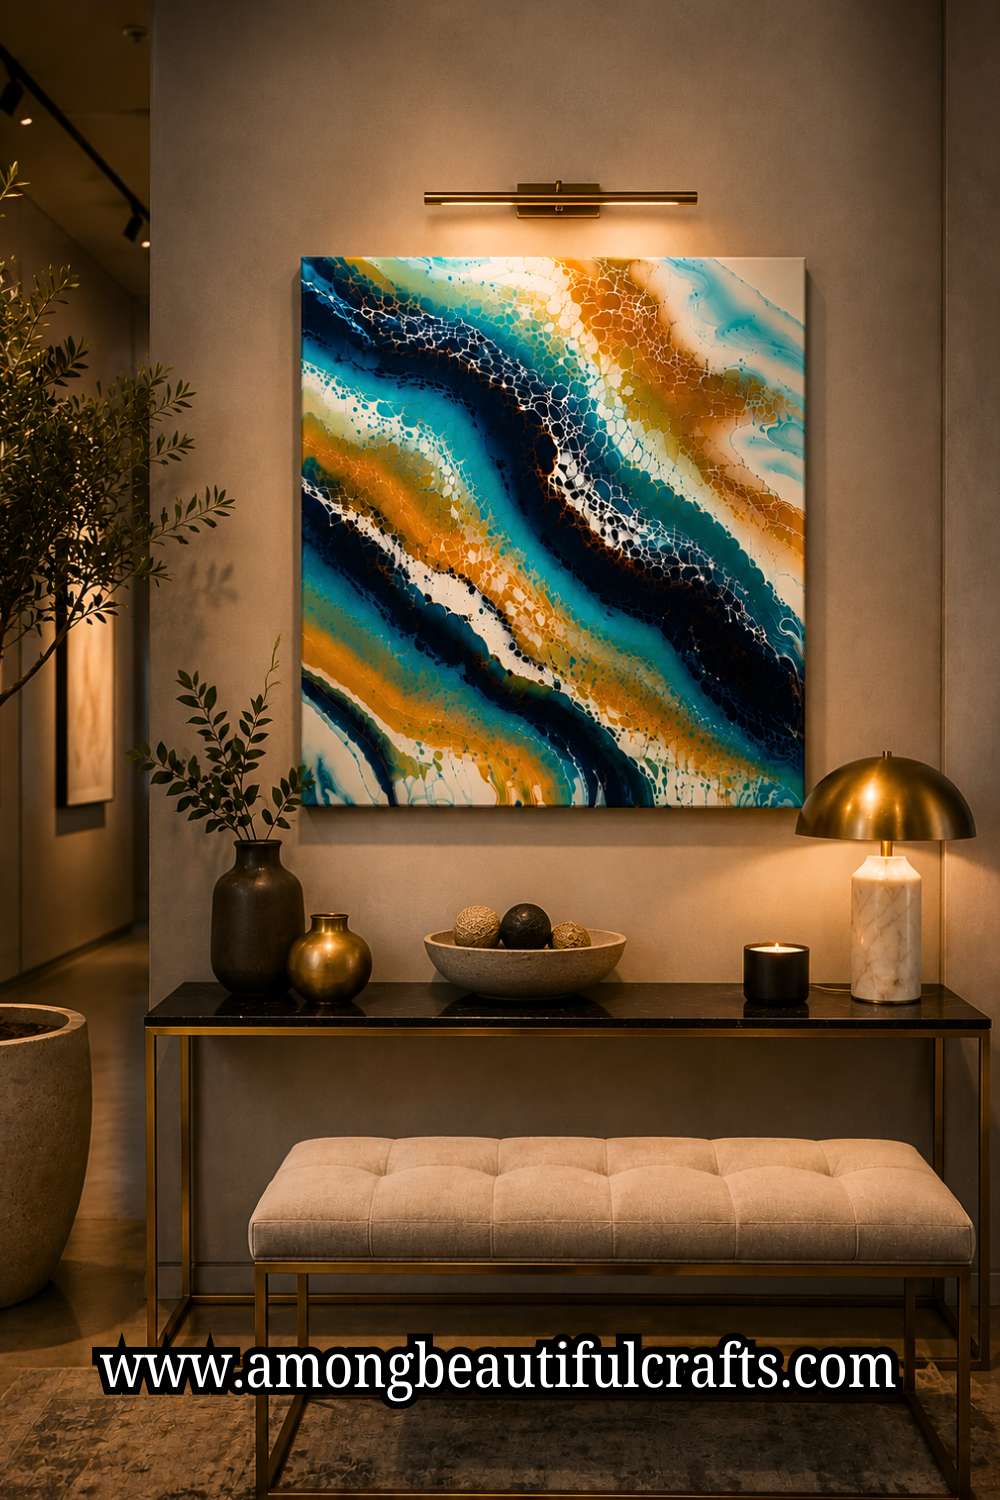
People often assume beautiful artwork comes with a high price tag. A glossy abstract painting hangs on a wall, catches the light, and instantly makes a room feel more inviting.
Most visitors admire it for a moment before asking the same question. “Where did you buy it?” The answer surprises them every time because it did not come from an expensive gallery.
It started on a table at home with a blank canvas, a handful of acrylic paints, and the simple techniques behind learning How to Create Acrylic Pour Art at Home.
If you enjoy expressing your personality through color and design, 25 Aesthetic BTS Painting Ideas Every ARMY Should Try is another fun way to turn a blank canvas into something meaningful.
That surprise explains why acrylic pouring has become a favorite project for so many creative people.
Instead of worrying about perfect brush strokes, you get to watch colors stretch, twist, and blend into patterns that feel almost impossible to plan by hand.
Every movement creates something new, yet each step still follows a simple process.
Once you understand why the paint behaves the way it does, the project becomes much less intimidating. Soon, you stop hoping for a good result and start creating one on purpose.
This guide explains each part of Creating Professional-Looking Acrylic Pour Art at Home in clear, simple English without skipping the little details that matter.
Along the way, you will learn practical techniques that improve every pour and help your artwork look clean, polished, and display-worthy from the very beginning.
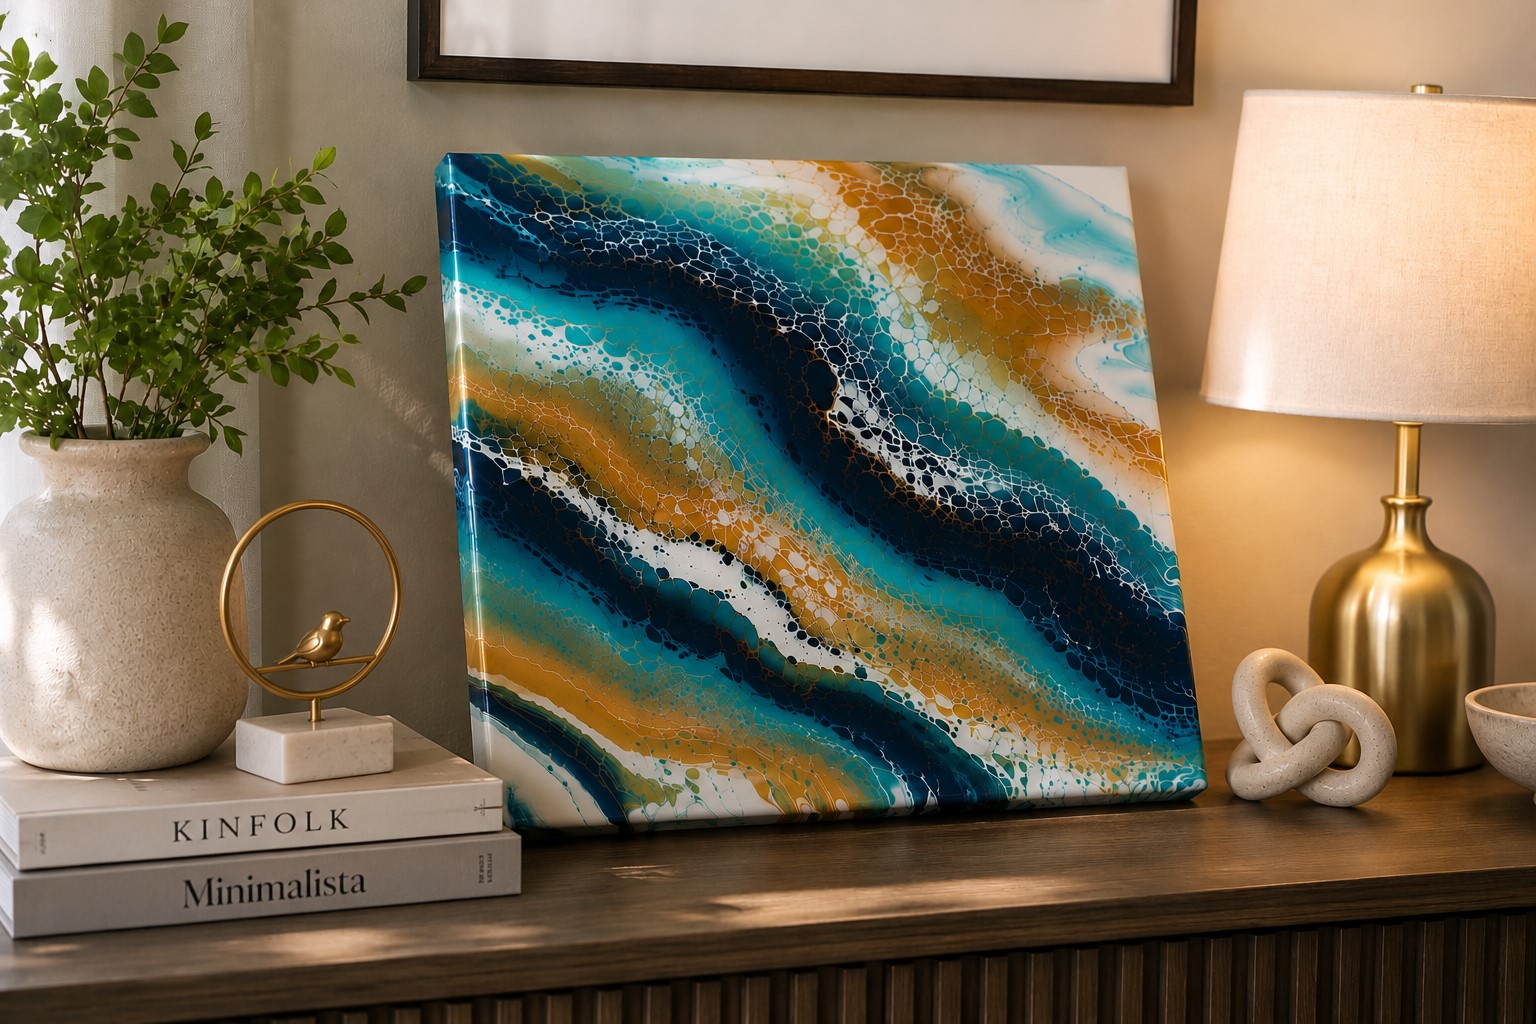
Supplies You’ll Need
Gathering everything before you begin makes the whole process more enjoyable. Acrylic pouring moves quickly once the paint is mixed, so you do not want to stop halfway because you forgot a supply.
Most of these items are affordable, and many will last through several projects.
- Acrylic paint – (Available on Amazon): Choose good-quality acrylic paints with strong pigments. You do not need every color in the store. Four to six colors work well for your first project because they create interesting patterns without looking crowded. Rich colors also keep their brightness after they dry.
- Pouring medium – (Available on Amazon): This product helps the paint flow across the canvas while keeping the color strong. It also reduces cracking and gives your artwork a smoother finish. Always follow the mixing instructions on the bottle because every brand recommends a slightly different ratio.
- Silicone oil (optional): Many artists add a few drops of silicone oil to create round “cells” throughout the painting. These cells give acrylic pour art its signature look. You can still create beautiful artwork without silicone, so do not worry if you cannot find it.
- Stretched canvas – (Available on Amazon): A pre-stretched canvas saves time because it already has a smooth painting surface. Beginners usually find an 8 x 10-inch or 11 x 14-inch canvas easier to handle than a very large one.
- Plastic or silicone mixing cups – (Available on Amazon): You will need separate cups for each paint color and one larger cup for combining the colors before pouring. Clear cups help you see how the colors layer together.
- Wooden craft sticks – (Available on Amazon): These help you mix the paint thoroughly. A smooth mixture creates a much better finish than one with streaks or lumps.
- Measuring cups or measuring spoons – (Available on Amazon): Accurate measurements make it easier to achieve the right paint consistency every time. Guessing often leads to paint that feels too thick or too runny.
- Disposable gloves – (Available on Amazon): Acrylic paint washes off many surfaces, yet it can stay on your hands for quite a while. Gloves also make cleanup much easier.
- Plastic table cover or drop cloth – (Available on Amazon): Protecting your table allows you to enjoy the project without worrying about accidental spills.
- Painting pyramids – (Available on Amazon), upside-down cups, or small blocks: These lift the canvas above the table. The extra height allows excess paint to drip freely instead of sticking to the edges.
- Paper towels – (Available on Amazon) or old rags: Keep these nearby for wiping spills, cleaning your hands, or removing paint from the edges of the canvas.
- Small butane torch or heat gun – (Available on Amazon): This helps remove tiny air bubbles after pouring. If you use silicone oil, gentle heat also encourages beautiful cells to appear.
- A small level – (Available on Amazon): A level may seem unnecessary, yet it plays an important role. If your table tilts even slightly, the paint will slowly slide in one direction and change your design.
A similarly small, affordable supply list is all you need for learning How to Make Adorable Clay Magnets Worth Displaying, if you’re looking for another quick project to try.
How to Create Professional-Looking Acrylic Pour Art at Home
Step 1: Prepare Your Workspace Before Mixing the Paint
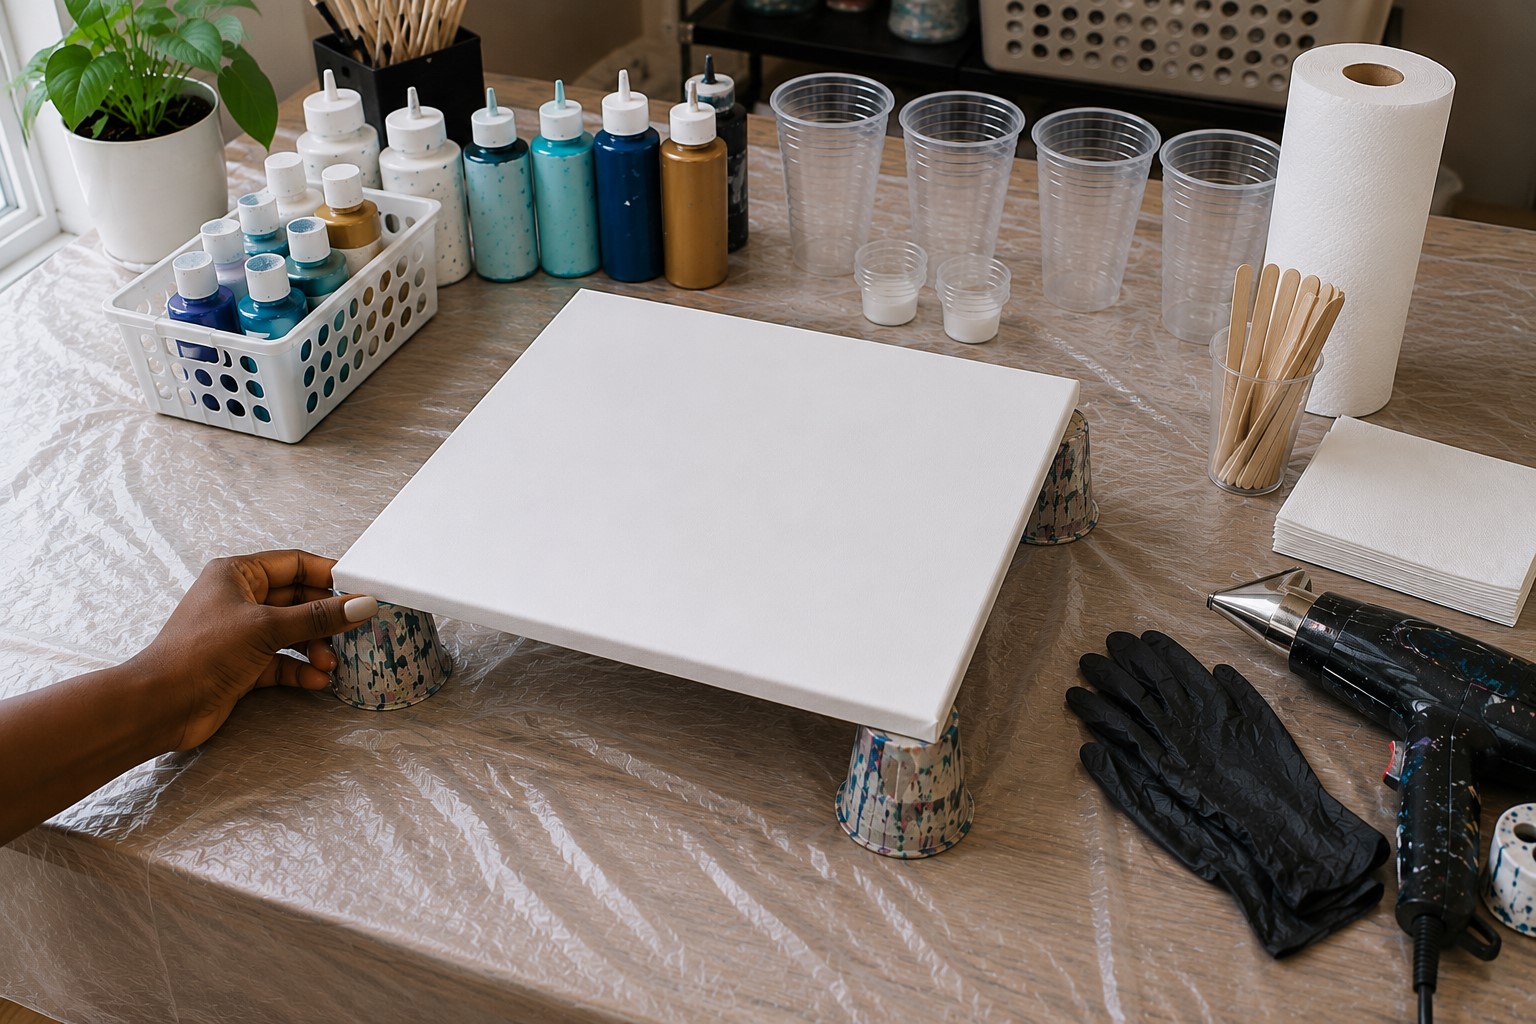
A successful acrylic pour starts long before the paint touches the canvas. Taking a little time to prepare your workspace helps the project flow smoothly from beginning to end.
Once the paint is mixed, you need to work at a steady pace, so having everything ready prevents unnecessary interruptions.
It also allows you to focus on creating your design instead of searching for missing supplies.
Begin by covering your work surface with a plastic tablecloth, drop cloth, or old shower curtain to catch paint drips.
Next, raise your canvas using painting pyramids, upside-down plastic cups, or small wooden blocks. This gives excess paint room to run off the edges without sticking underneath.
Arrange all your supplies within easy reach, including your paints, pouring medium, mixing cups, craft sticks, gloves, paper towels, and torch or heat gun if you plan to use one.
A clean, well-prepped workspace matters just as much in figuring out How to Build a Beautiful Terrarium That Doesn’t Get Moldy, where a rushed setup causes problems later.
Before moving on, check that your table is completely level. Even a slight slope can cause the paint to slowly slide in one direction, changing the design while it dries.
Finally, wear old clothes or an apron because acrylic paint splashes easily.
Spending five extra minutes on preparation may not seem exciting, yet it can save you from frustrating mistakes later.
Step 2: Choose Colors That Create Beautiful Contrast
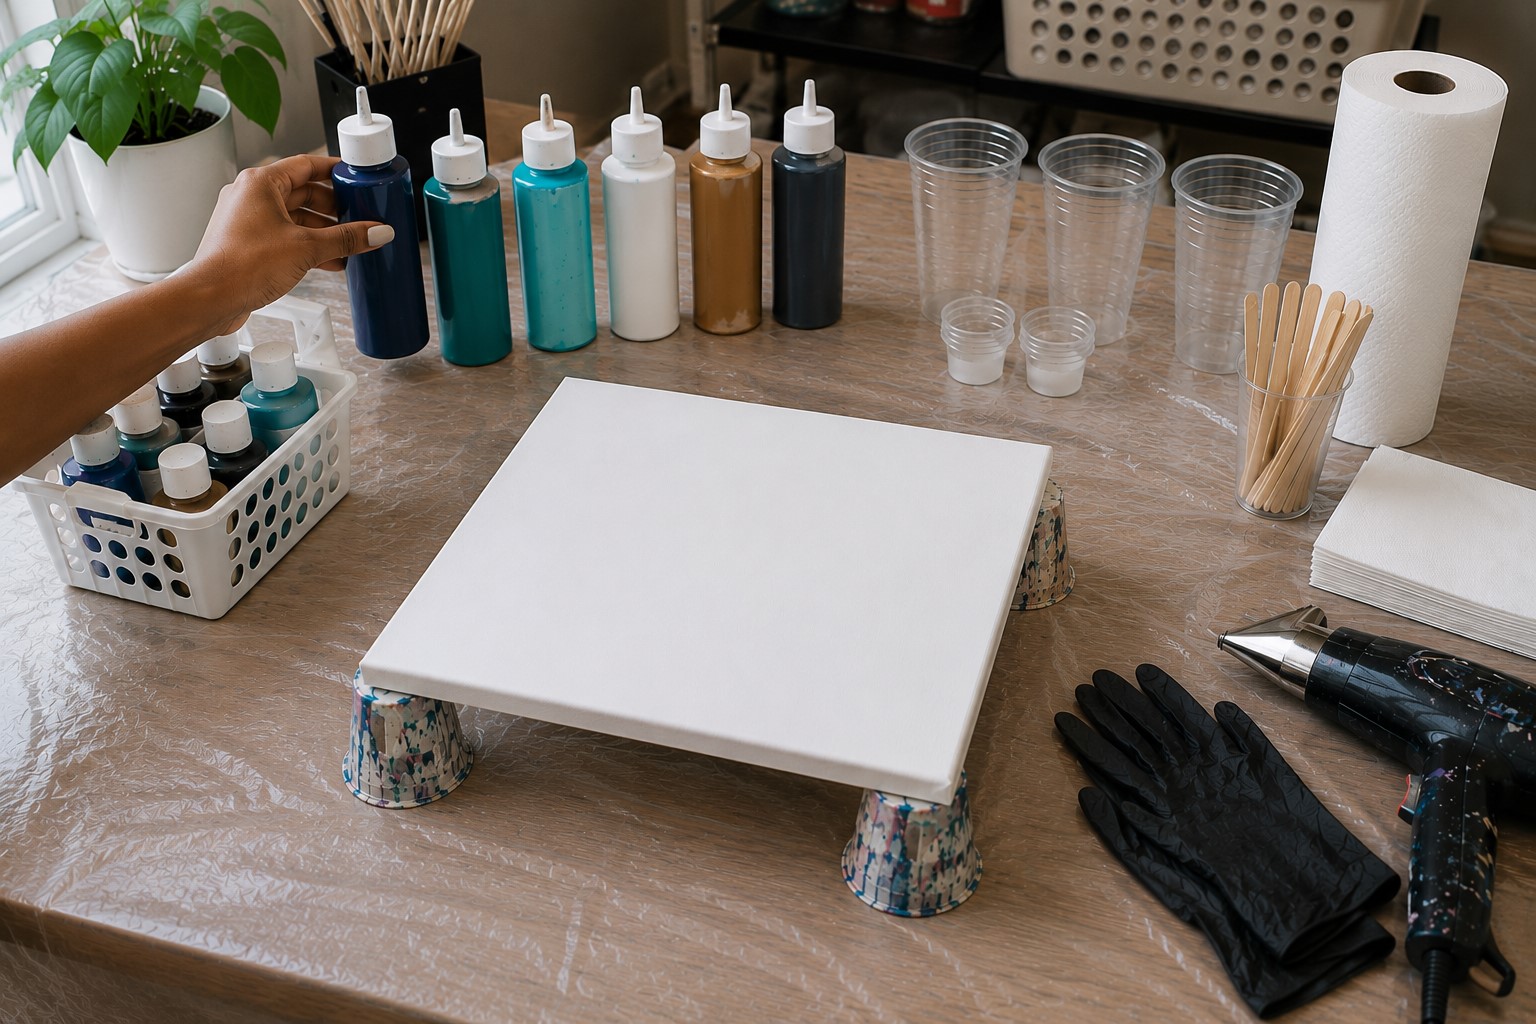
Your color palette sets the mood for the entire painting, so avoid choosing colors at random. A thoughtful combination creates artwork that looks balanced and eye-catching instead of busy or muddy.
If this is your first acrylic pour, limit yourself to four or five colors. Using fewer colors makes it easier to see the unique patterns as they develop across the canvas.
Try combining light, medium, and dark shades to create contrast. White deserves a place in most acrylic pours because it separates neighboring colors and gives the design a brighter, cleaner appearance.
Metallic shades like gold, silver, or copper can also add a touch of elegance without overpowering the painting.
As you decide on your colors, think about where you plan to display the finished piece.
If you enjoy playing with bold color combinations like this, 21 Creative Rainbow Crafts That Brighten Any Day has plenty more ideas to explore.
Soft blues, whites, and sandy tones suit coastal-inspired spaces, while earthy greens, browns, and golds create a warm natural feel.
You can even use a favorite throw pillow, rug, or photograph as inspiration. Most importantly, avoid pairing too many colors that blend into brown when mixed.
A simple, well-planned palette almost always produces a more professional-looking result than one with too many competing shades.
Step 3: Mix the Paint to the Right Consistency
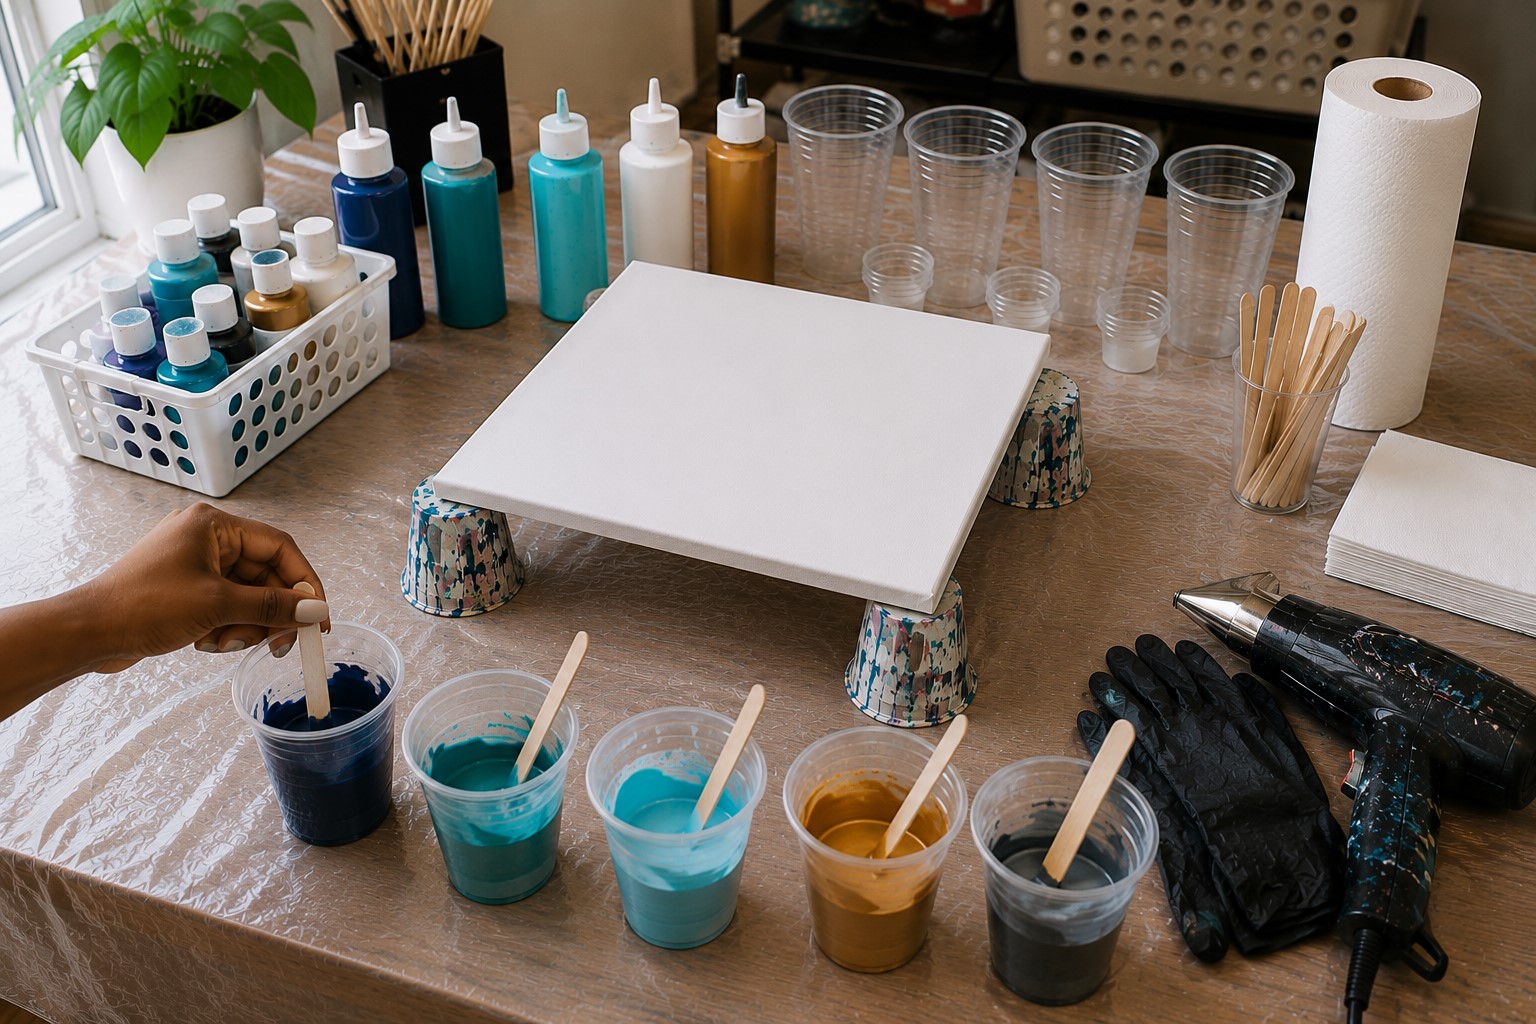
Many beginners think the pouring technique matters most, yet paint consistency has an even bigger impact on the final result.
Paint that feels too thick will not flow across the canvas properly, while paint that becomes too thin can lose its rich color and even crack after it dries.
Taking your time during this step gives you much better control over the finished artwork.
Pour each acrylic paint color into its own mixing cup before adding the pouring medium. Follow the instructions on your pouring medium because different brands recommend different mixing ratios.
Once you add the medium, stir the paint slowly with a craft stick. Keep scraping the sides and bottom of the cup until the mixture becomes completely smooth.
You should not see streaks, lumps, or pockets of thick paint.
Getting the mixture exactly right matters just as much when you condition clay for exploring How to Make Gorgeous Air Dry Clay Earrings That Don’t Crack, where the wrong consistency causes the same kind of problems.
After mixing, lift the craft stick and let the paint flow back into the cup. It should run in a smooth, steady ribbon without falling in heavy clumps or dripping like water.
Many artists compare the perfect consistency to warm honey or melted cream. If the paint still feels too thick, add a little more pouring medium.
If it becomes too runny, mix in a little more paint. Making small adjustments now will help your colors flow beautifully once they reach the canvas.
Step 4: Prepare the Canvas for a Smooth Pour
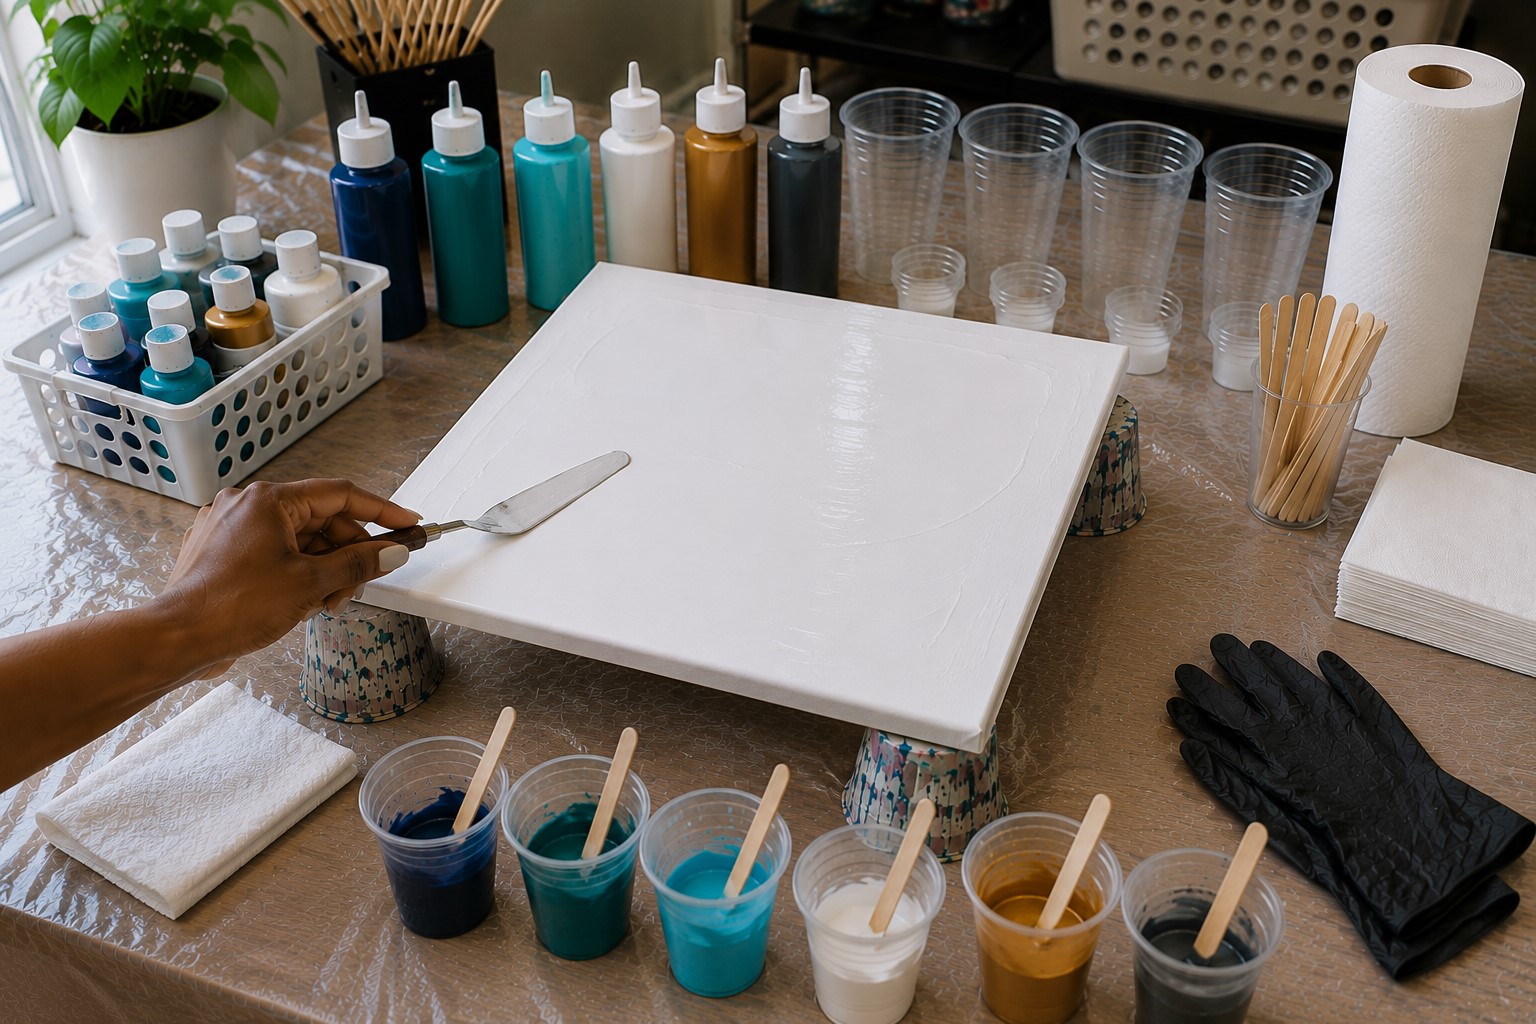
A clean, well-prepared canvas gives the paint the best surface to move across.
Even though it seems like a small detail, preparing the canvas properly helps prevent uneven coverage and makes it easier to create graceful flowing patterns.
Start by placing your canvas on the raised supports you prepared earlier.
Wipe the surface gently with a clean, lint-free cloth to remove dust or tiny fibers that could become trapped in the paint.
Even small particles can stand out once the painting dries, especially if you plan to seal it with a glossy finish.
Preparing a surface properly matters just as much in learning How to Paint on Fabric That Stays Bright Wash After Wash, where skipping this step can affect how well the color holds.
Next, spread a thin layer of paint across the entire canvas before pouring your main colors.
Most artists use white because it brightens the finished artwork and helps the colors glide more easily.
Use a palette knife or large spreader to create an even coat, making sure every corner is covered.
This base layer acts like a smooth foundation, allowing the poured paint to move naturally instead of catching on dry spots.
Step 5: Layer the Colors Inside the Pour Cup
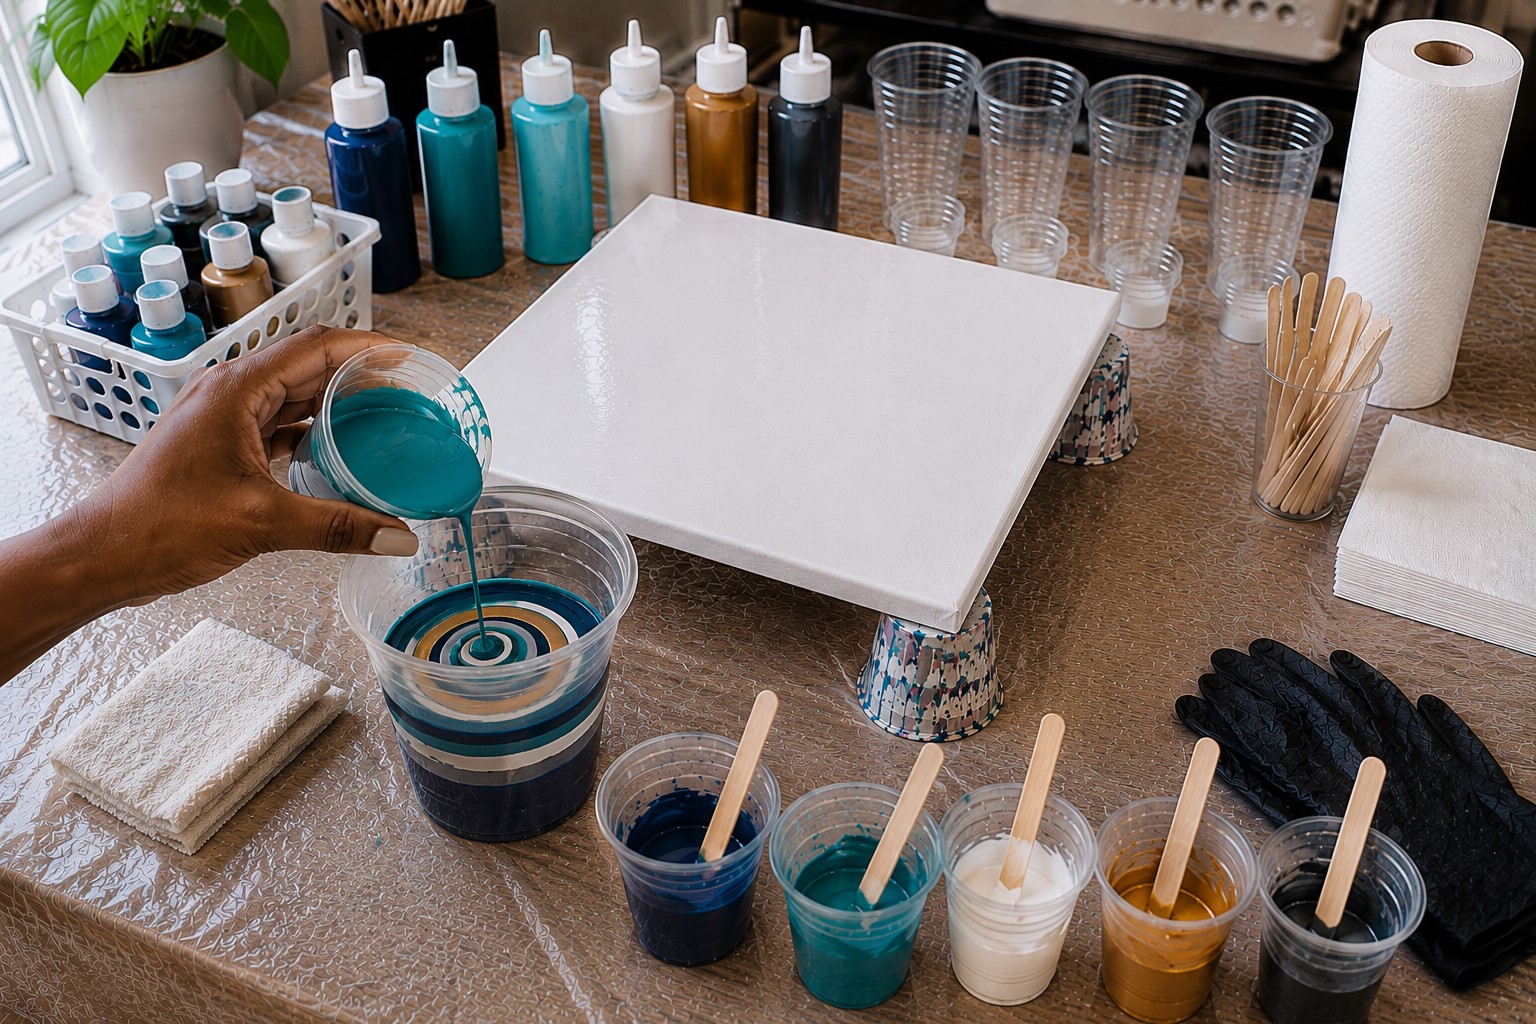
This step begins shaping the beautiful patterns that will appear in your painting.
Although the colors will eventually blend on the canvas, the way you stack them inside the cup influences how they flow together.
Taking a little extra care here often leads to more interesting swirls and ribbons later.
Choose one larger cup to hold all your mixed paints. Slowly pour the first color into the bottom of the cup, then gently pour the next color directly into the center.
Continue adding the remaining colors one at a time.
As each new color enters the cup, it naturally pushes the previous layers outward, creating bands of color without mixing them completely.
Building a design one layer at a time is also how the project on How to Make Full and Fluffy Tissue Paper Flowers That Impress gets its full, soft shape.
You do not have to use the same amount of every color. If you want one shade to stand out, simply add a little more of it during several layers.
White works especially well when repeated because it separates stronger colors and creates beautiful movement throughout the painting.
Resist the urge to stir the cup once you finish layering.
Keeping the colors separate allows them to interact naturally during the pour, which creates the unique patterns acrylic pouring is known for.
Step 6: Pour the Paint Onto the Canvas
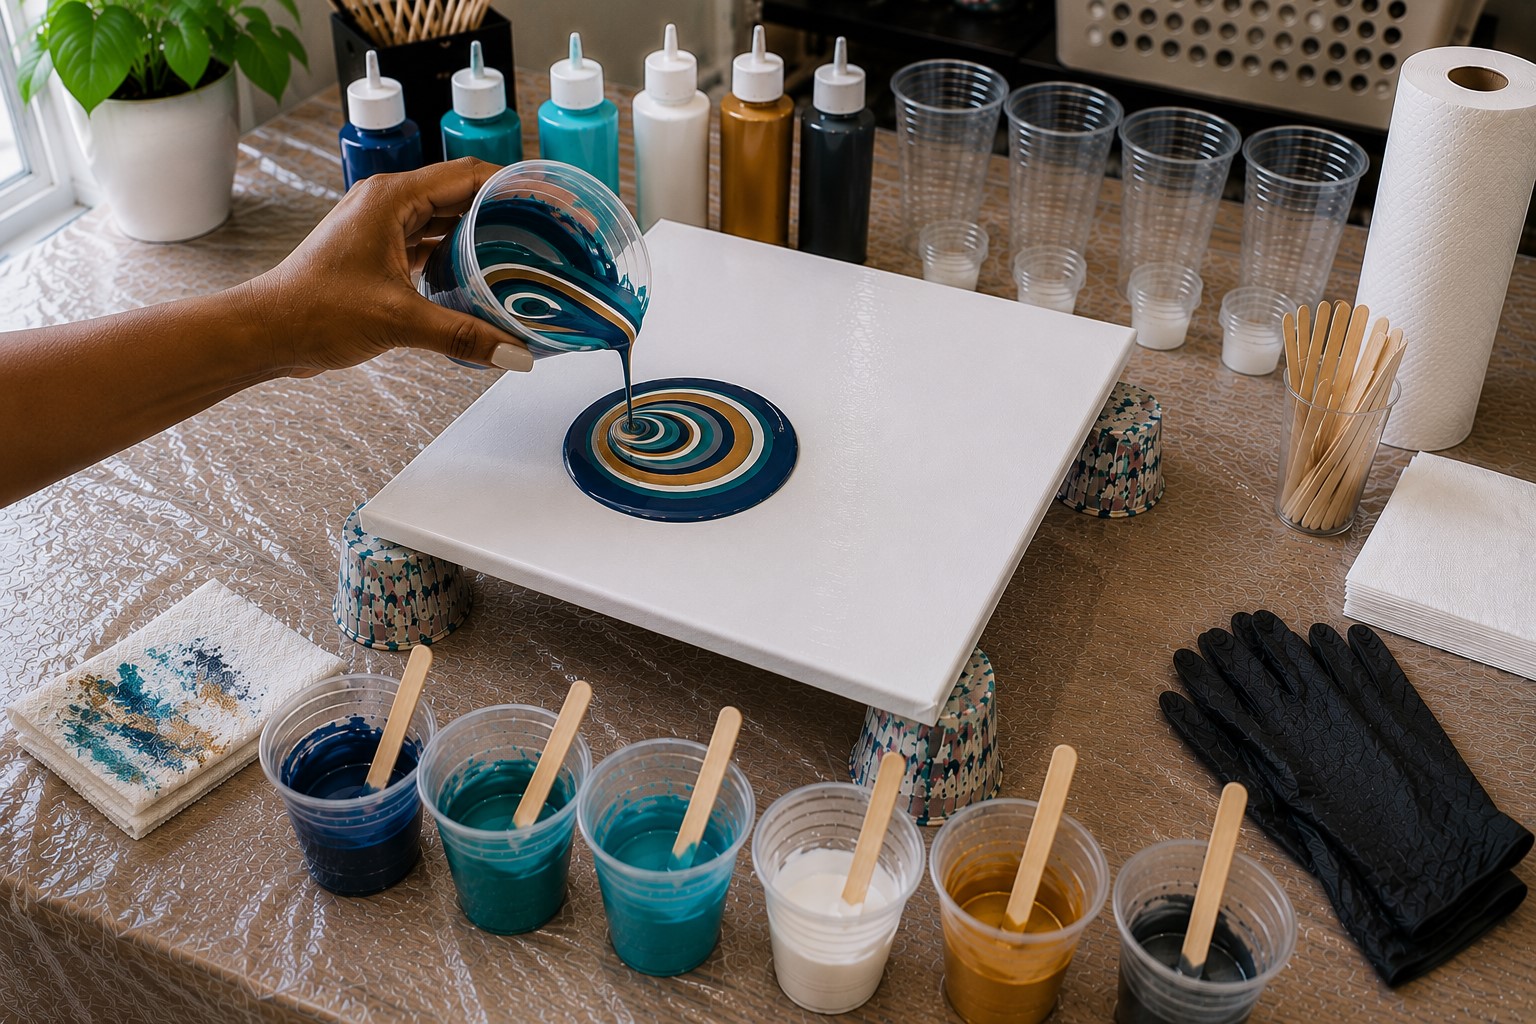
Now comes the most exciting part of the project. This is where all your preparation begins to pay off.
Instead of rushing, move slowly and confidently. Smooth movements usually produce much cleaner results than quick ones.
If you are new to acrylic pouring, the flip cup method is a great place to start. Place the layered cup upside down in the center of the canvas.
Hold both the cup and canvas firmly, then flip them together in one steady motion. Let the cup sit for a few seconds before lifting it.
This gives the paint time to settle and helps the colors spread more evenly.
Another simple option is the dirty pour technique. Instead of flipping the cup, slowly pour the paint onto the canvas in one continuous stream.
This same slow, controlled pouring is exactly the skill behind learning How to Make Sand Art in a Bottle Without the Colors Mixing.
You can pour into the center, move in gentle circles, or create loose zigzag lines across the surface.
Each movement creates a completely different design, so feel free to experiment as you gain confidence.
Whatever technique you choose, avoid stopping halfway through the pour. A steady flow creates smoother color transitions and stronger patterns.
Once the paint reaches the canvas, give it a few moments to spread naturally before touching or tilting it.
You may already notice beautiful swirls beginning to appear, and the next step will bring those patterns to life even more.
Step 7: Tilt the Canvas to Spread the Paint

After the paint settles on the canvas, you can begin shaping the design. This step gives you the most control over the final look of your artwork.
While the colors naturally create beautiful patterns, the way you tilt the canvas determines where those patterns travel and how much of the surface they cover.
Hold the canvas firmly with both hands and tilt it slowly toward one edge. Let the paint move naturally instead of forcing it across the surface.
Once it reaches the edge, gently tilt the canvas in another direction. Continue changing directions until the paint covers every corner.
Small movements usually create cleaner designs, while large, sudden movements can blend the colors too much.
This same slow, deliberate movement is what makes the project on How to Make a Beautiful Origami Crane You’ll Be Proud to Display come together so cleanly too.
As you work, stop every few seconds to look at the painting from different angles. This makes it easier to decide where the paint needs to flow next.
If you already like the design, resist the temptation to keep tilting. Many beginners overwork their paintings because they believe one more movement will improve the result.
In many cases, the artwork already looks its best. Knowing when to stop is just as important as knowing when to continue.
Step 8: Remove Air Bubbles and Encourage Beautiful Cells
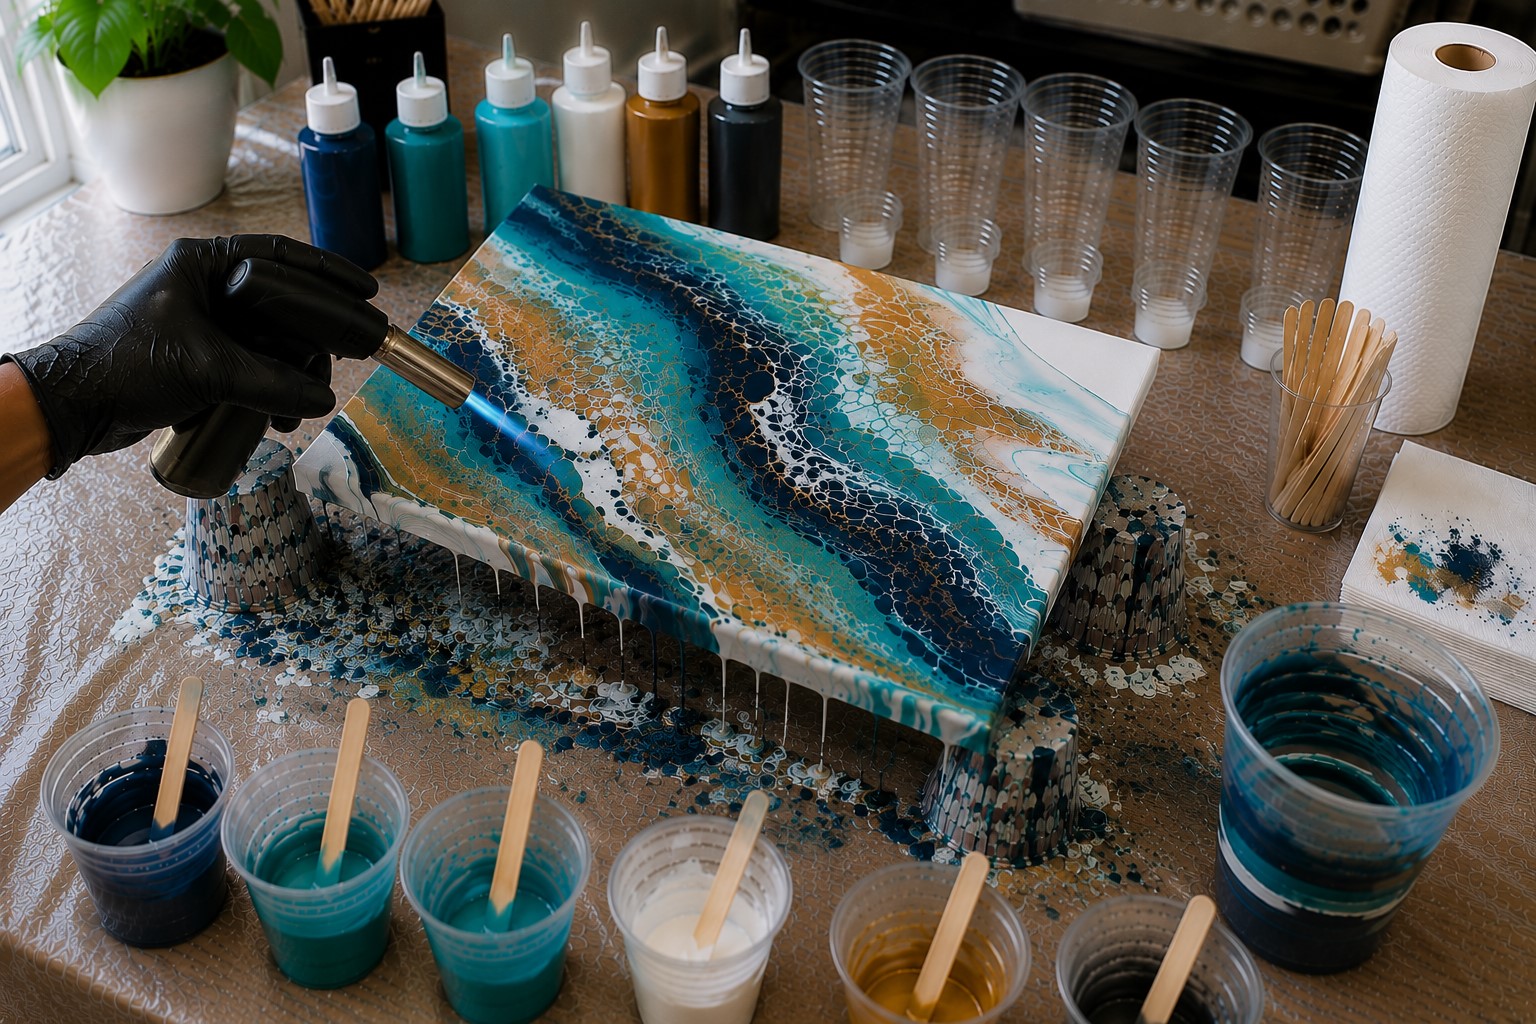
Once the paint covers the entire canvas, take a closer look at the surface. You may notice tiny air bubbles trapped inside the paint.
These bubbles can leave small holes after the painting dries, so removing them now will help create a smoother finish.
If you have a small butane torch, pass the flame quickly over the surface. Keep the torch moving at all times and hold it several inches above the paint.
The gentle heat pops trapped air bubbles almost immediately. If you added silicone oil to your paint, this step also helps create the beautiful round cells that many acrylic pouring artists love.
This same careful attention to a clear, bubble-free surface is what makes the project on How to Make Stunning Resin Coasters With Pressed Flowers look so polished too.
A heat gun on a low setting also works well if you do not own a torch. Move it gently across the painting without staying in one place for too long.
Too much heat can dry the surface unevenly or push the paint farther than you intended.
After removing the bubbles, avoid touching the surface because even a light fingerprint can remain visible after the paint dries.
Step 9: Let the Painting Dry Without Disturbing It
Drying is one of the easiest steps, yet many beautiful paintings get ruined here.
Fresh acrylic pour art may look dry after a few hours, but the paint underneath usually stays soft much longer.
Touching it too soon can leave fingerprints, dents, or unwanted marks that are impossible to remove.
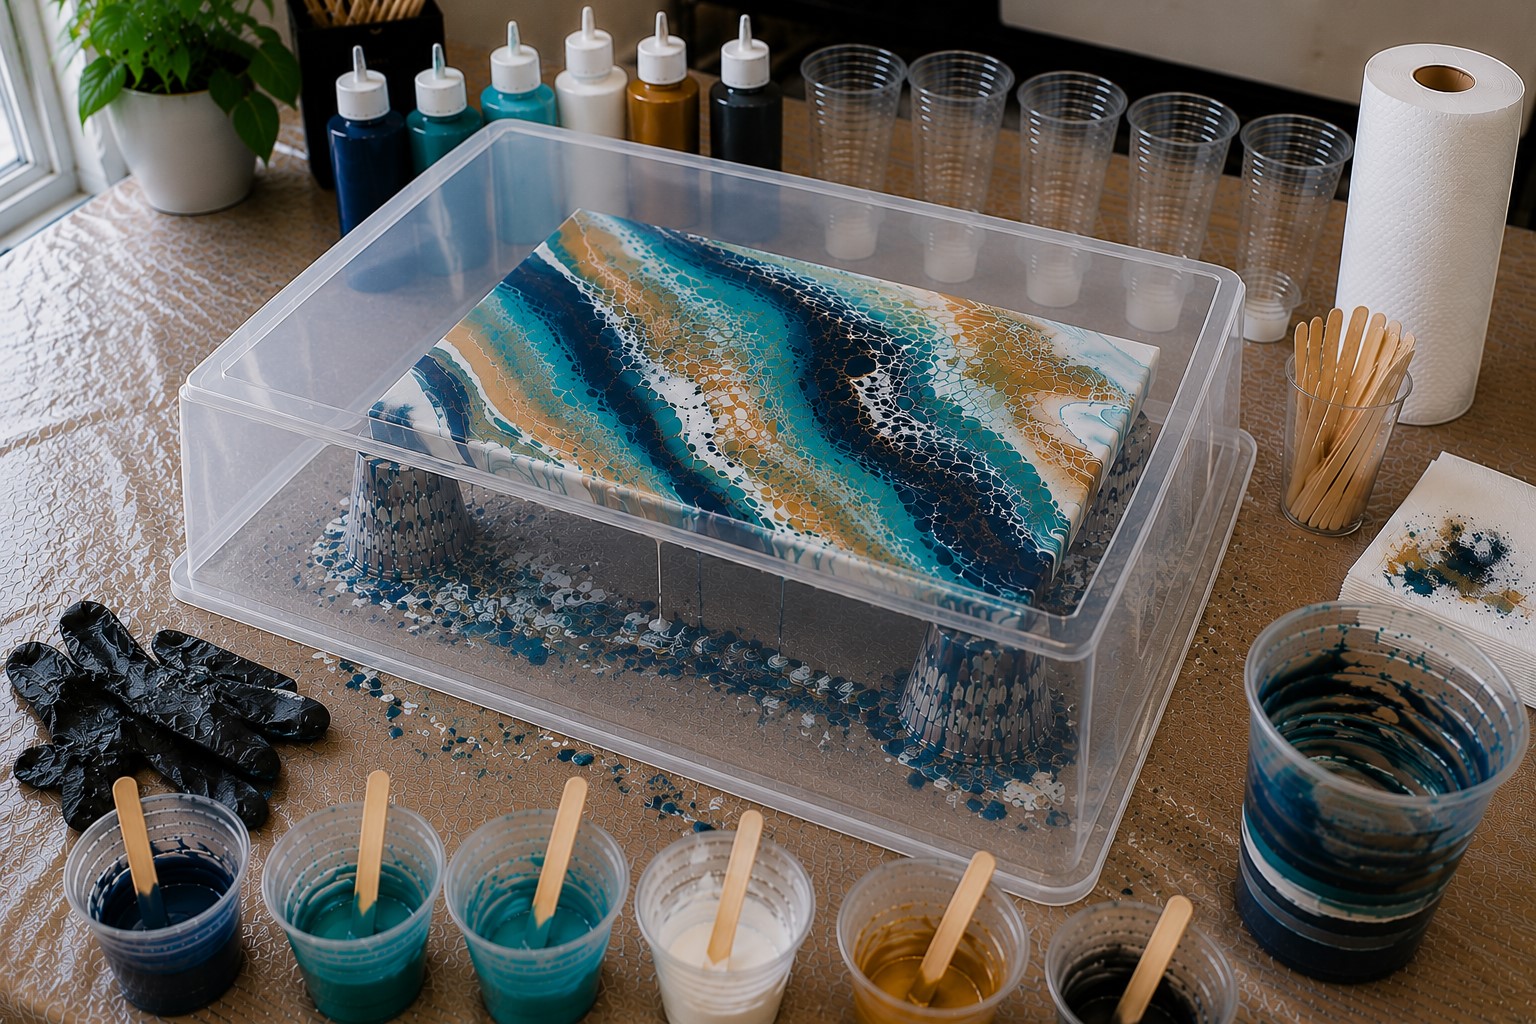
Leave the canvas on its raised supports so excess paint can continue dripping from the edges. Place it in a clean area where pets, children, and dust are less likely to reach it.
If possible, cover the painting with a large cardboard box or a plastic storage container without letting it touch the wet paint.
This simple trick protects the surface while still allowing air to circulate.
Giving a finished piece enough time to dry properly matters just as much for a quick project like How to Paint a Watercolor Bookmark in Under 30 Minutes.
Keep the room at a comfortable temperature and avoid placing the painting in direct sunlight or near a fan.
Rapid drying can sometimes cause cracks or an uneven finish.
Depending on the amount of paint you used, the artwork may need anywhere from one to several days to dry completely.
Waiting patiently now will reward you with a much better-looking painting later.
Step 10: Seal Your Painting for a Professional Finish
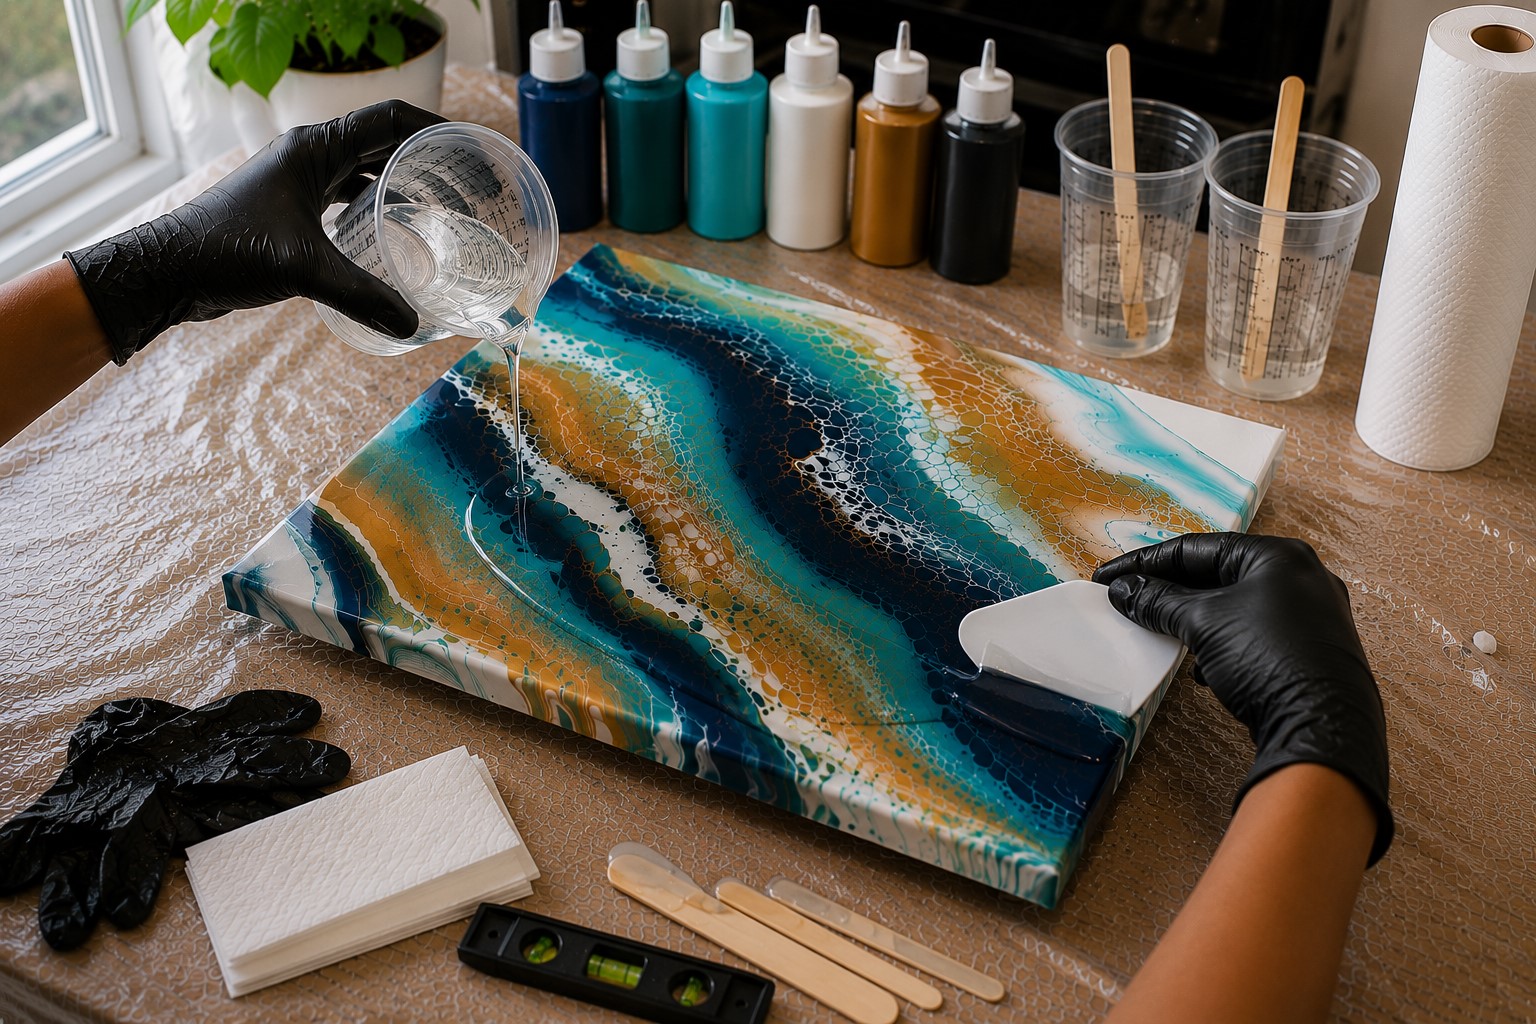
Once the painting feels completely dry, you can protect it with a clear sealer.
Although this step is optional, it gives your artwork a more polished appearance and helps preserve the colors for years.
A good sealer also protects the surface from dust, moisture, and minor scratches.
Choose a varnish or resin finish designed for acrylic paintings. A glossy finish makes the colors appear deeper and more vibrant, while a satin or matte finish creates a softer look.
Protecting a finished piece with the right sealer is a skill worth practicing, the same way it matters in learning How to Paint on Glass That Stays Beautiful for Years.
Before applying anything, make sure the painting has dried completely. Even slightly damp paint can cause problems under the sealer.
Apply the varnish according to the manufacturer’s directions using smooth, even strokes or light spray coats.
If you decide to use epoxy resin, work slowly and follow the mixing instructions carefully.
Resin creates a stunning glass-like finish, but it requires careful measuring and enough curing time.
After the sealer dries, inspect your artwork under good lighting.
You will notice richer colors, a smoother surface, and a professional finish that makes the painting look ready to display.
At this point, you can proudly hang it on your wall, place it on a shelf, or wrap it as a thoughtful handmade gift.
Common Mistakes to Avoid When Creating Acrylic Pour Art
Everyone makes mistakes while learning a new craft. The good news is that most acrylic pouring mistakes are easy to avoid once you know what causes them.
Paying attention to these small details will help your paintings look much cleaner and more professional.
I. Using Paint That Is Too Thick
Thick paint struggles to move across the canvas. Instead of creating smooth ribbons and flowing patterns, it often sits in heavy blobs that refuse to spread.
Always test the consistency before pouring. If the paint does not flow smoothly from the mixing stick, spend a little more time adjusting it.
II. Making the Paint Too Thin
Adding too much pouring medium or water creates the opposite problem. Very thin paint loses its rich color and may crack after it dries.
It can also run off the canvas too quickly, leaving weak-looking patterns. Make small adjustments until you reach the right consistency instead of pouring in large amounts at once.
III. Choosing Too Many Colors
It is easy to get excited and use every beautiful color you own. Sadly, too many colors often blend into dull shades that hide the interesting patterns.
Four or five carefully chosen colors usually create a much stronger painting than eight or nine competing shades.
The same patient, precise approach helps with learning How to Do Diamond Painting: A Beginner’s Step-by-Step Tutorial, where a cluttered color plan makes the whole project harder to enjoy.
IV. Tilting the Canvas Too Much
Many beginners keep moving the canvas because they think the painting can always look better. In reality, too much tilting stretches the design until the beautiful swirls disappear.
Once the paint reaches every edge and the composition looks balanced, stop and let the artwork speak for itself.
V. Forgetting to Cover the Canvas Edges
Some people focus only on the top surface and forget about the sides. As the painting dries, those bare edges become much more noticeable.
Before leaving the artwork to dry, check all four sides and use the excess paint to cover any exposed areas.
VI. Touching the Painting Too Soon
Fresh acrylic pour art may look dry after several hours, but the paint underneath often remains soft.
Touching it too early can leave fingerprints, dents, or scratches that cannot be repaired. Give the painting enough time to dry completely before moving or sealing it.
VII. Skipping the Sealer
Many people feel finished once the paint dries. Even so, sealing the artwork protects it from dust, fading, and everyday wear.
A clear varnish or resin coating also enhances the colors and gives the painting a beautiful finished appearance.
Final Thoughts
Learning How to Create Acrylic Pour Art at Home is about much more than making colorful paintings.
It is a chance to slow down, enjoy the creative process, and watch simple materials turn into something completely unique.
Every canvas teaches you something new, and every pour helps you build more confidence for the next project.
If you enjoy building up thin, careful layers of color, exploring How to Paint Shoes at Home and Get a Professional Look is another rewarding painting project to try.
Do not worry if your first painting looks different from the one you imagined. Acrylic pouring combines planning with surprise, so even experienced artists never know exactly how every design will turn out.
Instead of chasing perfection, focus on improving one step at a time. Before long, you will notice cleaner color combinations, smoother movement, and more polished finishes.
The best way to improve is to keep creating. Experiment with new color palettes, try different pouring techniques, and explore projects beyond traditional canvases.
If you love working with natural, coastal-inspired materials, Step-by-Step Guide to Making Beautiful Seashell Art for Your Home is a lovely project to try next.
Most importantly, enjoy the process and let your creativity lead the way. Your next acrylic pour could easily become the piece that everyone asks about when they visit your home.
