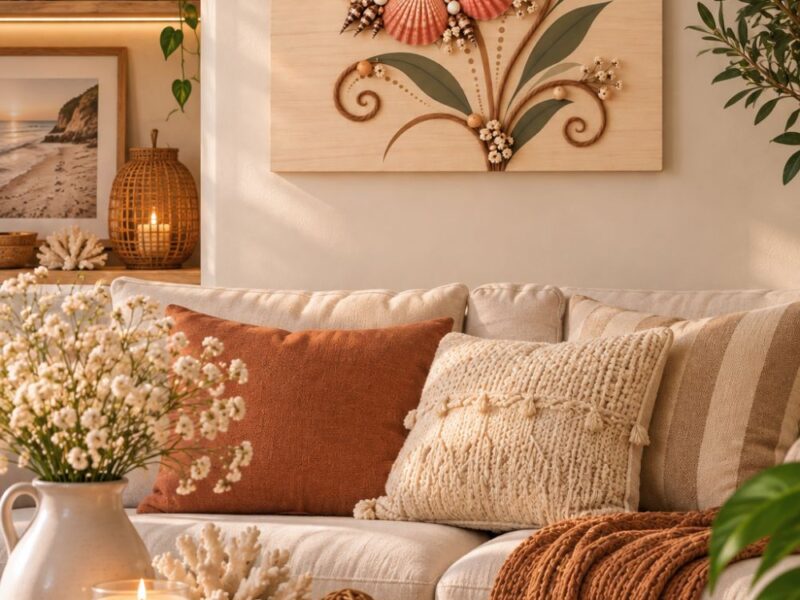
If you take time to study a pile of small rocks, you’ll notice that some have shapes that can work surprisingly well in a DIY craft project.
A flat stone can form a body, while smaller pieces can become heads, arms, leaves, or other details.
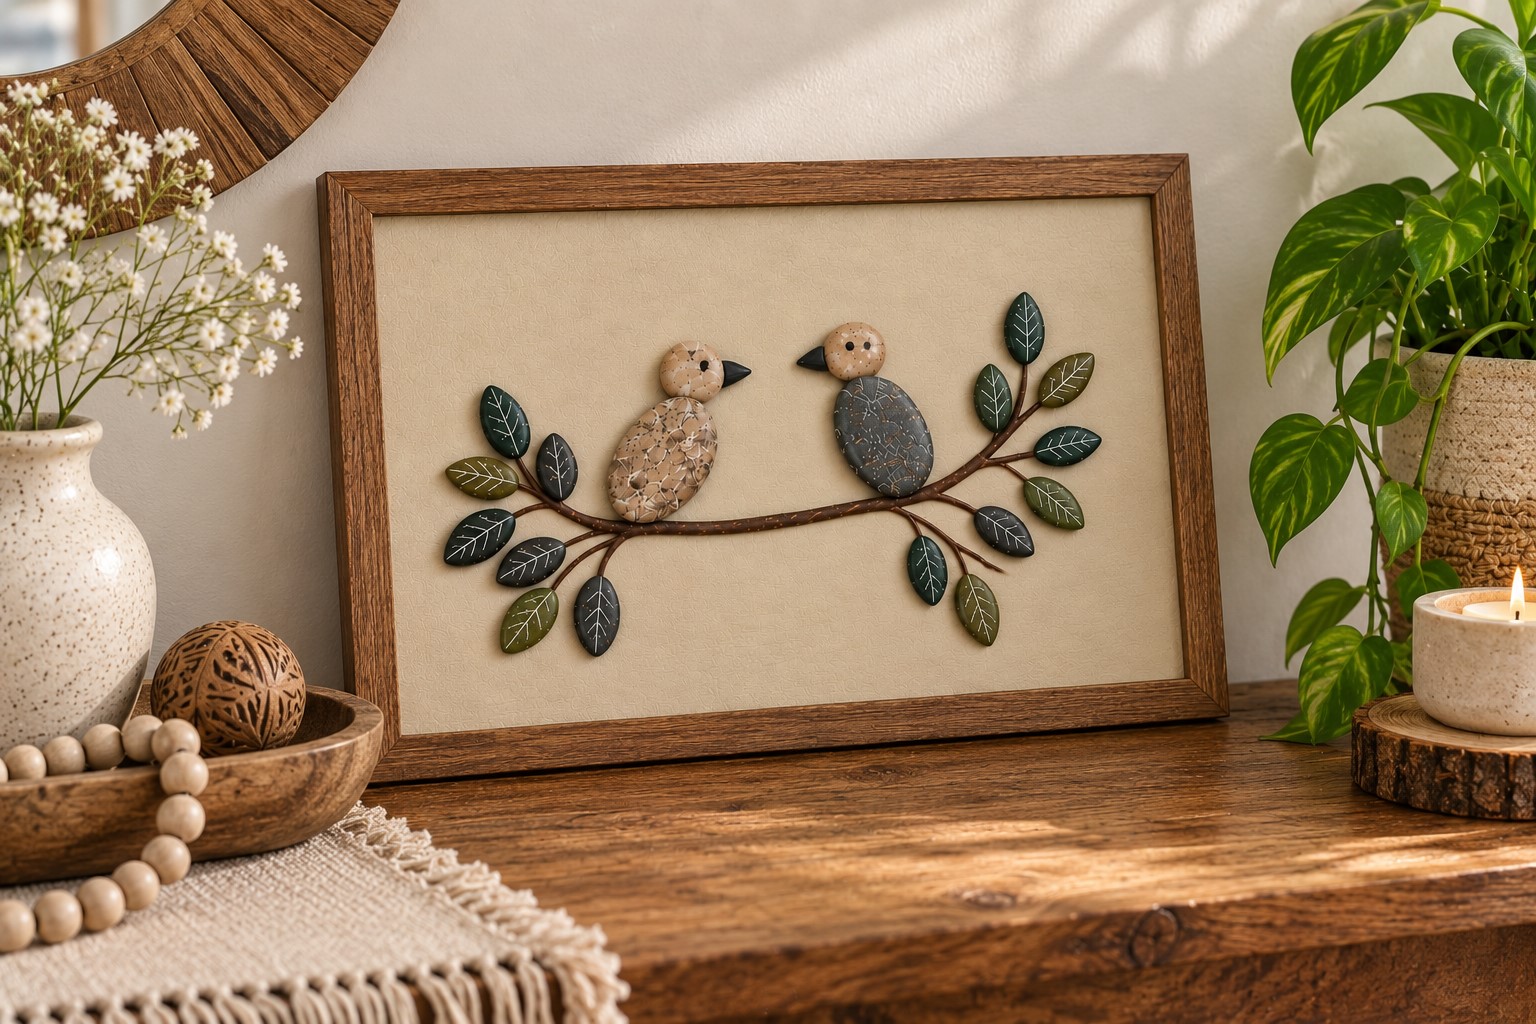
Learning How to Make Pebble Art from Rocks is about putting these simple pieces together to create a picture.
If you enjoy working with natural materials like this, figuring out How to Make a Beautiful Nature Collage Using Natural Materials is another lovely project to try.
What makes this project worth trying is how little you need to get started. You can use a few rocks, basic craft supplies, and an idea that does not need to be complicated.
The fun comes from arranging the pieces until the picture starts to come together.
It is also a lovely way to turn inexpensive materials into something you will actually want to display.
There is no single right way to make pebble art, so you have plenty of room to experiment.
Keep the rocks natural, paint a few details, or combine both approaches for a more finished look.
In this tutorial, I will take you through each part carefully, from preparing the rocks to securing the final design.
You will see how simple choices can turn a handful of ordinary stones into a piece of art with plenty of character.
Materials You’ll Need
Before you start arranging anything, gather everything you will need and keep it within reach. This saves you from stopping halfway through the project to look for a missing supply.
- Smooth or flat pebbles and small rocks – (Available on Amazon)
- Wooden board, thick cardstock, or canvas panel – (Available on Amazon)
- Pencil
- Acrylic paints – (Available on Amazon)
- Small paintbrushes – (Available on Amazon)
- Black and white paint
- Strong craft glue – (Available on Amazon)
- Tweezers – (Available on Amazon)
- Paper towel or an old cloth
- Small bowl of water
- Clear protective sealer, optional – (Available on Amazon)
A similarly small, affordable supply list is all it takes for learning How to Make Gorgeous Air Dry Clay Earrings That Don’t Crack, if you want another quick project to try.
How to Make Charming Pebble Art from Ordinary Rocks
Step 1: Choose the Rocks for Your Design
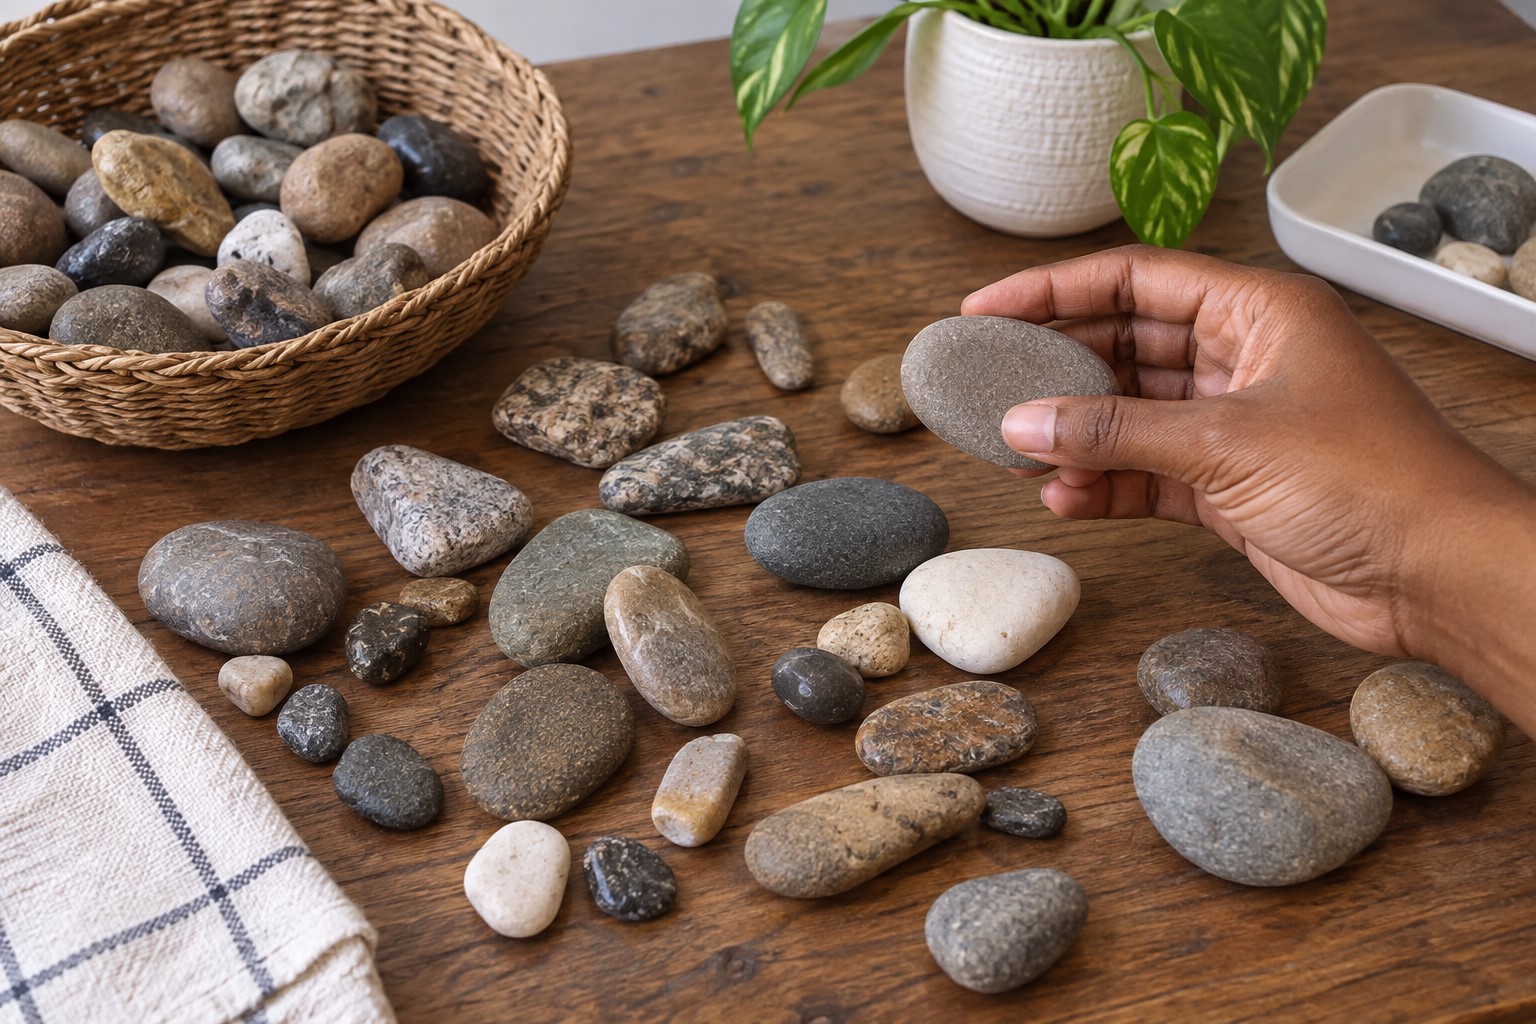
Start by spreading your rocks across a table where you can see them clearly. Do not worry about finding perfectly smooth or identical pieces.
Different shapes can actually make the finished picture more interesting.
Look for stones that have useful shapes and sizes. Flat pebbles work well for larger parts of your design, while smaller stones can fill in tiny details.
Try turning each rock in different directions too. Sometimes a stone looks completely different when you rotate it.
Think about the scene you want to create as you sort. A simple design might need only a few carefully chosen stones.
This same joy of collecting small natural treasures is what makes Step-by-Step Guide to Making Beautiful Seashell Art for Your Home such a fun project too.
A larger picture may need several pieces for the main shapes and smaller ones for extra details.
Also, keep a few spare rocks nearby. You may change your mind once you begin arranging the picture.
Having extra options makes it easier to adjust the design without starting over.
Step 2: Clean and Dry the Rocks
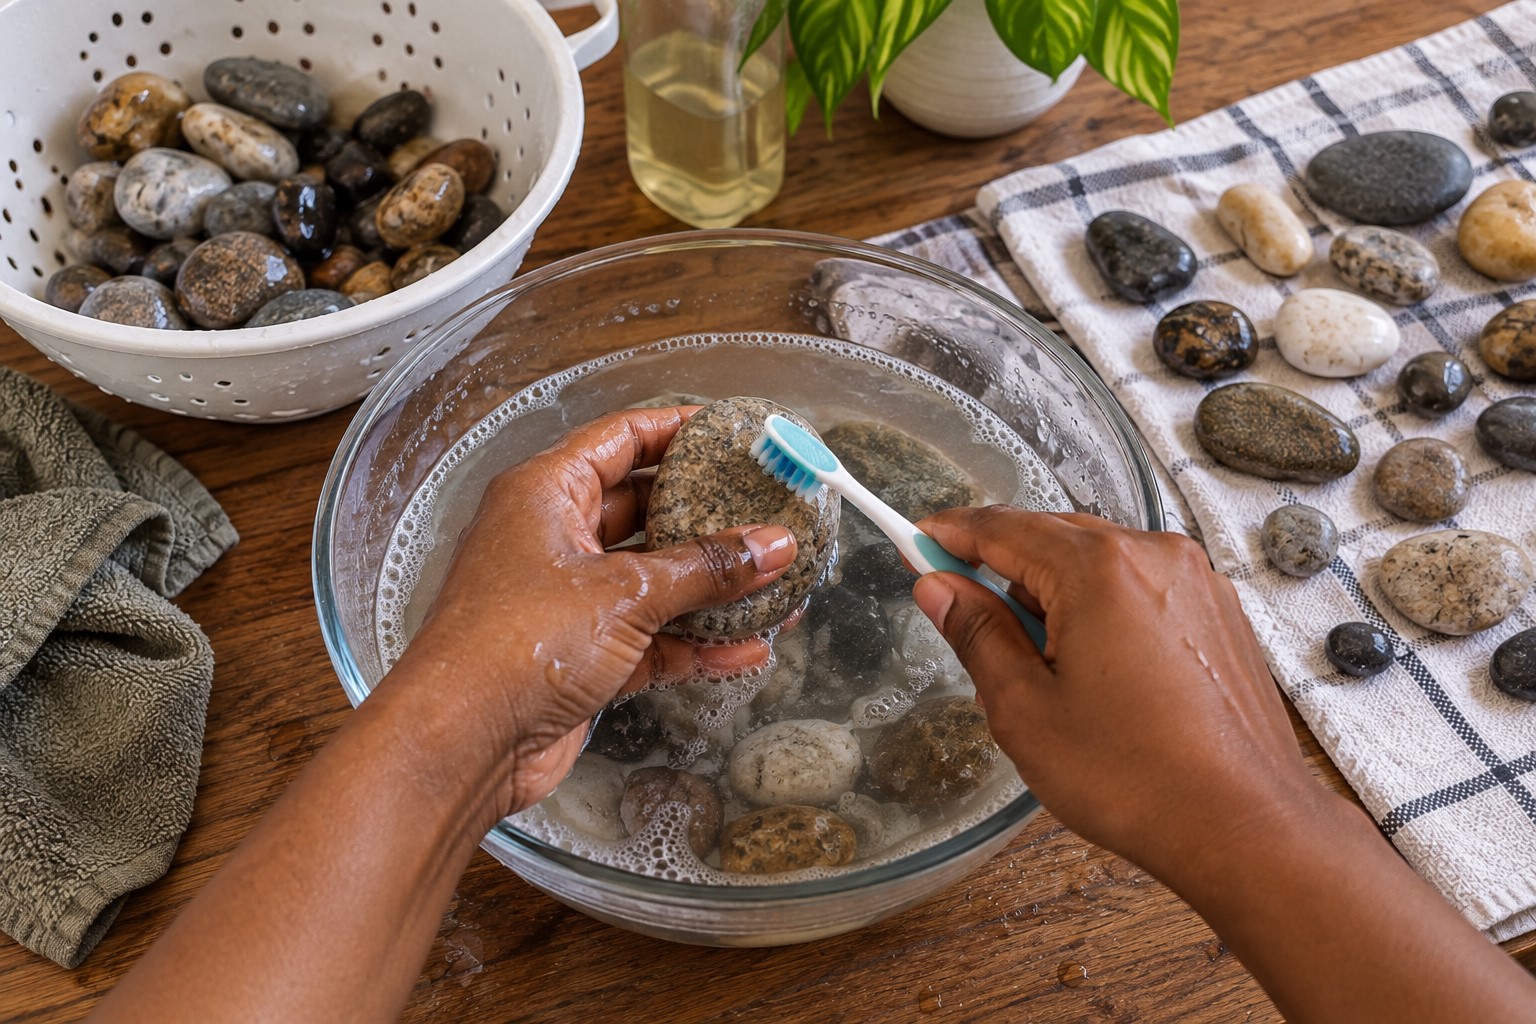
Once you have chosen your rocks, give them a good cleaning. Dirt and dust can prevent paint and glue from sticking properly. This small step can make a noticeable difference later.
Place the rocks in a bowl of warm water and gently scrub them with an old toothbrush. Pay attention to small grooves where dirt tends to collect.
You do not need to scrub aggressively, especially if the stones already look clean.
Rinse each piece under clean water and place them on a towel. Let them dry completely before you move on to painting or gluing.
You can also wipe them with a dry cloth to remove any remaining moisture.
Taking the time to prepare materials properly matters just as much in figuring out How to Build a Beautiful Terrarium That Doesn’t Get Moldy, where trapped moisture causes problems later.
If you collected the rocks outdoors, check them carefully before using them. Remove loose bits of soil, moss, or other debris.
Then let every piece dry fully so moisture does not interfere with your materials.
Step 3: Sort the Rocks by Shape and Size
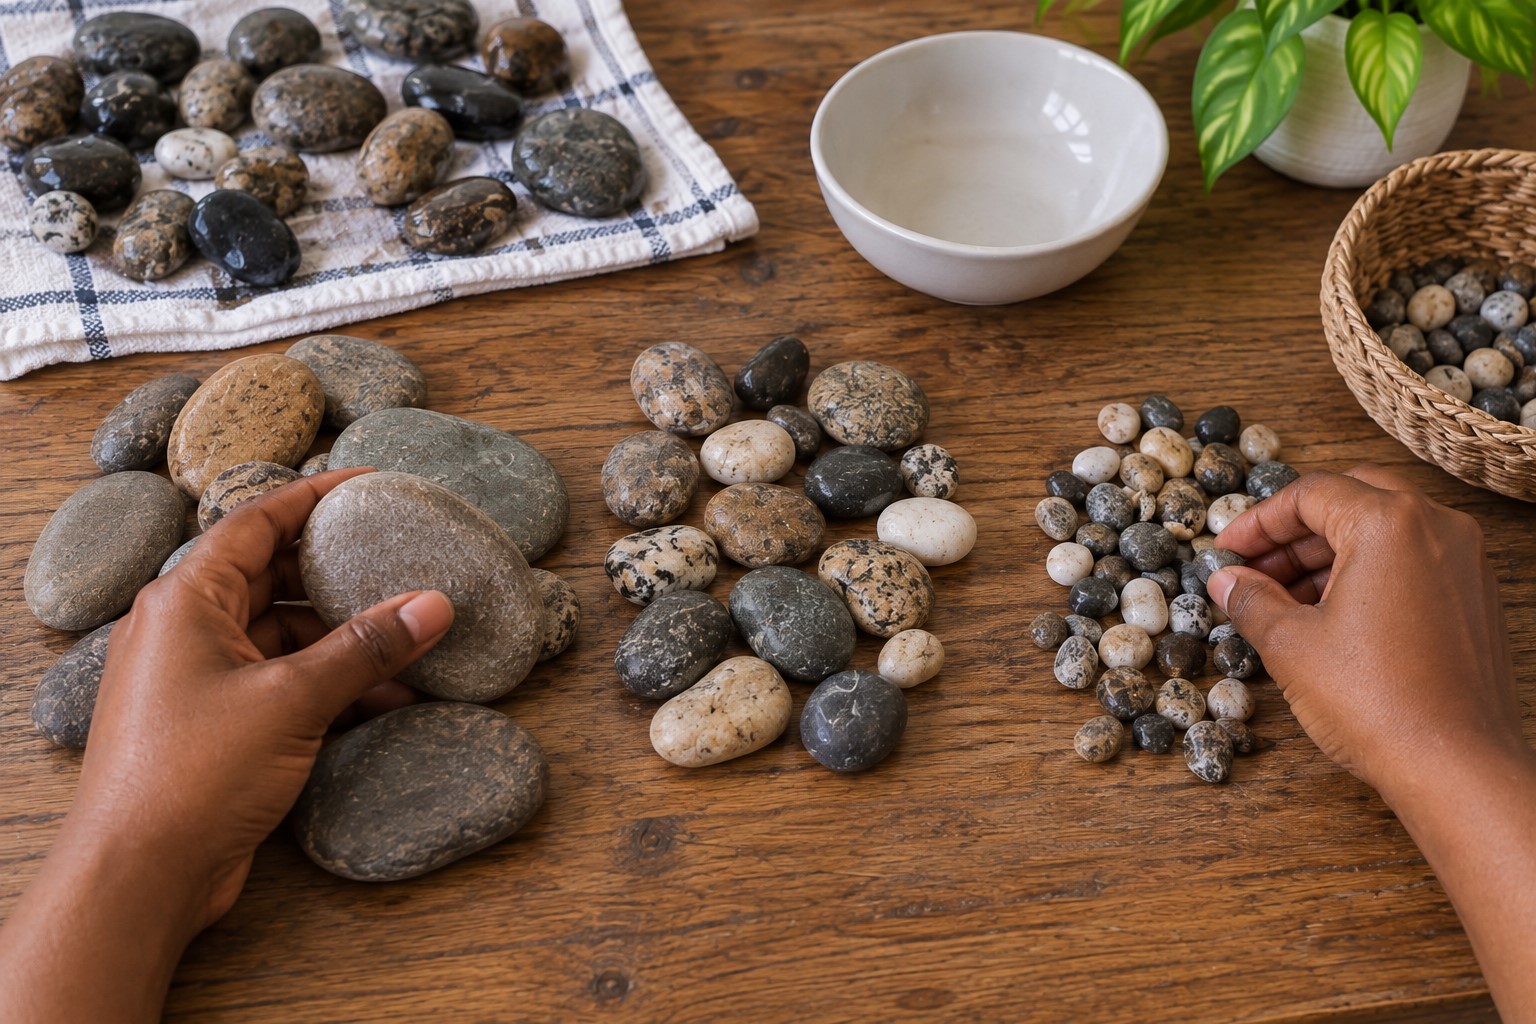
Now arrange your clean rocks into small groups. Put the larger pieces together, then make another group for medium stones and a final group for tiny ones.
This makes it much easier to find the right piece when you start building your picture.
You can also sort them according to their shapes. Keep the flat stones in one area and the rounder pieces in another. Long, narrow pebbles deserve their own little group too.
At this point, do not worry about creating the final arrangement. You are simply making your materials easier to work with.
A little organization now can save you plenty of searching later.
Take a few minutes to study the rocks again after cleaning them. Their colors and textures may look different once the dirt is gone.
You may even notice a stone that works better for your idea than the ones you first selected.
Step 4: Decide What Your Picture Will Show
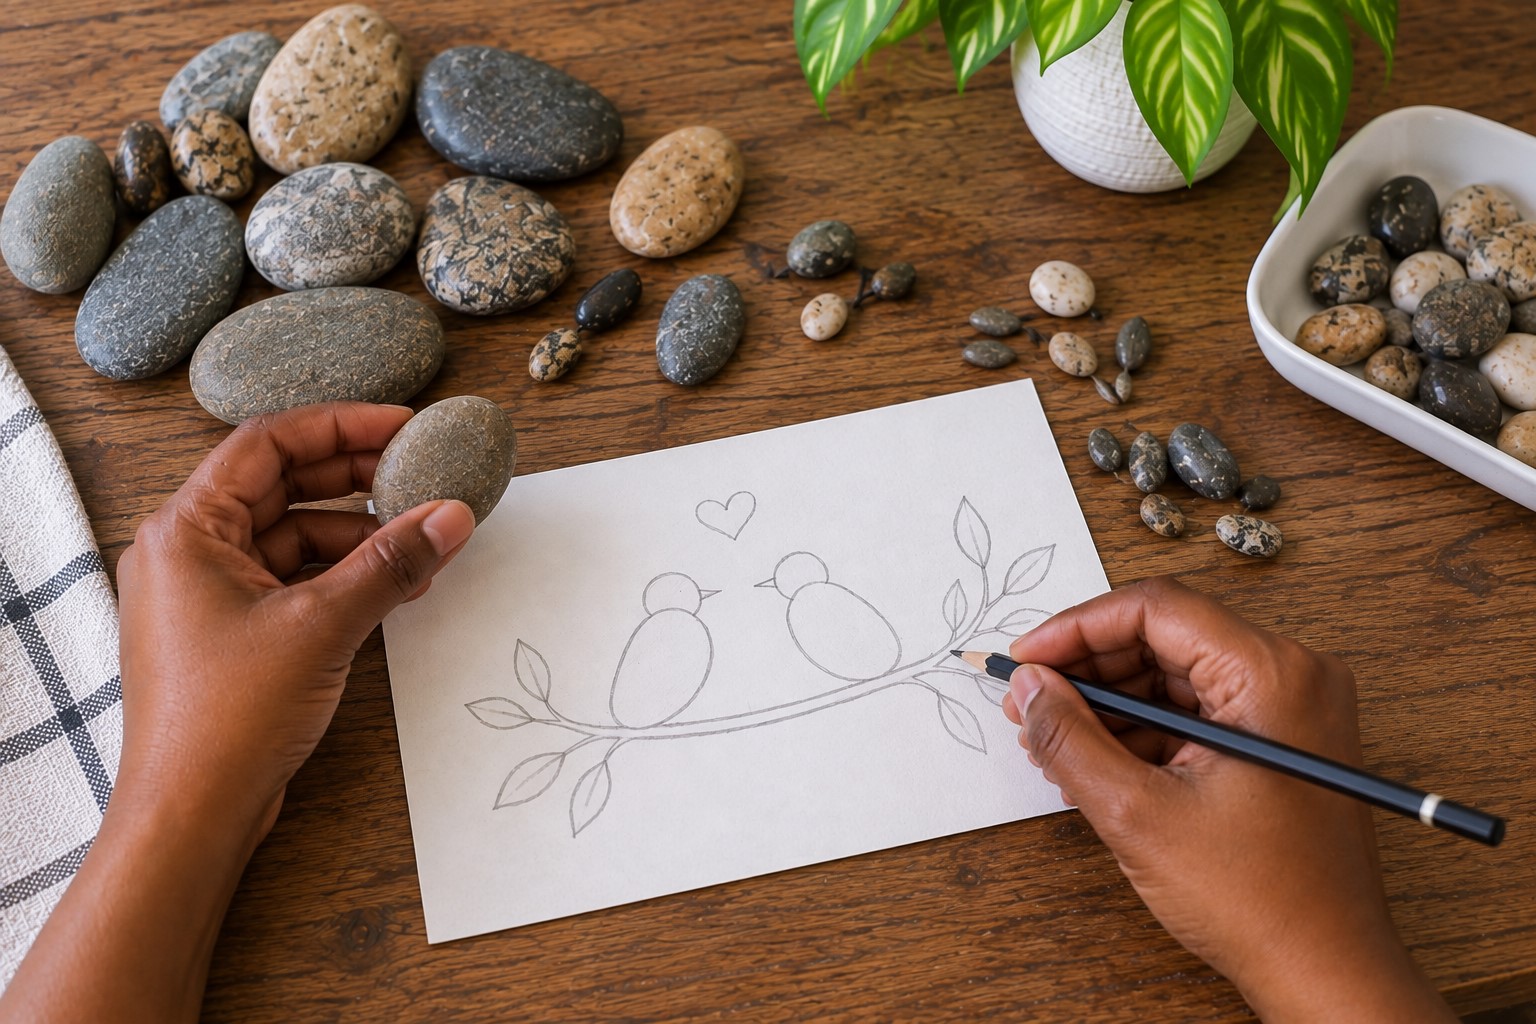
Choose a simple scene before you start gluing anything. You could make two little birds on a branch, a flower arrangement, a family of figures, or a small outdoor scene.
If you enjoy pebble animals like this, 23 Adorable Farm Animal Crafts That Bring the Barnyard to Life has a whole pebble pig family idea worth exploring too.
Keep your first design fairly simple. Too many elements can make the artwork difficult to arrange, especially if this is your first pebble art project.
A few well-placed pieces can tell a stronger story than a crowded picture.
Once you choose your idea, think about the main shapes you need.
For example, a pebble bird might need one larger stone for the body and smaller pieces for the head and tail. You can then use paint for the eye and other tiny features.
Make a quick sketch if you find planning easier on paper. It does not need to look artistic at all.
Just mark where you want the main parts to sit so you have a rough guide while arranging the stones.
Step 5: Prepare and Mark the Background
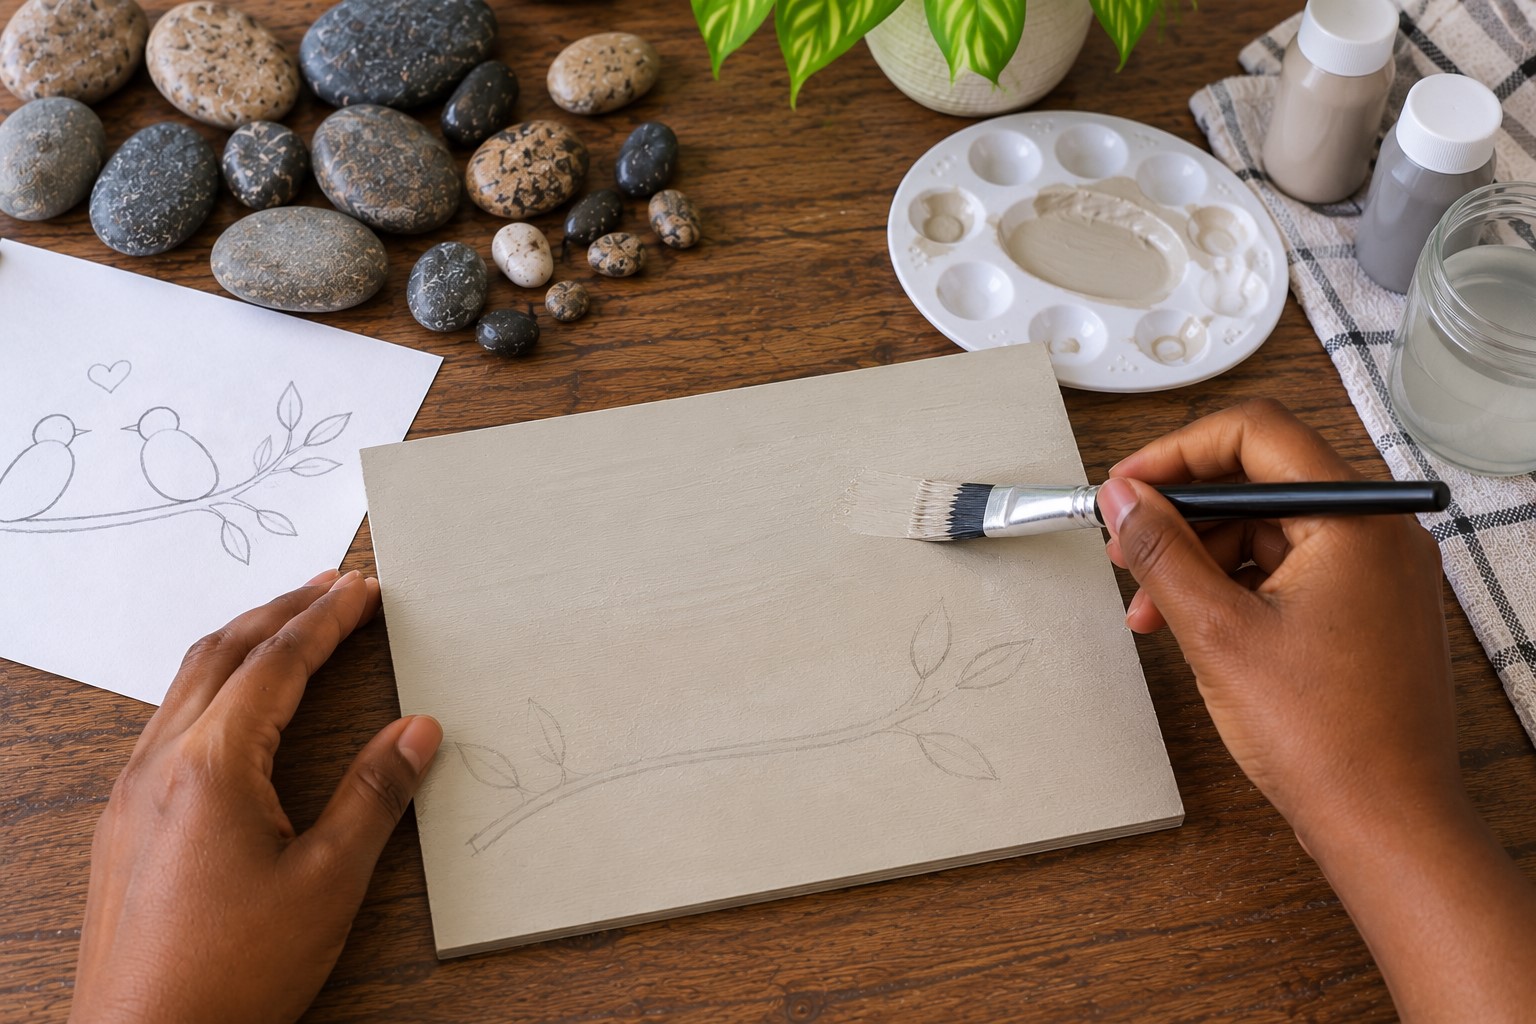
Choose a sturdy surface for your artwork before arranging the rocks. A small wooden board works beautifully, but thick cardstock or a canvas panel can also work.
The important thing is choosing a surface that can support the weight of your stones.
Keep the background simple if your pebble arrangement already has several details. A soft neutral color can help the rocks stand out without competing with them.
You can also leave the surface plain if you prefer a more natural look.
A simple, natural-looking background is also what makes the project on How to Make Moss Wall Art That Stays Green Without Watering feel so alive.
If you want to paint the background, do that before placing the rocks. Give the paint enough time to dry completely.
Working on a dry surface will make the arranging and gluing stages much easier.
Once the background is ready, lightly mark important areas with a pencil. You might draw a branch, a horizon line, or a few simple guide marks.
Keep these lines faint because you do not want them showing around the finished rocks.
Step 6: Arrange the Rocks Before Gluing
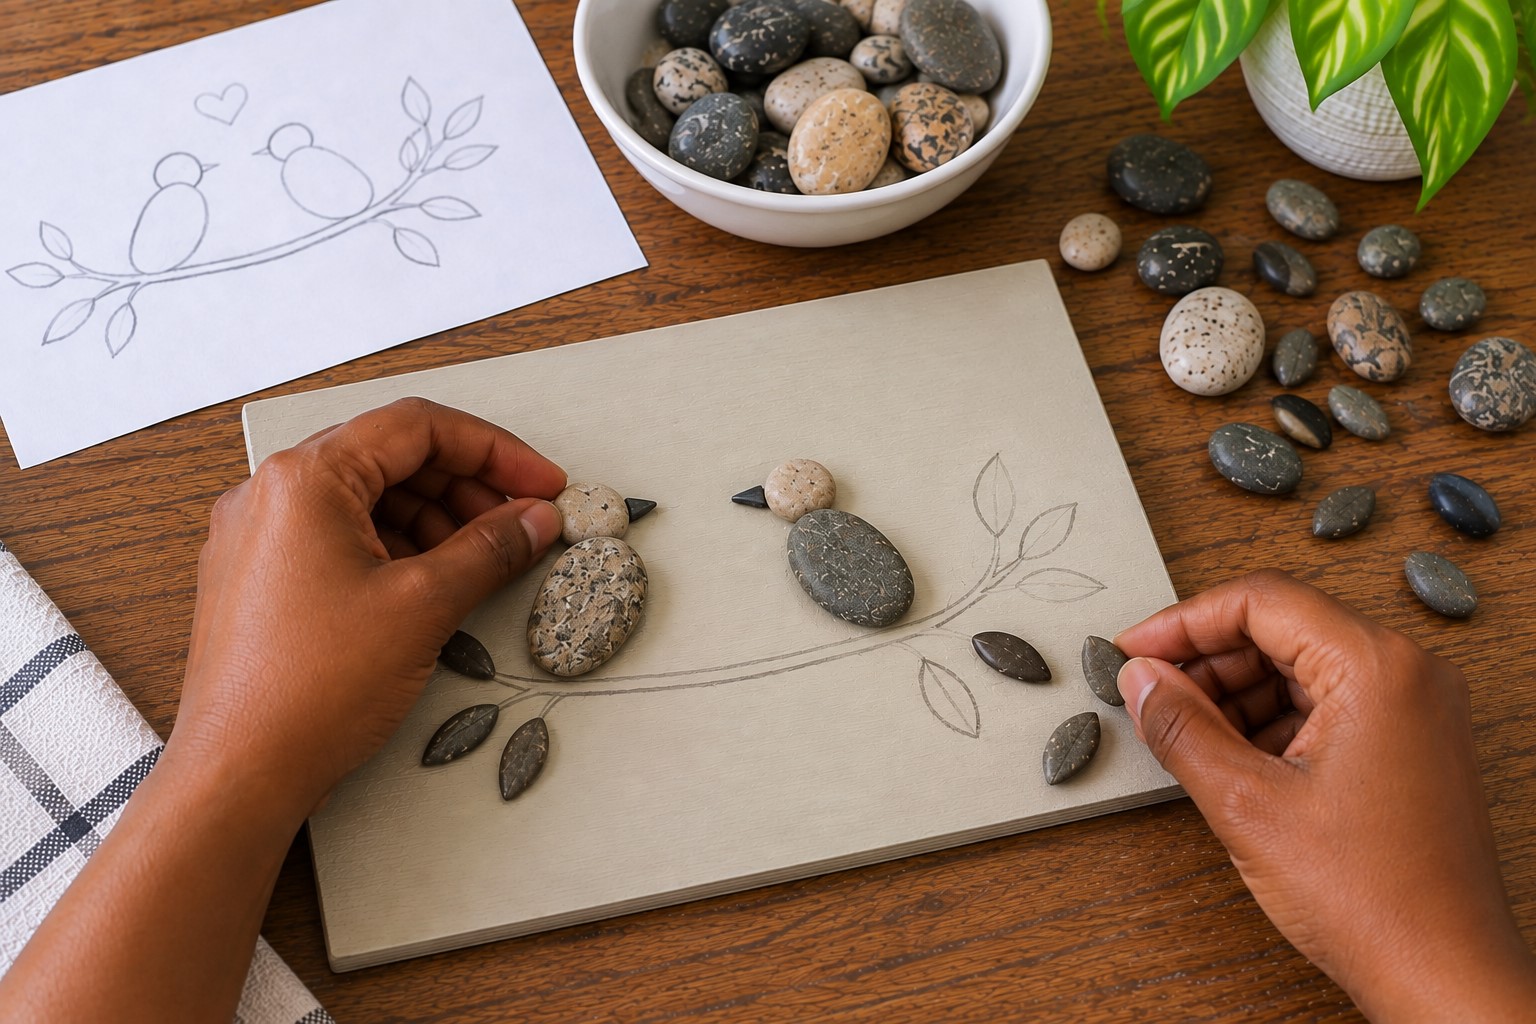
This is the stage where your picture really starts to take shape. Place the largest rocks on your background first.
Then add the smaller pieces around them until the scene looks balanced.
Do not glue anything yet. Move each stone around and try several positions before deciding where it belongs.
A piece that looks perfect in one spot may work even better somewhere else.
Testing an arrangement before making it permanent is a habit worth building, the same way it helps in figuring out How to Make Sand Art in a Bottle Without the Colors Mixing.
Pay attention to the spaces between the rocks too. You do not have to fill every empty area. A little breathing room can make the design look cleaner and help each part stand out.
Step back from the table every now and then and look at the whole arrangement. This simple trick can help you spot pieces that feel out of place.
Once you are happy with the overall picture, take a quick photo with your phone. That gives you a reference if the pieces move before you glue them.
Step 7: Build the Main Part of the Picture
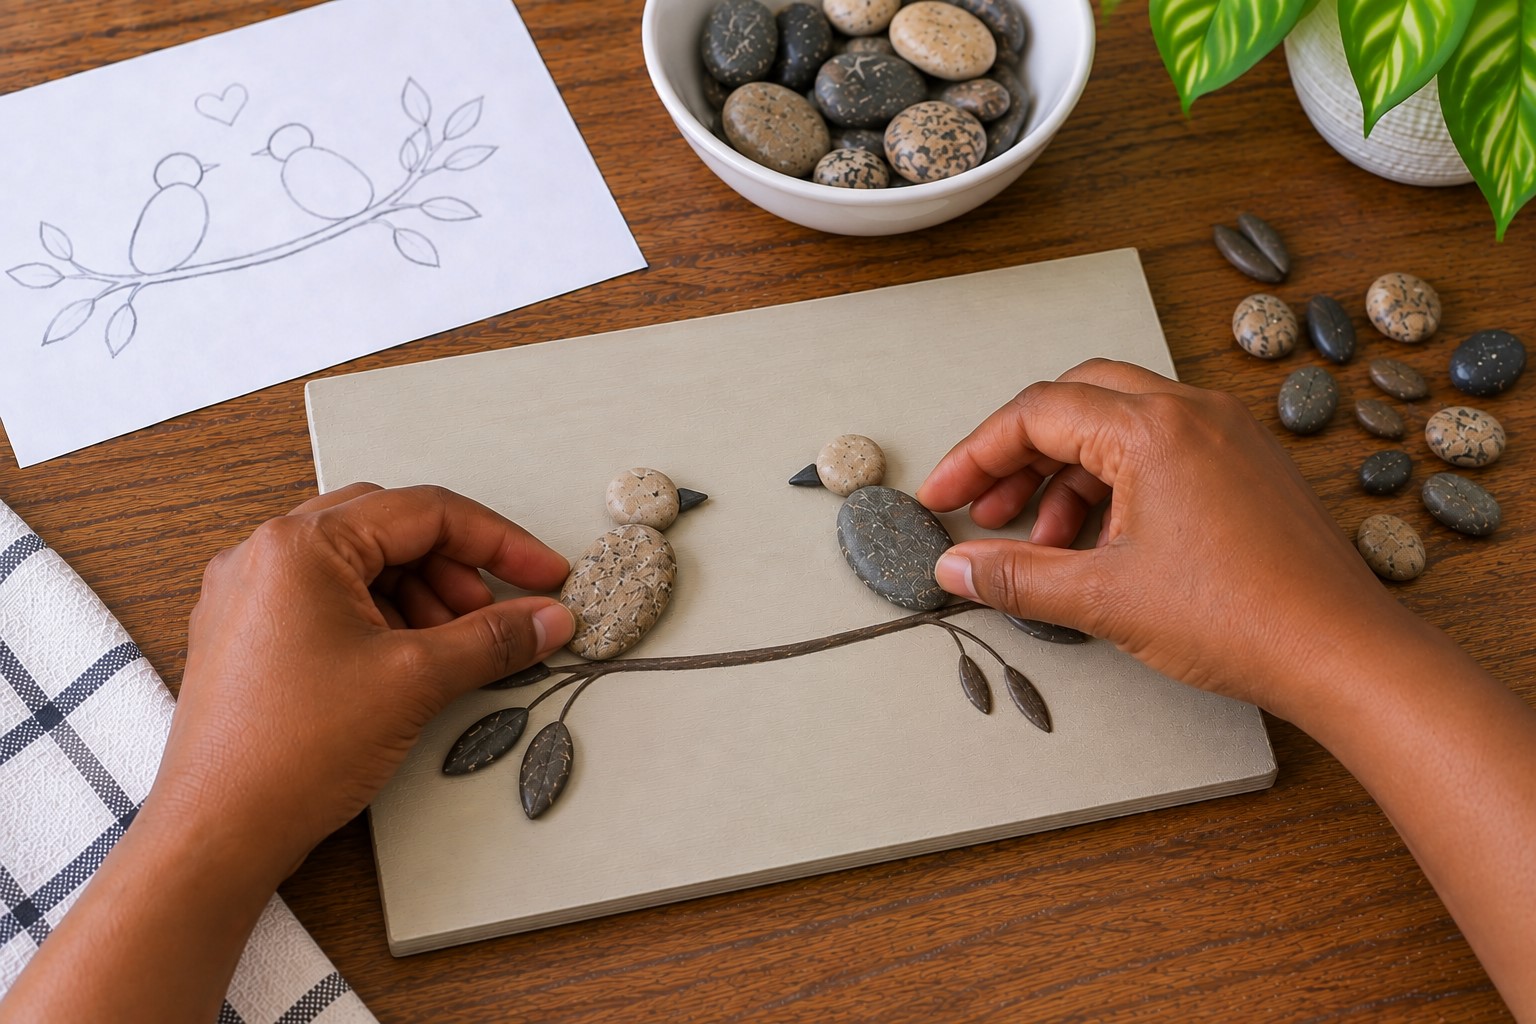
Start with the largest and most important shapes in your design. These pieces create the foundation for everything else.
Place them carefully according to the arrangement you already tested.
For a simple scene, you might begin with the bodies of your pebble figures. For a flower design, you could start with the larger petals and center.
If you are making a landscape, begin with the larger stones that form trees, hills, or other main elements.
Take your time with positioning. Look at the distance between each piece and check that the shapes work together.
Small changes can make a figure look taller, shorter, closer, or farther away.
You can also turn a stone around if its first position does not look right. Remember that the same pebble can give you several different shapes.
Keep experimenting until the main part of your picture feels natural.
Step 8: Add the Smaller Rocks and Details
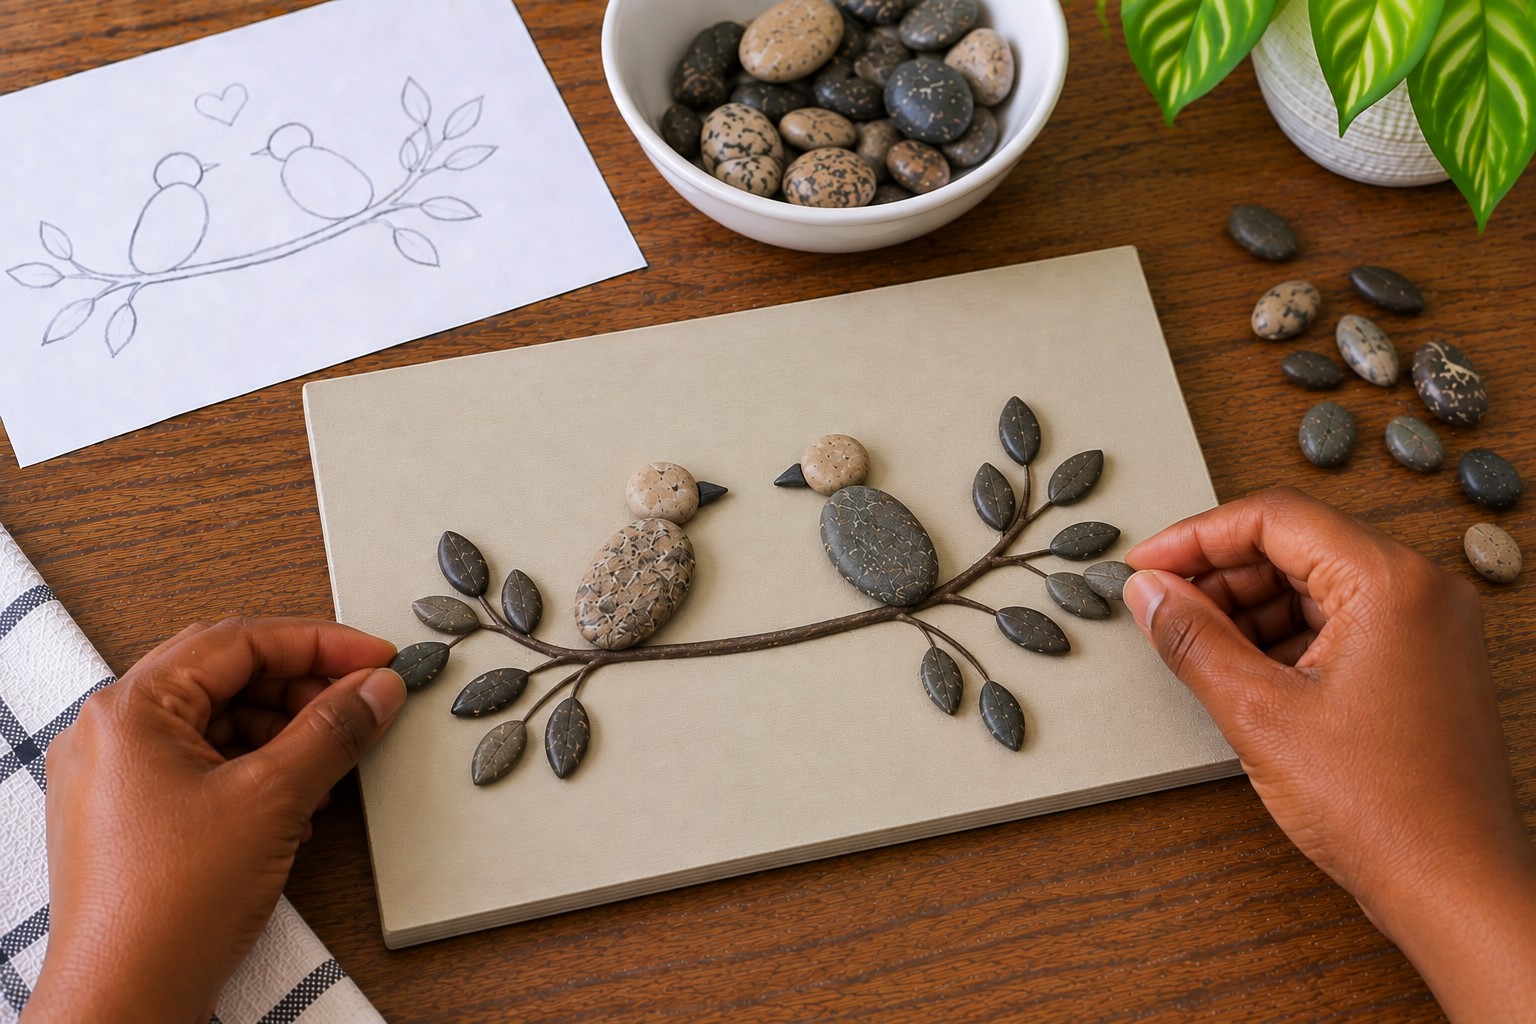
Once the main shapes are in place, bring out your smaller stones. These pieces can fill gaps and add details that make the scene easier to understand.
For instance, tiny pebbles can become hands, feet, flower centers, leaves, or small animals.
You can also use narrow stones for branches, stems, fences, or other thin parts of your picture.
Be careful not to add pieces simply because you have them. Every stone should have a purpose in the design.
If a tiny pebble makes the picture feel crowded, remove it and see how the artwork looks without it.
This is also a good time to make small adjustments to the overall composition. Shift pieces closer together or spread them apart when needed.
Keep checking the picture from a short distance so you can see how all the parts work together.
Step 9: Paint the Rocks Where Needed
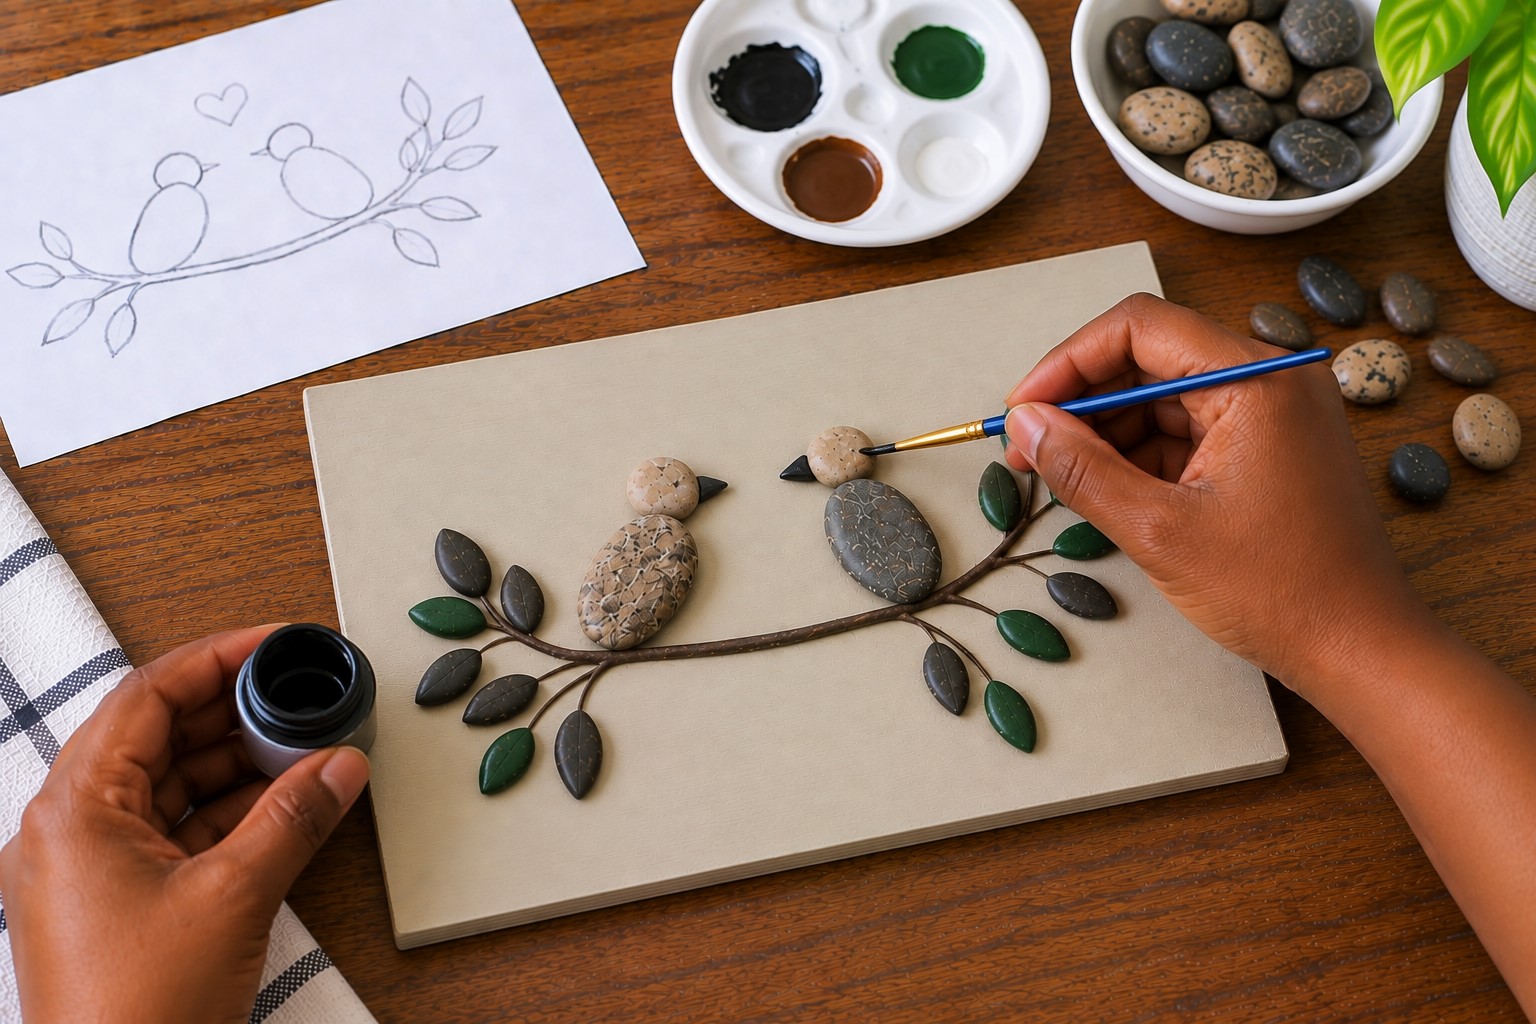
Your rocks do not need to be completely painted for the artwork to look finished. In many designs, leaving some stones natural gives the piece more texture and character.
Paint only the areas that need extra color or definition.
Use acrylic paint for the best results. Start with thin coats instead of applying a thick layer at once.
Let each coat dry before adding another one if you need stronger coverage.
Building color in thin layers is the same trick that works so well in learning How to Paint Shoes at Home and Get a Professional Look.
You can paint an entire pebble when its natural color does not suit your design.
You can also paint only one section, such as a shirt, flower petal, bird wing, or leaf. This approach keeps some of the natural stone visible.
Keep your brush fairly small when working on tiny rocks. A small brush gives you better control and helps prevent paint from spreading onto areas you want to leave natural.
Also, rinse your brush between colors so your details stay clean.
Step 10: Add the Tiny Details That Bring It Together
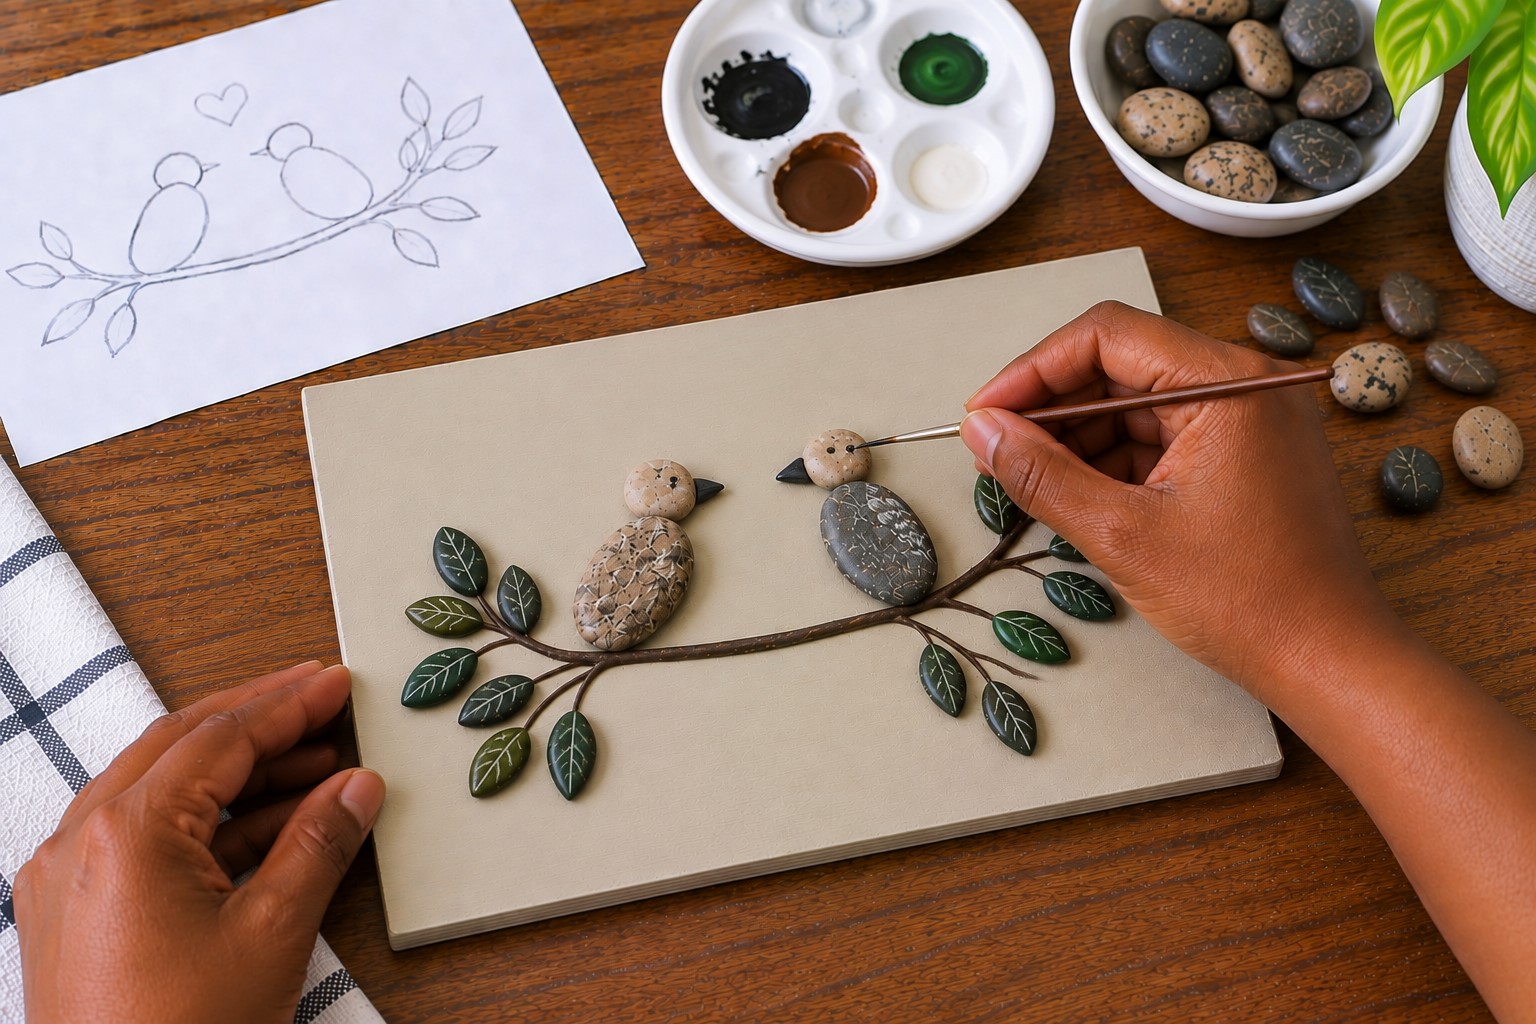
Now look closely at your painted and unpainted rocks. This is where a few tiny marks can give the picture much more personality.
Use a fine brush to add eyes, smiles, patterns, flower centers, feathers, or other small features.
Black paint works well for many outlines, while white paint can add tiny highlights.
Do not feel pressured to add lots of detail. A couple of simple marks can be enough to make a pebble figure recognizable.
This same patient, small-scale detail work is also the whole point of learning How to Do Diamond Painting: A Beginner’s Step-by-Step Tutorial.
Too many details can also take away from the natural charm of the stones.
If you make a small mistake, let the paint dry before fixing it. Then cover the unwanted mark with the original color and try again. Acrylic paint makes this process fairly forgiving.
Step 11: Glue Everything Down Carefully
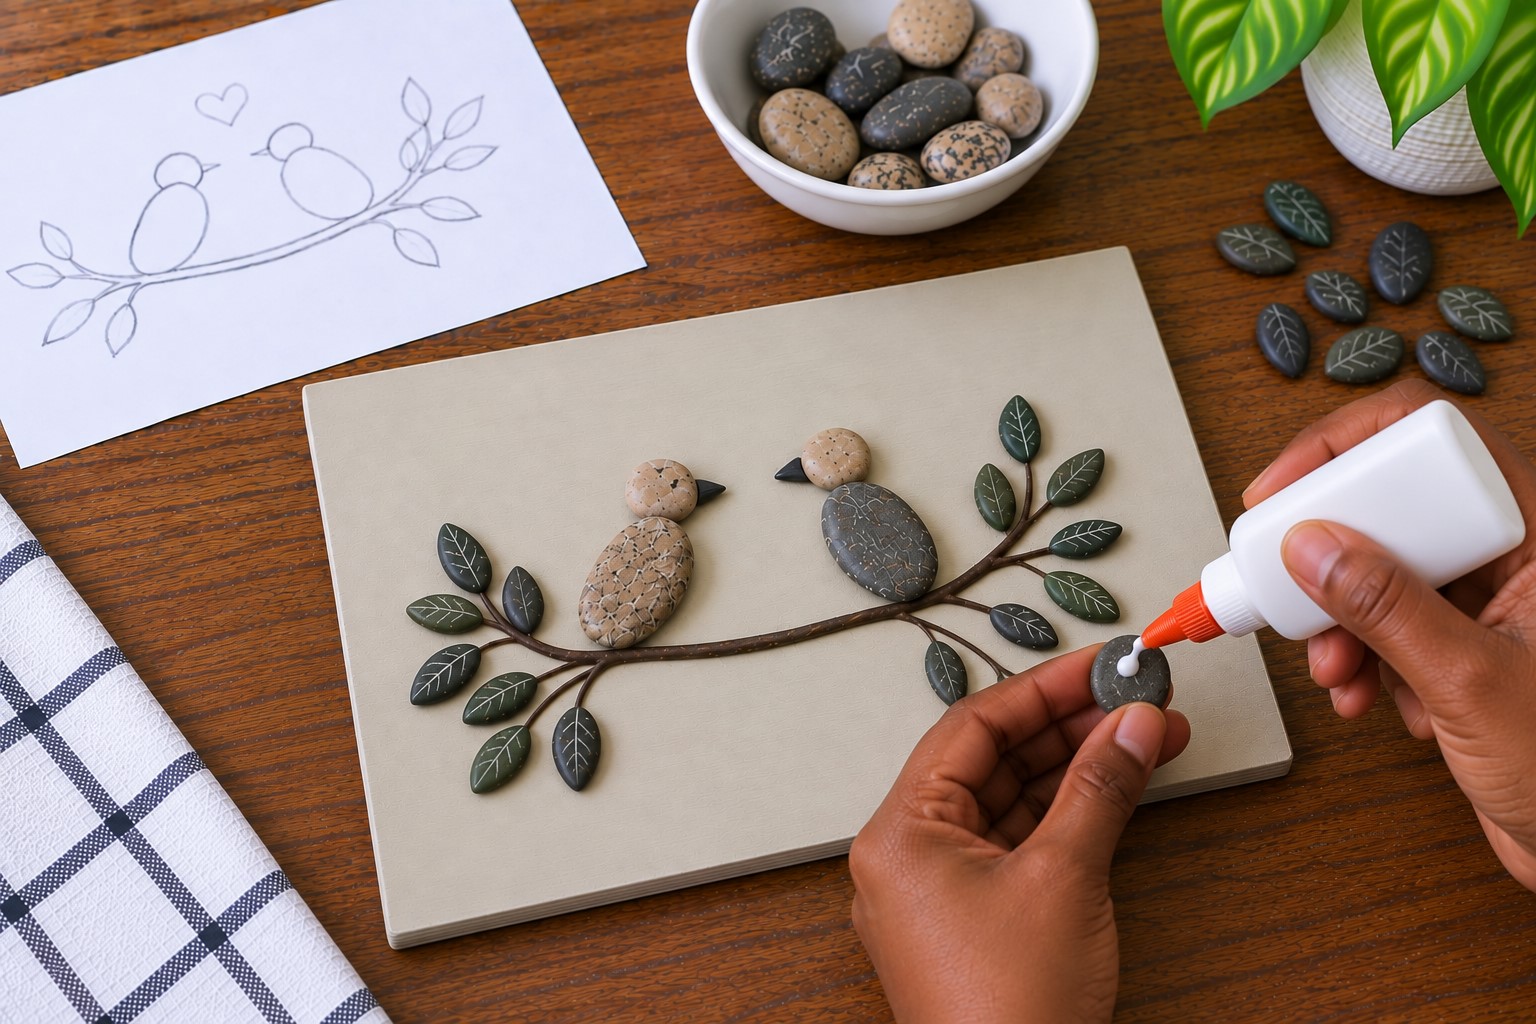
Once you are completely happy with the arrangement, it is time to secure the rocks. Move slowly during this part because glue can make repositioning difficult.
Lift one stone at a time and apply a small amount of strong craft glue underneath. You do not need to cover the entire back of the rock.
A few well-placed dots or a thin layer should be enough for most small pieces.
Press each rock gently onto the background and hold it for a few seconds. Follow the instructions on your glue because drying times can vary.
This same slow, deliberate placement is what makes the project on How to Make a Beautiful Origami Crane You’ll Be Proud to Display come together so cleanly too.
Keep working from the larger pieces toward the smaller details.
Try not to disturb the artwork while the glue sets. Even if a piece looks secure at first, it may still move if you bump the board.
Leave the finished arrangement somewhere flat and undisturbed until the glue has fully cured.
Step 12: Finish, Protect, and Display Your Pebble Art
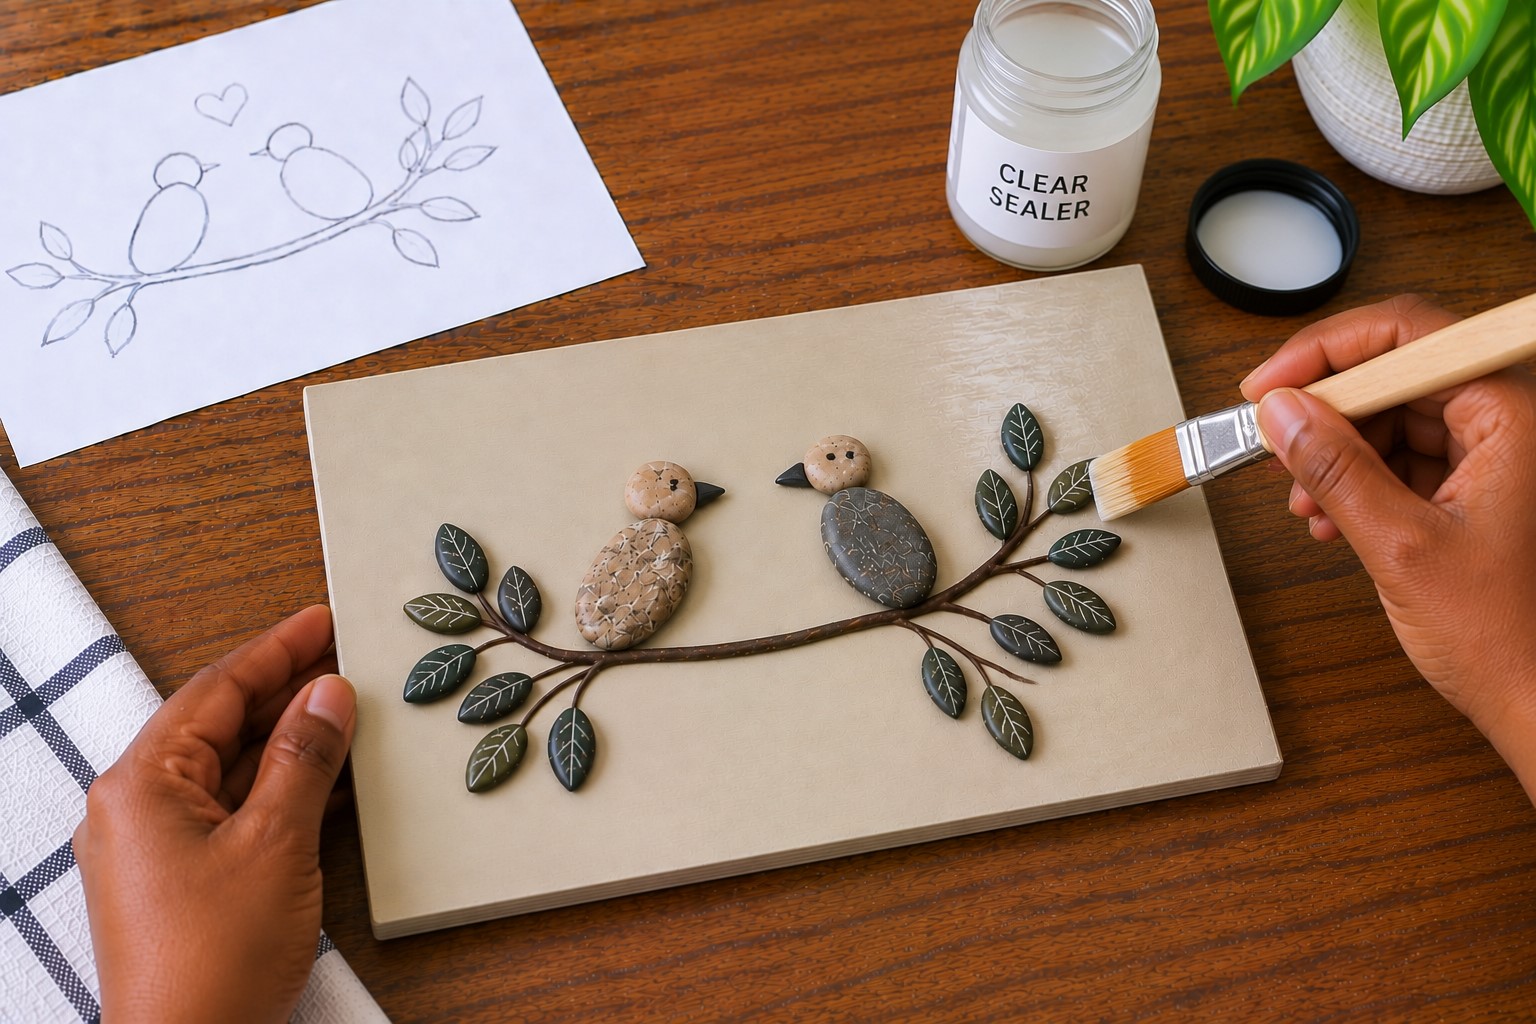
Give the entire piece one final inspection once everything has dried. Look for loose stones, unfinished paint marks, or small areas that need a little more detail.
This is your chance to make those final corrections.
If you want extra protection, apply a clear sealer once the paint and glue have completely dried. Choose a finish that suits the look you want.
A matte sealer keeps the artwork soft and natural, while a glossy finish gives the stones more shine.
A similar glossy, protective finish is what makes the project on How to Make Stunning Resin Coasters With Pressed Flowers look so polished too.
Let the sealer dry fully before handling or displaying the artwork. Avoid touching the surface too much during this stage because fresh finishes can still feel tacky.
Finally, choose a spot where your pebble art can be seen easily. A small shelf, desk, craft corner, or wall can work nicely.
More importantly, take a moment to enjoy what you made from a handful of ordinary rocks.
Tips for Making Your Pebble Art Look More Charming
Once the main artwork comes together, you can make a few small changes to improve its overall appearance. These tips can also help you feel more confident during future projects.
1. Give Your Rocks Time to Tell You What They Can Become
Do not always decide what a rock should represent before arranging it. Place several stones together and see how their shapes interact.
A stone that seems unsuitable alone may work perfectly beside another piece. So, move things around before deciding that a rock will not work.
Try rotating each stone too. Sometimes one small turn creates a much better arrangement.
Playing with color and shape combinations like this is also half the fun of 21 Creative Rainbow Crafts That Brighten Any Day.
2. Keep the Number of Rocks Under Control
Adding more stones can feel exciting once the design starts developing. Still, too many pieces can make the artwork look busy.
Remove one or two stones if an area feels crowded. Then look at the picture again from a short distance.
You may find that the design looks stronger with fewer pieces. Empty areas can also help your main subjects stand out.
3. Use Paint as an Accent
Paint does not need to cover every natural surface. Let some of the stone texture remain visible.
Use paint where you need color, contrast, or small details. This can make your artwork feel more balanced.
You can also choose two or three main colors. A limited palette often gives a handmade piece a more connected appearance.
Common Mistakes to Avoid
A few simple mistakes can make pebble art frustrating. The good news is that you can avoid most of them with a little planning.
1. Gluing the Rocks Too Soon
Do not glue the first arrangement that looks acceptable. Move the pieces around several times first.
A design can look different once you view it from farther away. Take a quick photo before gluing too.
2. Using Too Much Glue
Too much glue can squeeze out around the edges of your rocks. It can also make tiny pieces harder to position.
Start with a small amount. Add more only when a stone needs extra support.
Keep a paper towel nearby for quick cleanups. This helps prevent dried glue from becoming part of the finished design.
3. Painting Dirty or Damp Rocks
Dust and moisture can interfere with your paint. They can also make adhesive less effective.
Always wash your rocks and let them dry completely. Then give them a quick wipe before painting.
This small preparation step can save you trouble later.
4. Rushing the Drying Time
You may want to pick up your artwork as soon as you finish. Try to resist that urge.
Paint and glue need time to set properly. Moving the board too early can shift pieces that took time to arrange.
The same patience pays off with delicate natural materials in learning How to Create Vibrant Flower Pounding Prints on Fabric, where rushing the drying time can smear all your hard work.
Leave your artwork on a flat surface until everything feels completely dry.
Final Thoughts
Learning How to Make Pebble Art from Rocks gives ordinary stones a chance to become something much more interesting.
You do not need expensive materials or advanced art skills to begin. A few carefully chosen rocks can become a sweet scene with the right arrangement and a little paint.
If you want another small, giftable project to try, the project on How to Make Adorable Clay Magnets Worth Displaying is easy to make in the same afternoon.
The process also gives you plenty of freedom. You can follow a simple idea, change it as you work, or create something completely unexpected.
Even mistakes can lead you toward an arrangement that feels more natural.
So, if you have a few pebbles waiting in a box or sitting around after a walk, give them another look. Pick out the pieces that interest you and start experimenting.
If you enjoy expressing a favorite theme through your art, 25 Aesthetic BTS Painting Ideas Every ARMY Should Try is a fun place to find more painting inspiration.
Before long, you may have a small piece of pebble art that feels far more special than the ordinary rocks you started with.