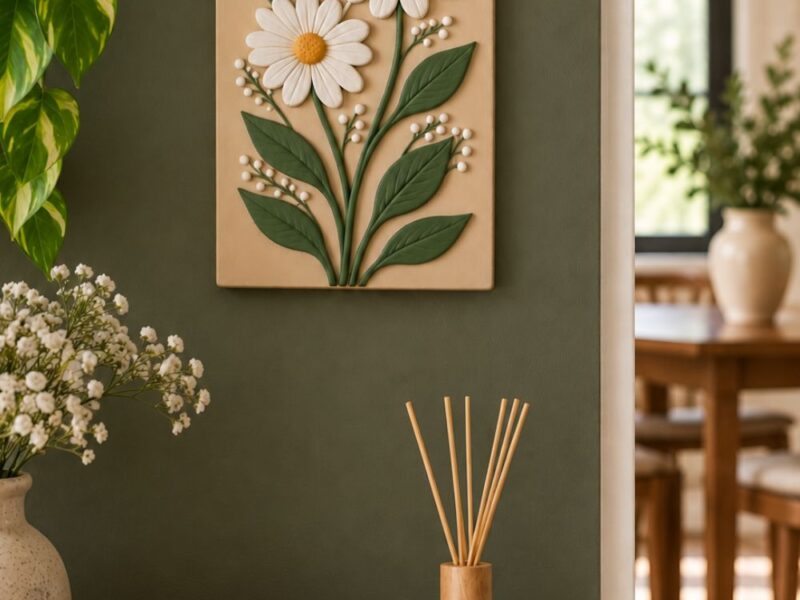
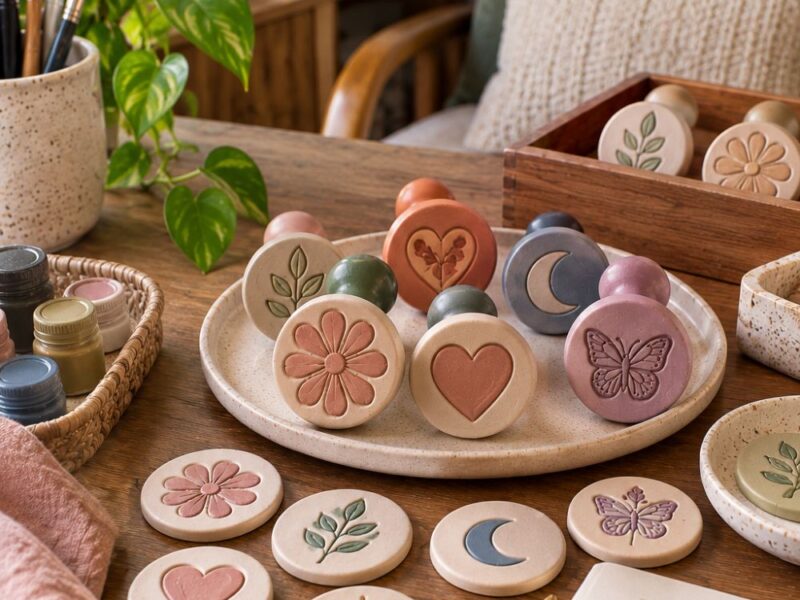
Some crafts need a long supply list before you can even begin. Salt Dough Crafts are different.
You probably already have most of what you need in your kitchen, and the rest is easy to find.
That makes them a great choice when everyone wants to make something, but nobody wants a complicated project.
I especially like salt dough for family crafting because it gives everyone room to do their own thing.
One person can shape ornaments, another can make little animals, and someone else can paint tiny decorations.
You can also change the ideas to suit younger kids or older children. So, you do not have to make every project exactly as shown.
The real fun starts when you stop treating the dough like something that must become one particular thing. Roll it, press it, cut it, shape it, or add texture.
Then let the paint bring each piece to life. Below, I’ll break down 39 ideas you can actually make at home, along with simple tips for getting each one right.
39 Creative Salt Dough Crafts the Whole Family Will Love
1. Handprint Family Keepsake
Turn a simple handprint into something you can keep for years. Roll the dough into a thick, even piece first. Then press each family member’s hand into the surface.
You can place smaller hands beside larger ones for a sweet family picture.
Add names or the year around the edges with a toothpick. After the dough dries completely, paint each handprint in a different color.
This idea works especially well for birthdays, family reunions, or a new baby celebration.
2. Salt Dough Christmas Ornaments
Christmas ornaments give you plenty of room to experiment with shapes. Cut stars, trees, bells, snowflakes, stockings, or simple circles from rolled dough.
Before drying the pieces, make a small hole near the top. Later, thread ribbon or twine through the hole for hanging.
Paint the ornaments after they dry. You can also add tiny patterns with a toothpick or paint pen. Let each family member create their own ornament for a personal touch.
3. Mini Salt Dough Animals
Animal shapes make an easy project for kids who enjoy imaginative crafts. Start with basic animals such as cats, dogs, fish, birds, or turtles.
Keep the shapes simple instead of trying to make every detail perfect. Add ears, tails, wings, or tiny legs with small pieces of dough.
Once the pieces dry, use paint to add eyes and other features. A group of colorful animals can also become a little homemade zoo.
4. Salt Dough Flower Magnets
Make small flowers that can brighten up your refrigerator or magnetic board. Roll small pieces of dough into balls, then flatten them slightly.
Arrange five or six pieces around a smaller center to form each flower. Press the pieces together gently so they hold their shape.
After drying, paint the petals and center. Glue a small craft magnet to the back once the paint dries. Make several flowers in different colors for a cheerful set.
5. Personalized Name Plaques
Salt dough can turn into a cute name plaque for a child’s bedroom or craft corner. Roll the dough into a rectangle, oval, or cloud shape.
Use a toothpick to write the child’s name before the dough dries. You can also press small stars, hearts, or flowers around the name.
Paint the background first and let it dry. Then add the lettering with a contrasting color. Punch two small holes at the top if you want to hang the plaque.
6. Salt Dough Leaf Impressions
Take a short walk outside and collect a few leaves with interesting textures. Choose leaves with clear veins and fairly sturdy surfaces.
Roll out your dough and place a leaf on top. Press it gently with your fingers or a rolling pin.
Peel the leaf away carefully. You should see its natural pattern in the dough. Let the pieces dry, then paint them or leave the natural texture visible.
This makes a nice project when you want to bring a little nature into family craft time.
7. Little Salt Dough Mushrooms
Mushrooms give you an easy way to make small woodland decorations. Shape a tiny stem and a rounded cap from separate pieces.
Press the cap gently onto the stem. Then add small dots or lines to the top with a toothpick.
Paint the stems in earthy colors and give the caps bright shades. You can make several sizes and arrange them together on a shelf or craft display.
8. DIY Salt Dough Pendants
Older children can turn small dough shapes into simple pendants. Hearts, moons, stars, flowers, and leaves all work well.
Make the pieces fairly thin, but keep enough thickness for strength. Create a hole at the top before the dough dries.
After painting, thread cord or ribbon through the hole. Add a small bead if you want to give the pendant more detail.
9. Salt Dough Garden Markers
Create little markers for herbs, flowers, or pretend garden pots. Flatten the dough into small rectangles with rounded corners.
Write the plant names into the dough before drying. Basil, mint, rose, and sunflower can all make fun examples.
Paint each marker after it dries. Use different colors for different plants so kids can easily recognize them.
You can also make simple flower shapes at the top for extra character.
10. Tiny Salt Dough Food
Pretend food makes a fun project for children who enjoy playing restaurant. Make tiny pizzas, cupcakes, cookies, fruits, or sandwiches.
Focus on recognizable shapes instead of tiny details. For example, a small round piece can become a cookie with a few pressed dots.
Paint each item with realistic colors. Then use the pieces in a pretend kitchen, play shop, or miniature restaurant.
11. Salt Dough Rainbow
Make a rainbow that feels bright without requiring complicated shaping. Roll several thin strips of dough in different colors.
Curve each strip gently and place the strips together from largest to smallest. Press them lightly so they connect.
After drying, paint the rainbow in bright shades. Add small clouds at both ends for a finished look. This project also works nicely as a cheerful bedroom decoration.
12. Textured Salt Dough Hearts
Hearts do not need complicated decorations to look interesting. Start with simple heart shapes cut from rolled dough.
Before drying, press lace, fabric, leaves, buttons, or textured objects into the surface. Remove each object carefully so the pattern stays visible.
Paint the raised areas lightly after drying. You can also leave some parts unpainted to show the texture.
13. Salt Dough Sun Catcher Shapes
Create flat shapes that can hang near a bright window. Try suns, stars, moons, flowers, or simple geometric designs.
Cut a small hole near the top of each shape. You can also make a larger center opening and fill it later with a translucent material.
Keep the dough pieces thin and even. Once dry, paint them with bright colors and hang them with clear thread or ribbon.
14. DIY Salt Dough Picture Frame
Make a small frame that can hold a favorite family photo. Start with a flat dough slab and cut out the center.
Keep the frame wide enough to support decorations without becoming too heavy. Add small flowers, stars, hearts, or leaves around the edges.
Dry the frame completely before painting it. Once finished, attach the photo to the back or place the frame around a printed picture.
15. Salt Dough Butterfly Decorations
Butterflies give kids plenty of freedom with color. Cut or shape a simple butterfly from the dough.
Use a toothpick to draw wing patterns before drying. You can also press small textures into each wing.
Paint both sides once the butterfly dries. Try matching colors, bright rainbow wings, or completely different patterns.
Several butterflies together can create a fun spring display.
16. Little Salt Dough Houses
Build tiny houses from simple flat shapes. Make the walls from rectangles and add triangular pieces for roofs.
You can also shape the entire house from one thicker piece if you want a quicker project. Press windows and doors into the surface with a toothpick.
Paint the houses in different colors. Add tiny flowers, doors, or roof patterns to make each one different.
17. Salt Dough Ocean Animals
Bring an ocean theme to the craft table with fish, whales, turtles, crabs, and starfish. Kids can choose their favorite sea creatures.
Keep the shapes flat enough to dry evenly. Use small pieces of dough for fins, tails, or claws.
Paint the animals once they dry. You can create a whole underwater collection and display it together.
18. Salt Dough Initials
Initials make quick personalized decorations for everyone in the family. Roll the dough flat and cut letters using small cutters or a handmade template.
Make each person’s initial a different size or color. You can also add dots, flowers, stripes, or small shapes around the edges.
Punch a hole through the top if you want to turn the letters into hanging decorations.
19. Salt Dough Photo Holders
Create a simple photo holder with a small dough base. Shape the base into a thick rectangle, circle, or heart.
Insert a short piece of craft wire into the top while the dough remains soft. Make a small loop at the end to hold a photograph.
Once the piece dries, paint it and add small decorations. The finished holder can display family photos, notes, or children’s artwork.
20. Salt Dough Christmas Trees
Christmas trees offer another easy shape for family crafting. Cut tree shapes from rolled dough using a cutter or paper template.
Press small dots into the surface to represent ornaments. You can also add tiny stars at the top.
Paint the trees green, white, gold, or any colors your family enjoys. Turn them into ornaments by adding a hole before drying.
21. Salt Dough Dinosaur Fossils
This idea makes the craft feel like a tiny science project. Shape simple dinosaur bones or fossil-style pieces from the dough.
You can also press plastic dinosaur toys into the dough to create footprints. Let the impressions dry before painting them.
Use beige, brown, or gray paint for a fossil-like appearance. Kids can then create their own pretend excavation display.
22. Salt Dough Sun Faces
Create cheerful sun faces using a simple round shape. Add pointed rays around the outside or press them into the edges.
Give the sun a simple face with eyes, a nose, and a smile. Use a toothpick for the smaller details.
Paint the face after drying. Try different expressions so every family member creates a slightly different sun.
23. Salt Dough Flower Garland
Make several small flowers and connect them into a garland. You can use one flower shape repeatedly or mix several designs.
Make two small holes in each flower before drying. Later, thread string through the holes.
Paint the flowers in one color family or use a mix of bright shades. Hang the finished garland across a shelf, craft area, or bedroom.
24. Salt Dough Moon and Stars
Create a small night-sky collection with moons and stars. Cut crescent moons from rolled dough and shape stars with a cutter.
Add tiny dots to the moon for texture. You can also press a few small stars into the surface.
Paint everything in dark or bright colors depending on your display. String the shapes together for a simple hanging decoration.
25. Salt Dough Ladybugs
Ladybugs make a simple project because their basic shape needs very little detail. Shape small rounded bodies and flatten them slightly.
Add a line down the middle with a toothpick. Then press or paint small black spots on the wings.
Once dry, paint the bodies red and add the remaining details. Make several sizes for a cute garden-themed collection.
26. Salt Dough Rainbow Letters
Combine colorful letters with a rainbow theme. Make small alphabet pieces from rolled dough using letter cutters.
Arrange the letters into names or short words. Paint each letter in a different rainbow shade.
You can turn the finished pieces into a child’s name sign or simply use them for a fun learning activity.
27. Salt Dough Buttons
Make your own decorative buttons from leftover dough. Roll tiny balls, flatten them, and press two or four small holes through each one.
Keep the pieces similar in thickness so they dry evenly. Add simple patterns around the edges if you like.
Paint the buttons after drying. Use them as decorative pieces for other crafts rather than clothing fasteners.
28. Salt Dough Animal Paw Prints
Create little paw-print shapes for animal lovers. Start with one larger oval piece for the main pad.
Add four smaller rounded pieces above it for the toes. Press everything together gently.
Paint the finished paw prints in different colors. You can also write the name of a favorite pet beside each one.
29. Salt Dough Beaded Decorations
Make small dough beads by rolling tiny pieces into balls. Push a hole through the center of each piece with a skewer or toothpick.
Create different sizes so the finished decoration has more variety. Let the beads dry fully before painting them.
Thread them onto sturdy cord or combine them with regular craft beads. This gives the family another way to experiment with patterns.
30. Salt Dough Bird Decorations
Shape simple birds from flat pieces of dough. Add a small beak, wing, and tail with separate dough pieces.
Press a few feather lines into the wings with a toothpick. Keep the details large enough to survive drying.
Paint the birds in realistic shades or use bright colors for a playful display. Add a hole at the top if you want to hang them.
31. Salt Dough Sunflower
Create a sunflower by arranging small petals around a larger center. Press the petals together carefully so they keep their shape.
Add texture to the center with a toothpick or the end of a pencil. You can also press tiny dots into the middle.
Paint the petals yellow and the center brown. Add a green stem if you want to turn it into a larger decoration.
32. Salt Dough Snowflakes
Snowflakes let you create detailed patterns without complicated sculpting. Use a snowflake cutter if you have one.
If not, cut a simple star and add lines with a toothpick. Make several different patterns instead of copying one design.
Paint the pieces white, silver, blue, or any color you prefer. Add ribbon and hang them as winter decorations.
33. Salt Dough Friendship Tokens
Make small tokens that family members can exchange with each other. Hearts, stars, initials, and tiny flowers work especially well.
Add a short word such as “Love,” “Smile,” or “Kind” with a toothpick. Keep the lettering simple and large.
Once dry, paint each token and give it to someone else. This turns a basic craft into a small family activity with meaning.
34. Salt Dough Door Hanger
Make a larger piece for a bedroom or craft-room door. Choose a circle, heart, star, or simple sign shape.
Add a word such as “Welcome,” “Play,” or “Create.” Punch a hole near the top for hanging.
Decorate around the lettering with flowers, leaves, dots, or small shapes. Let the design reflect the person who will use it.
35. Salt Dough Dinosaur Footprints
Make a flat slab of dough and press toy dinosaur feet into it. Different dinosaur toys will create different footprint patterns.
You can also make a few tracks that cross the surface. Add tiny marks around them to create a pretend prehistoric scene.
After drying, paint the slab like a fossil display. Kids can even guess which dinosaur made each footprint.
36. Salt Dough Rainbow Clouds
Combine simple clouds with colorful rainbow pieces. Shape small clouds from white dough and make curved strips for the rainbow.
Attach the pieces while they remain soft. Keep the rainbow fairly thick so it does not break easily.
Once dry, paint the rainbow bright colors. Add a small hole at the top and hang the decoration near a window or child’s room.
37. Salt Dough Family Tree
Create a simple family tree using flat dough pieces. Shape a tree trunk and several branches from brown dough.
Add small leaves, hearts, or circles for family members. Write names or initials on the pieces before they dry.
Arrange everything carefully on a larger dough background. Paint the tree once the pieces dry, then display it as a family keepsake.
38. Salt Dough Seasonal Decorations
Use the same basic dough recipe for decorations throughout the year. Make leaves and pumpkins for fall, flowers for spring, and snowflakes for winter.
You can also create hearts for Valentine’s Day or simple stars for celebrations. That way, one craft technique gives you ideas for several seasons.
Keep a few blank shapes ready for future projects. Then you can decorate them whenever a new occasion comes up.
39. Salt Dough Memory Plaque
Finish your family craft session with a piece that captures the day. Make a flat plaque and add a short message, date, or family name.
Press a few fingerprints, tiny handprints, or simple symbols into the dough. You can also let everyone add one small design.
Once the plaque dries, paint it together. This turns your craft session into something you can remember instead of another project that disappears into a drawer.
Final Thoughts
The best part about Salt Dough Crafts is how much you can do with one simple material.
A little dough can become an ornament, animal, keepsake, decoration, or tiny pretend-food collection.
You also do not need a special occasion to try them. Pick a few ideas, clear a table, and let everyone choose something that sounds fun.
The different results can make the finished collection even more interesting.
So, start with the easiest project and build from there. Soon, you may have a box full of family-made pieces that carry little stories of their own.
Those handmade details can make an ordinary afternoon worth remembering.