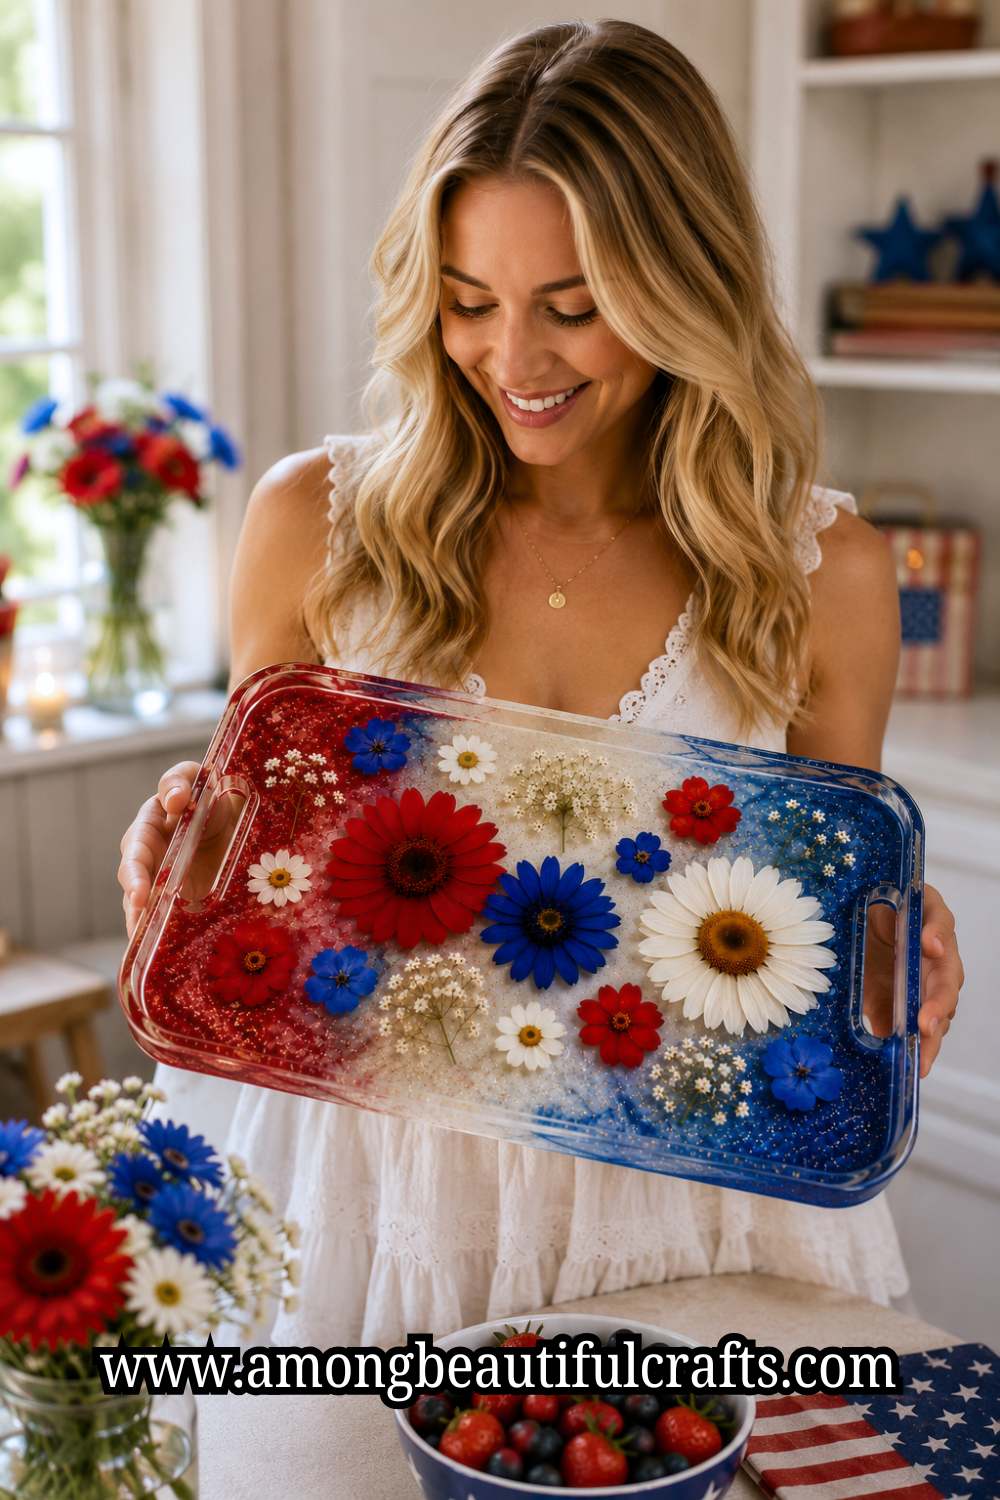
Flowers and resin together sound like a dream craft project; and they absolutely are. A patriotic resin tray with red, white, and blue blooms pressed inside it is one of those decorations that stops people in their tracks. Guests pick it up, turn it over, and genuinely cannot believe you made it yourself. That reaction alone makes every minute of this project worth it. For even more inspiration, you may enjoy exploring 13 Fourth of July Resin Tray Ideas for Gorgeous Party Décor, which showcase different ways to incorporate patriotic colors and resin techniques into your holiday decorating.

What makes this tray different from a regular resin pour is the floral element. Flowers add softness to a material that is naturally bold and glossy.
The contrast between delicate petals and hard, glassy resin creates something that feels almost magical. Moreover, the patriotic color palette ties everything together into a decoration that fits your Fourth of July table perfectly; yet looks elegant enough to display year-round. Many crafters who enjoy preserving flowers in resin also love How to Make Beautiful Summer Pressed Flower Resin Jewelry, since both projects rely on preserving botanical beauty inside crystal-clear resin.
This guide covers everything from pressing your flowers ahead of time to pouring your final glossy layer. No experience with resin is required. No fancy equipment is needed either. What you do need is a little patience and a genuine excitement for making something beautiful. If you have both of those things, you are completely ready to start..
Understanding the Patriotic Resin Tray Before You Begin
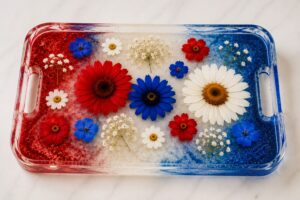
A patriotic resin tray is essentially a decorative serving tray cast entirely from epoxy resin. Unlike paint-on resin projects, this one uses a silicone mold to shape the tray from scratch. Dried or pressed flowers are embedded inside multiple resin layers. The result is a tray where the flowers appear preserved and suspended in glass-like clarity.
The floral approach works because dried flowers are completely moisture-free. Fresh flowers release moisture as they cure inside resin. That moisture creates cloudiness and eventual rot. Dried flowers, on the other hand, stay vibrant and stable inside the resin forever. So the prep work of pressing and drying your blooms is not optional; it is the step that determines whether your tray turns out stunning or disappointing. If you’ve never worked with resin before, How to Make Your First Resin Art Piece Without Making a Mess is a helpful introduction to the basics of measuring, mixing, and pouring resin successfully.
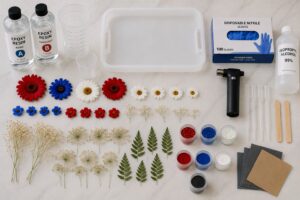
Supplies You Will Need
Gather everything before mixing a single drop of resin. Once you start pouring, you cannot pause to search for missing supplies.
For pressing and drying flowers:
- Fresh red, white, and blue flowers (suggestions below)
- Heavy books or a flower press
- Absorbent paper like parchment or newspaper
- At least one to two weeks of drying time
Supplies for the resin pour:
- Two-part epoxy resin (crystal clear formula)
- Large silicone tray mold (12 by 8 inches is a popular size)
- Disposable mixing cups and wooden stir sticks
- Nitrile gloves and a respirator mask
- Alcohol inks in red and blue
- White alcohol ink or white resin pigment
- Tweezers for placing flowers
- A heat gun or small torch
- Isopropyl alcohol for surface cleaning
- A level surface to pour on
- Plastic sheeting to protect your table
For finishing:
- Fine-grit sandpaper (400 and 800 grit)
- Clear spray sealer or UV-resistant resin top coat
- Felt pads for the bottom of the tray
Choosing Your Red, White, and Blue Flowers

Finding the right flowers is genuinely one of the most enjoyable parts of this project. Here are great options for each color:
Red flowers: Roses, carnations, red clover, poppies, and gomphrena all press and dry beautifully. Roses and carnations are the easiest to find at grocery stores year-round.
White flowers: Baby’s breath is perfect because it is already delicate and small. White daisies, Queen Anne’s lace, and white cosmos also work wonderfully. Baby’s breath is especially useful for filling gaps between larger blooms.
Blue flowers: True blue flowers are rarer in nature, but they do exist. Delphinium, hydrangea, bachelor’s button, and forget-me-nots all come in genuine blue tones. Additionally, dried lavender adds a soft purple-blue that pairs beautifully with red and white.
Avoid thick, fleshy flowers like succulents or tulips. They hold too much moisture and take too long to dry completely. Flat, thin-petaled flowers press and dry the fastest. Many of these same blooms are commonly used in Creative Ways to Use Dried Flowers in Your Home Décor, making it easier to use leftover flowers from this project elsewhere around your home.
How to Make a Patriotic Resin Tray With Red, White and Blue Flowers
Step One: Press and Dry Your Flowers

This step requires the most advance planning. Start pressing your flowers at least one to two weeks before you intend to pour your resin.
How to press flowers properly:
Lay a sheet of parchment paper flat inside an open heavy book. Arrange your flowers face-down on the parchment. Make sure the petals are not overlapping each other. Place another sheet of parchment on top of the flowers. Close the book firmly and stack two or three more heavy books on top. Check your flowers after five days. Carefully open the book and peek at the edges of each bloom. If they feel papery and completely flat, they may be ready. If they still feel slightly cool or flexible, close the book back up and wait another week.
Signs your flowers are ready:
- They feel completely dry and papery to the touch
- Petals do not bend; they snap or crumble at the edges
- No moisture transfers onto the parchment paper
- Colors have deepened slightly compared to fresh flowers.
Once fully pressed and dried, store your flowers in a flat container lined with parchment until you are ready to pour. Handle them gently because fully dried petals are fragile. For a deeper look at preserving blooms successfully, follow How to Press Flowers at Home Without Them Turning Brown, which covers additional techniques for keeping colors vibrant.
Step Two: Plan Your Floral Layout
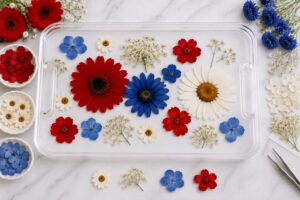
Before mixing any resin, do a dry run of your flower arrangement. Place your silicone mold flat on your table. Lay your pressed flowers inside the mold without any resin. Arrange them the way you want them to appear in the finished tray. Think about balance first. Place larger blooms like roses or carnations at intervals across the mold. Then fill the spaces between them with smaller flowers and baby’s breath. Tuck in blue flowers wherever the arrangement feels too red-heavy. Step back and look at the overall composition before committing.
The arrangement stage is a great opportunity to borrow ideas from Patriotic Paper Craft Ideas For Festive Fourth of July Décor, where color balance plays an important role in the finished design. Take a photo of your arrangement on your phone. This is your reference image. Once you start pouring resin, you will be working quickly and your arrangement photo will save you from second-guessing yourself.
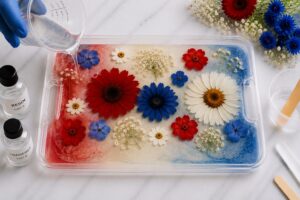
Step Three: Mix and Pour Your Base Layer
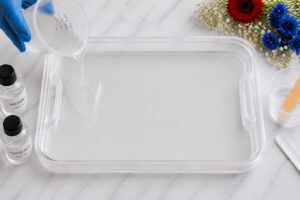
Put on your gloves and mask before opening any resin bottles. Set your silicone mold on a perfectly level surface. Use a small bubble level if needed because even a slight tilt causes your resin to pool unevenly. Measure equal parts resin and hardener into a clean mixing cup. Check your specific brand’s instructions since ratios occasionally differ by formula. Stir the mixture slowly and steadily for at least three to four minutes. Scrape the sides and bottom of the cup as you go. Insufficient mixing is the most common cause of sticky, uncured resin.
Pour a thin base layer; about an eighth of an inch deep; into the bottom of your mold. Use a heat gun about six inches above the surface to pop any bubbles that rise. Let this base layer cure until it reaches a gel-like consistency. It should feel tacky to the touch but not liquid. This typically takes two to four hours depending on your resin brand and room temperature. The gel stage is important. Flowers placed on fully liquid resin sink to the bottom and get lost. Flowers placed on gelled resin stay exactly where you put them.
Many resin artists first develop these foundational skills through projects like 15 Summer Resin Craft Ideas That Make Beautiful Home Décor, where careful pouring and curing are equally important.
Step Four: Place Your Flowers
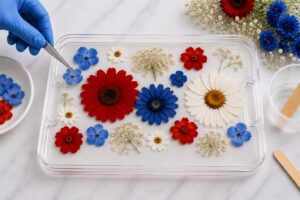
This is the most satisfying step of the entire patriotic resin tray process. Use tweezers to pick up each pressed flower individually. Refer to your reference photo as you work. Place each flower face-up on the gelled resin surface. Press each flower down very gently with the back of the tweezers. You want the flower to make full contact with the resin surface beneath it. Air gaps under petals cause cloudiness and lifting later in the process. Work from your largest flowers first. Position your red roses or carnations in their planned spots.
Next, add your blue delphinium or bachelor’s button pieces. Fill remaining gaps with white baby’s breath and smaller accent flowers. Finally, tuck in any tiny leaf or stem pieces to ground the arrangement naturally.
The red, white, and blue arrangement often draws inspiration from projects like 23 Red White and Blue Painting Ideas for Your Home This Summer, where patriotic color placement plays a major role in the final design. Take another photo once all flowers are placed. Compare it to your reference image and make any final adjustments before the resin hardens further.
Step Five: Encapsulate the Flowers
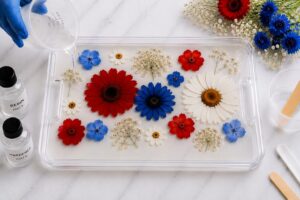
Once your flowers are positioned and you are happy with the layout, it is time to lock them in permanently. Mix a fresh batch of clear resin following the same process as before. Pour this second layer carefully over your flowers. Pour slowly and from a low height to avoid disturbing the arrangement. The resin should cover the flowers completely with about a quarter inch of resin above the highest petal. Use your heat gun gently to pop surface bubbles. Be especially careful around the flowers. Too much heat too close to dried petals can brown the edges or shift them out of position.
Flower preservation techniques like these can also be seen in 19 Stunning Pressed Flower Projects You Can Start Today, where dried blooms become the focal point of the finished craft.
Let this layer cure fully for at least 18 to 24 hours before touching the mold.
Step Six: Add Color and Depth With a Top Layer
Here is where your patriotic resin tray truly comes alive. Once the flower encapsulation layer is fully cured and hard, mix your final decorative top layer. Divide your freshly mixed resin into three cups. Add red alcohol ink to the first cup and stir gently. Add blue alcohol ink to the second cup. Leave the third cup clear or add a tiny drop of white pigment for a soft milky effect. Pour the colored resins in a loose, organic pattern around the edges of the mold. Let red pool in one corner and blue in the opposite corner. Pour clear or white resin in the center where the flowers are most visible.
The layered color approach works beautifully in many patriotic projects, including How to Paint a Fourth of July Canvas Without Artistic Experience, where strategic color placement creates visual impact without overwhelming the design.
Use a toothpick to lightly blend the color edges without disturbing the flowers beneath. The colors frame the flowers rather than cover them. Consequently, the blooms remain the star of the show while the colored resin adds a bold patriotic surround. Apply your heat gun one final time to eliminate surface bubbles. Then leave the tray completely undisturbed for a full 48 hours.
Step Seven: Demold and Finish Your Tray
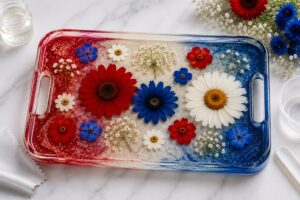
After 48 hours, your patriotic resin tray should be fully cured and ready to release. Gently peel the silicone mold away from the edges first. Work slowly and evenly around the entire perimeter before attempting to pop the tray out. Rushing this step can crack or chip the resin. Once demolded, inspect the surface and edges. Light sanding with 400-grit sandpaper smooths any rough spots on the edges. Follow with 800-grit sandpaper for a polished finish. Wipe away sanding dust with a dry cloth.
Apply a clear UV-resistant spray sealer over the entire tray surface. This step adds a final layer of gloss and protects the flowers from UV yellowing over time. Without UV protection, clear resin gradually turns yellow in sunlight. Therefore, this finishing step significantly extends how long your tray stays beautiful.
The same attention to finishing details can elevate projects like How to Make a Patriotic Clay Wreath That Lasts Every Summer, where durability is just as important as appearance.
Finally, stick self-adhesive felt pads onto the four corners of the tray’s underside. These protect your table surfaces and prevent the tray from sliding around during parties.
Styling Your Tray at the Party

A finished patriotic resin tray deserves a moment in the spotlight at your table setup. Here are a few ways to style it for maximum impact:
Center it on your dining table with a cluster of red, white, and blue pillar candles arranged on top. Use it as a drinks station organizer with glasses, a small carafe, and cocktail stirrers laid across it. Place it on your entry table with a small bowl of patriotic candy and a mini flag tucked beside it. Set it near your dessert station as the display surface beneath your cake stand. Alternatively, photograph it empty against a linen background for stunning social media content before guests arrive.
Final Thoughts
Making a patriotic resin tray with pressed flowers is genuinely one of the most rewarding craft projects you can take on this summer. It combines two beautiful things; the timeless appeal of preserved botanicals and the modern drama of clear epoxy resin; into one piece that truly earns its place as a party centerpiece.
The process does take time. Pressing flowers requires patience. Waiting for resin layers to cure between pours requires discipline. How to DIY a Gorgeous Paper Rosette Wreath for July 4th is another project that rewards patience and careful attention to detail, proving that some of the most beautiful holiday decorations are built one step at a time. However, every hour you invest shows up in the finished product in a way that rushed crafts simply never achieve. When you hold your completed tray up to the light and watch it glow, all that waiting feels like the best decision you ever made.
What makes this tray truly special is that no two will ever look exactly the same. Gift it to someone who appreciates handmade things and watch their face when they realize you made it yourself. A well-sealed resin tray lasts for years and only gets more sentimental with time. So do not let the multi-step process intimidate you. Break it down one day at a time. Press your flowers this week. Gather your resin supplies over the weekend. Pour your layers across three or four evenings. Before you know it, you will be holding something genuinely gorgeous in your hands; and wondering why you waited so long to try resin crafting in the first place.